Shower Mold Removal: A Plain-Language Guide
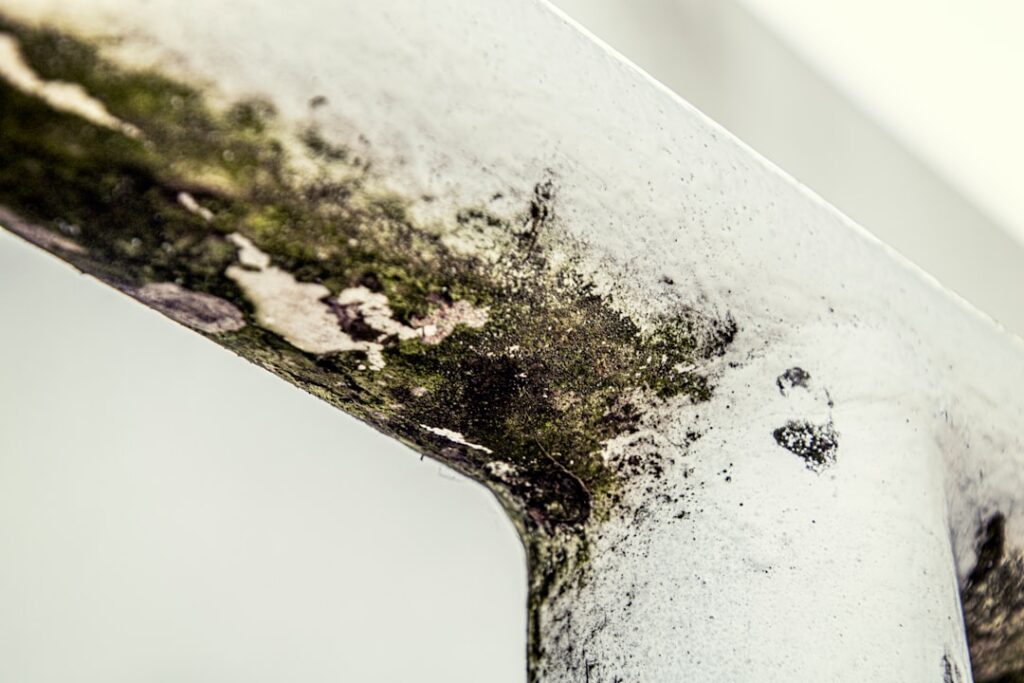
The shower is the dampest, warmest, least-ventilated spot in most homes, which makes it mold’s favorite address. Dark lines in the grout, spreading spots on the caulk, and a musty smell after a hot shower are the early evidence. Shower mold removal is well within reach for most homeowners when the growth is on the surface, but doing it right means cleaning correctly, protecting yourself, and fixing the moisture habits that grew it. This guide summarizes EPA and CDC guidance current as of 2026 and is educational only; consult a physician about symptoms and a certified professional for larger problems.
Part of our Mold Removal & Remediation guide — start there for the full picture →
Is this mold, asbestos, or water damage? Get a free instant screen
Upload a clear photo of the suspect area. You'll get an instant AI screening opinion and what to do next. This is screening guidance, not a professional determination.
Screening guidance only. AI can be wrong. Confirm asbestos, mold type, or lead with lab testing or a licensed professional before acting.
How to Remove Shower Mold
For the surface mold most showers develop, removal follows a simple sequence: ventilate the room, protect yourself, clean the affected surfaces with an appropriate cleaner, scrub the textured areas like grout, rinse, and dry thoroughly. The EPA notes that hard, nonporous surfaces such as tile and glass can be cleaned with detergent and water — bleach is not required, and should never be mixed with ammonia-based products.
Most shower surfaces are nonporous and clean up well. The stubborn exceptions are grout and silicone caulk, which are porous enough for mold to root below the surface. When mold has penetrated caulk so deeply it returns within days of cleaning, the fix is to remove and replace the caulk rather than keep scrubbing. For a closely related deep-clean walkthrough, see our guide on getting black mold out of a shower, and for the wider context of mold throughout the home, our mold inspection and testing hub.
It helps to think about shower mold in two layers. The cosmetic layer is the visible growth on tile, glass, and the surface of grout — that comes off with cleaning and scrubbing. The embedded layer lives below the surface in porous caulk and grout and in any moisture that has reached the wall behind the tile. Surface cleaning handles the first layer; the second often needs replacement of the affected material or repair of the waterproofing. Recognizing which layer you are dealing with is the key to whether a wipe-down will hold or whether the mold will be back by next week.
What You’ll Need and How to Stay Safe
Gather supplies before starting: an N95 respirator, gloves, eye protection, a stiff scrub brush or old toothbrush for grout lines, microfiber cloths, and your chosen cleaner. Open a window or run the exhaust fan throughout the job, because cleaning disturbs spores and releases them into the air.
Safety matters even for a small job. Never mix bleach with ammonia or with other cleaners — the combination produces toxic chloramine gas. If you use bleach, dilute it and keep the room well ventilated. People with asthma, allergies, or respiratory conditions should consider having someone else do the cleaning, since the activity raises airborne spore counts temporarily. Choosing a properly fitted N95 makes a meaningful difference; our guide to selecting an N95 mask for mold work explains why fit matters.
Work in good light so you can see where growth hides in grout lines and corners, and keep a window open or the fan running the entire time, since cleaning agitates the colony and sends spores into the air. Have a sealed bag ready for used cloths and sponges so you are not carrying spores through the house afterward. If the job turns out larger than a small patch once you start, stop and reassess rather than pushing through — a shower problem that covers a wide area or extends behind the tile is no longer a routine cleaning task.
Cleaning by Surface: Grout, Caulk, Tile, and Glass
Tile and Glass
These nonporous surfaces are the easiest. Spray with detergent solution or a commercial bathroom cleaner, let it dwell a few minutes, scrub lightly, rinse, and dry. Mold rarely roots into glazed tile or glass, so it lifts off cleanly.
Grout
Grout is porous and traps mold in its texture. Apply cleaner, let it sit, then scrub the lines with a stiff brush. A baking-soda paste or a dedicated grout cleaner can help on stubborn lines. If staining persists in the grout after the mold is dead, that is cosmetic discoloration; re-sealing grout annually reduces future penetration.
Silicone Caulk
Caulk is the hardest case. Mold often grows under the silicone film where no cleaner can reach. If surface cleaning does not work or the mold keeps returning, cut out the old caulk with a utility knife, clean and dry the joint completely, and apply fresh mold-resistant silicone. This single step solves most recurring shower-mold complaints.
How to Replace Moldy Shower Caulk
Because caulk is the single most common source of recurring shower mold, knowing how to replace it solves a problem scrubbing never will. The job is straightforward and inexpensive.
Start by cutting the old caulk free with a utility knife or a dedicated caulk-removal tool, slicing along both edges of the bead and peeling it out in strips. Remove every trace of the old silicone, since fresh caulk will not bond well over residue and any embedded mold left behind will grow back through the new bead. Clean the joint thoroughly, treat any visible mold, and then — this step is critical — let the area dry completely. Applying new caulk over a damp joint seals moisture inside and recreates the problem within weeks.
Once dry, apply a continuous bead of mold-resistant silicone caulk rated for kitchens and baths, smooth it with a wet finger or tool, and let it cure fully before using the shower, typically 24 hours. Mold-resistant formulations contain mildewcides that slow regrowth, though they are not permanent; the caulk will still need replacing every few years as part of normal bathroom upkeep. This single repair resolves the majority of “the mold keeps coming back” complaints homeowners have about their showers.
What Cleaners Actually Work
Several options remove shower mold effectively. Plain detergent and water with scrubbing is the EPA’s baseline recommendation for hard surfaces and works for most cases. Commercial mold and mildew sprays add convenience and often contain surfactants that lift growth from grout. Diluted bleach can lighten staining on nonporous surfaces but does not penetrate porous grout or caulk well and is not necessary for mold removal. White vinegar is a milder option some homeowners prefer; it has some antifungal effect on surface mold, though it is slower than commercial products.
What does not work is painting or caulking over live mold, or relying on a quick spray-and-rinse that never scrubs the textured surfaces where mold hides. Physical removal plus thorough drying is what actually clears it. For a survey of products and what each does, our overview of what kills mold spores compares the common choices.
Why Showers Grow Mold So Easily
Understanding the cause makes the cleanup and prevention click into place. A shower combines every condition mold needs in one small enclosure. Each hot shower fills the space with steam, which condenses on the cooler tile, grout, glass, and ceiling and leaves a film of moisture that can linger for hours. The enclosure is warm, often poorly ventilated, and frequently dim — exactly the dark, humid, stagnant environment mold favors.
The materials cooperate too. Grout and silicone caulk are porous enough to hold moisture and give mold a foothold, and they sit at the wettest seams of the shower. Soap scum and body oils that coat shower surfaces add a thin organic food source on top of the moisture. And many bathrooms simply lack adequate ventilation: an undersized exhaust fan, a fan that vents into the attic instead of outdoors, or the habit of leaving the fan off lets humidity sit instead of clearing. Stack these factors and it is no surprise the shower is usually the first place a home grows mold. Knowing the drivers is what makes prevention — ventilation, drying, and sealing — so effective.
When Shower Mold Is More Than a Surface Problem
Most shower mold is cosmetic and superficial, but a few signs point to a deeper issue. Mold that keeps returning quickly despite cleaning, soft or spongy areas in the wall behind the tile, loose or cracked tiles, brown staining bleeding through grout, or a persistent musty smell can indicate water getting behind the surround into the wall cavity. Failed waterproofing, cracked grout, or a leaking shower pan lets water reach framing and drywall, where mold grows out of sight.
If you suspect water is penetrating the wall, surface cleaning will not solve it. That is the point to investigate the waterproofing or call a professional, especially if the affected area is large or the wall feels soft. Hidden moisture behind a shower is a common source of structural mold that homeowners only discover during a remodel.
A few specific failures let water reach the wall. Cracked or missing grout opens a path behind the tile. A failed shower pan or a leaking drain connection lets water escape at the base. Gaps where the tile surround meets the tub or where plumbing fixtures penetrate the wall can wick water inward. Once water is in the cavity, it soaks the backer board, insulation, and framing, growing mold that no amount of surface cleaning reaches. The repair in these cases is not cleaning but correcting the waterproofing — re-grouting, replacing failed caulk and seals, or in serious cases opening the wall to dry it, treat it, and rebuild. Catching these failures early, before the framing is involved, keeps the fix small.
Preventing Shower Mold From Coming Back
Removal lasts only as long as the moisture is controlled. The single most effective prevention is ventilation: run the exhaust fan during every shower and for 20 to 30 minutes afterward, and confirm it vents outdoors. Keep indoor humidity below 60 percent, as the EPA advises.
Build a few habits into the routine. Squeegee glass and tile walls after showering to remove the water film mold feeds on. Spread out wet towels and washcloths rather than bunching them. Leave the shower door or curtain open to dry. Re-seal grout annually and replace cracked or moldy caulk promptly. Fix any drips at the showerhead or faucet quickly, since mold can begin growing within 24 to 48 hours of a surface staying wet. These small steps turn a recurring chore into an occasional one.
Shower curtains and liners deserve their own mention, since they are a frequent overlooked source. A vinyl or fabric liner that stays bunched and damp grows mold along its folds and at the bottom hem, and that growth can spread spores around the enclosure. Spread the liner out to dry after each use, wash or replace it regularly, and choose a machine-washable liner if mold is a persistent problem. Bath mats, loofahs, and stored bottles that sit in standing water on a shower ledge collect mold too; rinsing and drying them, and keeping the ledge clear, removes those quiet reservoirs.
Finally, give the bathroom a periodic deep clean rather than waiting for visible mold. A monthly pass over grout lines, caulk joints, and the corners where water lingers catches growth while it is still a quick wipe, long before it roots into porous surfaces. Prevention on this cadence is far less work than the alternative of repeated heavy scrubbing.
References
- Mold Cleanup in Your Home — U.S. Environmental Protection Agency
- About Mold and Your Health — Centers for Disease Control and Prevention
- A Brief Guide to Mold, Moisture and Your Home — U.S. Environmental Protection Agency
Frequently asked questions
What is the best cleaner for shower mold?
Detergent and water with scrubbing is the EPA's baseline for hard surfaces and works for most cases. Commercial mold sprays add convenience, and diluted bleach can lighten stains on nonporous tile but does not penetrate grout or caulk. Physical removal plus drying matters more than the specific product.
Why does mold keep coming back in my shower?
Recurring mold usually means it has rooted under porous caulk or grout, or water is getting behind the tile into the wall. Replacing moldy caulk and improving ventilation solves most cases; soft walls or persistent musty smells suggest a deeper leak.
Is shower mold dangerous?
Most shower mold is a surface nuisance rather than a serious threat to healthy people. It can trigger allergy-type symptoms, especially in those with asthma or allergies. Remove it promptly and ventilate, and wear an N95 while cleaning.
Should I use bleach on shower mold?
Bleach is optional, not required. It can lighten stains on nonporous tile and glass but does not penetrate grout or caulk well. Never mix bleach with ammonia or other cleaners, and ventilate the room while using it.
If recurring shower mold makes you suspect water is getting into the wall, Front Range homeowners can connect with a vetted local inspector through our contact page to check before a small leak becomes structural.
Mold removal & cleanup picks
For a small, contained patch (under ~10 sq ft) these EPA-friendly removers handle surface mold. Larger or recurring growth warrants a professional assessment first.
| Product | Why | Buy |
|---|---|---|
 RMR-86 Instant Mold Stain Remover RMR-86 Instant Mold Stain Remover | Fast-acting on stains; ventilate and wear PPE. | Amazon — $29.99 |
 Concrobium Mold Control Concrobium Mold Control | No-bleach formula that also helps prevent regrowth. | Amazon — $11.26 |
 Mold Armor Mold & Mildew Remover Mold Armor Mold & Mildew Remover | Widely stocked bathroom/surface remover. | Amazon — $22.98 |