Mildew Mold Removal: A Homeowner’s Plain-Language Guide
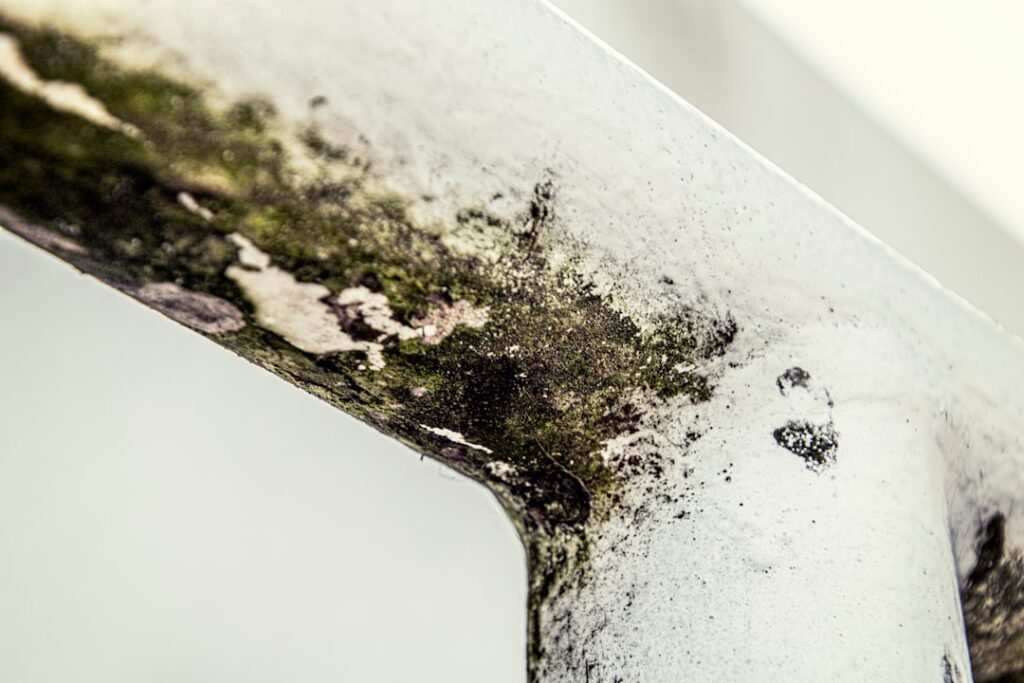
Mildew and mold are often used interchangeably, but the cleanup approaches differ in important ways. Mildew is a surface fungus — usually Cladosporium living on soap scum, mineral deposits, or thin biofilm on tile grout, shower curtains, window frames, and exterior siding. Mold, in the homeowner sense, usually means a deeper, more established colony on porous substrates: drywall, wood, insulation, or carpet padding. Confusing the two leads to wasted product on one problem and inadequate response on the other. This guide summarizes EPA and CDC guidance current as of 2026 — consult a certified mold inspector for testing decisions and your physician for symptom evaluation. The mildew mold removal workflow below covers both ends of the spectrum and how to tell which problem you actually have.
Part of our Mold Removal & Remediation guide — start there for the full picture →
Is this mold, asbestos, or water damage? Get a free instant screen
Upload a clear photo of the suspect area. You'll get an instant AI screening opinion and what to do next. This is screening guidance, not a professional determination.
Screening guidance only. AI can be wrong. Confirm asbestos, mold type, or lead with lab testing or a licensed professional before acting.
How to Tell Mildew From Mold
Five characteristics separate surface mildew from established mold growth. Each is observable without lab sampling.
Depth. Mildew sits on the surface — wipe with a damp cloth and it lifts. Mold has rooted into the substrate; wiping smears the colony without removing it.
Color. Mildew is typically gray, white, or yellow when fresh; darkens with age. Mold ranges from white-pink (Aspergillus, Penicillium) through olive-green (Cladosporium) to slimy-black (Stachybotrys). Color overlaps between the two, so depth and texture matter more than hue.
Texture. Mildew is powdery or flat. Mold is fuzzy, slimy, or has a defined raised colony structure.
Substrate. Mildew lives on non-porous or lightly-porous surfaces (tile, glass, painted walls, finished wood, plastic). Mold typically establishes in porous structural materials (drywall paper, insulation, untreated wood, ceiling tile, carpet padding).
Moisture history. Mildew appears with intermittent moisture (a humid bathroom, a damp exterior wall after rain). Mold requires sustained moisture — days to weeks of wetness on the substrate.
A homeowner can usually identify which they have in 30 seconds with these five checks. When the diagnosis is unclear, treat as mold (the more conservative response).
Mildew Removal: Surface-Level Workflow
Mildew responds to direct treatment with common household products and improved ventilation. The full mildew removal workflow on a small bathroom or kitchen area:
Ventilation. Open a window or run the room’s vent fan. Mildew remediation produces some airborne spore release, and ventilation prevents settling on other surfaces.
PPE. N95 respirator, nitrile gloves, safety glasses. Mildew is less aggressive than mold but still produces allergenic spores.
Cleaner choice. Three options work for typical mildew. Diluted bleach (one cup household bleach in one gallon water) handles tile, grout, fiberglass tubs, and other non-porous surfaces. Hydrogen peroxide 3% works on the same surfaces and is less harsh. EPA-registered antimicrobial cleaners are the premium option, with documented efficacy on the labeled surfaces.
Application. Spray or apply to the affected area. Let dwell 10 to 15 minutes. Scrub with a stiff brush or stiff sponge. Wipe with a microfiber cloth. Rinse with clean water on surfaces where bleach was used; let dry.
Prevention follow-up. Mildew returns when the moisture conditions return. Bathroom vent fans should run during and 15 minutes after every shower. Squeegeeing the shower walls after each use reduces standing water. A grout sealer applied annually keeps grout less porous and harder for mildew to colonize.
The full mildew removal job on a single bathroom typically takes 30 to 60 minutes. Materials cost is under $20. The work is well within homeowner range and rarely needs professional intervention.
Mold Removal: Established Colony Workflow
When the growth has rooted into a substrate and qualifies as mold rather than mildew, the workflow is more involved. The five-step EPA-aligned process:
Step one: assess. Measure the affected area in square feet, identify the substrate (drywall, wood, insulation), locate the moisture source feeding the colony, and check for staining beyond the colored growth that signals deeper colonization. Under ten square feet on accessible substrates is the EPA homeowner threshold.
Step two: contain. Close the door, tape plastic sheeting over the doorway, run a box fan in the window blowing outward, lay a wet towel along the threshold. Larger jobs need negative-pressure containment with a HEPA air scrubber.
Step three: fix moisture. The plumbing leak, the roof flashing, the unvented bathroom, the basement seepage — whichever caused the colony has to be addressed. Without the fix, the cleanup is cosmetic.
Step four: remove. Suit up with N95 or P100 respirator, nitrile gloves, safety glasses, and disposable coveralls. Spray antimicrobial, dwell, scrub, wipe with disposable cloths into a contractor bag. For drywall paper colonized through to the back face, cut and replace the affected section plus six inches of margin.
Step five: HEPA, treat, verify. HEPA-vacuum the work area, apply a second antimicrobial pass on stubborn pigmentation, moisture-meter check on the substrate, and monitor for two weeks.
For wall-cavity work specifically, our mold in walls removal guide covers the substrate-by-substrate decision tree in detail.
Why Bleach Works on Mildew but Not Mold
The bleach question recurs because bleach has long been the homeowner default for both problems, and it produces visibly different results depending on what is being cleaned.
On mildew (surface fungus on non-porous substrate): bleach is effective. It kills the fungal cells living on the surface biofilm, removes the dark pigment, and leaves the surface visually clean. Because mildew has not rooted into the substrate, surface-level killing equals full remediation.
On mold (established colony on porous substrate): bleach is mostly cosmetic. The chlorine bleaches the dark pigment so the visible colony disappears, but the hyphae underneath are alive in the substrate paper, wood pores, or grout interior. Bleach has a hard time penetrating porous materials to reach embedded fungal structures. The colony returns once moisture conditions allow regrowth.
Practical rule: bleach on tile, glass, sealed concrete, and fiberglass is reasonable. Bleach on drywall, wood, grout, or insulation is cosmetic and should be replaced with EPA-registered antimicrobials or 3% hydrogen peroxide, with porous materials removed rather than cleaned.
Combined Bathroom-and-Adjacent Mold Cleanup
A common Front Range scenario combines mildew on bathroom tile with mold inside the wall behind the tub or shower. The visible mildew is the easy part; the wall-cavity mold is the actual remediation problem.
The sequence: address the moisture source first (vent fan installation or upsize, regrouting around the tub, caulk replacement at the tub-to-tile joint). Open the wall cavity if water staining is visible on the back of the tile or the room-side drywall to confirm whether mold has established behind. If yes, the work scope grew — and a professional remediator is usually the right call, especially if the affected area extends into adjacent rooms.
If no wall-cavity involvement, treat the visible mildew on tile and grout, ensure the moisture source fix is in place, and monitor. Our mold and mildew restoration playbook covers the post-water-damage variant of this workflow.
When to Stop and Call a Professional
Six conditions push a mildew-or-mold job into professional territory:
- Affected area exceeds ten square feet
- Visible growth on porous structural materials (drywall paper, insulation, ceiling tile)
- Mold inside HVAC ducts, on the coil, or in the air handler
- Moisture source hidden or structural rather than identifiable
- Household members with asthma, immune compromise, or chronic respiratory conditions
- Repeat regrowth after a previous homeowner cleanup attempt
The broader mold inspection and testing hub covers when independent inspection adds value, how sampling decisions are made, and what to expect from clearance testing after professional remediation. Front Range homeowners with a complex finding often get a $300 to $600 inspection done before deciding whether to DIY or hire a remediator — the report typically pays for itself in misdirected-cleanup work avoided.
Substrate-Specific Notes
A few substrate-specific reminders that come up regularly in mildew-and-mold combined cleanups.
Shower silicone caulk. Surface mildew on silicone caulk is the textbook mildew problem — Cladosporium living on a soap-and-skin-oil biofilm. Brush, bleach or peroxide, rinse, dry. If the caulk has pulled away from the tile or tub, the mildew has likely tracked into the gap and behind. Cut out the entire run of caulk, dry the joint, re-caulk with mildew-resistant silicone. Trying to clean colonized caulk in place rarely works.
Tile grout. Surface mildew is straightforward. If the grout is unsealed and porous, the pigment penetrates deeper and surface scrubbing leaves stain. Apply a grout-specific cleaner or peroxide poultice, dwell longer (30 minutes), scrub, rinse. Seal the grout after drying to prevent return colonization.
Window frames. Common location for mildew on the lower sash where condensation pools. Wipe with peroxide or vinegar, dry, address the condensation source (interior storm window, dehumidifier, or window replacement). If the frame paint is bubbling or the wood underneath is soft, the problem has moved from mildew into wood-rot territory and the frame needs more than cleaning.
Painted drywall, surface only. Cladosporium occasionally appears as small dark spots on painted walls in chronically humid rooms. If the paint surface is intact and the drywall behind feels solid, wipe with peroxide or antimicrobial, let dry, repaint. If the drywall is soft or the spots return inside a month, the wall cavity behind has higher humidity than the room air, which typically means hidden moisture or insulation problems.
Preventing Mildew and Mold Long-Term
Long-term prevention comes down to three controls applied consistently. Humidity below 60% — measured with a $15 hygrometer in basements, bathrooms, and any room with prior mildew or mold history. Ventilation in moisture-producing rooms — bathroom fans during and after every shower, kitchen range hoods vented outside, clothes dryers vented outside. And maintenance of the building envelope — annual gutter cleaning, semi-annual HVAC condensate-line inspection, periodic roof and flashing inspection.
Front Range homes typically run dry in winter and humid in summer or after snow-melt. The seasonal pattern means prevention is also seasonal: humidifiers in winter (with careful management to avoid over-humidification) and dehumidifiers in summer (especially in basements). A whole-house humidity-control approach is more reliable than room-by-room intervention, but room-by-room is what most homeowners can realistically implement.
Add one more layer for homeowners who have already had a mildew or mold problem: an annual walk-through of all previously affected rooms with a hygrometer, a flashlight, and a notebook. Check the baseline moisture conditions, look for any returning staining or odor, and verify that the original moisture-source fixes are still holding. A 30-minute annual check catches early regrowth before it becomes another full cleanup cycle, and the cumulative savings over a five-year horizon are significant. Front Range freeze-thaw cycles are particularly hard on flashing and caulking, so the spring walkthrough often catches the most problems.
References
- A Brief Guide to Mold, Moisture, and Your Home — U.S. EPA
- Mold Cleanup and Remediation Guidance — Centers for Disease Control and Prevention
- Mold Health Effects and Exposure — National Institute of Environmental Health Sciences
- Mold and Dampness — American Lung Association
Frequently asked questions
What is the difference between mildew and mold?
Mildew is a surface fungus that wipes off easily and lives on non-porous surfaces such as tile and glass. Mold has rooted into a porous substrate (drywall paper, wood, insulation) and requires substrate-aware cleanup or removal. Mildew responds to bleach; mold on porous surfaces does not.
Will bleach actually remove mold?
Bleach removes mildew effectively on non-porous surfaces. On porous substrates such as drywall paper, wood, or grout, bleach removes the visible pigment but leaves the underlying hyphae alive. The mold returns when moisture conditions allow. EPA-registered antimicrobials and 3% hydrogen peroxide are better choices for porous surfaces.
How can I tell if my bathroom problem is mildew or mold?
Wipe with a damp cloth. Mildew lifts off the surface; mold smears or remains. Check the substrate: tile and grout almost always host mildew, while drywall paper and wood typically host established mold. Sustained moisture history (days to weeks of wetness) favors mold over mildew.
When does mildew or mold cleanup need a professional?
When the affected area exceeds ten square feet, when porous structural materials are extensively colonized, when HVAC is involved, when the moisture source is hidden, or when household members have respiratory susceptibility. Repeated regrowth after a homeowner attempt is also a signal to escalate.
Front Range homeowners weighing a bathroom mildew job against possible wall-cavity mold can connect with a vetted inspector through our contact page for an independent assessment before opening the wall.
Mold removal & cleanup picks
For a small, contained patch (under ~10 sq ft) these EPA-friendly removers handle surface mold. Larger or recurring growth warrants a professional assessment first.
| Product | Why | Buy |
|---|---|---|
 RMR-86 Instant Mold Stain Remover RMR-86 Instant Mold Stain Remover | Fast-acting on stains; ventilate and wear PPE. | Amazon — $29.99 |
 Concrobium Mold Control Concrobium Mold Control | No-bleach formula that also helps prevent regrowth. | Amazon — $11.26 |
 Mold Armor Mold & Mildew Remover Mold Armor Mold & Mildew Remover | Widely stocked bathroom/surface remover. | Amazon — $22.98 |