How to Get Rid of Shower Mold: A Plain Guide
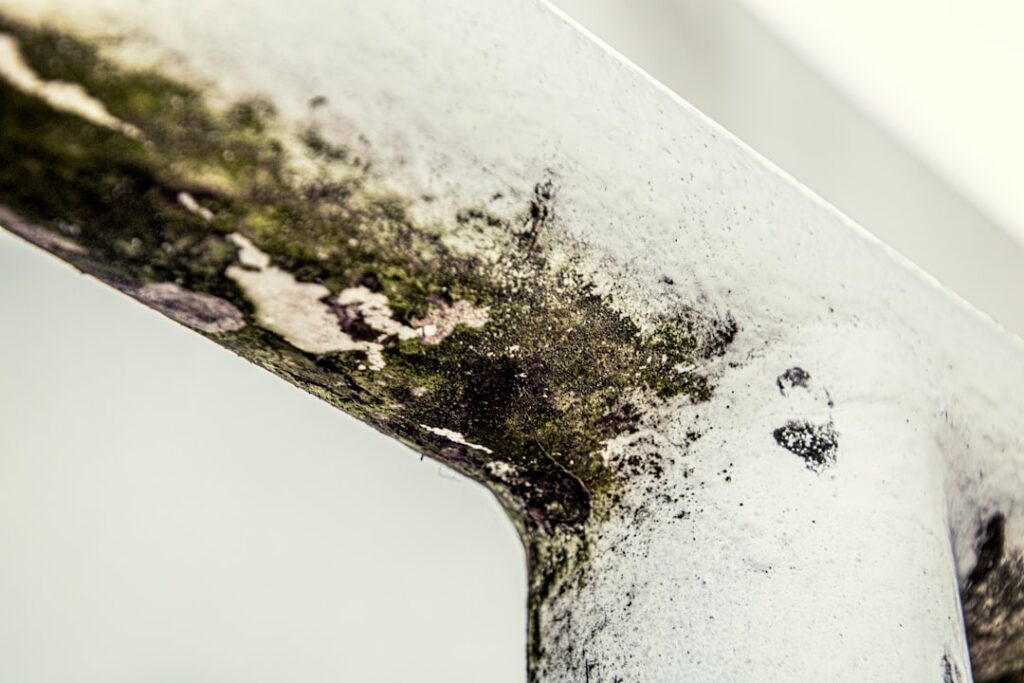
The shower is the single dampest spot in a home, and mold treats it like prime real estate. It settles into grout lines, climbs the caulk where the wall meets the tub, films the glass door, and clings to the bottom of the curtain. Getting rid of shower mold is partly about cleaning each material the right way and partly about changing the daily habits that let the enclosure dry. This guide focuses specifically on the shower stall, drawing on EPA and CDC guidance current as of 2026. It does not diagnose health conditions; consult a physician about symptoms and a certified professional for large or recurring problems.
Part of our Mold Removal & Remediation guide — start there for the full picture →
Is this mold, asbestos, or water damage? Get a free instant screen
Upload a clear photo of the suspect area. You'll get an instant AI screening opinion and what to do next. This is screening guidance, not a professional determination.
Screening guidance only. AI can be wrong. Confirm asbestos, mold type, or lead with lab testing or a licensed professional before acting.
How to Get Rid of Shower Mold Fast
For a typical shower, the fastest effective route is to scrub the non-porous surfaces with detergent and water, treat stained grout with hydrogen peroxide or a clinging cleaner, replace moldy caulk rather than scrubbing it, and then change how the shower dries so it stops coming back. The EPA notes that hard, non-porous surfaces like tile, glass, and acrylic can be cleaned with detergent and water, and that bleach is not routinely required. Homeowners can generally handle areas under about 10 square feet.
The reason shower mold returns so fast is that the enclosure rarely dries fully between uses. Cleaning addresses today’s growth; the squeegee, the fan, and an open door address tomorrow’s. Both halves are needed. The mold inspection and testing hub explains when recurring shower mold signals moisture behind the surround rather than on it.
It helps to think of shower mold as a moisture management problem rather than a cleaning problem. A shower used twice a day in a poorly ventilated bathroom may never fully dry, so mold has continuous damp conditions to exploit. The same shower in a well-ventilated room that dries within an hour gives mold no foothold. This is why two households can clean equally hard and get very different results: the difference is not the cleaner but how long the enclosure stays wet. Keeping that framing in mind turns the effort toward the habits that actually matter rather than toward an endless search for a stronger product.
Cleaning Each Shower Surface
Tile and Glass
Glazed tile and glass doors are non-porous, so detergent and water, white vinegar, or hydrogen peroxide all lift surface mold and soap scum. Scrub with a soft brush, rinse, and dry. These surfaces are the easy part.
Grout
Grout is porous and traps dark staining. Scrub with a stiff brush and detergent, stepping up to a hydrogen peroxide cleaner or a clinging gel for set-in discoloration. After cleaning, resealing the grout closes the pores mold exploits.
Caulk and Silicone
The silicone bead where the wall meets the tub or floor is where mold most stubbornly hides, because it roots inside the flexible material. Once it is embedded, cleaners only lighten it. Cutting out the old caulk and applying fresh mildew-resistant caulk is the lasting fix.
Shower Curtains and Liners
Fabric and plastic liners hold mold at the bottom hem. Many are machine washable on a hot cycle, or simply replaced when growth sets in. Our broader guide on removing mold from a shower covers liner care alongside the hard surfaces.
Which Cleaners Work on Shower Mold
The EPA’s recommendation for non-porous shower surfaces is detergent and water, and it does not consider bleach routinely necessary. Many homeowners still use chlorine cleaners on grout because they erase staining quickly, which is fine with ventilation, but bleach must never be mixed with ammonia or acidic cleaners. Hydrogen peroxide and white vinegar are lower-odor alternatives suited to regular maintenance. The practical point is that scrubbing and drying matter more than the specific product. For comparisons, see our roundup of the best mold and mildew removers.
Whatever you use, follow the label, ventilate the bathroom, and wear an N95 respirator and gloves, since the CDC notes that disturbing mold and using cleaning chemicals can irritate the airways and eyes. One safety rule is non-negotiable in the confined space of a shower: never mix cleaning products, particularly bleach with vinegar, ammonia, or other acids, because the resulting fumes are hazardous and concentrate quickly in a small, enclosed stall. Use one product at a time and rinse between any change.
Step-by-Step Shower Mold Removal
A consistent routine clears shower mold efficiently. Start by ventilating: open the window and run the exhaust fan, and put on an N95 respirator and gloves. Clear the shower of bottles, razors, and the bath mat so every surface is reachable.
Work top to bottom. Treat the upper walls and any ceiling growth first, then the tile and grout, then the door or curtain track, and finish with the lower corners and caulk lines where mold is heaviest. Apply your cleaner, give it the dwell time the label specifies, and scrub porous grout with a stiff brush and non-porous tile with a softer pad. Rinse thoroughly, then dry the enclosure with a squeegee and a towel. Wash or replace the curtain liner. Keep the fan running afterward until the stall is fully dry. This order keeps loosened mold and cleaner from dripping onto cleaned areas and ensures the wettest, most colonized spots get the most attention.
The Shower Corners and Crevices That Hold Mold
Shower mold concentrates in predictable hard-to-reach spots, and skipping them lets the problem reseed. The grout in the lower corners stays wettest and is usually the first to discolor. The silicone bead where the wall meets the tub or floor harbors deep-rooted growth. The bottom track of a sliding glass door collects standing water and grime. The underside and folds of a shower curtain liner grow mold along the hem.
Less obvious spots include the gaps around fixtures and the shower head, the edges of a built-in soap niche, the seam where two walls meet, and beneath any bath mat or non-slip stickers on the shower floor. A handheld brush, an old toothbrush for tight seams, and a flashlight to inspect the corners all help reach these areas. Cleaning the open tile while ignoring these crevices is why shower mold so often seems to come back within days, since the growth simply spreads back out from the spots that were missed.
Health Context for Shower Mold
The CDC associates damp, moldy environments with nasal congestion, throat and eye irritation, coughing, and wheezing, with stronger reactions in people who have asthma, mold allergies, or weakened immune systems. Shower mold is rarely dangerous for healthy people, but the warm, enclosed space concentrates spores during cleaning, so personal protection and ventilation help. Keep household members with respiratory conditions out of the bathroom while you clean. This is general health context rather than a diagnosis; persistent symptoms should be evaluated by a physician. Because a shower is small and steamy, both spores and cleaning fumes build up quickly, so keeping the fan running and the door open during cleanup is as much about your own comfort and safety as it is about drying the stall afterward.
When Shower Mold Needs a Professional
Most shower mold is a DIY job, but some signs point deeper. Call a professional if mold keeps returning no matter how often you clean, if the wall behind the tile feels soft or the tile is loose, if the area exceeds about 10 square feet, if you smell mold without finding the source, or if a household member’s health makes cleanup risky. A leaking shower pan, failed waterproofing behind the tile, or a plumbing leak inside the wall can grow mold in the cavity that you cannot reach. A professional can use moisture mapping to find it before you spend more weekends scrubbing a symptom.
Several clues distinguish a surface problem from a structural one. Loose or shifting tiles, grout that crumbles or keeps cracking, a soft or spongy wall when pressed, and staining that appears on the ceiling of the room below the shower all suggest water is reaching the structure. A musty odor that lingers even after the visible mold is cleaned points to growth inside the wall or beneath the pan. When these signs appear, the issue is failed waterproofing or a leak rather than dirty grout, and continuing to scrub the surface will not solve it. Catching this early, before the subfloor or framing is compromised, keeps a repair manageable, which is why recurring shower mold that resists cleaning is worth a professional look rather than another round of cleaner.
Keeping Shower Mold From Returning
The habits that keep a shower dry matter more than any cleaner. The EPA recommends keeping indoor humidity below 50 percent; in a shower that means running the exhaust fan during the shower and for 20 to 30 minutes after, then squeegeeing the glass, tile, and walls to remove standing water. Spread the towel and bath mat to dry, and leave the shower door or curtain open between uses so air circulates and the enclosure dries out.
On the Front Range, the dry outdoor air clears bathroom moisture quickly once the fan moves it out, so ventilation pays off fast. Resealing grout annually, replacing aging caulk before it discolors, and wiping down the enclosure weekly remove the footholds and food sources mold depends on. With the shower drying fully between uses, mold has nowhere to establish and the scrubbing sessions become rare.
Recaulking a Moldy Shower
Because caulk is where shower mold most stubbornly roots, replacing it is often the step that finally breaks the cycle. Cut out the old, moldy bead with a utility knife or a caulk-removal tool, taking care not to scratch the tile or tub. Remove every trace of the old silicone, since fresh caulk will not adhere properly over residue. Clean the joint, treat any remaining surface mold, and let the area dry completely, which is critical because caulk applied over a damp joint traps moisture behind it.
Apply a quality mildew-resistant silicone caulk made for bathrooms, smoothing the bead and letting it cure fully before using the shower. Done right, fresh caulk removes the embedded growth and gives a clean, sealed joint that resists mold far longer. This is a modest project that pays off, since a moldy caulk line will keep reseeding the surrounding grout and tile no matter how often you scrub the open surfaces around it.
Mistakes That Let Shower Mold Return
Several habits undermine an otherwise good cleaning. Skipping the caulk and grout crevices leaves rooted growth that spreads back out. Leaving the shower door or curtain closed traps humidity and keeps the enclosure damp for hours. Failing to run the exhaust fan, or running it only during the shower rather than afterward, lets steam linger. Reaching for a second chemical when the first does not work invites dangerous mixing and rarely helps.
Other errors include scrubbing acrylic surrounds with abrasives that scratch and create rough surfaces mold clings to, painting or caulking over active mold, and treating a recurring problem as a cleaning failure when it is actually a hidden leak. The pattern across all of these is the same: they leave either moisture or rooted growth in place. Addressing both, by cleaning thoroughly into the crevices and then keeping the stall dry, is what makes shower mold stay gone. A shower that is cleaned into its corners and then dries fully between uses simply does not give mold the rooted footholds or the standing moisture it needs to come back, which is why the prevention habits matter every bit as much as the cleaning itself.
References
- Mold Cleanup in Your Home — U.S. Environmental Protection Agency
- A Brief Guide to Mold, Moisture and Your Home — U.S. Environmental Protection Agency
- About Mold and Your Health — Centers for Disease Control and Prevention
Frequently asked questions
What is the best way to get rid of shower mold?
Scrub non-porous tile and glass with detergent and water, treat stained grout with hydrogen peroxide, replace moldy caulk instead of scrubbing it, and wash or replace the curtain liner. Then dry the enclosure with a fan and squeegee so it does not return.
Why does mold keep growing back in my shower grout?
Grout is porous and stays damp, so mold roots into it and returns whenever the shower does not dry. Clean it, then reseal the grout to close the pores, run the exhaust fan, and squeegee surfaces to break the moisture cycle that feeds regrowth.
Should I replace moldy shower caulk or just clean it?
Replace it. Mold roots inside silicone and latex caulk, so cleaners only lighten the staining. Cutting out the old bead and applying fresh mildew-resistant caulk removes the embedded growth and is the lasting fix.
If shower mold keeps coming back and you suspect a leak behind the tile, Front Range homeowners can reach out through our contact page to connect with a vetted local inspector.
Mold removal & cleanup picks
For a small, contained patch (under ~10 sq ft) these EPA-friendly removers handle surface mold. Larger or recurring growth warrants a professional assessment first.
| Product | Why | Buy |
|---|---|---|
 RMR-86 Instant Mold Stain Remover RMR-86 Instant Mold Stain Remover | Fast-acting on stains; ventilate and wear PPE. | Amazon — $29.99 |
 Concrobium Mold Control Concrobium Mold Control | No-bleach formula that also helps prevent regrowth. | Amazon — $34.27 |
 Mold Armor Mold & Mildew Remover Mold Armor Mold & Mildew Remover | Widely stocked bathroom/surface remover. | Amazon — $22.98 |