Refrigerator Water Line Repair: Leaks, Fittings and Costs
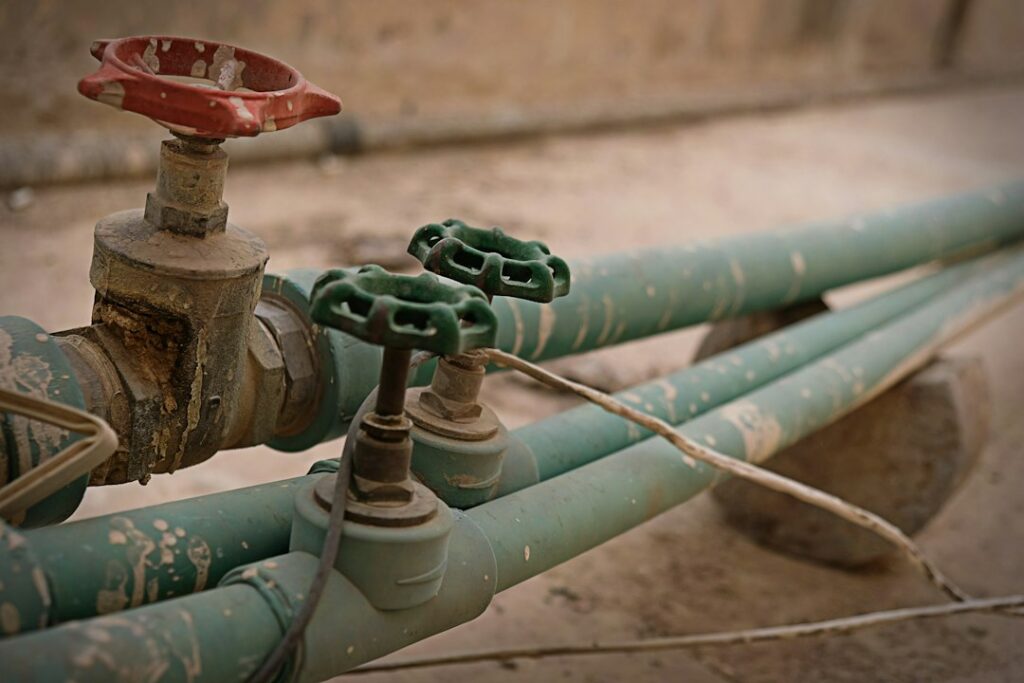
The thin tube that feeds a refrigerator’s ice maker and water dispenser is easy to forget about. It sits behind a heavy appliance, usually runs through a cabinet or the floor, and stays under household water pressure around the clock. When it fails, it rarely announces itself with a burst. More often a fitting weeps for weeks, soaking the subfloor and the back edge of the flooring before anyone pulls the fridge out. This guide covers refrigerator water line repair from start to finish: the types of supply line and why the choice matters, saddle valves versus proper shutoff valves, how to trace a leak to the inlet valve, filter housing or ice maker, what to look for on the floor behind the fridge, and what repairs tend to cost. Cost ranges are general 2026 estimates and vary by home, region and contractor.
Part of our Plumbing & Water guide — start there for the full picture →
How Refrigerator Water Line Repair Works
Most refrigerator water line repair comes down to three steps: shut off the water, find the exact point of the leak, and replace the failed part rather than patching it. Plastic and copper lines are inexpensive, and the fittings that connect them are standardized, so replacing a damaged section or the whole line is usually more reliable than trying to seal a crack.
The typical setup has four parts. A shutoff valve taps into a nearby cold-water pipe, often under the kitchen sink or in the basement below. A supply line runs from that valve to the back of the refrigerator. At the fridge, the line connects to an electric inlet valve, which opens on demand to feed the ice maker and dispenser. Inside the cabinet, short internal tubes carry water to the filter, the dispenser and the ice maker fill tube. A leak can start at any of those joints, and the location of the puddle often hints at which one.
Before doing anything else, close the shutoff valve and unplug the refrigerator. If the valve cannot be found or will not close, shut off the main water supply to the house until the leak is located.
Supply Line Types: Plastic, PEX, Copper and Braided Stainless
Several types of supply line are in common use, and the material affects how likely a line is to fail.
Plastic (polyethylene) tubing
Thin, flexible plastic tubing is often included in ice maker kits because it is cheap and easy to route. It can kink when the fridge is pushed back, crack as it ages, and split if it freezes. Many plumbers consider basic plastic tubing the least durable option, especially in long runs or where the line passes through a cold crawl space or garage wall.
PEX
PEX is a more robust plastic used for household water lines. A short PEX run with proper fittings can work well, though the line still needs gentle bends and protection from sharp edges where it passes through cabinets or floors.
Copper
Soft copper tubing was the standard for decades. It resists punctures and lasts a long time, but it can kink if the fridge is moved carelessly, and repeated flexing can eventually crack it. A coil of extra copper behind the fridge allows the appliance to be pulled out for cleaning, but the coil also takes a beating over the years.
Braided stainless steel
Braided stainless lines have a flexible inner hose wrapped in a woven metal jacket, with fittings crimped on at both ends. They are widely recommended for refrigerator connections because they resist kinking and punctures and come in fixed lengths with factory-made ends. Many appliance manufacturers sell their own braided lines. Even braided lines do not last forever, so it is reasonable to check them whenever the fridge is pulled out and to replace older ones during an appliance swap.
Saddle Valves vs Quarter-Turn Shutoff Valves
A saddle valve clamps around a copper pipe and uses a small piercing needle to tap into it. They were popular because they install in minutes without cutting the pipe. They are also a frequent source of slow leaks. The rubber gasket under the clamp can harden, the needle can corrode or stick, and the small hole in the pipe can clog with mineral deposits, which reduces flow to the ice maker. Some local plumbing codes no longer allow saddle valves, and many plumbers replace them on sight.
The more reliable alternative is a dedicated quarter-turn shutoff valve installed on a tee in the cold-water line, or a dual-outlet valve under the kitchen sink that serves both the faucet and the fridge. A quarter-turn ball valve opens and closes fully with a 90-degree turn, which makes it easy to shut off quickly in an emergency. If a home has a saddle valve that is weeping, stiff or partly clogged, replacing it as part of the repair is generally a good idea.
Finding the Leak
With the water shut off and the fridge unplugged, carefully slide the refrigerator out. Protect the floor with cardboard or a moving blanket, and avoid pulling so far that the line is stretched or kinked. Then work through the likely sources.
The inlet valve
The inlet valve is mounted at the lower back of most refrigerators behind an access panel. A cracked valve body or a loose compression nut where the supply line connects will leave water directly under the back of the fridge. Turn the water back on briefly and watch the connection with a flashlight. A valve that drips from its body, or one that leaks even when the fridge is not calling for water, usually needs replacement rather than tightening.
Fittings along the supply line
Compression fittings rely on a small brass or plastic ring (the ferrule) to seal. Overtightening can crush it, and moving the fridge can loosen it. Run a dry paper towel along each fitting to find the damp spot. If tightening a quarter turn does not stop the drip, replace the ferrule and nut or the entire line.
The water filter housing
Leaks that appear at the front of the fridge, or puddles inside the fresh-food compartment, often come from the filter. A filter that is not fully seated, an off-brand cartridge that does not match the housing, or a cracked housing can all leak. Remove the filter, check the O-rings, and reinstall it firmly. A cracked housing is a part replacement.
The ice maker fill tube
The fill tube carries water from the back of the fridge into the ice maker. If it freezes, water backs up and can overflow inside the freezer, forming ice sheets on the floor of the compartment or dripping out the door. Low freezer temperature settings, a slow-filling inlet valve or a poor door seal can contribute. A hair dryer on a low setting can thaw a frozen fill tube, but repeated freezing points to an underlying problem worth diagnosing.
Frozen or damaged lines in exterior walls
In older Front Range homes, refrigerator lines sometimes run through an exterior wall, an unheated crawl space or a garage. Cold snaps in Denver, Castle Rock and Colorado Springs can freeze those runs. A split line may only leak after it thaws. Rerouting the line through a heated space, or adding insulation, can prevent the problem from returning.
Is it the water line at all?
Not every puddle in front of a fridge is from the supply line. A clogged defrost drain can send meltwater onto the floor, and a cracked drain pan underneath can leak too. If the floor is wet but the supply line, inlet valve and filter are all dry, check the defrost drain and pan before replacing plumbing parts.
Floor Damage Behind the Refrigerator
Because a slow leak sits under a heavy, rarely moved appliance, the damage is often worse than the drip suggests. Look for:
- Cupped or buckled hardwood, or laminate swelling at the seams near the back wall.
- Dark staining or soft spots in the subfloor once the fridge is moved.
- Swollen baseboard, peeling paint, or wallpaper lifting behind the fridge.
- A musty smell, or mold growth on the back of the baseboard or drywall.
- Water stains on the ceiling or joists below, if the kitchen is above a basement.
A moisture meter can show whether the subfloor and wall base are still wet after the leak is fixed. If readings remain high, the floor may need professional drying, and some sections may need to come out. The guide to water damage restoration explains how that process and the related insurance questions typically work. The EPA’s guidance on mold and moisture is clear that the faster wet materials are dried, the better: materials dried within 24 to 48 hours of a leak usually will not grow mold.
Replacing a Supply Line Step by Step
Swapping a damaged line for a new braided connector is the most common DIY repair. The general sequence looks like this, though the refrigerator’s installation manual should take priority for model-specific details.
- Shut off and drain. Close the shutoff valve, unplug the fridge, and dispense water from the door until flow stops to relieve pressure.
- Measure the run. Pick a braided line long enough to let the fridge slide out for cleaning without strain, but not so long that it bunches into a tight coil behind the appliance.
- Check the connection sizes. Most refrigerator inlets use a 1/4-inch compression fitting, but the valve end varies. Confirm both ends before buying.
- Disconnect the old line. Keep a towel and a shallow pan handy. Use two wrenches where possible, one to hold the valve body steady and one to turn the nut.
- Install the new line. Thread nuts on by hand first, then snug them with a wrench. Overtightening is a common cause of later leaks.
- Test before pushing back. Open the valve slowly, then check every connection with a dry paper towel over several minutes. Run water from the dispenser to purge air and flush the new filter if one was installed.
- Recheck the next day. A quick look after 24 hours catches slow weeps before the fridge goes back against the wall for months.
Refrigerator Water Line Repair Costs
Costs vary with local labor rates, how far the line runs, and whether wall or floor access is needed. These are general estimates only:
- Braided stainless supply line (DIY): commonly about $15 to $40 for the part.
- Replacing a saddle valve with a quarter-turn valve: often around $150 to $350 with a plumber, depending on access.
- Inlet valve replacement: roughly $100 to $250 with an appliance technician, or less as a DIY part swap.
- Filter housing replacement: commonly $150 to $300 installed, depending on the model.
- Running a new line from the basement or sink: frequently $200 to $500 or more if walls or floors must be opened.
- Floor and subfloor repair: from a few hundred dollars for a small patch to several thousand when continuous flooring must be replaced.
When the refrigerator is also old, it can make sense to fold the water line repair into a replacement. ENERGY STAR notes that refrigerators over 15 years old could be costing about $95 more per year to run, and that a certified model is about 9 percent more efficient than one meeting the federal minimum standard. A new fridge installation is also the ideal time to install a fresh braided line and a proper shutoff valve.
Shutoff Location, Leak Sensors and Prevention
Everyone in the household should know where the refrigerator shutoff valve is. The most common locations are under the kitchen sink, in the basement or crawl space directly below the fridge, or in a recessed wall box behind the appliance. If the line disappears into the floor, follow it in the basement to find the valve. Label it so it can be closed quickly.
A small water sensor placed on the floor behind or beside the refrigerator is an inexpensive early warning. Many sensors chirp loudly or send a phone alert when water touches the contacts, and some systems can automatically close a valve. The EPA’s WaterSense program notes that leak detection and flow monitoring devices can help identify leaks or irregular water use and reduce water waste and damage caused by leaks. Options are in the leak detector category.
A few other habits reduce the odds of a leak:
- Leave enough slack in the line to pull the fridge out without stretching or kinking it.
- Inspect the line, valve and inlet connection whenever the fridge is moved or cleaned behind.
- Use the correct filter cartridge and replace it on the manufacturer’s schedule.
- Replace saddle valves and aging plastic tubing proactively.
- Keep household water pressure in a reasonable range; very high pressure stresses small fittings. A simple water pressure test shows whether a pressure-reducing valve may be needed.
The same approach applies to the dishwasher, which shares the kitchen plumbing and can leak in similarly hidden ways. The guide on a dishwasher leaking covers that appliance.
What Home Inspectors Check, and What They Do Not
Buyers are sometimes surprised that a refrigerator gets little attention during a general home inspection. The ASHI Standard of Practice lists specific installed kitchen appliances inspectors operate, such as ranges, dishwashers and food waste grinders, and does not require inspection of other installed and free-standing kitchen and laundry appliances. Refrigerators usually fall into that second group, and inspectors rarely move a fridge to look behind it.
Inspectors can still flag clues. Swollen flooring at the front of the fridge, staining on the ceiling below the kitchen, a saddle valve visible in the basement or a musty smell near the appliance are all worth noting. Buyers who want a closer look can ask the seller to pull the fridge out before the inspection or request moisture readings around the appliance. The guide to choosing a home inspector covers how to ask about scope before booking.
When to Call a Plumber or Appliance Technician
Many refrigerator water line repairs are within reach of a careful homeowner: swapping a braided line, reseating a filter, or tightening a compression fitting. Call a professional when the leak is inside the refrigerator cabinet, when the shutoff valve itself leaks or will not close, when the line runs inside a wall or floor, or when you find soft subfloor or mold. A plumber handles valves, tees and line routing. An appliance technician handles inlet valves, filter housings, internal tubing and ice maker problems.
References
- Fix a Leak Week: Finding Leaks and Leak Detection Devices — U.S. EPA WaterSense
- A Brief Guide to Mold, Moisture and Your Home — U.S. Environmental Protection Agency
- ENERGY STAR Refrigerators: Efficiency and Replacing Older Models — ENERGY STAR
- ASHI Standard of Practice for Home Inspections — American Society of Home Inspectors
Frequently asked questions
Can I repair a refrigerator water line myself?
Many homeowners can replace a supply line, tighten a compression fitting or reseat a filter with basic tools. Shut off the water and unplug the fridge first. Leaks inside the cabinet, at the shutoff valve or inside a wall are usually better handled by a plumber or appliance technician.
What is the best water line for a refrigerator?
Braided stainless steel lines are widely recommended because they resist kinks and punctures and come with factory-made fittings. Copper and PEX can also work well when installed carefully. Thin plastic tubing is generally considered the least durable option.
Why are saddle valves a problem?
Saddle valves clamp onto a pipe and pierce it with a needle. Their gaskets can harden and their small openings can clog or corrode, which commonly leads to slow leaks or reduced flow. Some local codes no longer allow them, and many plumbers replace them with quarter-turn valves.
How much does refrigerator water line repair cost?
A DIY braided line often costs $15 to $40. Professional repairs commonly run from about $100 to $350 depending on the part and access. Floor or subfloor damage can add considerably more.
Where is the refrigerator water shutoff valve?
It is most often under the kitchen sink, in the basement or crawl space below the fridge, or in a recessed box in the wall behind the appliance. Following the supply line from the back of the fridge is the quickest way to find it.
Shopping for a Front Range home and worried about leaks hiding behind the kitchen appliances? Send us a message and we will help you connect with a vetted local inspector before you commit.