Paver Base: Gravel, Sand, and Drainage Under a Patio
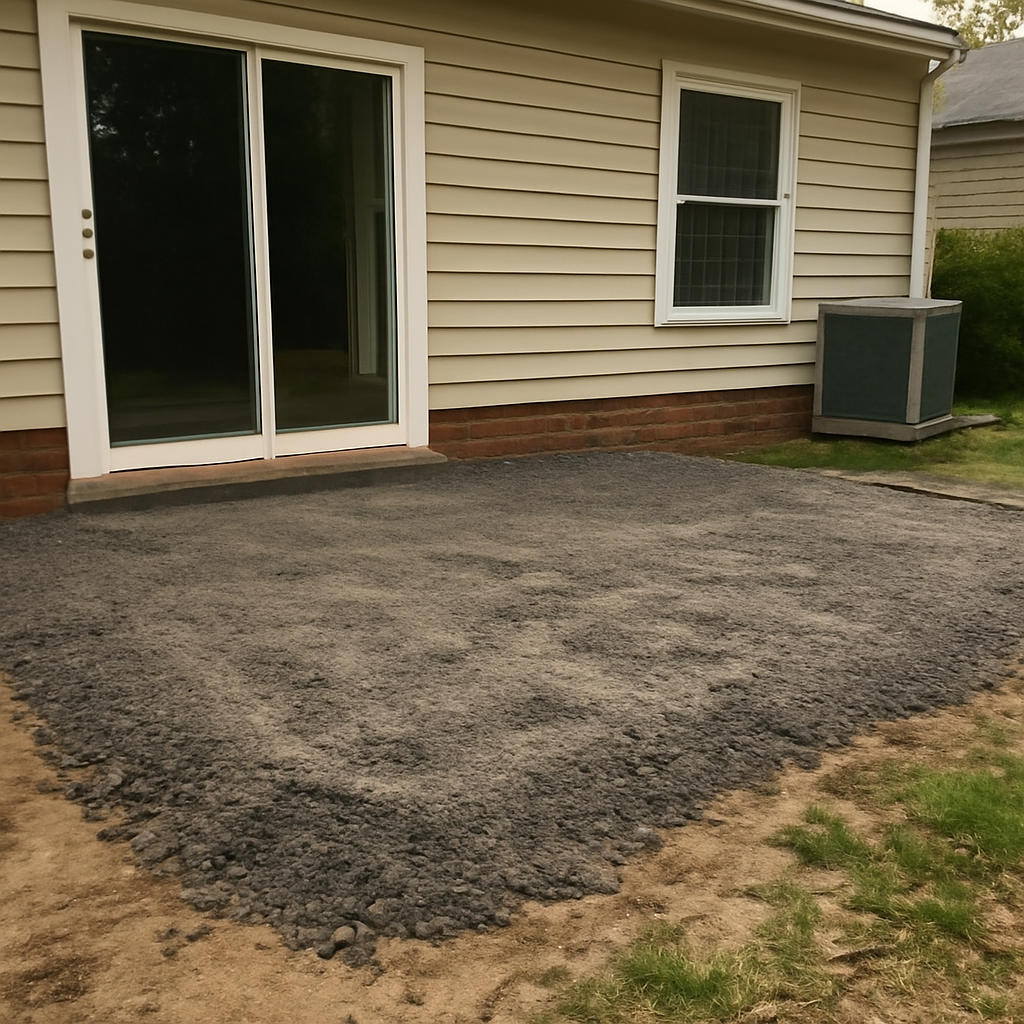
A paver patio or walkway can look finished and solid on day one and still be headed for trouble. Within a few winters, poorly built paving can sink near the downspout, ripple where tires pass or tip up at the edges. In almost every case the pavers themselves are fine. The problem is what sits underneath. The layers below the surface carry the load, shed water and resist the freeze-thaw movement that Colorado Front Range soils are known for. This guide explains how a typical base is built, why drainage and soil type matter so much, what failure looks like and what a home inspector will notice around a house with paved outdoor areas.
Part of our Structure & Exterior guide — start there for the full picture →
What a Paver Base Is and Why It Matters
Interlocking pavers are a flexible pavement. Unlike a poured slab, the individual units are not bonded together. They rely on friction from the joint sand, a firm edge around the perimeter and a uniform, well-compacted foundation below to stay level. If that foundation shifts, the pavers move with it.
A well-built paver base does three jobs:
- Spreads the load. Foot traffic, furniture, grills and vehicles press down on a small area. A compacted aggregate layer distributes that pressure across a wider patch of soil.
- Handles water. Crushed stone drains far better than native clay, and a properly sloped base helps move water off the surface and away from the house.
- Limits movement. A thick, dense base reduces how much soil swelling, shrinking and frost action reach the surface.
Shortcuts here are common because the base is buried and invisible once the job is done. That is why two patios that look identical at installation can perform very differently five years later.
The Layers, From the Ground Up
Most residential paver installations use a similar stack of layers. Exact materials and depths vary by installer, region, soil and intended use, so the descriptions below are general rather than a specification.
1. Compacted Subgrade
The subgrade is the native soil left after excavation. Topsoil, roots and organic material are normally stripped away because they compress and decay over time. The exposed soil is then graded to the intended slope and compacted with a plate compactor or roller. Soft spots, buried debris and pockets of loose fill are typically dug out and replaced. A firm, uniform subgrade is the starting point for everything above it.
2. Geotextile Fabric (Often Used)
Many installers place a woven or non-woven geotextile over the subgrade before the gravel goes down, especially on clay or silty soils. The fabric acts as a separator, keeping fine soil particles from migrating up into the aggregate and keeping stone from being pushed down into soft soil. Over time, that mixing can weaken a base. Geotextile used under pavement is a different product from the thin weed-barrier rolls sold for planting beds; our guide to landscape fabric explains the differences between common fabric types.
3. Crushed Aggregate Base
This is the structural heart of the system. Installers typically use angular crushed stone with a mix of particle sizes, often sold locally as road base or base course. The angular pieces lock together when compacted, and the range of sizes fills voids so the layer becomes dense and stable. Rounded pea gravel does not lock together the same way and is generally avoided for this layer.
Base depth is one of the biggest variables. As a rough guide, many contractors install a shallower base for walkways and patios that see only foot traffic and a noticeably deeper base for driveways and areas that carry vehicles. Clay soils, poor drainage and harsh freeze-thaw exposure often push depths higher. Local practice, manufacturer guidance and the soil on the specific site should drive the final number, so it is worth asking any contractor to state the planned depth in writing.
4. Compaction in Lifts
Aggregate is not dumped in one thick layer and compacted once. A plate compactor can only densify material to a limited depth, so the base is usually placed and compacted in lifts, thin layers each compacted before the next goes on. Lightly moistening the stone can help it compact. Skipping lifts is one of the most common hidden shortcuts and a frequent cause of settling later.
5. Bedding Sand
On top of the compacted base sits a thin, screeded layer of coarse bedding sand, typically about an inch deep. Its job is to give the pavers a smooth, even surface to settle into, not to make up for low spots in the base. Too thick a sand layer can shift and create ruts. After the pavers are laid, they are usually compacted into the sand, and joint sand is swept into the gaps.
6. Joint Sand and Polymeric Sand
The narrow joints between pavers are filled with sand that locks the units together. Many installers now use polymeric sand, a blend of sand and binders that hardens after it is wetted. It resists washout, discourages weeds and ants and helps the surface behave as a unit. It needs to be installed carefully, with the paver surfaces kept clean, or it can leave a hazy residue. Polymeric sand can wear and need topping up over the years, like any joint material.
Edge Restraint: Holding the System Together
Without a firm edge, pavers at the perimeter slowly creep outward, joints open and the field loosens. Edge restraints, which can be plastic, aluminum or steel strips staked into the base, a concrete curb or a soldier course of pavers set in a mortar haunch, keep the outer row locked in place. The restraint should sit on the compacted base rather than on loose soil. Our guide to landscape edging covers common edging materials and how they hold up.
A telltale sign of a weak edge is a perimeter row that has drifted outward, with widening joints and pavers that rock underfoot near the border.
Drainage: Slope Away From the House
Water is the main enemy of any paved surface and of the foundation next to it. A patio placed against a house wall should be pitched so surface water flows away from the foundation, not toward it. Many installers aim for a modest, steady fall across the surface, enough to shed water without feeling tilted underfoot. The base itself should follow the same slope so water that seeps through the joints also moves outward.
The EPA’s guidance on mold and moisture recommends making sure the ground slopes away from the building foundation so that water does not enter or collect around it. That principle applies just as much to hard surfaces. A patio that drains toward the house can direct roof runoff and snowmelt straight to the foundation wall, window wells and basement.
Where a lot is flat or water collects, a patio may need help from site drainage features:
- A shallow drainage swale can carry surface water around the paved area.
- A French drain can intercept groundwater or collect water at a low edge.
- Downspouts can be extended or redirected so roof water does not dump onto the pavers.
Our broader guide to yard drainage covers how these pieces work together. For homes in or near mapped flood zones, FEMA’s flood maps show which areas have a higher chance of flooding, which can affect how a larger hardscape project is planned.
Permeable Pavers
Permeable paver systems take a different approach. Instead of shedding water off the surface, they let it soak through wider joints filled with open-graded stone into a deeper, open-graded base that acts as a reservoir. The EPA describes permeable pavements, including interlocking pavers, as alternatives that allow rain and snowmelt to seep through to underlying soil and gravel, reducing runoff and helping filter pollutants. These systems require a different base design and are not simply standard pavers with gaps, and on expansive clay they need careful engineering so water is not stored against problem soils near a foundation.
Front Range Soils: Expansive Clay and Frost Heave
Many neighborhoods along the Front Range sit on clay-rich soils, some of which are expansive, meaning they swell when wet and shrink when dry. The amount of movement varies a great deal from lot to lot and even across a single yard. Expansive soil can lift a patio in a wet spring and let it drop again during a dry summer, cracking edges and opening joints.
Freeze-thaw cycles add another force. When water in fine-grained soil freezes, it can form ice lenses that push the ground upward. Our guide to frost heave explains the mechanism in more detail. A thicker, free-draining base, good surface drainage and a separation fabric are the usual tools for reducing these effects, though no base design eliminates them entirely on highly expansive soil.
On sites with known soil problems, a soils report from the original construction, if one exists, can be helpful. For larger projects, especially driveways or patios adjacent to a foundation with a history of movement, consulting a geotechnical or civil engineer is a reasonable step before choosing a base depth.
Signs a Paver Base Is Failing
Most base failures show up at the surface in recognizable patterns:
- Settling and dips. Low spots that hold water after rain often point to poor compaction, soft subgrade or water washing out the base.
- Rutting. Grooves in driveway paving where tires travel usually mean the base was too thin or too weak for vehicle loads.
- Heaving. Pavers lifted in humps or tented joints can come from frost action, expansive clay or tree roots.
- Spreading edges. An outer row drifting away from the field signals a missing or failed edge restraint.
- Sand loss and weeds. Empty joints, weeds and ant hills allow units to shift and water to get into the base.
- Negative slope. Water pooling against the house or running toward the foundation is a drainage defect regardless of how the pavers look.
Small areas can often be repaired by lifting the pavers, re-compacting or replacing the base and relaying the same units. Widespread settling or rutting usually means the base needs to be rebuilt.
Questions to Ask a Contractor About the Base
Because the base disappears once the pavers go down, the best time to judge it is before work starts. Useful questions include:
- How deep will the excavation and the compacted aggregate be for this use and this soil?
- What base material will be used, and will it be compacted in lifts?
- Will a geotextile separator go over the subgrade?
- What slope will the finished surface have, and which direction will water drain?
- What type of edge restraint will be installed, and what will it sit on?
- How will downspouts and roof runoff near the patio be handled?
Clear, specific answers in a written bid are a good sign. Vague replies such as “the usual base” make it harder to compare quotes and harder to hold anyone accountable if the surface settles. Photos of the excavation and compacted base taken during the job are also worth keeping with the home’s records.
Costs, Sealing and Alternatives
The base is a large share of the cost of any paver project because it involves excavation, hauling, material and compaction labor. The figures below are broad planning descriptions based on typical trade pricing, not quotes, and access, soil and Front Range labor rates can move them considerably.
| Work item | Typical use | Relative cost | Notes |
|---|---|---|---|
| Patio or walkway base | Foot traffic only | Moderate; usually priced within the per-square-foot total | Shallower base; drainage still critical |
| Driveway base | Vehicle loads | Higher per square foot | Deeper aggregate and more excavation |
| Geotextile fabric | Clay or soft soils | Low relative to total | Helps keep layers separated |
| Lift-and-relay repair | Localized settling | Low to moderate | Existing pavers often reused |
| Full base rebuild | Widespread rutting or heaving | Moderate to high | Often close to the cost of new paving |
| Drainage additions | Swales, French drains, downspout work | Varies widely | Protects both the base and the foundation |
For a fuller breakdown of material and labor pricing, see our guide to paver installation cost. Some owners also apply a sealer to protect color and help hold joint sand in place; our paver sealer guide covers the trade-offs. Sealing does not fix a weak base.
Pavers are not the only option. A poured concrete patio also depends on a compacted base and good drainage, but it cracks rather than shifting unit by unit, which changes how failures look and how they are repaired. Where a patio sits on a sloped yard, it may be paired with a retaining wall; our guides to retaining wall block and retaining wall repair cover how those walls are built and how they fail, since many of the same drainage and base principles apply.
Inspector Notes: Grading Toward the Foundation
A home inspection is a visual review of accessible conditions. The ASHI Standard of Practice directs inspectors to inspect adjacent and entryway walkways, patios and driveways, along with vegetation, grading, surface drainage and retaining walls that are likely to adversely affect the building. The same standard says inspectors are not required to inspect geological and soil conditions. An inspector will not dig into a patio to measure the base, but the surface often tells the story.
Common inspection notes around paver areas include:
- Patios or walkways that slope toward the house, or areas where water appears to pond against the foundation.
- Settled or heaved pavers that create trip hazards at doors and steps.
- Downspouts discharging onto the paving or directly at the foundation.
- Gaps between the paving and the foundation wall where water can enter.
- Leaning or bulging retaining walls near paved areas.
Grading problems near a foundation are a frequent recommendation item on Front Range reports because of the region’s clay soils. Inspectors commonly suggest evaluation by a hardscape contractor or drainage specialist when a patio clearly directs water toward the house. To learn how exterior findings fit into the larger report, see the structure and exterior section of our hiring guide, and for help selecting an inspector, visit our main home inspector hiring guide.
References
- ASHI Standard of Practice for Home Inspections — American Society of Home Inspectors
- Soak Up the Rain: Permeable Pavement — U.S. Environmental Protection Agency
- A Brief Guide to Mold, Moisture and Your Home — U.S. Environmental Protection Agency
- Flood Maps — Federal Emergency Management Agency
Frequently asked questions
How deep should a paver base be?
It depends on use and soil. Patios and walkways for foot traffic usually get a shallower crushed-stone base, while driveways need a deeper one. Clay soils and poor drainage often call for more depth, so ask the contractor to state the planned depth in writing.
Can pavers be laid directly on sand?
Not for a durable result. Bedding sand is only a thin leveling layer. Without a compacted crushed-aggregate base underneath, pavers tend to settle, rut and shift, especially on Front Range clay.
Is landscape fabric needed under a paver base?
It is often recommended on clay or soft soils. A geotextile separator keeps fine soil from mixing into the gravel base. It is a different product from thin weed-barrier fabric used in planting beds.
Why are my pavers sinking near the house?
Common causes include poor compaction, downspouts dumping water onto the paving, soil washout and a slope that drains toward the foundation. Fixing the water source usually comes before relaying the pavers.
Will a home inspector check my paver patio?
Inspectors look at adjacent patios, walkways and driveways and at grading and surface drainage near the house. They note settling, trip hazards and slopes toward the foundation, but do not dig into the base.
Worried a patio or driveway is sending water toward the foundation of a house you are buying? Get in touch with us and we will help you find a Front Range inspector who looks closely at grading and drainage.