New Construction Home Inspection Checklist PDF: Phase by Phase
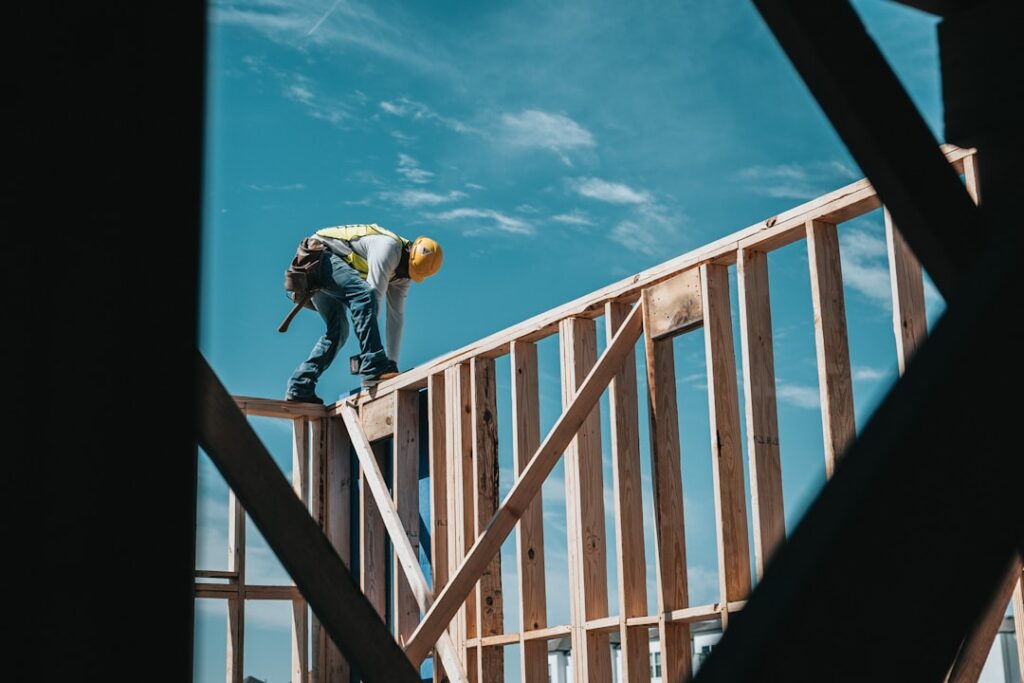
A brand-new house feels like it should be defect-free, but new homes are built by many crews working on tight schedules, and mistakes get covered up quickly by concrete, insulation and drywall. A new construction home inspection checklist pdf gives buyers a structured way to follow the build and know what to look for at each stage. Rather than offering a separate download, this page is designed to be printed: every checklist below is a plain list, and the browser’s Print command with “Save as PDF” turns the page into a file to bring to walkthroughs. The guide covers the four inspection phases, what to check in each, how builder warranties and municipal inspections fit in, and Colorado-specific concerns such as expansive soils and radon. It is general guidance; builder contracts and local codes vary, so confirm details with the builder and the local building department.
Part of our Home Inspections Explained guide — start there for the full picture →
The Four New Construction Inspection Phases
Most independent inspections of new homes fall into four windows. Each one sees parts of the house that will be hidden or harder to evaluate at the next stage.
| Phase | Typical timing | Key items |
|---|---|---|
| 1. Pre-pour foundation | After forms, rebar and under-slab work are in place, before concrete is poured | Footing and form layout, reinforcement, under-slab plumbing, vapor retarder, radon-resistant features, drainage provisions |
| 2. Pre-drywall (framing / rough-in) | After framing, roof, windows and mechanical, electrical and plumbing rough-ins; before insulation and drywall | Framing, fastening, headers, sheathing, flashing at windows, rough plumbing, wiring, ductwork, fire blocking, radon vent pipe routing |
| 3. Final (pre-closing) | When the builder reports the home complete, ideally before the final walkthrough | All systems operating, exterior grading, roof, attic insulation, finishes, appliances, safety devices |
| 4. 11-month warranty | About 11 months after closing, before a one-year workmanship warranty typically expires | Settlement cracks, drainage, nail pops, door and window operation, HVAC performance, roof and gutters after a full season |
Not every buyer books all four. Many choose at least the pre-drywall and final inspections. Our guide to when to schedule a home inspection for new construction covers timing in more detail, and the broader overview of a new construction home inspection explains what to expect from the inspector.
How to print this checklist as a PDF
Open the browser’s Print dialog (Ctrl+P on Windows, Cmd+P on Mac, or Share then Print on most phones), choose “Save as PDF” as the destination, and save. The checklists print as bulleted lists with room to add notes in the margins. Print a fresh copy for each phase so notes from one visit do not get mixed with the next.
Phase 1: Pre-Pour Foundation Checklist
This is the least commonly booked inspection, and access depends on the builder’s schedule and site safety rules. Many production builders limit buyer site visits, so ask in writing before signing whether third-party inspections are allowed and how much notice they need. Pour dates can move with weather, so stay in close contact.
- Footings and forms match the plan dimensions and are set on undisturbed or properly compacted soil.
- Rebar is present, supported off the ground on chairs or blocks and not lying in the dirt.
- Any engineer-specified details (piers, void forms, structural slab components) appear to be installed.
- Under-slab plumbing lines are in place and appear to have been pressure or water tested.
- A gravel or other gas-permeable layer is placed below where the slab will go.
- A plastic vapor retarder covers the gravel with overlapped, taped seams and minimal tears.
- A radon vent pipe stub is set in the gravel layer, if the home includes radon-resistant features.
- Foundation drains, sump pits and perimeter drainage are placed as shown on the plans.
- Standing water, mud or debris has been removed from forms and excavations.
- Utility penetrations through the foundation are planned so they can be sealed.
The inspector can observe and photograph, but structural adequacy of the design is the engineer’s responsibility. Treat this visit as a check that what was designed is what is being built.
Phase 2: Pre-Drywall and Framing Checklist
For many buyers this is the most valuable visit. Once insulation and drywall go up, the framing, wiring, plumbing and ductwork inside walls disappear for the life of the house. The American Society of Home Inspectors (ASHI) publishes a separate Predrywall Standard as one of its auxiliary standards, which is a sign of how distinct this inspection is from a standard resale inspection.
Structure and framing
- Studs, joists and rafters are free of large cracks, splits or excessive notching and boring.
- Headers are installed over window and door openings.
- Engineered joists and trusses are not cut or modified in the field without documentation.
- Hold-downs, hurricane ties and hangers are installed and fully fastened where specified.
- Sheathing is fastened properly, with no visible blowouts or missed nailing lines.
- Floors feel solid with no obvious bounce or squeaks.
- Lumber and sheathing are not visibly wet or moldy before being enclosed.
Exterior envelope
- Weather-resistive barrier is lapped shingle-style, without large tears.
- Windows and doors are flashed, with flashing lapped correctly at the sill and head.
- Roof-to-wall flashing and kick-out flashing are installed where roof edges meet walls.
- Penetrations for vents, pipes and wiring are sealed.
Mechanical, electrical and plumbing rough-in
- Plumbing drains slope correctly, are supported and are protected with nail plates where close to stud faces.
- Supply lines are secured and protected; no kinks in flexible lines.
- Wiring is stapled and supported, with nail plates where needed and boxes set at consistent heights.
- Ductwork is connected and sealed at joints, with no crushed or disconnected runs.
- Bath fan and dryer ducts lead to the exterior, not just into the attic or joist bay.
- Gas lines are supported, and flexible gas piping is bonded according to manufacturer instructions.
Fire safety and radon
- Fire blocking and draft stopping are present at required locations, such as between floors.
- Garage-to-house walls and ceilings are framed for the required fire-rated assembly.
- The radon vent pipe runs from the slab through conditioned space to the roof and is labeled.
- An electrical junction box for a future radon fan is in the attic near the vent pipe.
Phase 3: Final Inspection Checklist
The final inspection should happen before the builder’s walkthrough, so the inspector’s findings can be added to the punch list. Ask the builder for a date when utilities are on and the home is substantially complete.
Exterior and site
- Grading slopes away from the foundation on all sides.
- Downspouts discharge away from the house, with extensions or splash blocks.
- Siding, trim and caulking are complete, with no gaps at corners and penetrations.
- Roof shingles lie flat, with flashing at valleys, chimneys and walls.
- Driveway, walkways and patio slope away from the house.
- Exterior outlets are protected and hose bibs function.
Interior and systems
- Every window and door opens, closes and latches; weatherstripping seals.
- All outlets work; GFCI and AFCI protection trips and resets.
- Electrical panel is labeled, with no open knockouts.
- Every faucet, shower and toilet works, with no leaks under sinks.
- Water heater has proper venting and a discharge pipe on the relief valve.
- Furnace and air conditioner run; every register delivers air; the thermostat responds.
- Smoke and carbon monoxide alarms are installed and operate.
- Kitchen appliances power on and function; the range hood vents properly.
Attic, crawl space and basement
- Attic insulation depth is even and matches the specified level.
- Attic ventilation paths are clear, and baffles are in place at the eaves.
- No daylight or water stains at roof penetrations.
- Basement or crawl space is dry, with sump pump operating if installed.
- The radon system pipe is labeled, and any installed fan runs.
Finishes
- Drywall, paint, trim and flooring are complete without obvious defects.
- Cabinets and countertops are level, secure and undamaged.
- Stairs and railings are solid.
Phase 4: The 11-Month Warranty Inspection
Many builders offer a one-year workmanship warranty, often with longer coverage for systems and structural elements. Scheduling an inspection around month 11 gives time to submit a written list before the first-year coverage ends. By then the house has gone through a full cycle of seasons, and settling, shrinkage and drainage problems have had time to appear.
- Drywall cracks at corners of doors and windows and nail or screw pops.
- Doors that now rub or do not latch.
- Grading that has settled toward the foundation, especially around backfilled areas.
- Gutters that overflow or leak at joints.
- Slab or foundation cracks that have widened or show displacement.
- Water stains on ceilings, in the attic or around windows.
- Uneven heating or cooling between rooms.
- Caulking that has pulled away at tubs, showers and exterior trim.
- Long-term radon test results if testing was done after move-in.
Submit warranty claims in writing, keep photos and dates, and follow the builder’s process exactly. Read the warranty itself; coverage terms, exclusions and claim deadlines vary by builder and by any third-party warranty company.
Confused by your home inspection report? Decode it free in plain English
Upload your inspector's PDF and get a plain-English summary, what actually matters, rough repair costs, and negotiation talking points. Educational only — not a professional re-inspection. Your file is analyzed and discarded, never stored.
Educational summary only. AI can be wrong and cost figures are rough estimates. This is not a professional re-inspection, appraisal, or legal/financial advice — confirm major items with your inspector or a licensed contractor.
Why Municipal Code Inspections Are Not Enough
New homes are inspected by the local building department at several points, so buyers often ask why they should pay for another inspection. Code inspectors check for compliance with the adopted code at specific milestones. They may be responsible for many sites in a day, and the visits are often brief. Code compliance is a minimum standard, and a passed code inspection does not necessarily mean workmanship is good, finishes are complete or the home matches the buyer’s contract.
An independent inspector works for the buyer. The Consumer Financial Protection Bureau (CFPB) recommends hiring an independent inspector who is accountable to the buyer, and cautions that an inspector paid by someone else or not paid until closing might underemphasize problems. The CFPB also notes that inspectors may not be required to be licensed in every area and suggests checking references and records. Colorado does not license home inspectors at the state level, so experience with new construction, insurance and professional association membership are worth asking about.
The ASHI Standard of Practice describes a home inspection as a visual evaluation of readily accessible, installed systems and components, with a written report on items that are not functioning properly, significantly deficient, unsafe or near the end of their service lives. That scope is useful on a new home, but buyers should understand its limits: inspectors following it are not required to provide engineering services or to determine environmental hazards such as radon.
Colorado Concerns: Expansive Soils and Radon
Expansive soils
Many parts of the Colorado Front Range have clay soils that swell when wet and shrink as they dry. Builders typically address this with soils reports and engineered foundations, which might include structural floors, drilled piers or void forms in basements. Ask for the soils report and foundation design, and check that basement floor slabs and interior framing follow the engineer’s details. Slab-on-grade basement floors in expansive areas may be designed to “float,” with gaps at the bottom of framed walls so the slab can move without lifting the walls. Homeowners should not close those gaps during finishing. Keeping water away from the foundation through grading and gutters remains the most important long-term step.
Radon-resistant new construction
Much of Colorado has elevated radon potential. The EPA describes five basic radon-resistant features builders should include: a 4-inch layer of clean, coarse gravel beneath the slab (or an allowed alternative such as perforated pipe or a collection mat), heavy-duty 6-mil polyethylene sheeting or a vapor retarder over the gravel, a 3- or 4-inch solid PVC vent pipe running from the gravel layer through conditioned space to the roof and labeled “Radon System,” sealing and caulking of foundation openings and cracks, and an electrical junction box in the attic for a future vent fan.
The EPA states that the cost to a builder of including these features is typically less than the cost of mitigating after construction, and that a new home buyer may ask the builder to include them if they are not provided. Even with these features, a radon test after move-in is the only way to know the level in the finished home. The pre-pour and pre-drywall checklists above include these items so buyers can confirm them while they are visible.
Energy performance
Some builders certify homes under ENERGY STAR, which describes its certified new homes and apartments as designed and built better from the ground up and lists participating builders by state. If a builder advertises certification, ask for the documentation and include insulation, air sealing and duct sealing on the pre-drywall checklist so the advertised features are confirmed before they are covered.
Working With the Builder on Inspections
Independent inspections go more smoothly when expectations are set before the contract is signed. Some builders welcome third-party inspectors; others restrict site access for insurance and safety reasons, or limit inspections to specific dates. A few contracts try to prohibit independent inspections altogether, which is worth knowing before committing.
Questions to ask before signing
- Are independent inspections allowed at the pre-pour, pre-drywall and final stages?
- How much notice does the builder need, and who schedules the site visit?
- Will the builder respond in writing to the inspector’s findings?
- What does the warranty cover, for how long, and how are claims submitted?
- Is the home built with radon-resistant features, and is a radon fan included or optional?
- Will the builder provide the soils report, foundation design and municipal inspection records?
Documents worth requesting
- Approved plans and any engineer letters for the foundation and framing.
- The geotechnical (soils) report for the lot.
- Municipal inspection sign-offs and the certificate of occupancy.
- Manufacturer warranties for the roof, windows, water heater and HVAC equipment.
- Any energy certification or performance test results the builder advertises.
Handling findings
Share the inspector’s report with the builder’s construction manager promptly and politely, and ask for a written response listing what will be corrected and when. Builders often push back on items they consider cosmetic or within tolerance. Focus negotiations on water management, structure, safety and system performance, where a missed defect is costly later. Photograph corrections before they are covered, because the next phase may hide them for good.
Using the Checklist on Site
A printed checklist is most useful when it is treated as a working document rather than a souvenir. A few habits help:
- Walk the house in the same order every visit. Exterior first, then each floor from top to bottom, so nothing gets skipped.
- Photograph everything before it is covered. Wall cavities, plumbing runs and the under-slab layer are worth documenting room by room; those photos help later when hanging shelves, finishing a basement or tracing a leak.
- Mark items as “observed,” “not visible” or “concern.” A blank box can mean either fine or never checked; the extra label avoids confusion.
- Note the date and who was present. That record supports warranty claims.
- Keep the buyer’s list separate from the inspector’s report. The professional report carries more weight with the builder, while the buyer’s list catches finish and preference items.
Respect the site rules. Wear closed-toe shoes, avoid open trenches and upper floors without railings, and do not visit without the builder’s permission. Construction sites are hazardous, and an inspector’s visit is a scheduled, supervised event.
What a New Construction Inspection Costs
Pricing depends on the home’s size, the number of phases and the region. Phased packages that bundle pre-drywall, final and 11-month visits are common and can cost less than booking each separately. Add-ons such as radon testing, sewer scopes and thermal imaging increase the total. Our new construction home inspection cost guide breaks down typical pricing factors. Compared with the cost of opening finished walls to fix a framing or plumbing defect, an inspection at the right phase is modest.
Other Printable Checklists
Different situations call for different lists. A resale home, a quick buyer’s walk-through and an inspector’s form each emphasize different things:
- Home inspection checklist PDF: a general list for existing homes.
- New home inspection checklist PDF: a companion list focused on move-in-ready new homes.
- Home inspection checklist for buyers PDF: questions and checks for buyers during showings.
- Printable professional home inspection checklist: a more detailed, inspector-style list.
- Home inspection form PDF: a form layout for recording findings.
For more on choosing and working with inspectors, see the hiring process pillar and the home inspection basics hub.
References
- Radon-Resistant Construction Basics and Techniques — U.S. Environmental Protection Agency
- Schedule a Home Inspection — Consumer Financial Protection Bureau
- Standard of Practice for Home Inspections — American Society of Home Inspectors
- Energy Efficient New Homes and Apartments — ENERGY STAR
Frequently asked questions
Is there a printable new construction inspection checklist?
Yes. The phase-by-phase lists on this page are designed to print. Use the browser's Print command and choose Save as PDF to keep a copy, and print a fresh one for each inspection visit.
When should a new construction home be inspected?
Common windows are pre-pour foundation, pre-drywall after rough-ins, final before the builder walkthrough, and around 11 months after closing. Many buyers book at least the pre-drywall and final inspections.
Do city code inspections replace a private inspection?
Not fully. Code inspections check minimum compliance at set milestones, often briefly. An independent inspector works for the buyer and can note workmanship, incomplete work and items that do not match the contract.
Should a new Colorado home have radon-resistant features?
The EPA describes five basic features: a gas-permeable layer, plastic sheeting, a labeled vent pipe, sealed foundation openings and an attic junction box for a future fan. Buyers may ask builders to include them, and should still test after move-in.
What is an 11-month warranty inspection?
It is an inspection scheduled shortly before a typical one-year builder workmanship warranty ends. It finds settling, drainage and finish issues that appeared over the first year so they can be reported in writing before coverage expires.
Building a new home on the Front Range? Contact our team to find an inspector who handles phased new construction visits from pre-pour through the 11-month warranty check.