Lead Paint Removal: A Safe Homeowner Guide
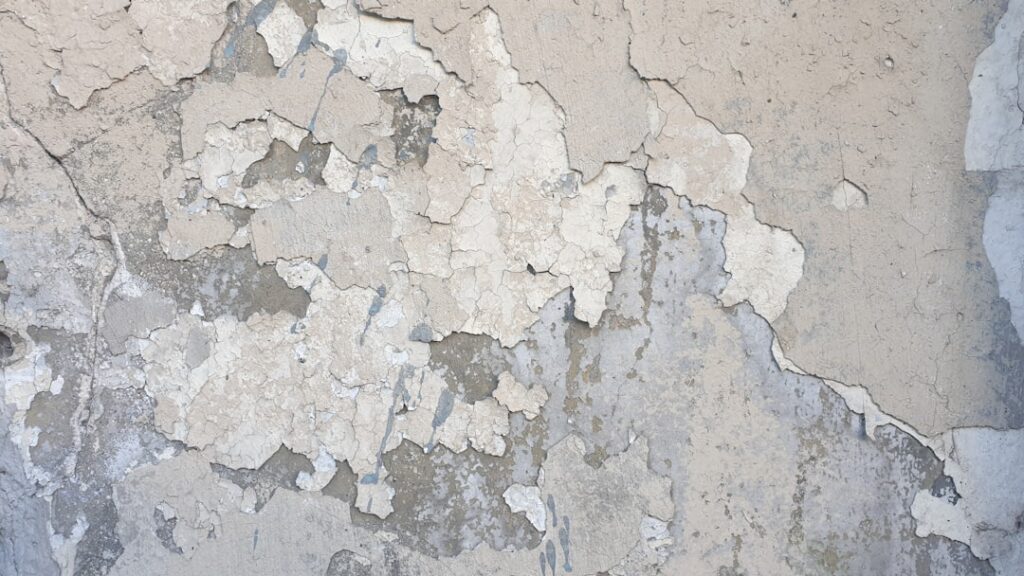
Lead paint removal is one of the riskiest do-it-yourself projects a homeowner can attempt, because the wrong method turns a manageable surface into a cloud of toxic dust. In housing built before 1978, lead-based paint is common, and how it is handled determines whether a renovation protects a family or poisons it. This guide summarizes EPA, HUD, and CDC guidance current as of 2026 and is informational only — consult a certified renovator for project decisions and a physician for any blood-lead concerns. The goal is to explain safe options and the methods to avoid.
Part of our Lead Paint & Lead Testing guide — start there for the full picture →
Is this mold, asbestos, or water damage? Get a free instant screen
Upload a clear photo of the suspect area. You'll get an instant AI screening opinion and what to do next. This is screening guidance, not a professional determination.
Screening guidance only. AI can be wrong. Confirm asbestos, mold type, or lead with lab testing or a licensed professional before acting.
Why lead paint removal demands caution
The hazard is not the intact paint film but the dust and chips created when paint is disturbed. Dry sanding, power sanding, open-flame burning, and high-heat stripping all aerosolize lead, contaminating the home and exposing everyone inside. Children and pregnant residents face the greatest risk.
Because of this, regulators treat lead paint disturbance in pre-1978 housing as regulated work. Understanding the safe paths, and the dangerous ones, is the difference between a clean project and a household exposure event.
Lead dust is insidious because it is invisible and settles everywhere. It works into carpet fibers, collects on windowsills, and drifts through ductwork to rooms far from the work area. Once a home is contaminated, cleanup is laborious and expensive, which is why prevention through safe methods matters so much.
Methods to avoid
Several common stripping methods are explicitly hazardous for lead paint. Open-flame torches and high-temperature heat guns can vaporize lead. Dry scraping and power sanding without containment spread fine dust through the air and into ductwork.
Uncontrolled chemical stripping that lets chips scatter is also problematic. These methods are why agencies discourage casual removal and why certified renovators follow strict dust-control protocols. Doing the job wrong is worse than leaving intact paint alone.
Pressure washing exterior lead paint deserves its own warning. Blasting paint off siding spreads lead-laden chips and water across the yard and into the soil, creating a contamination problem outdoors that can persist for years and put children playing in the yard at risk.
Safer removal methods
When removal is necessary, safer approaches keep dust contained. Wet scraping and wet sanding suppress airborne particles. Chemical strippers used with careful chip containment avoid dust altogether. Low-temperature heat guns kept below the threshold that vaporizes lead reduce, though do not eliminate, risk.
Component replacement is often the safest route for windows and trim: removing the whole painted component and installing new material avoids on-site stripping entirely. A certified renovator chooses the method that fits the surface and the home’s occupants.
Wet methods work because water binds the dust. Keeping a surface and its scrapings wet throughout the process means particles fall and stay down rather than becoming airborne, which is the single most important principle separating safe removal from dangerous removal.
Containment and cleanup
Whatever the method, containment matters. Plastic sheeting, sealed-off rooms, HEPA vacuuming, and thorough wet wiping prevent dust from migrating. Ordinary household vacuums spread fine lead dust rather than capture it, so HEPA filtration is essential.
Cleanup is not a quick sweep at the end. Lead-safe work practice calls for a methodical sequence of HEPA vacuuming and wet wiping, often repeated, followed by a verification that surfaces are clean. Cutting the cleanup short can leave behind exactly the dust the whole process was meant to control.
Encapsulation as an alternative
Removal is not always the best answer. Encapsulation coats intact lead paint with a specialized sealant that bonds the lead in place, and enclosure covers it with a new surface such as drywall or paneling. Both can be safer and cheaper than stripping when the underlying paint is sound.
For intact surfaces that are not friction points, encapsulation often makes more sense than aggressive removal. The choice depends on condition, location, and whether the surface rubs or weathers. This management-in-place philosophy mirrors the approach described in the parent guide to asbestos and lead hazards in pre-1978 housing.
Encapsulation does require maintenance. The sealant must stay intact to keep the lead bound, so encapsulated surfaces need periodic inspection and reapplication over the years. It is a durable solution, not a permanent one, but for sound surfaces it avoids the dust risk that removal creates.
The RRP rule and certified renovators
Federal renovation, repair, and painting rules require firms disturbing painted surfaces in pre-1978 housing to be certified and to follow lead-safe work practices. These rules mandate containment, dust control, and verified cleanup.
Hiring an RRP-certified contractor is the legal path when lead is confirmed and the work disturbs more than a minimal area. A certified renovator brings the equipment and procedures that keep dust out of the home, which a typical handyman does not.
Verifying certification is straightforward: a certified firm can provide its certification information, and the EPA maintains the program that governs it. Homeowners who hire uncertified workers for lead-disturbing renovation take on both the safety risk and a share of the compliance exposure.
Protecting occupants during the work
Beyond method and containment, the people in the home need protection. Children under six and pregnant residents should be out of the home entirely while lead-disturbing work is underway, since they are the most vulnerable to even small exposures. Other occupants should stay clear of the work zone.
Belongings and food-preparation areas need protection too. Dust travels, so sealing off the work area, covering or removing furniture, and keeping the kitchen isolated prevents lead from settling where families eat and children play. These precautions are part of why professional work costs more than a careless DIY attempt.
Re-entry should wait until cleanup is verified. Returning to a space that looks clean but still harbors fine settled dust defeats the purpose of the precautions. A methodical post-work cleaning and, where appropriate, dust-wipe verification confirm the area is genuinely safe before occupants move back in.
Exterior lead paint considerations
Exterior surfaces carry their own challenges. Old siding, trim, porches, and railings often hold lead paint, and removing it outdoors spreads chips and dust into the soil and onto adjacent properties. Ground cover, careful containment, and avoidance of pressure washing all matter outside as much as inside.
Soil contamination is a lasting concern. Lead that lands in the yard does not break down, and it becomes a hazard for children who play in the dirt. Containing debris with ground sheeting and cleaning up thoroughly protects the soil from a problem that is far harder to remediate than the original paint.
Component replacement shines on the exterior. Swapping out lead-painted windows, doors, or trim for new units sidesteps on-site stripping entirely, which is often the cleanest approach for weathered exterior surfaces that would otherwise require messy, dust-generating removal.
Testing before removal
Removal should follow confirmation, not assumption. Before stripping anything, families should confirm lead is present and where, through a certified inspection such as the one described in the guide to a lead paint inspection. Knowing which surfaces are positive focuses the work and avoids needless disturbance.
Testing also prevents the opposite error: assuming a pre-1978 home is clear without checking. An inspection turns guesswork into a documented map of where lead-safe practices are required.
What lead paint removal costs
Cost depends on the method, the surface area, and whether removal or encapsulation is chosen. Encapsulation of intact surfaces is generally less expensive than full stripping or component replacement. Whole-house abatement of deteriorated lead paint is a significant investment.
Homeowners should get a written scope that specifies the method, containment, cleanup, and any clearance testing. A certified renovator’s quote reflects the labor and care required to do the work safely, which budget shortcuts cannot match.
A bid far below the others usually signals omitted safety steps. Proper containment, HEPA equipment, trained labor, and verified cleanup all cost money, and a price that undercuts the field often means those protections were left out, which is exactly where the danger lives. The cheapest lead-removal bid is rarely the safest.
Hiring versus doing it yourself
For small, intact areas, a homeowner following lead-safe principles, wet methods, containment, and HEPA cleanup, can sometimes handle minor work. But the moment a project involves significant area, friction surfaces, deteriorated paint, or exterior stripping, the case for a certified renovator becomes compelling.
The federal RRP rule draws a legal line for pre-1978 housing: firms disturbing painted surfaces above a minimal threshold must be certified. Beyond the legal requirement, certified renovators bring the containment equipment, the HEPA tools, and the trained discipline that keep dust out of the home, which a typical DIY effort cannot match.
The honest calculus weighs the cost of professional work against the cost of a contaminated home and a potential exposure to children. For anything beyond the smallest intact surface, that calculus favors hiring a certified pro, and the regulations reflect the same judgment.
Front Range and older-home context
Front Range neighborhoods with pre-1978 housing carry the same lead considerations as older housing anywhere, and homeowners renovating these properties should plan for lead-safe work from the start. Confirming a contractor’s RRP certification before any paint-disturbing project is the baseline.
Pairing lead-safe renovation planning with the other assessments older homes warrant streamlines the work. Knowing where lead exists, deciding between encapsulation and removal, and hiring a certified renovator together form a coherent approach that protects the household and keeps the project lawful.
Health context and medical follow-up
Lead exposure is associated with developmental and neurological harm, especially in young children, which is why safe practices matter so much during removal. The project addresses the source; it does not measure a person’s exposure.
Families worried about exposure, particularly for children under six, should ask a physician about a blood-lead test. The removal project and the medical evaluation answer different questions. Any symptoms or concerns warrant a doctor’s assessment rather than self-diagnosis.
Making the right call
For most homeowners, the safest sequence is to test first, weigh encapsulation against removal, and hire a certified renovator for any disturbance of confirmed lead paint. Avoid the high-dust methods entirely, and never let children or pregnant residents stay in a work zone.
Intact paint can often be managed in place; deteriorated or friction-surface paint deserves prompt, professional attention. Choosing the least disruptive effective method protects both the home and the people in it.
The guiding principle is simple: control the dust, protect the vulnerable, and verify the result. Whether a homeowner encapsulates an intact surface or hires a certified renovator to remove deteriorated paint, success is measured by a home left clean and a family kept safe, not by how much paint was stripped.
Approached carefully, lead paint in an older home is a manageable condition rather than a crisis. Testing reveals where it is, sound surfaces can be sealed and maintained, and any disturbance can be handled with lead-safe practices. The danger comes only from careless work, which is precisely what the methods in this guide are designed to avoid.
References
- RRP Lead-Safe Work Practices — EPA
- Lead Hazard Control Guidance — HUD
- Lead Poisoning Prevention — CDC
- Lead Exposure Standards — OSHA
Frequently asked questions
What is the safest way to remove lead paint?
Wet scraping, wet sanding, controlled chemical stripping, and component replacement keep dust contained. Avoid open-flame torches, power sanding, and high-heat stripping, which vaporize lead. A certified renovator selects the method that fits the surface and the household.
Should I remove lead paint or encapsulate it?
Encapsulation coats intact lead paint with a sealant and is often safer and cheaper than stripping when the paint is sound. Removal makes sense for deteriorated or friction surfaces. The right choice depends on condition, location, and how the surface is used.
Do I need a certified contractor for lead paint removal?
Federal RRP rules require certified firms to follow lead-safe practices when disturbing painted surfaces in pre-1978 housing. A certified renovator brings the containment and cleanup equipment a typical handyman lacks. It is the legal and safe path.
How much does lead paint removal cost?
Cost depends on method and surface area. Encapsulation of intact surfaces is generally cheaper than full stripping or component replacement, while whole-house abatement is a significant investment. Get a written scope covering method, containment, and cleanup.
If you are on the Front Range and want a certified renovator or lead inspector before tackling old paint, reach out through our contact page and we will connect you with a vetted local professional.
Lead paint test kits
Instant swab kits flag lead on painted surfaces in minutes — useful before a renovation in any pre-1978 home.
| Product | Why | Buy |
|---|---|---|
 3M LeadCheck Swabs 3M LeadCheck Swabs | EPA-recognized instant swabs. | Amazon — $15.00 |
 Lead Test Kit (lab-based) Lead Test Kit (lab-based) | Mail-in for a documented result. | Amazon — $35.00 |