Removing Lead Paint: Methods and Safe Practices
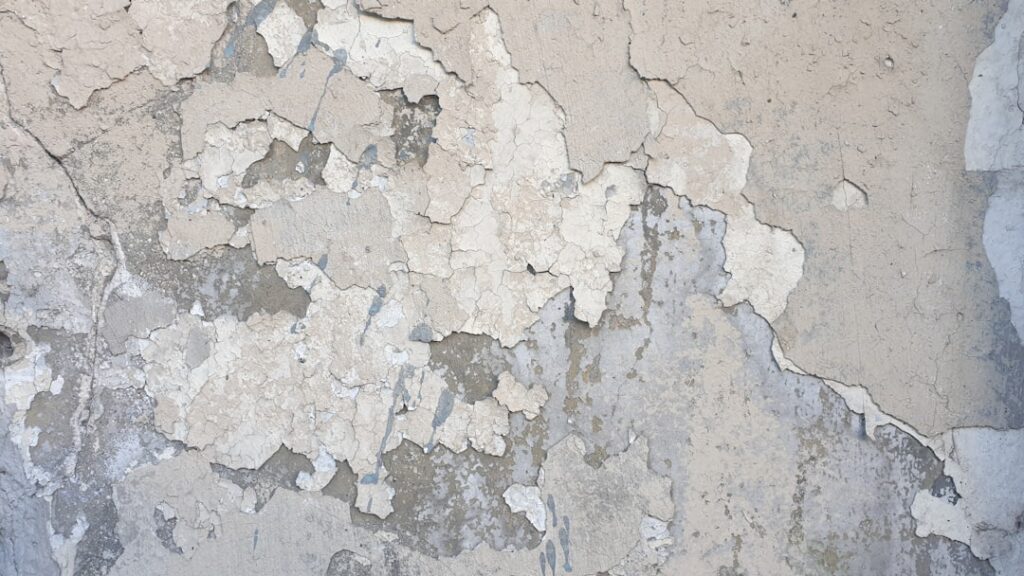
Removing lead paint is less about the paint itself and more about controlling the dust it creates. Lead-based paint, common in homes built before 1978, is hazardous mainly when it chips, peels, or is disturbed, releasing fine toxic dust that settles into a home and threatens children and pregnant women most of all. The methods used to remove it are designed around one goal: containing that dust. This guide walks through the recognized removal methods, the federal safety rules that govern the work, and how to decide between hiring a pro and limited DIY. The information reflects EPA and HUD guidance current as of 2026; consult a certified professional before disturbing lead paint.
Is this mold, asbestos, or water damage? Get a free instant screen
Upload a clear photo of the suspect area. You'll get an instant AI screening opinion and what to do next. This is screening guidance, not a professional determination.
Screening guidance only. AI can be wrong. Confirm asbestos, mold type, or lead with lab testing or a licensed professional before acting.
The main methods for removing lead paint
There is no single way to remove lead paint. Professionals choose a method based on the surface, the paint’s condition, and how much disruption is acceptable. The recognized approaches each have strengths and limits.
Wet scraping and wet sanding
Keeping the surface wet during scraping or sanding suppresses dust by binding particles before they become airborne. This is a core lead-safe technique and is far safer than dry sanding, which is prohibited under lead-safe work practices because it spreads dust aggressively. A simple spray bottle keeps the surface damp, and power sanders, when used at all, must be fitted with HEPA-filtered dust collection to capture what they generate.
Chemical stripping
Chemical strippers soften the paint so it can be scraped away with minimal dust. The trade-off is handling caustic chemicals and disposing of the lead-laden residue properly. Some peel-away systems are designed specifically for lead and capture the paint in a removable laminate; our guide to peel-away lead paint removers covers how those work. Chemical methods can be effective on detailed or irregular surfaces where sanding would be impractical, but they demand ventilation, protective equipment, and careful handling of the resulting waste, which must be treated as lead-contaminated material.
Component replacement
Often the safest and most cost-effective method is to remove and replace the painted component entirely, swapping a leaded window or door for a new one rather than stripping it in place. This eliminates the hazard with minimal dust generation. Replacement is especially attractive for old single-pane windows, which are both high-friction lead sources and energy-inefficient, so a swap can address the hazard and improve the home at the same time. The old component is removed carefully and disposed of as lead-containing waste.
Heat and abrasive methods
Specialized low-temperature heat guns can be used with care, but high-heat torches and open-flame burning are banned because they vaporize lead. Abrasive blasting and power sanding without HEPA control are likewise unsafe and prohibited for lead work.
Enclosure
Sometimes the best approach is not to remove the paint at all but to cover the leaded surface with a new, durable barrier, installing drywall, paneling, or new siding over it. Enclosure differs from encapsulation in that it uses rigid materials rather than a coating, and it can be a practical, low-dust option when the surface allows. Like encapsulation, it manages the hazard rather than eliminating it, so the underlying lead must be documented and the barrier maintained over time.
Removal versus encapsulation
Removal is not always the answer. When lead paint is intact and on a non-friction surface, encapsulation, sealing it under a durable specialized coating, is often safer and cheaper than removal because it generates no dust. Encapsulation does require maintenance and is not suitable for chipping, peeling, or high-friction surfaces like windows and doors.
Many homes end up with a combination: encapsulate stable walls, replace or strip the high-risk friction components. Deciding between the two depends on the paint’s condition and your budget. Our guide to lead paint encapsulation explains when sealing makes more sense than stripping. Whichever path you choose, start with confirmation that lead is present; a lead paint inspection identifies which surfaces actually need treatment.
The choice of method on each surface should follow the surface’s role in the home. A friction surface like a window sash will wear through a coating, so it calls for replacement or careful stripping. A flat, stable wall is a poor candidate for the dust and labor of stripping, so encapsulation or enclosure usually wins. Trim that takes knocks may need stripping or replacement, while a high ceiling that no one touches can often be sealed. Mapping method to surface, rather than applying one approach everywhere, is how professionals control both cost and risk on a lead project. A good contractor walks the home, classifies each surface, and proposes the appropriate treatment for each, which is also why a flat one-method quote sometimes signals less thoughtful planning than a surface-by-surface scope.
The EPA RRP Rule and why it matters
Federal law shapes how lead paint must be removed when professionals are involved. The EPA’s Renovation, Repair and Painting (RRP) Rule requires that contractors performing renovation, repair, or painting that disturbs lead-based paint in pre-1978 homes and child-occupied facilities be certified and follow lead-safe work practices.
Those practices include containing the work area with plastic sheeting, prohibiting dust-generating methods like dry sanding and open-flame burning, cleaning thoroughly with HEPA vacuums and wet methods, and verifying the area is clean before residents return. Full abatement, work specifically intended to permanently eliminate lead hazards, is governed by even stricter EPA and HUD abatement standards and must be performed by certified abatement professionals.
The practical implication is that you cannot legally hire an uncertified handyman to sand your old windows for pay. Verify any contractor’s RRP or abatement certification before work begins, and ask how they will contain and clean the site.
The distinction between RRP renovation work and full abatement is worth understanding, because it affects who you hire and what you can expect. RRP governs general renovation, repair, and painting that happens to disturb lead paint; the goal is the renovation, and lead-safe practices keep it safe. Abatement is different: its entire purpose is to permanently eliminate lead hazards, and it follows stricter standards including specific methods, certified abatement workers, and clearance testing. If your aim is to make a home permanently lead-safe rather than simply to remodel safely, you are in abatement territory, and the contractor’s certification should match that.
Containment and cleanup steps
Whether the job is professional or carefully limited DIY maintenance, the safety sequence is similar. Proper containment is the difference between a controlled job and a contaminated home.
- Isolate the area. Seal off the work zone with plastic sheeting, cover floors, and turn off HVAC to prevent dust from circulating.
- Protect occupants. Keep children, pregnant women, and pets entirely out of the work area until cleanup and clearance are complete.
- Use wet methods. Mist surfaces to suppress dust during scraping or sanding, and never sand dry.
- Clean with HEPA. Vacuum with a HEPA-filtered unit and wet-wipe surfaces; ordinary vacuums spread lead dust.
- Dispose properly. Bag debris and dispose of it according to local regulations for lead waste.
After the work, clearance testing, dust-wipe sampling analyzed by a lab, confirms the area is safe for re-occupancy. On any significant project this verification step is essential.
The reasoning behind each step traces back to the same fact: lead is hazardous as dust, not as intact paint on a wall. Every safe-work practice exists to keep that dust from forming, spreading, or persisting. Wet methods stop dust at the source. Containment keeps whatever dust does form inside the work zone. HEPA cleaning captures the fine particles that ordinary vacuums would blow back into the air. Clearance testing proves none was left behind. Understanding the why makes it easier to follow the how, and to recognize when a contractor is cutting a corner that actually matters.
DIY versus hiring a professional
Homeowners working on their own property are not bound by RRP certification, but the health risks do not change. Limited maintenance, like repainting a small, stable area with careful wet methods, can be reasonable for a knowledgeable, cautious homeowner. Anything beyond that belongs to professionals. The legal exemption for owner-occupants is a regulatory technicality, not a statement that the work is safe to do casually; the lead dust behaves exactly the same whether a certified crew or a homeowner disturbs it.
Full removal, work on friction surfaces, large areas, or any project in a home with young children should go to a certified contractor. The dust hazard is simply too high to manage with consumer tools, and there is no safe level of lead exposure. For the cost side of professional removal, see our breakdown of lead paint removal cost, and for the bigger picture on older-home hazards, the asbestos and lead housing guide. When in doubt, test first, contain thoroughly, and hire certified help for anything more than minor upkeep. The guiding principle never changes: lead paint is dangerous as dust, so every safe-removal decision flows from controlling that dust, and the surest way to do that on anything beyond a small job is to bring in a certified professional. With testing to confirm where lead lives, the right method matched to each surface, disciplined containment during the work, and clearance testing to prove the result, removing lead paint becomes a controlled, documented process rather than a gamble with your family’s health.
Protecting your household during the work
Whoever does the work, the people in the home need protection from the dust it generates. The most vulnerable, young children and pregnant women, should be kept entirely away from the work area until cleanup and clearance are finished, and ideally out of the home altogether during a significant project. Lead is especially harmful to developing nervous systems, which is why these precautions are non-negotiable rather than cautious overkill.
Practical steps matter. Seal off the work zone, shut down forced-air HVAC so dust does not circulate, and cover or remove furnishings. After the work, clean methodically with HEPA vacuums and wet wiping, and do not rush re-occupancy until the area is verified clean. Wash work clothing separately from household laundry, since lead dust clings to fabric. These habits keep the hazard contained to the surfaces being worked on rather than spreading it through the home. The same care applies whether you are tackling a small DIY touch-up or overseeing a certified crew, because the dust does not distinguish between the two. Combined with proper testing beforehand, disciplined containment is what turns a potentially dangerous job into a controlled one. When the work is finished, a final clearance test offers the proof that the containment actually worked, which is the reassurance most worth having before children return to a freshly worked space.
References
- Renovation, Repair and Painting Program — U.S. EPA
- Lead Safety During Renovation — U.S. EPA
- Lead Hazard Control Resources — U.S. Department of Housing and Urban Development
- About Childhood Lead Poisoning Prevention — Centers for Disease Control and Prevention
Front Range homeowners dealing with lead paint in an older home can connect with a vetted local inspector or risk assessor before removal work by reaching out through our contact page.
Lead paint test kits
Instant swab kits flag lead on painted surfaces in minutes — useful before a renovation in any pre-1978 home.
| Product | Why | Buy |
|---|---|---|
 3M LeadCheck Swabs 3M LeadCheck Swabs | EPA-recognized instant swabs. | Amazon — $199.00 |
 Lead Test Kit (lab-based) Lead Test Kit (lab-based) | Mail-in for a documented result. | Amazon — $150.00 |