Kitchen Sink Sprayer: Fixing Leaks, Weak Spray and Hose Problems
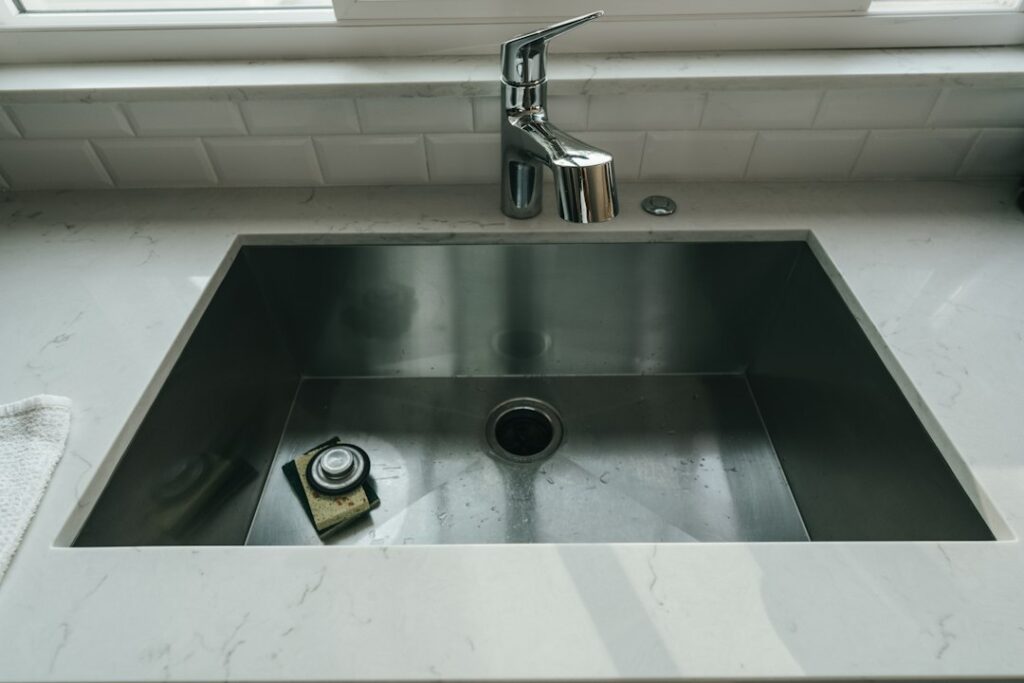
The kitchen sink sprayer is one of the hardest-working parts of a kitchen and one of the least examined. It gets yanked, dropped, twisted and left running against dirty pans several times a day, yet most people only think about it when the spray turns into a dribble or water starts pooling in the cabinet below. A sprayer problem is usually cheap to fix. The bigger concern is what a slow leak from the hose or its connections can do to a sink base cabinet over months: swollen particleboard, stained subfloor and, in some cases, mold. This guide explains how side sprayers and pull-down sprayers work, why the diverter valve fails, what causes weak spray, how to trace leaks under the sink, which replacements fit which faucets, and what homeowners can expect to pay. It also covers what a home inspector typically notices during a purchase inspection.
Part of our Plumbing & Water guide — start there for the full picture →
What a Kitchen Sink Sprayer Does and the Two Main Types
A kitchen sink sprayer is a handheld outlet that redirects water from the faucet so it can be aimed at dishes, the sink basin or a pot sitting on the counter. There are two broad designs, and they fail in different ways.
Side sprayers
The classic side sprayer sits in its own hole in the sink deck or countertop, a few inches from the main faucet. A flexible hose runs from the sprayer head, down through that hole, and connects to an outlet on the underside of the faucet body. Inside the faucet is a diverter valve. When the trigger on the sprayer head is squeezed, pressure drops in the sprayer hose and the diverter shifts, sending water to the sprayer instead of the spout. Release the trigger and the diverter shifts back.
Side sprayers are common in older kitchens and in many budget faucet sets. They work well when the diverter is clean, but they have more parts that can go wrong: a separate hose, a separate deck seal, a diverter inside the faucet and a hose that tends to snag on items stored under the sink.
Pull-down and pull-out sprayers
Pull-down and pull-out faucets build the sprayer into the spout itself. The spray head docks at the end of the spout and pulls free on a long hose that runs down through the faucet body. A weight clipped to the hose under the sink pulls the head back into place when it is released. Instead of a separate diverter in the faucet body, these heads usually have a button or toggle on the head that switches between a stream and a spray pattern.
Pull-down designs eliminate the separate deck hole and the classic diverter, but they introduce their own weak points. The hose flexes every time the head is used, the quick-connect fitting under the sink can work loose, and a missing or badly placed counterweight lets the head droop or fail to retract. Many homeowners replacing an older faucet choose a pull-down model, which can leave an empty sprayer hole to cap or reuse for a soap dispenser or filtered-water tap.
Diverter Valve Problems on Side Sprayers
When a side sprayer goes weak while the main spout still runs strong, or water keeps coming out of the spout while the sprayer is in use, the diverter is the usual suspect. Its job depends on a small piston or poppet sliding freely in a narrow bore, and anything that slows that movement interferes with the switch.
Common diverter symptoms include:
- Spray is weak, but the spout is fine. The diverter is only partly shifting, so water splits between the two outlets.
- The spout keeps running while the trigger is squeezed. Similar cause, often worse. The diverter may be stuck or its seals worn.
- The sprayer drips or seeps when not in use. The diverter is not fully closing the sprayer path, or the sprayer head itself is leaking at the trigger.
On many faucets the diverter can be reached by removing the handle and spout, pulling the old diverter out with pliers and either cleaning it or replacing it with the manufacturer’s part. Others integrate the diverter into the cartridge, in which case the repair becomes a cartridge replacement. Because diverter designs vary widely by brand and model, the faucet’s model number and the manufacturer’s parts diagram are worth finding before buying anything. Some older or discontinued faucets no longer have parts available, which tips the decision toward replacing the faucet.
Why the Spray Turns Weak
Weak spray is the most common complaint. Before blaming the diverter, it helps to check the simpler causes in order.
Clogged spray head and mineral scale
The holes in a spray face are small, and minerals in the water deposit around them over time. Many homes along the Colorado Front Range are served by water that is moderately hard to hard, depending on the utility and source, though conditions vary considerably from one system to the next and private wells can differ again. Where water is hard, white crust tends to form on the spray face, in the screen behind it and inside the aerator of the main spout.
Many spray heads unscrew from the hose. Soaking the head in white vinegar, then brushing the face and pushing debris out of the holes, often restores flow. Some newer heads have flexible rubber nozzles designed to be rubbed clean with a fingertip. There is often a small screen or flow restrictor at the base of the head or at the hose connection that collects sediment, particularly after plumbing work or a water main break. The same cleaning approach applies to the spout aerator, covered in the faucet aerator guide.
Kinked or collapsed hose
Side sprayer hoses are often plastic or vinyl, and they kink easily when cleaning products, trash cans or storage bins are pushed against them under the sink. A permanently kinked section restricts flow even after the obstruction is removed. Older hoses can also harden, crack or lose their shape. Pull-down hoses are usually braided, which resists kinking, but they can still be pinched by a poorly placed weight or a crowded cabinet.
Low pressure overall
If both the spout and the sprayer are weak, and other fixtures in the house are weak too, the problem may not be the sprayer at all. A partially closed shutoff valve under the sink, a failing pressure-reducing valve, or aging supply pipes can all reduce flow. A simple water pressure test at a hose bib helps separate a fixture problem from a whole-house pressure issue.
Filters and add-ons
A newly installed under-sink water filter that feeds the main faucet can reduce pressure as its cartridge loads up with sediment. If the drop in spray performance lines up with a filter that has gone past its change interval, the filter is the first thing to check.
Hose Leaks Under the Sink and Why They Matter
The sprayer hose and its connections live in one of the dampest, most crowded spaces in a house. Leaks there tend to be slow, quiet and easy to miss because the cabinet is full of cleaning supplies and nobody looks at the floor of it often.
Where sprayer leaks start
- Hose-to-faucet connection. On side sprayers, the threaded or quick-connect fitting under the faucet body can loosen with the constant pulling on the hose.
- Quick-connect fittings on pull-down hoses. If the clip is not fully seated, the fitting can seep or, in rare cases, separate under pressure.
- Cracked hose. Aged plastic hoses can crack where they bend through the deck hole or rub against the cabinet frame.
- Sprayer head and trigger. A leak at the head drips back down the hose, which can make it look like the leak is under the sink when it actually starts on top.
- Deck seal. On side sprayers, water on the countertop can run past a failed gasket around the sprayer base and drip into the cabinet.
A useful trick is to dry everything with paper towels, place a dry towel on the cabinet floor, then run the faucet and sprayer in turn while watching the connections with a flashlight. Water that only appears when the sprayer is in use points to the hose or its fitting. Water that appears when nothing is running points to a supply line or valve. The guide to leaks under the kitchen sink walks through the supply lines, drain connections and dishwasher hose that often get confused with a sprayer leak, and a dripping spout is covered separately in the guide to a leaking kitchen faucet.
Moisture damage and mold risk
Sink base cabinets are often built from particleboard or medium-density fiberboard, which swells and crumbles when it stays wet. Repeated small leaks can soften the cabinet floor, stain the subfloor underneath and, in homes over a basement, show up as a ceiling stain below the kitchen. EPA’s brief guide to mold, moisture and the home describes moisture control as the key to mold control and advises fixing plumbing leaks promptly and drying wet materials within 24 to 48 hours, noting that in most cases mold will not grow if materials are dried in that window. It also lists areas around leaking or condensing pipes inside walls as places hidden mold can develop.
For small areas, EPA’s mold cleanup guidance indicates that in most cases homeowners can handle a moldy area under about 10 square feet themselves, while larger areas or significant water damage call for its remediation guidance and an experienced contractor. Absorbent materials that have become moldy may need to be removed rather than cleaned. A cabinet floor that has swollen and darkened is usually cheaper to replace than to rescue.
Leaks also waste water. EPA’s WaterSense program notes in its Fix a Leak Week material that household leaks can add up to thousands of gallons a year and that worn faucet washers and gaskets are a frequent cause of faucet leaks. A sprayer that drips into the sink is less of a property risk than one that leaks into the cabinet, but both are worth fixing.
Repairing vs Replacing a Kitchen Sink Sprayer
Most sprayer repairs fall into a few categories, and the right choice depends on the faucet type and its age.
- Clean the head and screens. Free or nearly free, and often enough for mineral-related weak spray.
- Replace the sprayer head. Universal side sprayer heads are widely available, but brand-specific heads usually fit and perform better.
- Replace the hose. Side sprayer hoses and pull-down hoses are sold as replacement parts for many faucet lines. Pull-down hoses are typically brand- and model-specific.
- Replace the diverter or cartridge. Needed when the switching problem persists after the head and hose check out.
- Replace the whole faucet. Sensible when parts are unavailable, multiple components are worn, or the homeowner wants a different style.
Compatibility pitfalls
Replacement parts are where many do-it-yourself repairs go wrong. Side sprayer hoses connect to the faucet with brand-specific threads or quick-connect fittings, and a universal kit may need adapters that introduce another potential leak point. Pull-down spray heads typically connect to their hose with a proprietary fitting, and the hose must match the faucet’s internal path and the length needed to reach the supply connection. Mixing brands rarely works well.
When replacing the entire faucet, count the holes in the sink or countertop. A sink drilled for a faucet plus a separate side sprayer leaves an extra hole if the new faucet is a single-hole pull-down. Escutcheon plates, hole covers, soap dispensers and filtered-water taps are common ways to deal with it. The kitchen faucet replacement guide covers hole counts, supply line lengths and shutoff valve condition in more detail.
What a Home Inspector Looks For
During a standard home inspection, inspectors generally operate kitchen faucets and look under the sink for active leaks, stains and damage. A sprayer that leaks, a hose with visible cracks, a cabinet floor that is swollen or stained, or signs of past water damage may all be noted. Inspectors also often note missing or nonfunctional sprayers, slow drainage and corroded shutoff valves.
What an inspector does not do is dismantle the faucet, test diverter internals or confirm the brand and model of every part. A visual inspection also cannot see moisture trapped beneath a cabinet floor without moving the cabinet contents, and many inspectors note when stored items limit their view. Clearing out the sink cabinet before an inspection helps. Buyers who see a stained or warped sink base in a listing or during a showing can ask the seller about past leaks and repairs.
Our plumbing and water inspection guides explain how inspectors approach kitchen and bath fixtures, supply lines and drains. Drain-side concerns such as a slow or gurgling basin are covered in the guide to the kitchen sink drain.
Typical Costs
Costs depend heavily on the brand, the part involved and local labor rates. The ranges below are rough 2026 estimates for the Front Range and are not quotes.
- Cleaning a spray head: essentially free with vinegar and a brush.
- Universal side sprayer head and hose kit: commonly in the range of $15 to $40.
- Brand-specific pull-down spray head or hose: often around $25 to $90 or more, depending on the brand and finish.
- Diverter or cartridge: frequently in the $10 to $60 range for the part.
- Plumber service call for a sprayer or diverter repair: often roughly $150 to $350 including a short labor charge, and higher for after-hours visits.
- New kitchen faucet installed: commonly a few hundred dollars for basic models and more for premium pull-down or touch-activated faucets.
- Replacing a water-damaged sink base floor or cabinet: anywhere from a modest repair to a cabinet replacement in the hundreds to low thousands, especially if countertops must be removed.
Maintenance Habits That Prevent Problems
A few simple habits extend the life of most sprayers and reduce the chance of a hidden leak.
- Clean the spray face and the spout aerator every few months, more often where water is hard.
- Keep the sink cabinet organized so bins and bottles do not press on the sprayer hose or pull-down weight.
- Put a waterproof cabinet mat or tray on the cabinet floor so small leaks become visible and contained.
- Check the quick-connect fitting and hose connections whenever the cabinet is cleaned out.
- Consider an inexpensive battery water-leak sensor on the cabinet floor, especially in kitchens above finished basements.
When the cause of a leak is not obvious, or when water has clearly been reaching the cabinet floor for a while, a licensed plumber can trace the source and check the supply lines, valves and drain at the same time.
More Questions About Kitchen Sink Sprayers
How do you clean mineral buildup out of a kitchen sink sprayer head?
Soaking the sprayer head in white vinegar is the usual way to dissolve mineral scale. Unscrew the head from the hose, or tie a bag of vinegar around it, and let it soak for one to several hours depending on how heavy the deposits are. Rub the rubber nozzles with your fingers or a soft brush to break loose scale, then rinse and run water through it before reattaching. Avoid poking the holes with metal pins, which can enlarge them and change the spray pattern. Hard-water areas may need this every few months.
Why does my kitchen faucet leak when I use the sprayer?
A kitchen faucet that leaks only while the sprayer is in use usually has a worn diverter, a loose hose connection or a damaged O-ring at the spout base. When the sprayer opens, water pressure shifts inside the faucet body and finds the weak seal. On side sprayer setups, the diverter valve is the most common culprit. On pull-down faucets, check the quick-connect fitting and the hose where it joins the faucet. Look under the sink while someone runs the sprayer, since some of these leaks drip into the cabinet unseen.
Can black mold grow under a sink from a sprayer hose leak?
Yes, a slow sprayer hose leak can feed mold growth under a kitchen sink because the drip often runs only when the sprayer is used and goes unnoticed for months. The water collects on the cabinet floor or runs into the back wall. Signs include a musty odor, dark spots on the cabinet floor and swollen particleboard. Fix the leak, dry the cabinet thoroughly and replace damaged panels. For growth larger than a small patch, or any health concerns, consult a mold professional and a doctor where symptoms are involved.
How long does a pull-down kitchen sprayer hose last?
A pull-down kitchen sprayer hose commonly lasts about 5 to 10 years, though heavy daily use, hard water and a hose that rubs on the cabinet or shutoff valves can shorten that. Braided nylon hoses tend to fray at the bend under the faucet, while the quick-connect fittings can start to drip as O-rings age. Check the hose once or twice a year for fraying, kinks or dampness. Many brands sell replacement hoses, so a worn hose rarely means replacing the whole faucet.
References
- A Brief Guide to Mold, Moisture and Your Home — U.S. Environmental Protection Agency
- Mold Cleanup in Your Home — U.S. Environmental Protection Agency
- Fix a Leak Week — U.S. EPA WaterSense
Frequently asked questions
Why is my kitchen sink sprayer weak but the faucet is fine?
On a side sprayer, the diverter valve inside the faucet is the most likely cause, especially if the spray head and hose are clean and unkinked. Mineral scale in the spray head is the other common cause. Clean the head first, then inspect or replace the diverter.
Can I replace just the sprayer hose?
Often yes. Side sprayer hoses and pull-down hoses are sold as replacement parts, but they are usually brand- and model-specific. Find the faucet's model number before ordering to make sure the fittings and length match.
Is a leaking sprayer hose under the sink a big deal?
It can be. Slow leaks into the cabinet can swell particleboard, stain the subfloor and create conditions for mold. EPA advises fixing leaks promptly and drying wet materials within 24 to 48 hours.
Can I remove a side sprayer and cap the hole?
Yes, in many cases. The sprayer outlet on the faucet may need a plug or the diverter may need to stay in place, depending on the design, so check the manufacturer's instructions. The deck hole can be covered with a cap or reused for a soap dispenser.
How much does it cost to fix a kitchen sink sprayer?
A cleaning costs almost nothing, and replacement heads and hoses commonly run from about $15 to $90. A plumber visit for a sprayer or diverter repair often costs roughly $150 to $350. These are general 2026 estimates and vary by brand and location.
Why does my pull-down sprayer not retract all the way?
A pull-down sprayer that will not retract usually has a misplaced or missing counterweight, or the hose is catching on items stored under the sink. Slide the weight to the spot shown in the faucet instructions, clear the cabinet space around the hose loop, and check the hose for kinks that add drag.
Do all kitchen faucets need a sprayer?
No, a kitchen faucet does not need a sprayer to work or to meet code. Many faucets have no sprayer at all, and a side sprayer is an optional accessory. Pull-down and pull-out faucets build the spray into the spout. Homeowners who rarely use a side sprayer often remove it to cut down on leak points.
What is the button on a kitchen sprayer head for?
The button on a kitchen sprayer head usually switches between an aerated stream and a spray pattern, and some models add a pause or a stronger blade spray. If the button sticks or will not hold its setting, mineral scale inside the head is a common cause, and a vinegar soak often frees it.
Buying a home and seeing water stains under the kitchen sink? Reach out to us to find a Front Range inspector who checks fixtures, supply lines and cabinets for signs of hidden leaks. For background on choosing an inspector, start with our guide to hiring a home inspector.