Kitchen Backsplash Installation: Tile, Outlets and Moisture
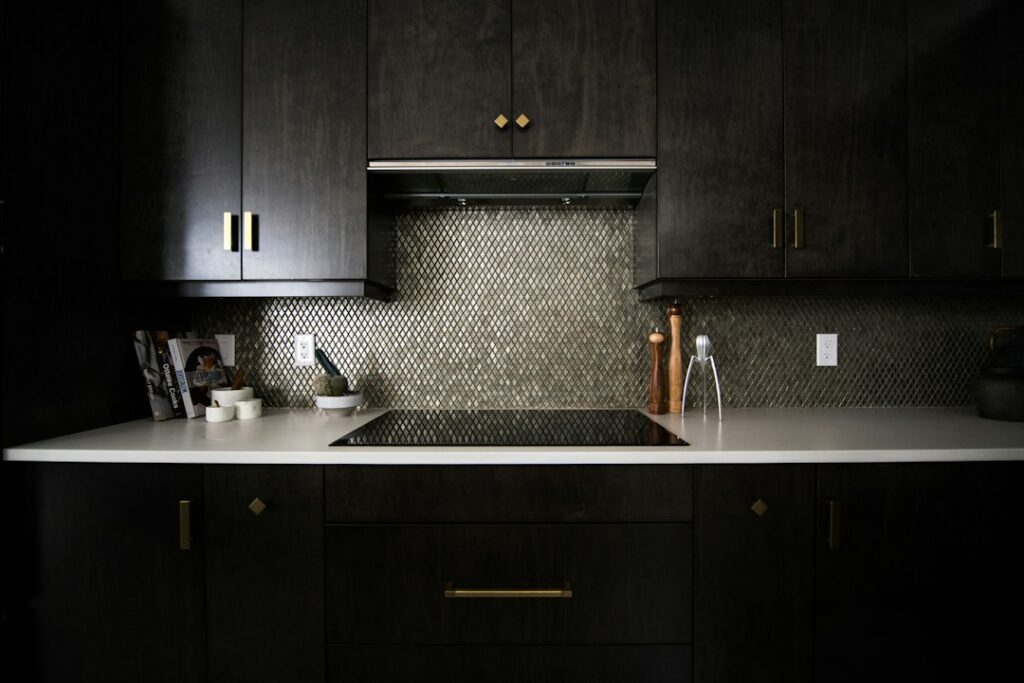
A backsplash protects the wall between the countertop and the upper cabinets from splashes, grease and steam, and it does a lot of visual work for a modest amount of material. It is also a project where small details decide whether the result lasts: a wavy wall, an outlet that ends up recessed behind tile, a grouted joint at the countertop that cracks within a year, or a slow leak behind the sink that nobody notices until the drywall is soft. This guide walks through kitchen backsplash installation from material choice to finished joints, including wall preparation, outlet and GFCI considerations, moisture behind the sink, heat near the range, and the lead and asbestos questions that come up in older kitchens before demolition. Cost figures are broad 2026 ranges and vary by region, tile choice and wall condition. This guide summarizes EPA guidance on lead and asbestos current as of 2026; consult a certified professional for testing decisions.
Part of our Structure & Exterior guide — start there for the full picture →
Kitchen Backsplash Installation: The Basic Sequence
Most professional backsplash jobs follow the same order, whether the material is ceramic tile, glass mosaic or a stone slab:
- Protect and prepare. Cover the countertop, shut off power to the outlets in the work area, and remove cover plates.
- Remove the old finish. Strip old tile, a 4-inch laminate splash or wallpaper. In older homes, confirm what the old materials contain before disturbing them.
- Repair and flatten the wall. Patch holes, fix damaged drywall and check flatness with a straightedge.
- Lay out the pattern. Find the centerline, plan cuts around windows and outlets, and decide where the tile will stop at the ends of the run and under the cabinets.
- Set the material. Use thinset or a manufacturer-approved mastic for tile, or the adhesive specified for a slab or panel product.
- Grout and seal. Grout the field, leave the joint at the countertop open for flexible sealant, and seal grout or stone if the manufacturer recommends it.
- Reset outlets. Install box extenders as needed, reattach devices and plates, and test GFCI protection.
A typical tile backsplash in an average kitchen takes one to three days of labor, with curing time between setting and grouting. Slab backsplashes depend on fabrication lead time, much like countertops.
Choosing a Backsplash Material
Ceramic and Porcelain Tile
Ceramic and porcelain tile are the default for good reasons: wide choice of sizes and colors, low cost per square foot for basic styles, and easy cleaning once grout is sealed. Subway tile, hexagons and large-format porcelain are all common. Larger tiles show wall irregularities more, while small mosaics follow minor waves more forgivingly.
Glass, Stone and Metal Tile
Glass tile reflects light and resists staining but shows thinset through translucent pieces if the setting technique is careless. Natural stone mosaics need sealing and gentle cleaners. Metal tiles can dent and show fingerprints. All of these usually cost more to install than plain ceramic because cutting is slower and more precise.
Peel-and-Stick Panels and Tiles
Peel-and-stick products, including vinyl, gel and thin composite tiles, appeal to renters and homeowners on a tight timeline. They install quickly with a utility knife and need no grout. Trade-offs include sensitivity to heat behind ranges, edges that can lift in humid spots, and limited durability compared with tile. Many manufacturers specify clearances or prohibit installation directly behind cooktops; check the product instructions.
Full-Height Slab
A slab backsplash, often the same quartz or granite as the countertop, runs from the counter to the upper cabinets or even to the ceiling behind a range. It has few or no grout lines and a clean look, but it is usually the most expensive option. Slab work also requires precise outlet cutouts and careful handling of a heavy, rigid panel. Our countertop replacement cost guide covers fabrication pricing that often bundles a slab backsplash.
Wall Preparation: Flat, Sound and Dry
The wall behind the backsplash determines how good the finished job looks. Tile magnifies every bump and dip, and adhesives do not bond reliably to loose paint, grease film or damaged paper facing on drywall.
Common preparation steps include:
- Cleaning. Kitchen walls carry grease, especially near the range. Degrease and rinse before setting anything.
- Patching. Fill holes from old anchors, outlet relocations and removed tile. Torn drywall paper should be sealed before skim coating, or the patch may bubble.
- Flattening. Check with a long straightedge. Low spots can be filled with a skim coat or by back-buttering tile, while high spots may need sanding or cutting out.
- Replacing damaged sections. Drywall that is soft, stained or crumbling, especially behind the sink, should be cut out and replaced rather than tiled over.
Removing an old tile backsplash often tears up the drywall face. Budget for patching or replacing a strip of drywall when demolition is involved. Our guide to drywall repair covers patch methods and when to replace a section instead.
Outlets, Box Extenders and GFCI Protection
Countertop receptacles sit right in the middle of most backsplashes, and they are the detail most likely to be handled poorly. Adding tile, mortar and sometimes a cement board layer moves the finished wall surface outward by a quarter inch or more. If the electrical box is not brought forward to match, the receptacle ends up recessed and the mounting ears no longer bear on a solid surface.
Good practice includes:
- Box extenders. Electrical box extenders bring the box flush with the new wall surface so the device mounts securely and combustible material is not exposed inside the box.
- Tight cuts. Tile cuts around boxes should be close enough that the cover plate covers the gap.
- Maintained GFCI protection. Kitchen countertop receptacles in modern homes are expected to be GFCI-protected, either by a GFCI receptacle or a GFCI breaker. Reinstalling devices after a backsplash job should not break that protection; a common mistake is swapping the line and load wires when reconnecting a GFCI.
- Testing. Press the test and reset buttons on each GFCI and confirm downstream outlets lose power when tripped.
If a receptacle does not reset after the job, our guide to a GFCI outlet not working walks through likely causes. Any rewiring, added outlets or moved boxes should be done by a licensed electrician, and some jurisdictions require a permit.
The Countertop Joint: Caulk, Not Grout
The joint between the backsplash and the countertop is a change of plane. The counter and the wall move independently with temperature, humidity and loading, and rigid grout in that joint tends to crack. Tile industry practice is to leave that joint, along with inside corners, open and fill it with a flexible sealant, such as a color-matched siliconized or silicone caulk.
A few details help that joint last:
- Keep thinset and grout out of the gap during installation.
- Use a sealant rated for kitchens and baths, ideally one with mildew resistance.
- Make sure the joint is clean and fully dry before caulking.
- Plan to inspect and recaulk the sink area every few years.
The same principles apply in bathrooms. Our guide to caulking a bathtub covers surface preparation and bead technique, and black mold in shower caulk explains why mold-stained caulk needs to be removed rather than covered.
Moisture Behind the Sink
The wall behind the sink takes the most water. Faucet splashing, failed caulk at the backsplash joint, and leaks from supply lines or the window above the sink can all wet the drywall. Before installing a new backsplash, check this area closely:
- Press on the drywall near the sink for softness.
- Look inside the sink cabinet for staining, swollen cabinet floors or a musty smell.
- Check under the window sill if the sink sits in front of a window.
- Confirm supply lines, shutoff valves and drain connections are dry.
The U.S. Environmental Protection Agency (EPA) states that the key to mold control is moisture control, and that if mold is a problem, homeowners should clean up the mold promptly and fix the water problem. EPA also advises drying water-damaged areas and items within 24 to 48 hours to prevent mold growth, and it cautions against painting or caulking moldy surfaces. Tiling over a damp or moldy wall simply hides the problem. Our guide to a leak under the kitchen sink covers the usual culprits.
Heat Near the Range
The wall behind a range or cooktop sees heat, grease and occasional flare-ups. Ceramic, porcelain, glass and stone tile generally handle this well when installed with appropriate setting materials. Plastic-based products, including many peel-and-stick tiles and some wall panels, may have specific installation limits or clearance requirements near heat sources.
Because requirements differ by range model, hood and backsplash product, follow both the appliance manufacturer’s installation instructions and the backsplash maker’s guidance on clearances. Gas ranges and cooktops in particular may list minimum distances to combustible surfaces. When in doubt, a noncombustible tile behind the range is the conservative choice. Range hoods also matter: a properly sized hood that vents outdoors reduces grease and moisture on the backsplash.
Lead Paint and Asbestos in Older Kitchens
Many Front Range homes built before 1978, including mid-century ranches in Denver, Lakewood and Aurora, have kitchens that have been repainted and retiled several times. Removing an old backsplash can disturb layers that contain lead-based paint or asbestos-containing materials.
Lead-Based Paint
EPA notes that the federal government banned the sale of lead-based paint for use in homes in 1978 and that any renovation, repair or painting project in a pre-1978 home with lead-based paint can easily create dangerous lead dust. EPA’s Renovation, Repair and Painting (RRP) Rule requires that anyone paid to perform work that disturbs painted surfaces in homes built before 1978 be certified and use lead-safe work practices. EPA says the RRP Rule generally does not apply to homeowners working on their own homes, although it does apply to landlords and house flippers. EPA’s guidance on reducing lead exposure at home adds that renovation or repair activities that disturb painted surfaces in older homes may create large amounts of lead dust, and that young children who crawl and play on floors are the main concern. Our guide to 1978 lead paint explains testing options and how the rule affects contractor bids.
Asbestos
Older drywall joint compound, textured wall finishes, some tile adhesives and some sheet flooring may contain asbestos. EPA says homeowners generally cannot tell whether a material contains asbestos by looking at it, and that remodeling is one of the situations where an inspection by a trained and accredited asbestos professional may make sense. EPA also notes that asbestos-containing materials may release fibers when they are disturbed, cut, sanded, drilled or scraped. Our guide to asbestos in drywall explains which materials to suspect and how sampling works.
DIY or Hire a Pro?
Backsplash work is one of the more approachable tile projects for a handy homeowner. The area is small, the wall is vertical rather than load-bearing like a floor, and mistakes are relatively easy to redo. Peel-and-stick products and simple subway tile on a flat, sound wall are reasonable do-it-yourself jobs for someone willing to take time on layout.
Hiring a tile setter tends to make more sense when:
- The wall needs significant flattening or drywall replacement before tile goes up.
- The design uses glass, natural stone, large-format porcelain or intricate patterns with many cuts.
- The backsplash wraps windows, open shelving or a range hood with complex trim details.
- Outlets need to be moved or added, which calls for a licensed electrician regardless.
- The home was built before 1978 and the existing wall finish has not been tested for lead or asbestos.
Even on a DIY job, cutting tile creates dust and noise. Wet saws keep dust down compared with dry cutting, and a vacuum with a HEPA filter is a better cleanup tool than a broom.
Caring for a New Backsplash
Once installed, a backsplash needs little attention, but a few habits extend its life. Wipe grease from behind the range regularly, since baked-on grease is harder to remove and can discolor grout. Reseal cementitious grout and natural stone on the schedule the manufacturer recommends. Check the caulk joint at the sink and countertop once or twice a year and replace any section that has pulled away, darkened or cracked. If grout begins to crumble or tiles sound hollow when tapped, investigate for moisture before simply regrouting.
Kitchen Backsplash Installation Costs
Costs vary widely, so the ranges below are only a starting point for comparing bids:
- Peel-and-stick, do-it-yourself: often a few hundred dollars in materials for an average kitchen.
- Ceramic or porcelain tile, professionally installed: commonly somewhere around $15 to $40 per square foot including labor and basic materials, so a 30-square-foot backsplash might land around $500 to $1,500 or more.
- Glass, stone or patterned tile: frequently higher, in the range of roughly $30 to $60 or more per square foot installed, because materials cost more and cutting is slower.
- Full-height slab: often priced with the countertop fabrication and can run into the thousands for a single range wall.
Extra charges can include old tile removal, drywall replacement, box extenders, outlet relocation by an electrician, and any lead or asbestos testing or abatement in older homes. When the backsplash is part of a larger project, the kitchen remodel cost guide puts it in context.
What Inspectors Notice About Backsplashes
During a general home inspection, a backsplash is mostly a finish, but it can reveal conditions worth noting: recessed or loose outlets, GFCI receptacles that do not trip or reset, cracked grout at the countertop joint, failed caulk and staining near the sink, and soft drywall below the window. A freshly installed backsplash can also cover earlier water damage, so buyers may want to ask about the age of the work and whether any repairs were made behind it. Our guide to hiring a home inspector covers what a standard inspection includes, and the structure and exterior hub collects related interior topics.
More Questions About Kitchen Backsplash Installation
How long does a kitchen backsplash installation take?
A typical tile kitchen backsplash installation takes about one to three days for a standard kitchen. Day one often covers wall prep, layout and setting tile; grout usually goes on the next day after the thinset cures, and sealing natural stone or cement grout may add another day. Complex patterns, mosaic sheets, many outlets or large-format slabs take longer. Peel-and-stick panels can often be finished in a few hours. Plan for the kitchen counters to be off-limits during installation and cure time.
How high should a kitchen backsplash go?
A standard kitchen backsplash usually runs from the countertop up to the bottom of the upper cabinets, which is typically about 18 inches. Behind a range with no upper cabinet, many designs extend tile to the hood or ceiling for easier cleaning and a focal point. Walls without upper cabinets often stop the backsplash at a set height, such as 4 inches, 18 inches, or aligned with a window sill, or run it to the ceiling. The choice is mostly design, but full coverage behind the range protects the wall from grease and heat.
What is the best backsplash material for easy cleaning?
Glazed ceramic and porcelain tile, glass tile and full-height slabs of quartz or similar solid surfaces are generally easiest to clean on a kitchen backsplash. Fewer grout lines mean fewer places for grease and stains to settle, so large-format tile and slabs are especially low-maintenance. Epoxy or stain-resistant grout helps in tile installations. Natural stone, unglazed tile and textured surfaces need sealing and more careful cleaning. Behind the range, choose materials rated for heat and avoid products not meant to be near cooktops.
Does a kitchen backsplash need to be sealed?
Whether a kitchen backsplash needs sealing depends on the material. Glazed ceramic, porcelain and glass tile do not need sealing, but cement-based grout between them benefits from a penetrating grout sealer to resist grease and stains. Natural stone, such as marble, travertine and slate, should be sealed after installation and resealed periodically, often every one to two years in a kitchen. Epoxy grout and solid quartz slabs generally do not need sealing. Follow the tile and sealer manufacturers’ directions, and let grout cure fully before sealing.
References
- Lead Renovation, Repair and Painting Program — U.S. Environmental Protection Agency
- Reduce the Risk of Lead Exposure at Home — U.S. Environmental Protection Agency
- Protect Your Family from Exposures to Asbestos — U.S. Environmental Protection Agency
- A Brief Guide to Mold, Moisture and Your Home — U.S. Environmental Protection Agency
Frequently asked questions
Should there be grout or caulk where the backsplash meets the countertop?
Caulk. The counter and wall move independently, so rigid grout in that change of plane tends to crack. Leave the joint open during tiling and fill it with a flexible, mildew-resistant sealant.
Do outlets need to be moved out for a new backsplash?
Usually the box needs to be brought flush with the new tile surface using a box extender so the device mounts securely. Countertop receptacles should remain GFCI-protected after the job, and any rewiring should be done by a licensed electrician.
Can a backsplash go over existing tile?
Sometimes, if the old tile is flat, sound and well bonded, and the added thickness works with outlets and cabinet edges. Many installers prefer removal, especially if the old tile is cracked, loose or hiding moisture damage.
How much does a kitchen backsplash installation cost?
A professionally installed ceramic or porcelain tile backsplash commonly runs around $15 to $40 per square foot, so an average kitchen might land near $500 to $1,500 or more. Glass, stone and slab options cost more, and demolition or drywall repairs add to the total.
Is peel-and-stick backsplash safe behind a stove?
It depends on the product. Many peel-and-stick materials are plastic-based and have heat or clearance limits near cooktops. Follow the manufacturer's instructions, and consider a noncombustible tile directly behind the range.
Can a backsplash be installed before the countertops?
Backsplash tile is usually installed after countertops, because the tile sits on or just above the countertop surface and the joint is then caulked. Installing tile first risks gaps or uneven lines when the counter goes in. Full-height slab backsplashes are often fabricated with the countertop.
Can you install a backsplash on a textured wall?
A backsplash can go on a textured wall once heavy texture is sanded or skimmed flat, since tile and panels need a smooth, even surface. Peel-and-stick products are especially sensitive to texture. Test for lead paint or asbestos in older homes before sanding.
What grout color is best for a kitchen backsplash?
Gray, beige or a color close to the tile usually hides kitchen stains better than bright white grout. White grout gives a crisp look but shows grease more. Epoxy or stain-resistant grout helps keep any color looking clean longer.
Looking at a home with a freshly tiled kitchen and want to know what is behind the wall? Contact us to be matched with a Front Range inspector who can check outlets, GFCI protection and moisture around the sink.