How to Remove Mold From Walls: A 2026 Homeowner Guide
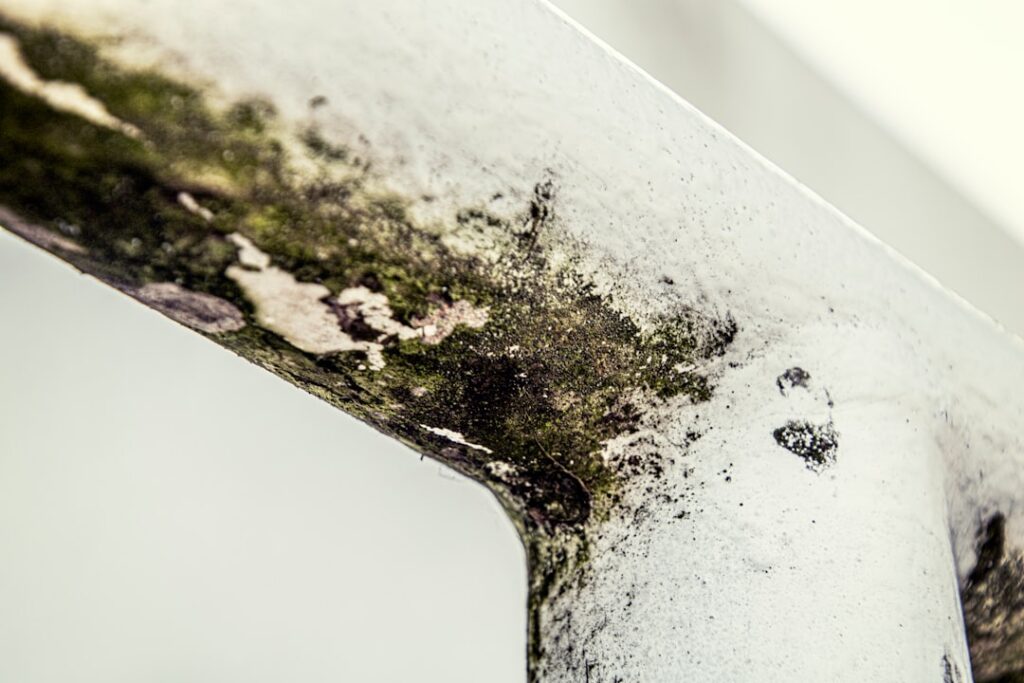
Knowing how to remove mold from walls matters because walls are where most homeowners first notice the problem and also where the wrong cleanup approach causes the most damage. Drywall is porous, paint can trap moisture, and aggressive scrubbing without containment spreads spores through the whole home. This guide summarizes EPA and CDC remediation guidance current as of 2026 and walks through the steps a homeowner can safely take versus the situations that require a licensed remediation contractor. Always consult your physician for respiratory symptoms before working near mold, and treat any patch over 10 square feet as a job for a certified professional rather than a weekend DIY task.
Is this mold, asbestos, or water damage? Get a free instant screen
Upload a clear photo of the suspect area. You'll get an instant AI screening opinion and what to do next. This is screening guidance, not a professional determination.
Screening guidance only. AI can be wrong. Confirm asbestos, mold type, or lead with lab testing or a licensed professional before acting.
How to Remove Mold From Walls: The Short Answer
For a small patch on a non-porous painted wall, the EPA-endorsed approach is: locate and fix the moisture source first, ventilate the room and seal off doorways with plastic sheeting, wear an N95 respirator and nitrile gloves, scrub the affected area with detergent and warm water, dry thoroughly, and monitor for regrowth. Bleach is not required for non-porous surfaces and the EPA explicitly does not recommend it as a routine remediation chemical because it leaves dead spores behind and stops working once the surface dries.
For drywall, plaster, wallpaper, or any porous wall finish where mold has penetrated below the surface, removal of the affected material is usually required. Painting over mold without removing it traps the colony and frequently allows regrowth within months. The Centers for Disease Control note that porous materials with visible mold growth should be discarded if cleaning cannot reach the source.
Step 1: Identify the Moisture Source
Mold cannot grow without sustained moisture, so cleanup that ignores the source is wasted effort. Common wall-mold causes include roof leaks tracking down studs, plumbing leaks behind tile, condensation on poorly insulated exterior walls (common in Front Range homes built before 1990 code updates), bathroom humidity without exhaust ventilation, and ground-water intrusion at basement walls. A moisture meter pushed into drywall will read 16% or higher in actively wet material; healthy interior walls read below 12%. Without finding and fixing the source, the cleanup will fail.
If the cause is hidden behind the wall, cut a small inspection hole or use a borescope before assuming surface cleanup is enough. The mold inspection and testing hub covers diagnostic tools in more detail.
Step 2: Contain the Work Area
Spore release during cleanup is the biggest health risk in DIY mold work. Containment is the difference between solving one wall and contaminating the rest of the home. Close interior doors and tape plastic sheeting over them. Cover floor and adjacent furniture with disposable plastic. If the affected area exceeds a few square feet, the EPA recommends a single layer of 6-mil polyethylene with a slit-and-flap entry. Turn off forced-air HVAC during the work so the system does not pull spores into ductwork.
Ventilate the work area to the outside with a window fan blowing out, not in. This creates negative pressure inside the workspace so spores leave the home rather than migrate to other rooms.
Step 3: Personal Protective Equipment
Minimum PPE for any mold cleanup includes an N95 respirator (not a surgical mask), nitrile or rubber gloves that extend to the forearm, safety goggles without ventilation holes, and disposable coveralls or old clothing that will be washed separately or discarded. For areas over 30 square feet or when working with Stachybotrys chartarum, a half-face P100 respirator is the OSHA-recommended baseline for occupational exposure. Workers with asthma, COPD, or compromised immune systems should not perform mold cleanup themselves.
Step 4: Clean Non-Porous Walls
For painted drywall, plaster, tile, or other non-porous wall surfaces, mix one cup of standard dish detergent into a gallon of warm water. Scrub the affected area with a stiff brush or microfiber cloth, working from the edges of the visible growth inward to avoid spreading spores. Rinse with clean water and dry the surface completely with fans within 24 to 48 hours. The CDC notes that this detergent approach is as effective as bleach for surface cleanup and avoids the respiratory and corrosion problems bleach creates.
For tougher growth or staining on tile grout or painted concrete, undiluted distilled white vinegar is a homeowner-friendly fungicide that the EPA recognizes as effective on porous and semi-porous surfaces. Apply, let sit one hour, scrub, and rinse. Avoid mixing vinegar with bleach or ammonia.
Step 5: Remove Affected Drywall When Necessary
If mold has penetrated the paper face of drywall (the surface looks fuzzy or stained with visible growth, not just surface mildew), the affected section must be cut out and replaced. Use a utility knife to score a clean rectangle at least 12 inches beyond the visible growth in all directions. Bag the removed pieces immediately in 6-mil contractor bags, double-bag them, and dispose through regular waste channels unless local codes require microbial waste protocols. Front Range counties generally allow household disposal of residential mold waste; check Boulder and Denver county-specific guidance for jobs over 100 square feet.
After removal, inspect the wall cavity for additional growth on insulation, sheathing, or framing. Studs with surface mold can usually be cleaned and dried; insulation that is wet or moldy gets replaced.
Step 6: Dry Aggressively and Verify
The single most common DIY failure is incomplete drying. Run dehumidifiers in the work area until relative humidity is below 50% and surface moisture readings are under 12%. Air movers (axial fans) directed across the wall surface accelerate drying. Plan on 48 to 96 hours of active drying for a wall that has been cleaned wet. Walls that feel dry to the touch are frequently still 18% to 22% moisture inside the cavity, which is plenty for regrowth.
Post-cleanup verification can be visual (no return of growth after two weeks) or instrumented (moisture meter readings under 12%, no musty odor). For insurance claims or real-estate transactions, third-party clearance air sampling is the accepted standard. Pair this with the air-testing methodology to document a clean result.
When to Call a Professional
Hire a certified remediation contractor when the affected area exceeds 10 square feet, when mold is in HVAC ductwork, when sewage or contaminated water is involved, when an occupant has diagnosed mold-related illness, or when you have already attempted cleanup and growth returned. The IICRC S520 standard is the industry remediation benchmark, and reputable Front Range firms will work to it. Expect $500 to $6,000 for residential remediation depending on scope.
What to Expect After Cleanup
Successful wall mold removal does not always produce an instantly perfect surface. After cleaning a small patch of mildew on tile grout, the visible growth disappears within minutes and the area looks like new. After removing a colonized section of drywall, the wall has a raw cutout that needs taping, mudding, sanding, and repainting before it looks normal again. Plan for a one-to-two-week cosmetic finish timeline on any drywall replacement, plus drying time for joint compound between coats.
Staining can persist even after the colony dies. Some mold species produce melanin and other pigments that bind to drywall paper or wood substrates and remain visible after cleaning. Mold-resistant primers (Zinsser BIN, Kilz Restoration) seal residual staining before topcoat painting. Skip stain-blocking primer and the discoloration often bleeds through fresh paint within weeks.
Smell may take longer to disappear than visible growth. Microbial volatile organic compounds (mVOCs) that produce the musty odor can persist in porous building materials for weeks after the colony is removed. Run dehumidifiers, ventilate aggressively, and consider an activated-carbon air purifier in the affected room for two to four weeks. If the smell persists beyond a month, you likely missed a portion of the colony or the moisture source.
Front Range Wall Mold Patterns
Colorado homes have specific moisture patterns that produce predictable wall mold locations. Basement walls below grade are the most common location because perimeter drainage in homes built before the 1990s often does not direct ground water away from the foundation effectively. Stucco and synthetic stucco (EIFS) exterior walls without proper drainage planes can trap moisture behind the wall surface, producing interior mold growth that is invisible until repairs begin.
Bathrooms in Front Range homes with rooftop HVAC and minimal exhaust ventilation accumulate humidity that condenses on cool exterior walls during winter. North-facing bedroom walls in pre-1990 construction sometimes develop hidden mold behind furniture pushed against the wall because the air gap is insufficient to allow moisture evaporation. Window sills with single-pane or aging double-pane glass develop seasonal condensation that drips into the wall cavity below.
Boulder, Denver, Jefferson, and El Paso County homes built between 1960 and 1990 commonly have minimal wall insulation by current standards, which creates cold-surface condensation problems on exterior walls during cold snaps. Adding R-21 or higher batt insulation in exterior wall cavities during remediation prevents recurrence in these homes.
Insurance and Remediation Documentation
Homeowners insurance coverage for mold removal varies widely by carrier and policy. Most standard HO-3 policies cover mold remediation only when it results from a covered peril (sudden plumbing leak, appliance malfunction, ice dam) and many carriers cap mold-specific coverage at $5,000 to $10,000 regardless of total damage. Long-term moisture problems caused by deferred maintenance or condensation are typically excluded.
If pursuing an insurance claim, document everything before cleanup begins: dated photographs of all visible growth, moisture meter readings, the suspected source, any prior plumbing or roofing repairs. Third-party assessment by a Certified Microbial Investigator (CMI) carries far more weight with insurers than homeowner-collected samples. Reputable Front Range CMI inspections run $300 to $700 and produce IICRC-aligned reports that align with what adjusters and remediation contractors expect to receive.
Post-remediation clearance testing matters for both insurance and resale. After remediation, air samples in the remediated room compared against unaffected control rooms and outdoor controls demonstrate that the cleanup worked. Skip clearance only on small DIY jobs where no claim or transaction is involved. For documented clearance, the mold inspection hub covers protocol.
Materials and Tools for DIY Wall Mold Removal
A small-scale wall mold removal project requires a specific set of materials. Personal protective equipment includes N95 respirators (typically $1.50 to $5 each), nitrile gloves extending to the forearm ($0.50 to $1 per pair), safety goggles without ventilation holes ($8 to $20), and disposable coveralls or old clothing that can be washed or discarded ($10 to $25 per set). Cleaning supplies include standard dish detergent ($4 to $6), a stiff scrub brush or microfiber cloths ($5 to $15), and a spray bottle for application ($3 to $8).
For larger or porous-material cleanup, add 6-mil polyethylene sheeting for containment ($25 to $40 per roll), painter’s tape ($8 to $12), heavy-duty contractor bags for waste disposal ($15 to $25), and a window fan for negative-pressure ventilation if not already on hand ($25 to $50). Moisture meters that read drywall and wood help verify the moisture source and confirm drying after cleanup; basic pinless meters run $25 to $50, professional-grade pin meters run $75 to $200.
Total DIY equipment cost for a small wall mold removal project: $75 to $150 not counting tools homeowners typically already own. The expense is competitive with one hour of professional remediation labor, which makes DIY economically attractive for small jobs.
References
- A Brief Guide to Mold and Moisture in Your Home — U.S. Environmental Protection Agency
- Cleanup After a Flood and Mold Removal — Centers for Disease Control and Prevention
- Preventing Mold-Related Problems in the Indoor Workplace — Occupational Safety and Health Administration
- Mold Inspection and Remediation Standards — International Association of Certified Home Inspectors
If wall mold returns after a DIY attempt or the area is larger than expected, connect with a vetted Front Range remediation contractor through our contact page for a scoped quote.
Mold removal & cleanup picks
For a small, contained patch (under ~10 sq ft) these EPA-friendly removers handle surface mold. Larger or recurring growth warrants a professional assessment first.
| Product | Why | Buy |
|---|---|---|
 RMR-86 Instant Mold Stain Remover RMR-86 Instant Mold Stain Remover | Fast-acting on stains; ventilate and wear PPE. | Amazon — $25.99 |
 Concrobium Mold Control Concrobium Mold Control | No-bleach formula that also helps prevent regrowth. | Amazon — $13.48 |
 Mold Armor Mold & Mildew Remover Mold Armor Mold & Mildew Remover | Widely stocked bathroom/surface remover. | Amazon — $22.98 |