How to Remove Mold From Basement Walls: A Guide
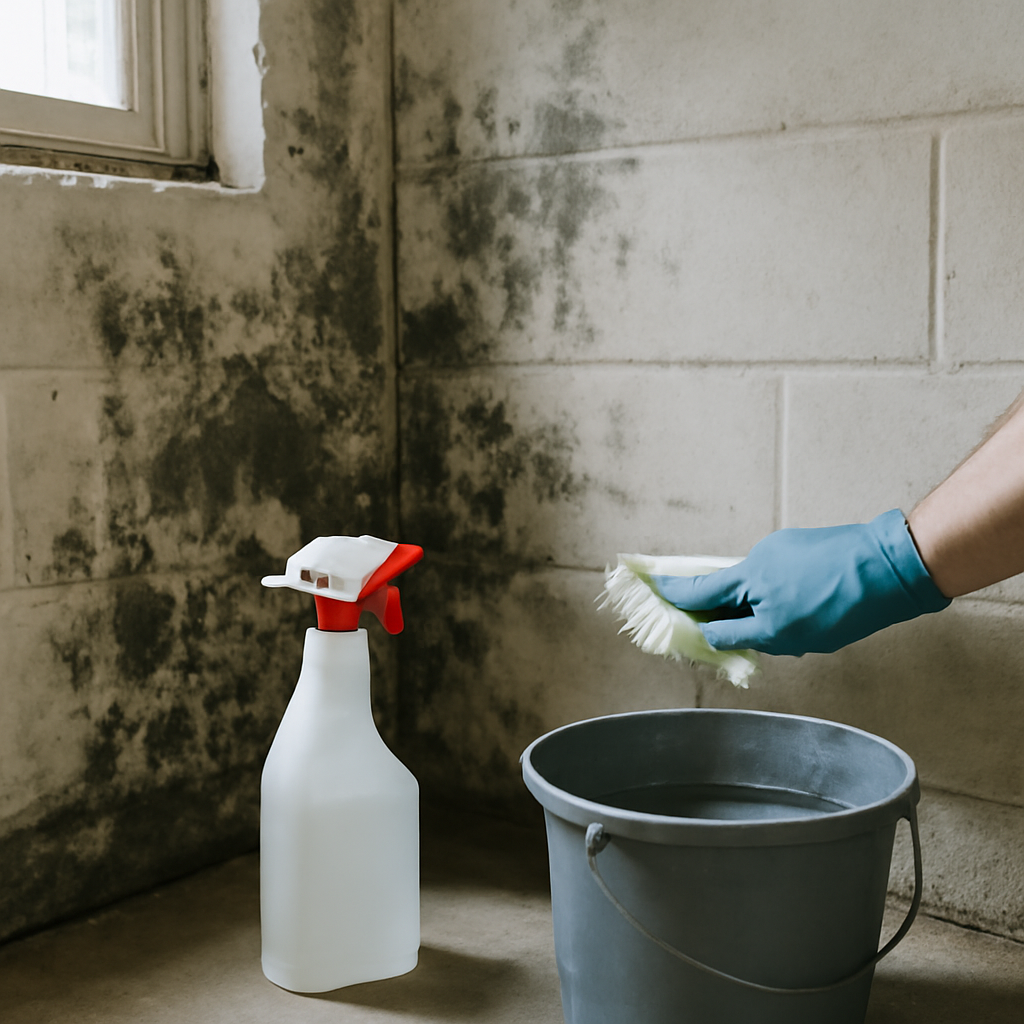
Basement walls take the brunt of below-grade moisture. Cool foundation surfaces invite condensation, water seeps through cracks, and finished walls hide growth inside the cavity. Discovering mold spreading across concrete or behind drywall is common, particularly along the Front Range where snowmelt and storms push water at foundations. This guide explains how to remove mold from basement walls, which materials you can clean and which you must discard, and when to bring in help. It summarizes EPA and CDC guidance current as of 2026; consult your physician for symptoms and a certified professional for testing or large-scale removal decisions.
Part of our Mold Removal & Remediation guide — start there for the full picture →
Is this mold, asbestos, or water damage? Get a free instant screen
Upload a clear photo of the suspect area. You'll get an instant AI screening opinion and what to do next. This is screening guidance, not a professional determination.
Screening guidance only. AI can be wrong. Confirm asbestos, mold type, or lead with lab testing or a licensed professional before acting.
How to Remove Mold From Basement Walls Step by Step
The method depends on the wall type. Bare concrete, painted block, and masonry are non-porous enough that surface mold can be scrubbed off. The EPA says small areas under about 10 square feet on hard surfaces can be cleaned with detergent and water, then dried completely. Finished walls with drywall are different, because drywall absorbs moisture and harbors mold in its paper and gypsum.
For a concrete or block wall, ventilate the space and put on an N-95 respirator, gloves, and goggles. Apply detergent and water or undiluted white vinegar, let it dwell, then scrub the wall with a stiff brush. Wipe the surface clean and dry it thoroughly with a fan or dehumidifier. Work in small sections to limit spore spread, and bag any debris.
Before any of this, find the moisture source. The EPA stresses that cleanup without moisture control fails, so a wall cleaned today will regrow if water keeps reaching it. The guide on basement mold removal covers the full sequence from diagnosis to drying.
Cleaning Concrete and Masonry Walls
Concrete and masonry tolerate aggressive scrubbing and most cleaners. Detergent and water handle routine growth; the CDC notes bleach is not always necessary. If you choose to disinfect, the EPA recommends no more than one cup of household bleach per gallon of water, applied in a ventilated space, and never mixed with other cleaners.
After scrubbing and rinsing, the critical step is drying. Concrete is porous enough to hold moisture, so run a dehumidifier to bring relative humidity below 50 percent. Efflorescence, a white crystalline deposit, sometimes appears on basement walls and is mineral salt rather than mold, though its presence signals water moving through the wall, which is worth addressing.
Dealing With Mold on Finished Drywall
Finished basement walls complicate removal because drywall is porous. If mold is only on the painted surface and the wall is firm, gentle cleaning may work, but once mold penetrates the paper backing or the gypsum feels soft, the EPA recommends removing and replacing the affected drywall rather than cleaning it.
Mold often hides in the cavity between drywall and the foundation, where humid air condenses against cold concrete. By the time it shows on the surface, the back of the drywall and the insulation may be heavily colonized. Cutting out the affected section reveals the true extent and lets you dry the cavity. This is frequently where a hidden leak or chronic condensation problem comes to light. The guide on black mold in the basement explains the moisture dynamics behind finished walls.
What You Should Discard
Some basement materials cannot be salvaged once mold takes hold. The EPA recommends discarding heavily contaminated porous items: water-damaged drywall, fiberglass or cellulose insulation, carpet and padding, ceiling tiles, and any cardboard or fabric stored against the wall. Surface cleaning leaves living mold inside these materials.
Bag contaminated debris in plastic before carrying it through the house, to avoid scattering spores along the way. Hard, non-porous items, plastic, metal, glass, sealed wood trim, can usually be wiped clean and kept. Distinguishing salvageable from unsalvageable is the judgment that determines whether removal actually solves the problem.
Why Basement Walls Grow Mold
The causes trace back to water reaching the wall. Condensation forms when warm interior air meets cold foundation surfaces. Bulk intrusion comes through foundation cracks, from poor exterior grading, or from downspouts that discharge near the wall. Plumbing leaks and high indoor humidity round out the list.
Identifying the dominant cause directs the fix. Condensation is solved with dehumidification, insulation, and air movement. Intrusion requires exterior grading, drainage improvements, crack sealing, or waterproofing. Until the water is controlled, scrubbing the wall is a temporary measure. The mold inspection and testing hub describes how professionals trace the source when it is not obvious.
What Not to Do
Do not paint or seal over mold on a basement wall; the coating traps moisture and growth continues underneath, eventually bleeding through. Do not use a dry brush or a shop vacuum without a HEPA filter, both of which fling spores into the air. Do not rely on bleach as a permanent fix, since it treats the surface but not the moisture, and the EPA notes it is not always necessary.
Avoid mixing chemicals, and do not disturb large areas of growth without protection. If the mold covers more than about 10 square feet, hides inside finished walls, or followed a flood or sewage backup, stop and call a professional rather than pressing on. These situations carry risks home cleaning cannot manage safely.
Step-by-Step Wall Cleaning Method
With supplies staged and the moisture source identified, the cleaning itself follows a clear order. Start by clearing the area and laying a drop cloth to catch debris. Put on all protective gear before disturbing anything, since the first scrub releases spores. If finished materials are involved, remove and bag heavily contaminated drywall and insulation first, sealing the bags before carrying them out.
For the wall surface, apply detergent and water or undiluted white vinegar and let it dwell so it can loosen the growth. Scrub the wall with a stiff brush, working in small sections to limit spread, then wipe the surface clean with a damp microfiber cloth, rinsing it often. HEPA-vacuum any loose residue. Once the visible mold is gone, dry the wall and the surrounding air thoroughly with a dehumidifier and fans, and verify the surface is dry before any repair. Discard the cloths and brush if they contacted heavy growth, and launder your work clothing separately. Methodical, section-by-section work beats a hurried scrub that flings spores across the basement.
Tools and Supplies for the Job
Removing mold from basement walls goes more smoothly with the right kit assembled in advance. For protection, gather an N-95 or N-100 respirator, non-vented goggles, rubber gloves, and a disposable coverall or old clothing you can launder separately. Basements are confined, so this gear matters more than it would in an open room.
For the work itself, you will want a stiff scrub brush, a bucket, detergent or white vinegar, a spray bottle, microfiber cloths, and contractor bags for debris. A HEPA-filter vacuum captures loose spores, while a standard shop vacuum without HEPA filtration scatters them and should be avoided. For drying, a dehumidifier and fans are essential, and an inexpensive moisture meter helps you confirm the wall is truly dry before any repair. If finished walls are involved, add a utility knife and a pry bar for removing drywall. Having everything staged means you can work continuously rather than tracking spores around the house searching for a tool mid-job.
Telling Mold Apart From Efflorescence
Before scrubbing a basement wall, confirm what you are looking at. Efflorescence, a white or grayish crystalline powder, is mineral salt deposited as water evaporates through concrete and masonry. It brushes off dry and is not a living organism, though its presence is a clear sign that water is moving through the wall and should be addressed. Homeowners frequently mistake it for white mold.
True mold tends to be fuzzy, slimy, or textured, spreads in irregular patches, and often carries a musty smell. A simple field check: if the deposit wipes off as dry powder and has no odor, it is likely efflorescence; if it smears, feels organic, and smells musty, treat it as mold. Both point to a moisture problem, but the response differs, efflorescence calls for addressing water intrusion, while mold also requires cleanup. The guide on black mold in the basement explains the distinction in more depth.
Removing Insulation and Wall Coverings Safely
Finished basement walls often hide insulation and a vapor barrier between the drywall and the foundation, and these materials are common reservoirs of hidden mold. Fiberglass and cellulose insulation absorb moisture and trap spores, so heavily contaminated insulation should be removed and discarded rather than dried in place. The same applies to moldy vapor barriers and the back of affected drywall.
Remove these materials carefully to limit spore release: mist the surface lightly to reduce dust, cut the drywall in manageable sections, and bag everything in plastic before carrying it out. Wear an N-95 or N-100 respirator, goggles, and gloves throughout. Exposing the wall cavity also lets you inspect the framing and the foundation for the moisture source, which is frequently revealed only once the coverings come off. Once the cavity is clean and dry, new insulation and drywall can go back, ideally with moisture-resistant materials.
Drying and Verifying the Wall
After cleaning concrete or removing finished materials, drying is the step that locks in the result. Run a dehumidifier and fans to bring the wall and the surrounding air below the EPA’s recommended 50 percent humidity. Concrete holds moisture and dries slowly, so allow extra time and confirm progress with an inexpensive moisture meter or hygrometer rather than guessing.
Verify before you close anything up. A wall that still reads damp will reseed mold behind new drywall, so the cavity must reach a stable, dry state first. Watch the cleaned area over the following week for any sign of return, which would indicate the moisture source is still active. Patience here is what separates a permanent repair from a cosmetic one that fails within a month. If readings will not come down despite a running dehumidifier, the intrusion source has not been fully addressed and warrants a closer look before reconstruction.
When to Call a Professional
Professional remediation is warranted for growth larger than about 10 square feet, mold inside finished walls or insulation, a musty smell throughout the basement, or contamination after flooding. The EPA recommends professional remediation with containment in these cases to prevent spreading spores to the rest of the home.
Anyone with asthma, allergies, or a weakened immune system should not attempt basement wall cleanup, given the confined, spore-heavy conditions. A qualified inspector can locate moisture with meters and thermal imaging and define the true extent of growth, while a remediation contractor removes contaminated materials safely. The guide on treating mold in the basement outlines where the DIY line sits and what professionals add. When in doubt, the safer default is to get an objective assessment before opening walls or committing to a removal scope, since an honest diagnosis of the moisture source usually costs far less than a repeated cycle of cleaning that never resolves the underlying intrusion. The goal is a wall that stays clean because it stays dry, and reaching that goal almost always means treating the water before, and more seriously than, the visible growth.
References
- Mold Cleanup in Your Home — U.S. Environmental Protection Agency
- A Brief Guide to Mold, Moisture and Your Home — U.S. Environmental Protection Agency
- About Mold and Health — Centers for Disease Control and Prevention
- Mold and Your Health — Colorado Department of Public Health and Environment
Frequently asked questions
How do I remove mold from a concrete basement wall?
Ventilate, wear an N-95 respirator and gloves, apply detergent and water or white vinegar, scrub with a stiff brush, rinse, and dry completely with a dehumidifier. Find and fix the moisture source first so it does not regrow.
Can I clean mold off basement drywall?
Only if it is on the painted surface and the wall is firm. Once mold penetrates the paper or the gypsum is soft, the EPA recommends removing and replacing the affected drywall rather than cleaning it.
What basement wall materials should I throw away?
Discard heavily contaminated porous items: water-damaged drywall, insulation, carpet, ceiling tiles, and stored cardboard or fabric. Bag them in plastic before carrying them through the house to limit spore spread.
When is basement wall mold a professional job?
Call a pro for growth over about 10 square feet, mold inside finished walls or insulation, a musty smell throughout the space, or flood-related contamination. People with respiratory conditions should not do the cleanup.
If mold keeps returning to your Front Range basement walls, the moisture source must be found before removal will last. We can connect you with a vetted local inspector. Reach out through our contact page to get matched.
Mold removal & cleanup picks
For a small, contained patch (under ~10 sq ft) these EPA-friendly removers handle surface mold. Larger or recurring growth warrants a professional assessment first.
| Product | Why | Buy |
|---|---|---|
 RMR-86 Instant Mold Stain Remover RMR-86 Instant Mold Stain Remover | Fast-acting on stains; ventilate and wear PPE. | Amazon — $29.99 |
 Concrobium Mold Control Concrobium Mold Control | No-bleach formula that also helps prevent regrowth. | Amazon — $11.26 |
 Mold Armor Mold & Mildew Remover Mold Armor Mold & Mildew Remover | Widely stocked bathroom/surface remover. | Amazon — $22.98 |