How Do I Remove Mold: A Plain-Language Guide
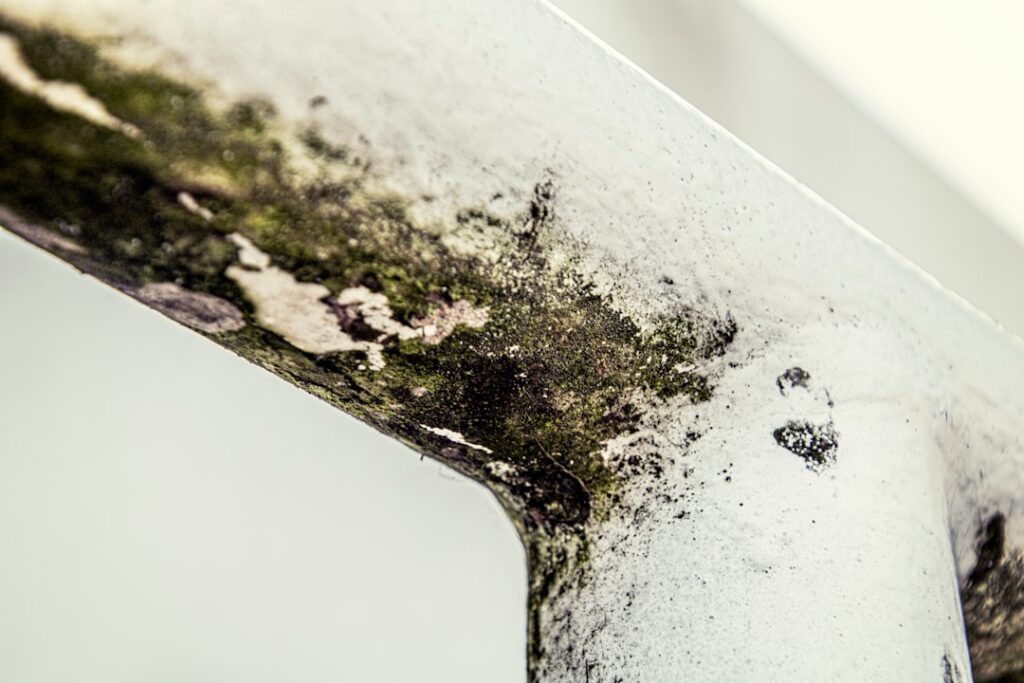
Homeowners staring at a fresh patch of mold on a bathroom ceiling or behind a vanity usually ask the same question: how do i remove mold safely without making it worse? The honest answer depends on three variables — surface type, contaminated area, and personal sensitivity. This guide walks through the homeowner-DIY decision tree, the EPA’s 10-square-foot threshold, and the cleanup sequence that has the best chance of working the first time. This guide summarizes EPA and CDC guidance current as of 2026 — consult a certified mold inspector for testing decisions and your physician for symptom evaluation.
Part of our Mold Removal & Remediation guide — start there for the full picture →
Is this mold, asbestos, or water damage? Get a free instant screen
Upload a clear photo of the suspect area. You'll get an instant AI screening opinion and what to do next. This is screening guidance, not a professional determination.
Screening guidance only. AI can be wrong. Confirm asbestos, mold type, or lead with lab testing or a licensed professional before acting.
The First Decision: DIY or Hire It Out
The EPA suggests homeowners can typically tackle visible mold under 10 square feet — roughly a 3 by 3 foot patch — on hard, non-porous surfaces. Anything larger, anything inside HVAC, anything tied to sewage, or anything in a home with an immunocompromised or asthmatic occupant moves into professional remediation territory.
If the visible patch sits on paper-faced drywall, ceiling tile, or behind wallpaper, assume there is more behind the surface than what shows. Drywall paper wicks moisture in all directions; the colony often extends six to twelve inches past the staining edge. The parent mold inspection and testing hub covers how professionals scope hidden growth before opening a wall.
Personal Protective Equipment
Even small jobs deserve real PPE. The EPA recommends:
- N95 disposable respirator at minimum; P100 cartridges on a half-face elastomeric for jobs larger than a square foot.
- Nitrile gloves, long-sleeved disposable coveralls or old clothing that gets bagged afterward.
- Safety glasses or sealed goggles — not regular eyeglasses.
- Closed shoes that stay in the workspace until cleanup ends.
Skip PPE and the cleanup itself can trigger the symptoms it’s supposed to prevent.
The Five-Step Removal Workflow
Step 1 — Fix the Moisture Source
Removal without source repair is a temporary cosmetic fix. Identify and correct the leak, condensation, or humidity problem first. Even if removal happens before the repair, document the source so the work order is clear.
Step 2 — Contain the Area
Close doors. Tape plastic sheeting across openings for larger jobs. Turn off the HVAC to prevent spreading spores through ducts. A small box fan blowing out a window pulls negative pressure on the work area if no scrubber is available.
Step 3 — Remove or Clean
On non-porous surfaces — tile, glazed ceramic, glass, metal, sealed wood — scrub with detergent and water, rinse, then apply an EPA-registered antimicrobial. On porous materials — paper-faced drywall, ceiling tile, carpet, fabric-covered furniture — replace rather than clean. A step-by-step removal walkthrough covers the substrate decisions in more detail.
Step 4 — HEPA Vacuum and Damp Wipe
After visible removal, HEPA-vacuum the area and surrounding surfaces — floors, ledges, shelving. Damp-wipe horizontal surfaces. This step pulls settled spores out of the room before they re-establish.
Step 5 — Dry Completely
Run dehumidifiers and fans for 48 to 72 hours. Confirm under 20 percent moisture content on a pinless meter before reconstruction or repainting. Sealing in trapped moisture restarts the problem within weeks.
Cleaning Products: What Actually Works
The EPA’s current position is to use detergent and water for most surface mold, supplementing with antimicrobials when necessary. Practical choices:
- Detergent and water — first-line for most non-porous surfaces.
- Hydrogen peroxide 3 to 8 percent — broad-spectrum, leaves no residue, color-safe on most materials.
- Vinegar (5 to 6 percent acetic acid) — effective on some species, gentler on grout than bleach.
- EPA-registered antimicrobials — labeled for mold and mildew, used by remediation contractors.
Bleach is no longer the EPA’s recommended go-to. It works on glass and glazed tile but soaks into porous substrates without killing the colony underneath. The wall-substrate protocol guide explains why product choice depends heavily on the material.
Specific Locations
Bathroom Grout and Caulk
Stained grout often cleans up with a hydrogen peroxide paste and a stiff brush. Moldy silicone caulk almost always needs to be cut out and replaced — the colony grows into the silicone matrix where surface cleaning cannot reach.
Drywall
If the affected area is larger than a square foot or the back side shows growth, cut out and replace. Score the drywall 6 to 12 inches past visible staining. Bag the removed material in 6-mil plastic and dispose with regular trash unless local rules require otherwise.
Carpet and Padding
Carpet with visible mold growth is usually a replace decision. Padding wicks and holds moisture far longer than carpet face fiber and almost never dries cleanly after a flood event.
Wood Framing and Subfloor
Sound wood structural members can usually be cleaned, sanded, HEPA-vacuumed, and sealed with a clear shellac-based primer after drying. Soft, punky, or visibly delaminated wood needs replacement by a contractor.
Verification and Follow-Up
For a small DIY job, the verification step is sensory and visual: no musty odor, no visible regrowth at 30 and 60 days, and stable humidity readings in the room. For larger or recurring problems, a post-remediation air-spore sample from a third-party tester compared to outdoor baseline gives a defensible result. The spore-cleaning workflow guide covers verification testing in more detail.
When the Job Is Bigger Than It Looked
Open a wall and find growth running along the bottom plate? Stop. Bag what’s exposed, tape over the opening, and call a remediator. Halfway-removed mold is worse than untouched mold because the disturbance puts spores into the air without the containment to capture them. Remediation contractors with negative-air machines, full containment barriers, and post-job clearance testing exist for exactly this scenario.
Cost Reality for Homeowner DIY
A small DIY mold job runs roughly $80 to $250 in supplies for the average bathroom corner or under-sink cabinet. Itemized:
- N95 respirators: $5 to $15 per pack.
- Nitrile gloves and disposable coveralls: $20 to $40.
- Hydrogen peroxide and EPA-registered antimicrobial: $15 to $30.
- HEPA vacuum rental: $40 to $80 per day at most home-improvement stores.
- Pinless moisture meter: $30 to $80 (one-time investment).
- Plastic sheeting, tape, and disposal bags: $15 to $25.
- Replacement drywall, joint compound, paint: variable, $20 to $80 for a small patch.
Compare to a professional remediation quote of $1,500 to $4,000 for the same scope — the DIY math favors self-execution when scope is genuinely small and substrate is non-porous.
Common Substrate Mistakes
Three substrate errors that turn small jobs into expensive ones:
- Cleaning paper-faced drywall surface only. The hyphae penetrate the paper face and the colony continues below the visible patch. Replace, don’t clean.
- Painting over residual staining. Trapped moisture under paint film restarts growth within weeks. Confirm dry substrate before any coating.
- Caulking over moldy silicone. Old silicone with embedded growth must be cut out completely. New caulk over old creates a contamination layer that fails within months.
Tool List for the Homeowner Job
A complete DIY mold-removal kit:
- N95 disposable respirators (or P100 half-face cartridge mask for larger jobs).
- Nitrile gloves and safety glasses.
- Disposable coveralls or work clothes that get bagged after.
- Utility knife or drywall saw for cutting back affected substrate.
- HEPA vacuum (purchase or rental from a home-improvement store).
- Dehumidifier and fans for the dry-down phase.
- Pinless moisture meter for verification.
- Plastic sheeting and painter’s tape for containment.
- 6-mil disposal bags for contaminated material.
- Spray bottles for detergent solution and antimicrobial.
- Stiff brush or scrub pad for non-porous surface work.
- Shellac-based primer for sealing cleaned wood framing.
- Detergent, hydrogen peroxide (3 to 8 percent), EPA-registered antimicrobial.
- Headlamp for working in dark cavities.
- Phone or camera for before-and-after documentation.
Step-by-Step Decision Points
During the cleanup, several decision points come up where homeowners often hesitate. Plain answers:
The mold is bigger than expected — do I keep going?
If exposed area exceeds 10 square feet, stop, bag what’s exposed, and call a remediator. Halfway-removed mold without containment puts more spores into the air than untouched mold.
The drywall back side is moldy — clean or replace?
Replace. Cleaning the front while leaving moldy paper face on the back leaves the colony alive. Cut back 6 to 12 inches past visible staining.
The wood framing has surface staining — sand or replace?
If the wood is sound and the staining is surface-level, HEPA-vacuum, sand lightly, and seal with shellac-based primer. If the wood is soft, punky, or delaminated, replace it.
The smell persists after cleanup — what’s wrong?
Usually one of three things: residual hidden growth in an adjacent cavity, insufficient HEPA capture leaving dead-spore allergen load, or incomplete drying with trapped moisture. Investigate before considering the job done.
Pets, Children, and Sensitive Occupants
Mold cleanup disturbs colonies and aerosolizes spores. Keep children, pets, and immunocompromised occupants out of the work zone and adjacent rooms during cleanup and for at least 24 hours after the HEPA scrubber finishes its run. Bedding and stuffed animals from adjacent rooms benefit from a hot-water wash or HEPA vacuum after the work. Plan around the cleanup — many homeowners schedule remediation for a weekend the family is traveling.
What to Tell a Home Inspector at Pre-Sale
If a homeowner has completed a mold removal and is preparing to sell the property, disclosure practices matter. Most states require disclosure of known water-damage events and mold remediation. Practical points:
- Provide the inspector with documentation of the moisture source repair, removal work, and any clearance testing.
- Note the dates of work and the affected areas on the disclosure form.
- Keep contractor invoices and lab reports organized in a single folder for buyer review.
- Don’t paint over disclosed areas to hide visible repair evidence — buyer inspectors typically find this and flag it.
Documented remediation work with clearance verification often supports the sale rather than hindering it. Hidden or undocumented work tends to surface during inspection and damage transactions.
Differentiating Real Mold from Look-Alikes
Several conditions get mistaken for mold and trigger unnecessary cleanup. Before launching a removal project, verify the visible material is actually mold:
- Efflorescence — white-to-gray mineral salts on masonry. Wipes off with a damp cloth; doesn’t return.
- Soot — combustion deposits from candles, fireplaces, and cooking. Wipes off cleanly with detergent.
- Asphalt streaking — dark stains from old shingles on attic sheathing. Follows roof grain rather than moisture patterns.
- Mildew — surface-only mold typically pink or gray. Cleans easily with bathroom products.
If unsure, a $40 tape-lift sample to an AIHA-accredited lab confirms species before significant work begins.
References
- Mold Cleanup in Your Home — U.S. Environmental Protection Agency
- Mold Cleanup Guide — Centers for Disease Control and Prevention
- Mold Resource Guide — InterNACHI
- Mold Workplace Safety — Occupational Safety and Health Administration
Frequently asked questions
Can I remove mold myself or do I need a professional?
The EPA suggests homeowners can typically handle visible mold under 10 square feet on hard, non-porous surfaces. Larger areas, HVAC contamination, sewage-related growth, or homes with sensitized occupants should go to a certified remediator.
What's the safest cleaner for mold?
Detergent and water is the EPA's first-line recommendation. Hydrogen peroxide at 3 to 8 percent is a good supplement on non-porous surfaces. Bleach is no longer the preferred option for porous substrates.
Will painting over mold work?
No. Paint traps moisture and does not kill underlying growth. The colony continues to grow through paint film and reappears within weeks or months. Remove and replace contaminated material first.
How do I know the mold is really gone?
Visible cleanup, no musty odor, dry substrate confirmed by moisture meter, and no recurrence at 30 and 60 days. For larger jobs, a post-remediation air-spore sample compared to outdoor baseline provides documented verification.
If a small spot turns out to be much larger once the wall is open, Front Range homeowners can reach a vetted local inspector through our contact page for a second opinion before committing to a full remediation contract.
Mold removal & cleanup picks
For a small, contained patch (under ~10 sq ft) these EPA-friendly removers handle surface mold. Larger or recurring growth warrants a professional assessment first.
| Product | Why | Buy |
|---|---|---|
 RMR-86 Instant Mold Stain Remover RMR-86 Instant Mold Stain Remover | Fast-acting on stains; ventilate and wear PPE. | Amazon — $29.99 |
 Concrobium Mold Control Concrobium Mold Control | No-bleach formula that also helps prevent regrowth. | Amazon — $34.27 |
 Mold Armor Mold & Mildew Remover Mold Armor Mold & Mildew Remover | Widely stocked bathroom/surface remover. | Amazon — $22.98 |