How to Remove Black Mold: A Plain-Language Guide
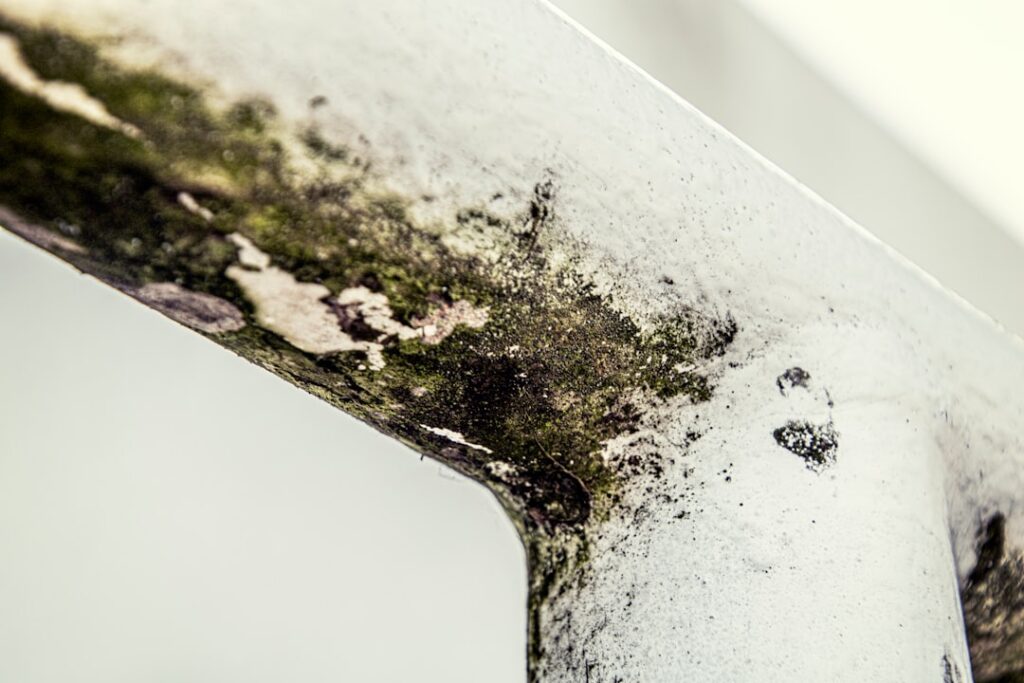
Black mold draws more alarm than any other household growth, and that alarm often leads to the wrong first move — dry-scrubbing a wall, dousing drywall in bleach, or painting over a stain. Done correctly, removing black mold is a methodical process of protecting yourself, wetting the growth, cleaning or removing the affected material, and drying the area so it cannot return. Done hastily, it spreads spores through the house. This guide explains how to remove black mold the controlled way, and where the homeowner job ends. It summarizes EPA and CDC guidance current as of 2026 and is educational only — consult a certified professional for sizing and your physician for any symptoms.
Is this mold, asbestos, or water damage? Get a free instant screen
Upload a clear photo of the suspect area. You'll get an instant AI screening opinion and what to do next. This is screening guidance, not a professional determination.
Screening guidance only. AI can be wrong. Confirm asbestos, mold type, or lead with lab testing or a licensed professional before acting.
How do you remove black mold safely?
The safe method follows a fixed order: protect, isolate, wet, clean or remove, capture, and dry. Black mold reacts to disturbance by releasing spores, so every step is designed to keep those spores from becoming airborne and migrating into clean rooms.
Begin with personal protection. The EPA recommends at minimum an N-95 respirator, rubber gloves, and goggles without ventilation holes for any mold cleanup. Isolate the area by closing doors, covering vents, and turning off the HVAC so ductwork does not distribute spores. Mist the moldy surface lightly so the growth stays wet and grounded — this single step prevents most of the spore release that dry brushing causes. Then clean non-porous surfaces or remove porous ones, bag the debris on-site, and dry everything thoroughly.
The realistic goal is removal, not sterilization. No method makes a home permanently mold-free, because spores exist everywhere in the air. Success means the growth is gone, the stain is cleaned where possible, and — most importantly — the moisture that fed it is corrected so it does not regrow.
The DIY size limit and when to stop
The EPA sets a practical threshold of roughly 10 square feet of contiguous growth — about the area of a bath towel. Below that, a careful homeowner can usually handle the work with proper protection. Above it, professional remediation with full containment, negative air pressure, and HEPA filtration is the safer route.
Other situations push a job past DIY regardless of size: mold from sewage or floodwater, growth inside HVAC systems, mold that keeps returning despite cleaning, structural materials that are soft or rotted, and any case where an occupant has asthma or a weakened immune system. In those circumstances the controlled process scales beyond what household tools can manage. The decision factors are laid out further in the guide on remediating mold, and the overall framework lives in the mold inspection and testing hub.
Removing black mold surface by surface
Non-porous surfaces — tile, glass, metal, sealed counters
These materials do not absorb the cleaning solution, so the mold can be cleaned off the surface entirely. Detergent and water with scrubbing handles most cases; a diluted bleach solution (about one cup per gallon) or a 3 percent hydrogen peroxide spray also works and removes the stain. Wipe dry afterward. The product choices are matched to surfaces in choosing a spray to kill mold.
Porous surfaces — drywall, ceiling tile, carpet
Here the colony roots into the material, so cleaning the surface leaves living growth behind. Paper-faced drywall, ceiling tile, and carpet that have absorbed mold are generally cut out, bagged, and discarded rather than wiped. The walkthrough on removing mold from drywall shows how far past the visible edge to cut and how to contain the demolition.
Semi-porous surfaces — wood, grout
Bare wood can sometimes be saved by HEPA-vacuuming, scrubbing with detergent, drying fully, and sanding off residual stain. Moldy grout is usually cut out and re-grouted. The deciding factor is whether the material is structurally sound after cleaning; soft or rotted wood is removed.
Why black mold keeps coming back
A cleaned spot that returns within weeks almost always means one of two things: the surface was porous and roots survived below where the cleaner reached, or the moisture source was never corrected. Black mold is a moisture symptom. Treating the stain without treating the water simply resets the clock.
Common hidden moisture sources include a slow plumbing drip behind a wall, condensation on cold surfaces, poor exterior drainage soaking a foundation, a roof or flashing leak, and chronically high humidity in a basement or bathroom. A musty odor that lingers after cleaning often signals growth still hidden inside a cavity. Finding and fixing the water is the part that makes removal permanent; without it, even a textbook cleanup fails. A moisture meter reading on the surrounding framing helps confirm whether an area is genuinely dry before it is closed up.
What protective gear and supplies you need
Removing black mold safely depends as much on the right equipment as on technique, and assembling it before starting keeps the job controlled. The respiratory protection is the priority: an N-95 respirator is the EPA’s stated minimum, and a half-face respirator with P100 cartridges offers more protection on larger or dustier jobs. Cloth and surgical masks do not filter fine spores and are not adequate.
Eye protection should be goggles without ventilation holes, since vented goggles let spores in. Gloves should be nitrile or rubber, extending up the forearm, especially when using cleaners. For anything beyond a tiny patch, disposable coveralls keep spores off clothing that would otherwise carry them through the house. On the supply side: a spray bottle for misting, plastic sheeting and tape for containment, contractor-grade bags for debris, a stiff nylon brush, disposable rags, the surface-appropriate cleaner, and a HEPA-filtered vacuum for capturing loose spores. Ordinary shop vacuums pass fine spores through the filter and exhaust them back into the room, so they make the problem worse. Fans and a dehumidifier handle the critical drying step, and a moisture meter confirms the area is truly dry before closing it up. Renting the HEPA vacuum and meter for a weekend is cheaper than a failed cleanup.
How long does black mold removal take?
Timeframes help set expectations and prevent the rushed shortcuts that cause failures. A small, non-porous patch — a corner of bathroom tile or a window sill — is genuinely a one-to-two-hour task including setup, misting, cleaning, and drying, though the surface should then stay monitored to confirm it does not return.
A medium job involving removing a section of drywall and drying the cavity stretches across a day or more, because the drying phase cannot be rushed: fans and a dehumidifier need time, often 24 to 48 hours or longer, to bring framing down to a verified-dry reading before any rebuild. Trying to close a wall while it is still damp seals the problem inside. Large or professional jobs with full containment, demolition, drying, and clearance testing commonly span several days, and reconstruction adds more time on top. The slowest and most important phase is almost always drying and confirming the moisture source is fixed — the part homeowners are tempted to skip. Black mold removal is not a single afternoon’s stain-scrubbing so much as a sequence whose pace is set by how long the materials take to dry and how thoroughly the water problem is solved.
Mistakes that spread black mold instead of removing it
Several common errors turn a contained black-mold problem into a wider one, and avoiding them is as important as the cleaning itself. The most damaging is dry brushing — scrubbing a dry colony launches a cloud of spores that settle in other rooms and seed new growth while you inhale the rest. Always mist the surface first so the growth stays wet and grounded.
Skipping containment is another. Working without sealing the area, covering vents, and shutting off the HVAC lets spores ride air currents and ductwork through the house, so a bathroom problem becomes a whole-home one. Painting over live mold to hide it traps the growth briefly, then the stain and colony bleed back through the fresh coat. Using an ordinary vacuum instead of a HEPA-filtered one blows fine spores straight through the filter and back into the air. Over-wetting porous materials with cleaner feeds the very mold you are fighting. And the dangerous mistake — mixing bleach with ammonia or vinegar — releases toxic gas. Each of these is avoidable with the controlled sequence of protect, isolate, wet, remove, capture, and dry. The pattern is that black mold removal failures rarely come from using the wrong product; they come from disturbing the colony carelessly and letting the spores travel, which is exactly what the controlled method is designed to prevent.
Preventing black mold after removal
Once the growth is gone and the area is dry, prevention is about keeping it that way. Keep indoor relative humidity below 60 percent — the EPA’s recommended range is 30 to 50 percent — and verify it with a hygrometer rather than guessing. Run bathroom and kitchen exhaust fans, fix leaks promptly, and dry any wet material within 24 to 48 hours, the window before mold establishes.
Improve drainage so water flows away from the foundation, insulate cold surfaces that condense, and ventilate or dehumidify damp basements and crawlspaces. Front Range homes start with an advantage in the dry Colorado climate, but finished basements, poorly vented bathrooms, and summer evaporative-cooler humidity still create the damp pockets where black mold takes hold. The throughline is consistent everywhere: mold needs water, and a dry surface stays clean. Remove the growth correctly, fix the moisture, and the same wall will not need cleaning again next season.
Removing black mold from different materials
Black mold removal is not one technique but several, chosen by the material it grows on, and matching method to material is what separates a lasting result from a cosmetic one.
Tile, glass, and sealed surfaces
These non-porous materials release mold readily. Clean with detergent and water or a diluted bleach or peroxide solution, scrub, and dry. The mold comes off the surface completely because nothing soaked in, so the result holds as long as the area stays dry.
Drywall and ceiling tile
Paper-faced drywall and ceiling tile are porous and absorb mold into their structure. Surface cleaning leaves living growth behind, so colonized board is generally cut out past the visible edge, bagged, and replaced. Attempting to wipe drywall clean is the most common reason black mold returns.
Wood and framing
Bare or framing wood is semi-porous. Sound wood can sometimes be saved by HEPA-vacuuming, scrubbing with detergent, drying fully, and sanding off residual stain. Wood that is soft, spongy, or structurally compromised is removed. The deciding question is whether the material is still sound after cleaning.
Carpet, fabric, and insulation
These soft, highly porous materials hold mold deep in their fibers and are usually discarded rather than cleaned once colonized, because no surface treatment reliably reaches throughout the material.
Why black mold is not a one-time fix
Homeowners often expect black mold removal to be a single decisive event, and reframing it as an ongoing relationship with moisture sets more realistic expectations. The removal itself can be a one-time job, but keeping the mold gone is not — because spores are always present in the air, any surface that becomes damp again can regrow mold, even a freshly cleaned one.
This is why the moisture fix is the heart of the process and why prevention continues after the cleanup ends. A wall cleaned perfectly will grow mold again if the leak behind it is not repaired or the room’s humidity stays high. The durable outcome comes from pairing a correct one-time removal with permanent moisture control: humidity kept below 60 percent and verified with a hygrometer, leaks repaired promptly, exhaust fans run, drainage maintained, and damp spaces ventilated or dehumidified. Thinking of black mold as a moisture-management problem rather than a stain to erase reorients the effort toward the part that actually lasts. The removal closes the immediate problem; the moisture control is what prevents the next one, and a home that controls its moisture well rarely needs the removal step a second time in the same spot.
References
- Mold Cleanup in Your Home — U.S. Environmental Protection Agency
- A Brief Guide to Mold, Moisture and Your Home — U.S. Environmental Protection Agency
- About Mold and Your Home — Centers for Disease Control and Prevention
If black mold covers more than a small area or keeps returning in your Denver-metro or Front Range home, reach out through our contact page to connect with a vetted local inspector.
Mold removal & cleanup picks
For a small, contained patch (under ~10 sq ft) these EPA-friendly removers handle surface mold. Larger or recurring growth warrants a professional assessment first.
| Product | Why | Buy |
|---|---|---|
 RMR-86 Instant Mold Stain Remover RMR-86 Instant Mold Stain Remover | Fast-acting on stains; ventilate and wear PPE. | Amazon — $18.38 |
 Concrobium Mold Control Concrobium Mold Control | No-bleach formula that also helps prevent regrowth. | Amazon — $13.48 |
 Mold Armor Mold & Mildew Remover Mold Armor Mold & Mildew Remover | Widely stocked bathroom/surface remover. | Amazon — $22.98 |