Brown Mold Removal: What Homeowners Need to Know
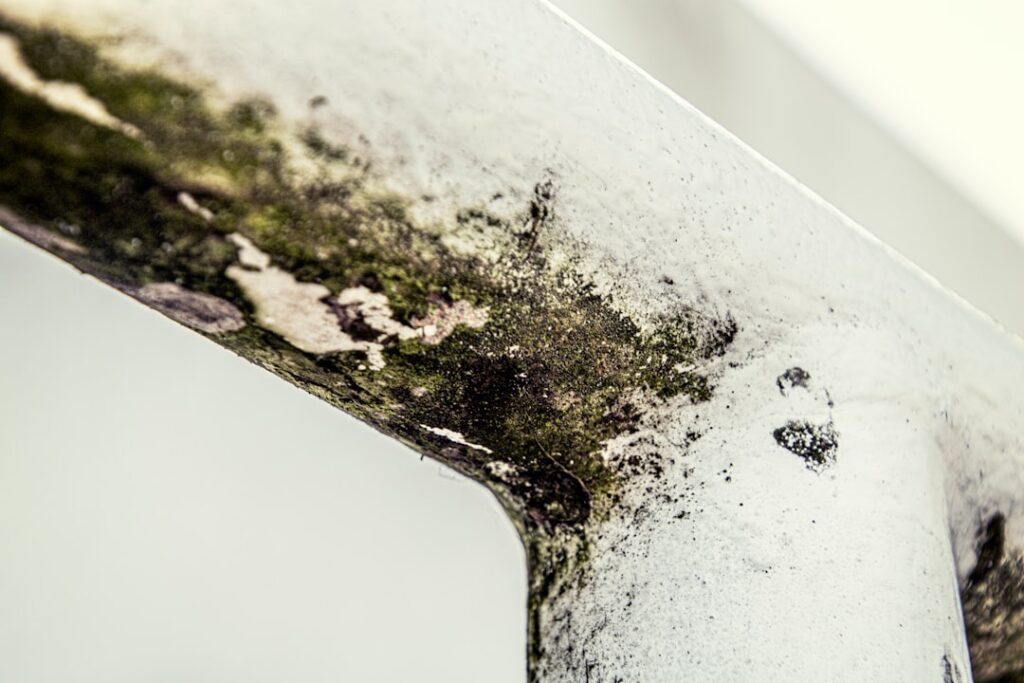
Brown mold removal is a different problem than removing the black or white surface molds homeowners hear about most often. The brown coloration usually points to one of two organism groups: Stemphylium species, which are allergenic surface molds that grow on damp wood and paper substrates, or brown-rot wood-decay fungi such as Serpula lacrymans and Coniophora puteana, which actively consume the structural cellulose in framing lumber. The remediation path looks similar at the cleaning stage but diverges sharply on structural questions. This guide summarizes EPA and CDC guidance current as of 2026 — consult a certified mold inspector for testing decisions and your physician for symptom evaluation. Knowing which brown organism you are looking at decides whether the next step is a sponge or a structural engineer.
Part of our Mold Removal & Remediation guide — start there for the full picture →
Is this mold, asbestos, or water damage? Get a free instant screen
Upload a clear photo of the suspect area. You'll get an instant AI screening opinion and what to do next. This is screening guidance, not a professional determination.
Screening guidance only. AI can be wrong. Confirm asbestos, mold type, or lead with lab testing or a licensed professional before acting.
What “brown mold” actually means
Brown is a color category that masks a wide range of organisms. On bathroom caulk, brown discoloration is often Cladosporium or Aureobasidium pullulans — surface yeasts and molds that respond to the same cleaning workflow as any other surface mold. On wood framing, brown growth more often indicates active decay fungi. The visual distinction matters: surface molds sit on top of the substrate and wipe off, while brown-rot fungi consume the wood from within and produce a characteristic cubical cracking pattern as the wood loses cellulose.
If brown discoloration on framing wipes off cleanly with a damp cloth and the underlying wood is firm when pressed with a screwdriver tip, the issue is most likely a surface mold. If the wood feels spongy, splits into cubes when probed, or has dried into a darker, lighter-weight, almost charcoal-like texture, the issue is decay. The remediation strategy for the second case must address structural capacity, not just appearance.
Brown surface mold: identification and cleanup
Stemphylium and other allergenic surface molds appear as soft brown to olive-brown patches on damp drywall paper, wallpaper, window sills, and damp wood that has not yet decayed. The growth pattern is typically thin, fuzzy, and confined to the surface. A moisture meter pressed into the affected drywall will usually read elevated, confirming the wetness that is feeding the colony.
EPA mold cleanup guidance applies directly here. For affected areas under ten contiguous square feet, homeowners can handle the work with the following workflow. Wear an N95 or P100 respirator, nitrile gloves, eye protection, and clothing that can be laundered hot or discarded. Contain the work area with plastic sheeting taped to floor and ceiling if the room is occupied. Mist the affected surface lightly with water to suppress spore release. Wipe with a detergent solution — plain dish soap and water works as well as branded mold cleaners — and follow with a clean rinse. HEPA-vacuum the surrounding area afterward. Dispose of cleaning rags in a sealed bag.
Brown-rot fungi: a structural problem, not a cleaning problem
Brown-rot fungi are wood-destroying organisms. The two most commonly encountered in residential settings are Serpula lacrymans, sometimes called dry rot despite requiring moisture to establish, and Coniophora puteana, often called cellar fungus. Both digest cellulose and hemicellulose in wood while leaving the brown lignin behind, which is the source of the color and the cubical fracture pattern.
Critical detail: brown-rot fungi can transport moisture through rhizomorphs — strand-like structures that extend across masonry and concrete — and continue growing in wood that appears dry at the time of inspection. This is why surface cleaning alone is the wrong response. The affected structural members must be assessed for residual capacity, the moisture source must be eliminated, and decayed wood must usually be removed back to sound material with a margin of safety.
The signs that move a brown-mold question from cleaning to structural assessment include cubical cracking of beams or joists, white or yellowish mycelium fanning out across nearby surfaces, sponge-like response to screwdriver probing, and noticeable mass loss in suspect lumber.
When to call a structural engineer
Several conditions move a brown-mold finding into structural engineer territory. The first is any decay on a load-bearing element — sill plates, floor joists, rim joists, beams, columns, posts, roof rafters, or load-bearing studs. The second is decay associated with foundation contact, where moisture pathways are typically chronic. The third is decay discovered during a pre-purchase inspection where the buyer needs a documented capacity analysis to inform negotiation. The fourth is decay covering more than a few linear feet of any single member.
A licensed professional engineer can evaluate the remaining capacity of partially decayed lumber, specify the extent of replacement needed, and detail the shoring and temporary support required during repair. This is not a job for a general handyman or even most remediation contractors working solo. The mold inspection and testing hub explains how inspectors typically flag structural concerns for engineering follow-up.
Step-by-step removal workflow
The workflow below assumes a surface brown mold finding that does not involve structural decay. For decay cases, jump to the engineering section and adapt cleanup to the contractor’s instructions.
Step 1: Identify and fix the moisture source
No remediation succeeds without this step. Common sources include roof leaks, plumbing leaks, basement seepage, condensation on cold walls, and undersized exhaust ventilation. A moisture meter and a methodical walk through the affected room usually identifies the path. Repairs must be completed before cleanup begins; otherwise the colony returns.
Step 2: Set up containment and personal protection
For small areas, a single plastic-sheet containment with painter’s tape works. For larger areas — over ten square feet — a negative-air HEPA scrubber and double-zipper entry are appropriate. Personal protective equipment scales with area: N95 respirator and nitrile gloves for small jobs, full-face respirator and Tyvek suit for larger ones.
Step 3: Suppress spore release and clean
Mist the affected surface with water from a spray bottle before disturbing it. Wipe with detergent solution. Avoid bleach on porous surfaces — the EPA does not recommend bleach for mold remediation on porous substrates because chlorine evaporates while the water carrier penetrates and feeds residual growth. Rinse and air dry.
Step 4: Remove unsalvageable porous materials
Drywall paper, ceiling tiles, carpet padding, and damp wallpaper that show brown growth on more than a few square inches usually cannot be saved. Cut affected drywall back to a stud line on either side of the visible damage and dispose of the cutout in a sealed bag.
Step 5: HEPA-vacuum and verify dryness
Vacuum the work area and surrounding floor with a HEPA-rated machine. Recheck moisture readings 48 hours later. A dry surface that stays dry is the validation that remediation succeeded; an ongoing wet reading means the moisture fix is incomplete.
What homeowners often get wrong with brown mold
Three errors recur in brown-mold cases. The first is treating decay like surface mold. Cleaning the visible brown off a decayed joist does nothing to restore structural capacity, and the next inspector will flag the same issue with a worse report. The second is using bleach on porous wood substrates; the carrier water deepens the moisture problem while the chlorine offgasses. The third is closing up a wall before verifying that the moisture source is corrected, which buries an active colony where it cannot be monitored.
A fourth pitfall is worth naming: misidentifying brown-rot fungi as a cosmetic issue and selling or refinancing a home without disclosure. State disclosure laws vary, but most require known material defects to be disclosed, and decayed framing usually qualifies. A consultation with a real-estate attorney is worth the cost when this situation arises during a transaction.
Health considerations for brown molds
Stemphylium and other allergenic surface molds can produce nasal congestion, eye irritation, cough, and asthma exacerbation in sensitized individuals. The CDC notes that mold sensitivity varies widely by individual, with some people experiencing significant respiratory symptoms while others have none at all. Anyone with persistent symptoms should consult a physician for evaluation before assuming the cause is mold.
Brown-rot fungi themselves are not commonly associated with significant respiratory allergy in the way that Alternaria or Cladosporium are, but the wet structural conditions they require typically support secondary growth of allergenic molds. For broader symptom context the mold and allergy explainer covers what symptom patterns look like and when to escalate to a clinician.
Costs and realistic timelines
Surface brown-mold remediation on a single ten-square-foot area typically runs $400 to $900 with a licensed remediator and one to two days of work. Larger surface areas scale roughly linearly. Brown-rot remediation involving structural replacement is a different cost category: engineering fees of $500 to $2,000 to scope the work, plus carpentry costs that vary by location and member size. A sill-plate replacement around the perimeter of a small home can reach $8,000 to $25,000 in 2026 dollars depending on access and shoring requirements.
The cost differential is exactly why correct identification at the front end matters. Misclassifying decay as surface mold is the single most expensive mistake homeowners make in this category — the cleanup gets done twice, and the second time happens after the structure has continued to lose capacity.
Prevention after the work is done
Three habits keep brown mold from returning. Maintain indoor relative humidity between 30 and 50 percent year-round. Inspect plumbing and roof penetrations annually for early leaks. Walk crawlspaces and basements once a quarter with a flashlight and moisture meter to catch problems before they become structural. Ground-contact wood near a foundation should be pressure-treated; existing untreated members in contact with damp soil are the highest-risk spots in any older home.
How brown mold differs from black, white, and green molds
Homeowners benefit from a quick mental color map even though color is a notoriously unreliable identifier. Black surface growth that wipes off bathroom caulk is usually Cladosporium or Aureobasidium, not Stachybotrys chartarum, despite the popular shorthand. White or pale gray fluffy growth on basement framing is often Aspergillus or Penicillium and shares the same cleanup workflow as brown surface mold. Green-blue patches on drywall paper are typically Penicillium. Brown sits in its own category mainly because of the brown-rot decay possibility — most other colors do not carry the same structural-decay risk profile.
The takeaway is not to trust color identification alone. Use color as a starting hypothesis, then confirm with substrate behavior, moisture readings, and where the disclosure stakes are high, laboratory species identification from a tape lift or surface swab.
Insurance and disclosure considerations
Most homeowners insurance policies cover sudden and accidental water damage and any mold that results from it, but exclude long-term seepage, gradual leaks, and ongoing maintenance failures. Brown-rot decay almost always falls into the excluded category because it requires sustained moisture over months or years. Policyholders should photograph and document the conditions before contacting the insurer and read the policy’s specific mold endorsement before assuming coverage applies.
For Front Range homeowners selling a property where brown mold or brown rot has been discovered, Colorado’s Seller’s Property Disclosure form requires disclosure of known material defects. Failing to disclose a known structural decay issue exposes the seller to legal liability after closing. The conservative approach is to remediate and obtain documentation before listing, or to disclose the condition clearly and price accordingly.
Choosing the right remediator
Not every contractor advertising mold work is qualified for brown-rot remediation. Look for IICRC certification — specifically the S520 standard for mold remediation — and ask for proof of liability insurance and workers compensation. For structural cases, the remediator should be working under the direction of a licensed professional engineer or general contractor with framing carpentry experience. Get three written estimates with specific scope language naming the affected members, the linear feet to be removed, and the post-work verification process.
Warning signs include scope language that promises to “treat” decayed wood with a spray-on biocide, vague pricing, refusal to provide containment and personal-protection details, and reluctance to coordinate with an engineer. Brown-rot fungi cannot be reliably killed in place; the standard of care is removal back to sound material with sufficient margin for spore expansion in adjacent lumber.
References
- Mold remediation reference for buildings — U.S. Environmental Protection Agency
- Mold cleanup recommendations for homes — U.S. Environmental Protection Agency
- Mold facts and health effects overview — Centers for Disease Control and Prevention
- Wood decay fungi reference — International Association of Certified Home Inspectors
Frequently asked questions
How do I tell brown mold from brown-rot fungi?
Press a screwdriver against the affected wood. Surface mold leaves the wood firm and only marks the surface. Brown-rot decay produces spongy or cubically cracked wood that breaks easily. The second case requires structural assessment, not just cleaning.
Is bleach the right cleaner for brown mold?
The EPA does not recommend bleach on porous wood or drywall. Detergent and water work as well for cleaning, and bleach's water carrier can deepen the moisture problem while the chlorine evaporates.
When does brown mold need a structural engineer?
Any decay on load-bearing elements — sill plates, joists, beams, posts, rafters — should be evaluated by a licensed professional engineer before repair. Surface brown mold without underlying decay does not require engineering input.
How much does brown-rot repair cost?
Engineering fees typically run $500 to $2,000 plus carpentry. Sill-plate replacement on a small home can reach $8,000 to $25,000 in 2026 dollars depending on shoring and access. Surface mold cleanup is far cheaper at $400 to $900 per small area.
If brown growth has appeared on framing lumber or sill plates and you are not sure whether it is surface mold or active decay, Front Range homeowners can request a connection to a vetted inspector through our contact page to triage the finding before bringing in a remediation contractor or engineer.
Mold removal & cleanup picks
For a small, contained patch (under ~10 sq ft) these EPA-friendly removers handle surface mold. Larger or recurring growth warrants a professional assessment first.
| Product | Why | Buy |
|---|---|---|
 RMR-86 Instant Mold Stain Remover RMR-86 Instant Mold Stain Remover | Fast-acting on stains; ventilate and wear PPE. | Amazon — $29.99 |
 Concrobium Mold Control Concrobium Mold Control | No-bleach formula that also helps prevent regrowth. | Amazon — $11.26 |
 Mold Armor Mold & Mildew Remover Mold Armor Mold & Mildew Remover | Widely stocked bathroom/surface remover. | Amazon — $22.98 |