Best Way to Get Rid of Mold On Walls: Substrate Decision Guide

The phrase “best way to get rid of mold on walls” hides a critical detail: the right method depends entirely on the substrate the mold is growing on and the depth the colony has reached. Surface mold on painted drywall responds to one approach. Mold that has penetrated the gypsum core needs a different one. Mold on wood framing behind drywall calls for a third. The wrong method for the wrong substrate either leaves contamination behind or destroys finishes that did not need to be removed. This guide summarizes EPA and CDC guidance current as of 2026 — consult a certified mold inspector for testing decisions and your physician for symptom evaluation. The decision framework below covers substrate identification, antimicrobial selection, DIY versus professional thresholds, and a cost comparison across realistic Front Range scenarios.
Part of our Mold Removal & Remediation guide — start there for the full picture →
Is this mold, asbestos, or water damage? Get a free instant screen
Upload a clear photo of the suspect area. You'll get an instant AI screening opinion and what to do next. This is screening guidance, not a professional determination.
Screening guidance only. AI can be wrong. Confirm asbestos, mold type, or lead with lab testing or a licensed professional before acting.
The first decision: what substrate is the mold on?
Walls in a typical American home break into five common substrate categories that each respond differently to mold remediation. Painted drywall with intact paper face — surface cleaning often works when contamination is shallow. Drywall with paper face already compromised (peeling, bubbled, or visibly stained) — the gypsum core may be colonized and the drywall section usually requires removal. Wood framing behind drywall — antimicrobial treatment after drywall removal, then verification before re-finishing. Painted surfaces over plaster (common in pre-1960 construction) — cleaning works on intact plaster but cracked or damaged plaster behaves like compromised drywall. And finishes over masonry (brick, block, concrete) — mostly cosmetic cleaning since porous masonry holds contamination but does not feed it the same way cellulose does.
Identifying substrate is step one. Mold that looks identical on the surface can require very different responses depending on what is below the visible growth. A homeowner who treats all wall mold with the same method either over-treats (tearing out drywall that could have been cleaned) or under-treats (cleaning a surface while leaving colonized core material in place).
Antimicrobial selection: what actually kills mold on walls
Four antimicrobial categories show up in wall-mold remediation. EPA-registered fungicidal cleaners (Sporicidin, Concrobium, BioCide 100) carry an EPA registration number on the label, are formulated specifically for mold remediation, and remain active on treated surfaces for hours after application. These are the professional standard for substrate treatment in mold remediation work. Hydrogen peroxide at 3% concentration (the standard drugstore strength) kills surface mold effectively on non-porous and semi-porous surfaces and breaks down to water and oxygen leaving no residue. Distilled white vinegar at full strength kills approximately 80 percent of common indoor mold species on non-porous surfaces but does not penetrate porous materials. Household bleach (sodium hypochlorite at 5-6 percent) kills surface mold and lightens stains but does not penetrate porous substrates and the EPA does not recommend it for mold remediation on cellulose-based materials.
The selection rule is straightforward. EPA-registered antimicrobials for substrate-penetrating treatment, especially on framing and other exposed wood. Hydrogen peroxide for surface-only cleaning on non-porous and semi-porous finishes. Vinegar for light cosmetic cleanup where damage tolerance is high. Bleach mostly for stain lightening after the underlying mold has been killed with one of the other agents, never as the primary remediation chemical on cellulose substrate.
The 10-square-foot threshold
EPA mold-remediation guidance establishes a clear threshold: contamination covering less than ten square feet of contiguous surface can be remediated by a homeowner using PPE (N95 respirator, gloves, eye protection) and standard antimicrobial cleaners. Contamination exceeding ten square feet, or any contamination in HVAC systems, should be remediated by a credentialed professional with containment, HEPA filtration, and post-cleanup verification. The threshold matters because cross-contamination from disturbed spores during DIY removal can spread an isolated problem across the home.
The ten-square-foot rule applies to visible contamination. Hidden contamination inside wall cavities or behind finishes can extend well beyond what is visible on the surface; the visible patch is sometimes a small fraction of the actual colony. A homeowner finding a one-square-foot visible patch with a strong musty odor and recent water-damage history should treat the situation as potentially exceeding the threshold and investigate before deciding DIY versus professional.
Substrate-by-substrate decision tree
For painted drywall with intact paper face and contamination under ten square feet, the workflow is: spray EPA-registered antimicrobial on the affected area and surrounding 12 inches of clear surface, let dwell per label instructions (typically 10 minutes), wipe with a clean cloth, and apply a second coat. Allow to dry fully. Sand and repaint with a quality primer-sealer (Kilz Mold & Mildew or similar) to seal any residual stain and prevent regrowth.
For drywall with compromised paper face (peeling, bubbled, stained) or for contamination exceeding two square feet on drywall, the workflow shifts to removal. Cut out the contaminated drywall plus at least 12 inches of clear margin in each direction, bag the debris in 6-mil polyethylene, and treat the exposed cavity and framing with EPA-registered antimicrobial. Allow framing to dry to under 16 percent moisture content (confirmed with a moisture meter) before installing new drywall.
For wood framing exposed by drywall removal, surface-clean with HEPA vacuuming, then apply EPA-registered antimicrobial per label, let dwell, and either wire-brush stubborn growth or sand lightly before re-treating. Verify with a moisture meter that framing reads under 16 percent before closing the cavity. For wallpaper-covered walls, remove the wallpaper to expose substrate and treat per substrate type identified beneath. For painted masonry, surface-clean with EPA-registered antimicrobial; masonry rarely needs removal because porous masonry does not feed mold growth the way cellulose substrate does.
DIY workflow for under-10-square-feet wall mold
Step one: put on PPE — N95 respirator, nitrile gloves, eye protection, old long-sleeve clothing you can dispose of after work. Open windows in adjacent rooms if possible and close doors to non-affected rooms to limit spore spread. Step two: spray the affected area and surrounding margin with EPA-registered antimicrobial. Let dwell per label. Wipe with clean disposable cloths and bag the cloths immediately in a sealed trash bag.
Step three: inspect the wall after the first cleaning. If staining persists, apply a second antimicrobial coat. If the paper face is intact and growth has lifted, allow to dry fully (24-48 hours), then sand lightly and prime with a mold-resistant primer. Step four: photograph the cleaned area before painting, dispose of all rags, gloves, and PPE in sealed bags, and shower and change clothes before leaving the work zone. Re-inspect at 30 days and 90 days for any signs of regrowth. The InspectandTest mold inspection hub covers verification steps for the post-cleanup period.
Cost comparison: DIY versus professional wall-mold remediation
DIY remediation for under-10-square-feet wall mold runs $50-$200 in supplies — EPA-registered antimicrobial ($30-$60 per gallon), PPE kit ($20-$40), disposable cloths and bagging ($15-$25), and primer-sealer plus paint for finishing ($40-$80). Time investment runs four to eight hours including cleanup and finishing. The DIY path makes financial sense for clearly bounded surface contamination on non-load-bearing walls.
Professional remediation costs in Front Range markets vary by scope. Small contained jobs (10-30 square feet, single room, no HVAC involvement) run $1,500-$3,500. Mid-size jobs requiring drywall removal, framing treatment, and one room of containment run $3,500-$8,000. Larger jobs with multiple rooms, structural drying, or HVAC remediation run $8,000-$20,000 or more. Professional pricing typically includes pre-remediation testing, the remediation work itself, and post-remediation verification air sampling.
The price gap between DIY and professional reflects the cost of containment, HEPA-filtered negative-pressure equipment, certified labor (IICRC mold remediation credential), and verification testing. For under-10-square-feet contamination on accessible substrate, DIY is genuinely cost-effective. For anything larger, the professional cost is justified by containment that prevents cross-contamination during the work.
Moisture-source identification: the step that prevents recurrence
Remediation without moisture-source identification almost always fails within months. Five common moisture sources drive wall-mold recurrence in Front Range homes. Slow plumbing leaks behind bathroom and kitchen walls — pin or pinless moisture meter readings on the wall confirm. Foundation moisture migrating through below-grade walls — readings climb at floor-wall junction. Condensation behind insulation in poorly insulated exterior walls during winter — thermal imaging finds the cold spots. Roof or window leaks dripping into wall cavities — staining patterns point upward to the source. And humidity from inadequate bath or kitchen ventilation soaking into walls over years — whole-room hygrometer logging reveals the pattern.
Identifying and correcting the moisture source matters before final remediation finish. A moisture meter reading the affected framing should sit under 16 percent before the cavity is closed. A hygrometer in the room should show sustained readings under 50 percent for at least a week before declaring success. Skipping these checks turns the remediation into a temporary patch that re-fails in the next high-humidity season.
When the wall mold problem is bigger than it looks
Several signs indicate that visible wall mold represents a larger problem than the surface suggests. Strong musty odor radiating from a small visible patch suggests significant hidden growth. Visible growth on multiple walls in the same room suggests room-scale humidity or HVAC contamination. Soft or bubbling drywall around the visible patch suggests gypsum-core penetration. Black staining bleeding through subsequent paint coats indicates ongoing colony activity below the surface. Occupants reporting worsening respiratory symptoms in the affected room suggests airborne spore release that needs Air-O-Cell sampling to characterize.
Each of these triggers warrants stepping back from DIY and consulting a credentialed inspector before proceeding. The cost of an inspection ($400-$800) is small relative to the cost of an underspecified DIY remediation that fails and requires professional work later anyway. The how-to-find-the-source-of-mold-in-your-home guide covers signs that the visible problem is the tip of a larger iceberg.
Choosing the right antimicrobial product
EPA-registered antimicrobials with proven mold-remediation track records include Sporicidin Disinfectant Solution (phenolic-based, broad spectrum), Concrobium Mold Control (trisodium phosphate-based, leaves a thin invisible film that resists regrowth), BioCide 100 (chlorine dioxide-based), and Fiberlock ShockWave (quaternary ammonium-based, common in professional remediation). Each carries an EPA registration number visible on the product label; that registration is the homeowner’s confirmation that the product was tested and approved for the claims on the label.
Avoid products that make broad antimicrobial claims without an EPA registration number. Avoid combining bleach with vinegar or ammonia — the chemistry produces toxic chlorine gas. Avoid spraying any antimicrobial in unventilated spaces without respirator PPE. And avoid products marketed primarily as “fragrance” or “deodorizers” that promise mold control without antimicrobial active ingredients; those products mask odor but do not kill the underlying organism.
When to call a professional for wall mold
Six conditions argue for professional remediation rather than DIY. Visible growth exceeding ten square feet of contiguous wall surface. Mold inside HVAC ducts or on supply registers (any duct work requires professional containment). Confirmed Stachybotrys chartarum on a lab report. A water-damage event where wall materials sat wet for more than 48 hours. Occupants with diagnosed mold allergy, asthma, or immunocompromised status. And any wall mold in a real-estate transaction where the inspection contingency requires documented professional remediation for closing.
Front Range homeowners weighing DIY versus professional wall-mold remediation can use the InspectandTest contact page for a connection to a vetted local IICRC-credentialed remediation contractor or mold inspector. Browse the how-to-eradicate-mold remediation overview for additional context on remediation workflow and verification.
Post-remediation verification steps
Verification matters because mold remediation done correctly produces a measurable result that homeowners can confirm before closing the cavity or repainting. Three verification steps apply across most wall-mold remediation projects. First, visual clearance — the work zone should be free of visible growth, free of dust and debris, and the surrounding materials should appear consistent in color and texture. Photograph the cleaned surface with adequate lighting. Second, moisture clearance — moisture meter readings on adjacent framing and substrate should sit at or below baseline (under 16 percent for wood, under 12 percent for drywall). Document the readings. Third, air-sampling clearance for larger remediation projects — an Air-O-Cell sample taken inside the remediated zone should produce indoor spore counts comparable to outdoor reference levels, with no dominance of water-damage-indicator species like Stachybotrys.
For DIY-scope remediation under ten square feet, the visual and moisture clearance steps suffice. Larger projects warrant the third step (post-remediation air sampling) and many professional contracts include it in the scope. The clearance step protects the homeowner against latent regrowth and supports any future buyer-seller disclosure conversations.
Material disposal and cross-contamination prevention
Disposing of contaminated materials correctly matters as much as the chemistry of the treatment. Removed drywall sections, cleaning rags, used PPE, and any porous materials touching the contamination should be double-bagged in 6-mil polyethylene and sealed before exiting the work zone. The exterior of the bag should be wiped with antimicrobial cleaner before moving the bag through the home. Dispose with household trash unless local jurisdiction requires separate handling — most municipalities in the Front Range allow bagged remediation debris in standard trash collection.
Cross-contamination prevention during the work matters most for under-10-square-foot DIY projects where homeowners are tempted to skip containment. A simple plastic sheeting drape from ceiling to floor across the doorway of the affected room, with a small opening sealed by painter’s tape between visits, reduces spore migration into adjacent rooms. Run a HEPA-filtered room air purifier in the work zone during and after work. Shower and change clothes immediately after exiting the work zone. These steps keep the disturbance contained to the room rather than spreading spores throughout the home.
Front Range climate considerations for wall mold work
Colorado’s semi-arid climate affects wall-mold remediation in three ways homeowners should plan for. Outdoor air typically runs drier than indoor air during winter heating months, so opening windows during remediation work helps lower indoor humidity. Spring snowmelt months bring increased basement and below-grade wall moisture; remediation work timed for late spring through early summer often catches moisture sources at their most active and easier to identify. Summer thunderstorm season can introduce sudden humidity spikes that prolong drying times — running a dehumidifier during summer remediation work can shorten the dwell-and-dry cycle by twelve to twenty-four hours.
Front Range mid-century homes also tend to have specific construction patterns worth noting. Plaster-over-lath walls in pre-1960 Denver and Boulder homes respond differently than modern drywall — plaster damage from mold often extends into the lath wood substrate, which requires removal of the affected plaster section rather than surface cleaning. Newer construction (post-1990) typically uses paper-faced drywall throughout; the paper face is the most vulnerable layer and the first to require removal when growth is more than superficial.
References
- EPA: Mold Remediation in Schools and Commercial Buildings Guide — U.S. Environmental Protection Agency
- CDC: About Mold — U.S. Centers for Disease Control and Prevention
- InterNACHI: Mold Inspection Standards — International Association of Certified Home Inspectors
- NIEHS: Mold and Health — National Institute of Environmental Health Sciences
Frequently asked questions
What is the best chemical for getting rid of mold on walls?
EPA-registered antimicrobials like Sporicidin, Concrobium, or BioCide 100 are the professional standard for substrate treatment. Hydrogen peroxide at 3 percent works for surface-only cleaning on non-porous finishes. Vinegar handles light cosmetic cleanup. Bleach is mostly cosmetic on porous surfaces and not recommended on cellulose substrates.
Can you remove mold from walls without removing drywall?
Yes, when contamination is limited to the paper face and under ten square feet on intact drywall with no signs of gypsum-core penetration. Cleaning with EPA-registered antimicrobial plus mold-resistant primer-sealer is effective. Compromised or bubbled drywall requires removal.
How much does professional wall mold removal cost?
Small contained jobs run $1,500-$3,500 in Front Range markets. Mid-size jobs requiring drywall removal and framing treatment run $3,500-$8,000. Larger multi-room or HVAC-involved jobs run $8,000-$20,000 or more, including pre-testing and post-verification.
What is the 10 square foot rule for mold remediation?
EPA guidance says contamination under ten square feet of contiguous surface can be DIY-remediated with PPE and antimicrobial cleaners. Anything larger, plus any HVAC contamination, should be handled by a credentialed professional with containment and HEPA filtration.
Front Range homeowners facing wall mold beyond simple surface cleaning, or with hidden moisture-source concerns, can reach out through our contact page for a connection to a vetted Denver, Boulder, Douglas, or Jefferson County inspector or IICRC-credentialed remediation contractor.
Mold removal & cleanup picks
For a small, contained patch (under ~10 sq ft) these EPA-friendly removers handle surface mold. Larger or recurring growth warrants a professional assessment first.
| Product | Why | Buy |
|---|---|---|
 RMR-86 Instant Mold Stain Remover | Fast-acting on stains; ventilate and wear PPE. | Amazon — $29.99 |
 Concrobium Mold Control | No-bleach formula that also helps prevent regrowth. | Amazon — $11.26 |
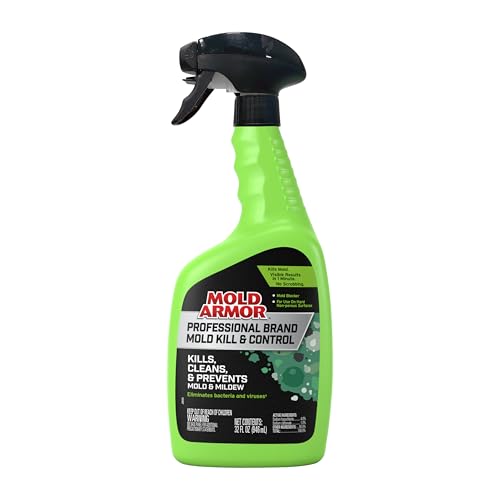 Mold Armor Mold & Mildew Remover | Widely stocked bathroom/surface remover. | Amazon — $22.98 |