How to Get Rid of Mold On Wall: A Plain-Language Guide
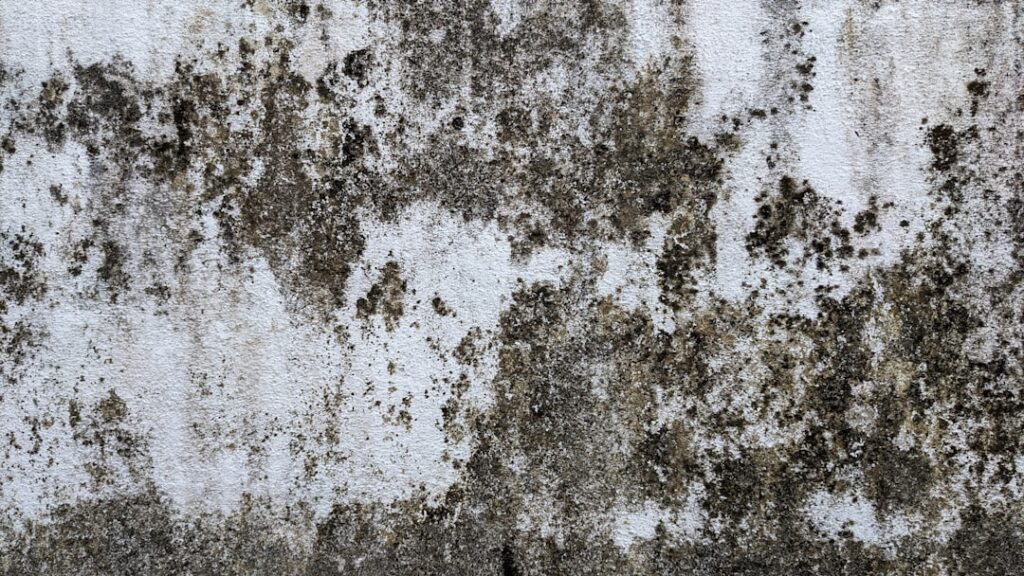
Mold on an interior wall is unsettling because walls are everywhere you look and often hide more behind them. A spreading gray patch near a window, a dark bloom behind furniture, or a stain on a painted surface all prompt the same question: how do you actually get rid of it without making things worse? This guide explains how to get rid of mold on wall surfaces, which materials you can clean and which you must replace, and when the job needs a professional. It summarizes EPA and CDC guidance current as of 2026; consult your physician for symptoms and a certified professional for testing or large-scale removal decisions.
Is this mold, asbestos, or water damage? Get a free instant screen
Upload a clear photo of the suspect area. You'll get an instant AI screening opinion and what to do next. This is screening guidance, not a professional determination.
Screening guidance only. AI can be wrong. Confirm asbestos, mold type, or lead with lab testing or a licensed professional before acting.
How to Get Rid of Mold On Wall Surfaces
The right approach depends on the wall material. A painted wall in good condition with surface mold can often be cleaned, while drywall whose paper or gypsum is colonized usually needs to be cut out and replaced. The EPA says small areas of mold on hard surfaces, generally under about 10 square feet, can be cleaned by a homeowner with detergent and water followed by thorough drying.
For a cleanable painted wall, ventilate the room and wear an N-95 respirator, gloves, and goggles. Apply detergent and water or undiluted white vinegar, let it dwell, then gently scrub the mold. Wipe the surface clean and dry it completely with a fan. Avoid soaking the wall, since saturating drywall can damage it and feed deeper growth. Work in small sections to keep spores from spreading.
Before cleaning, identify the moisture source, because the EPA stresses that growth returns if the water problem persists. Mold on a wall often points to condensation, a leak, or high humidity nearby. The mold inspection and testing hub explains how professionals trace those sources when they are not obvious.
Cleaning Painted Walls
Painted drywall is the most common wall mold scenario, and the outcome hinges on how deep the mold has gone. If the growth sits on top of intact paint and the wall feels firm, surface cleaning usually succeeds. Apply your cleaner, scrub gently, wipe, and dry. The CDC notes bleach is not always necessary; soap and water or vinegar handle many cases.
If you choose to use bleach, the EPA recommends no more than one cup of household bleach per gallon of water, applied in a ventilated room and never mixed with other cleaners. After cleaning, watch the spot for several days. Mold that returns quickly indicates the moisture source is still active or the growth has penetrated below the paint, both of which change the plan.
When the Wall Is Drywall and Mold Has Penetrated
Drywall is porous, and once mold gets past the paint into the paper backing or gypsum core, surface cleaning accomplishes little. Signs of penetration include a soft or crumbly feel, brown water staining, bubbling paint, and mold that reappears within days of cleaning. In these cases the EPA recommends removing and replacing the affected drywall.
Cutting out the compromised section also reveals what is behind it. Mold inside an exterior wall often traces to condensation against cold sheathing, a roof or window leak, or a plumbing line in the cavity. Addressing that hidden source is the real fix; replacing the drywall without it just resets the clock. The guide on how to clean mold covers the line between a wipeable surface and a compromised one.
What You Should Discard
Some materials around a moldy wall cannot be salvaged. The EPA recommends discarding heavily contaminated porous items: water-damaged drywall, insulation inside the wall cavity, and any carpet, fabric, or cardboard that absorbed moisture against the wall. Surface cleaning leaves living mold inside these materials.
Bag contaminated debris in plastic before carrying it out, to avoid scattering spores through the home. Hard, non-porous items near the wall, baseboards if sealed, furniture with hard surfaces, can usually be wiped clean. The judgment about what to keep and what to discard often determines whether the problem actually goes away.
Why Mold Grows on Walls
Wall mold traces back to moisture reaching the surface or the cavity. Condensation forms on cold exterior walls, especially behind furniture that blocks airflow or near poorly insulated corners. Leaks from windows, roofs, and plumbing soak the wall from within. High indoor humidity raises the baseline so that even minor cold spots grow mold.
Window areas are a frequent trouble spot because condensation collects on cold glass and frames and wicks into the surrounding wall. Identifying whether your wall mold is condensation, a leak, or humidity determines the durable fix. The guide on black mold on windows covers the condensation pattern that often spreads to adjacent walls.
What Not to Do
Do not paint over wall mold; the coating traps moisture and growth continues underneath, eventually bleeding through the new paint. Do not use a dry brush or a shop vacuum without a HEPA filter, since both fling spores into the air. Do not rely on bleach as a permanent cure, because it treats the surface but not the moisture.
Never mix cleaning chemicals, and do not disturb large areas of growth without protection. If the mold covers more than about 10 square feet, sits inside the wall cavity, or followed flooding, stop and call a professional. Pressing on with DIY in these situations risks spreading spores and missing the real source.
Preventing Mold From Returning to the Wall
Getting rid of wall mold is only durable if the conditions that grew it change. The first priority is the moisture source, whether that is a leak, condensation, or high indoor humidity. Keep relative humidity below 50 percent, the EPA’s recommended ceiling, using a dehumidifier in damp rooms and confirming the number with an inexpensive hygrometer rather than guessing.
A few practical habits help. Pull furniture a few inches away from cold exterior walls so air can circulate and condensation does not collect behind it. Improve ventilation in chronically humid rooms, insulate cold spots that sweat, and address leaks within 24 to 48 hours. When repainting a previously moldy wall, a mold-resistant primer and paint add a measure of protection. None of this replaces fixing the underlying water problem, but combined with that fix, these steps keep a cleaned wall clear for good.
Mold on Different Wall Types
Walls are not all the same, and the material dictates the approach. Painted drywall is the most common interior wall and the trickiest, because the paint may be cleanable while the gypsum behind it is vulnerable; surface mold on intact paint cleans up, but penetration means replacement. Plaster walls, found in older homes, are denser and somewhat more forgiving, though a soft or crumbling area still signals trouble.
Tile and other non-porous wall surfaces in kitchens and bathrooms clean easily, since mold sits on top and scrubs away. Wood paneling and unfinished wood are porous and absorb moisture, so growth can root in and may require sanding or replacement of badly affected boards. Concrete and masonry walls, common in basements, tolerate scrubbing but hold moisture and need extra drying. Identifying your wall type before choosing a method avoids both wasted effort on a surface that needs replacing and unnecessary demolition of one that only needed a wipe. The guide on removing mold from basement walls covers masonry surfaces specifically.
Choosing the Right Cleaner for a Wall
The cleaner you use on a wall should match the paint and the severity of growth. For surface mold on intact, washable paint, soap and water or white vinegar is gentlest and usually sufficient. White vinegar, sprayed undiluted and left to dwell for an hour, kills many surface molds without harsh fumes and is a sensible default for a painted interior wall.
A diluted bleach solution, one cup per gallon, removes both growth and staining more aggressively, but bleach can lighten or damage colored paint and produces stronger fumes, so test an inconspicuous spot first and ventilate well. Hydrogen peroxide at around 3 percent is a milder stain-lifter. Avoid soaking any painted drywall, since saturation damages the surface and drives moisture into the gypsum. And never combine bleach with vinegar or ammonia. Matching the cleaner to the wall prevents both an ineffective wipe on stubborn growth and needless paint damage on a minor patch.
How to Tell If Mold Has Spread Behind the Wall
The hardest part of wall mold is judging what lies out of sight. Several clues suggest the growth extends into the cavity rather than sitting on the surface. A musty smell stronger than the visible patch would explain, paint that bubbles or peels, drywall that feels soft or cool and damp, and staining that bleeds through after cleaning all point to hidden moisture and possible cavity growth.
Mold that reappears within days of a thorough cleaning is another strong signal, since surface treatment cannot resolve a problem rooted behind the wall. In these cases, cleaning the face accomplishes little, and the cavity must be opened to assess the extent and dry the structure. A moisture meter can reveal elevated readings in a wall that looks dry, and professionals use thermal imaging to map hidden dampness. The guide on black mold in the ceiling covers similar hidden-moisture clues where walls meet ceilings.
Repairing and Repainting After Removal
Once mold is removed and the wall is dry, restoration can begin, but the sequence matters. Confirm the surface is fully dry with a moisture meter before any repair, because painting over residual dampness traps moisture and invites regrowth. If drywall was cut out, the cavity and framing must be dry before new board goes in, ideally moisture-resistant drywall in chronically damp locations.
For a cleaned painted surface, prime with a stain-blocking, mold-resistant primer before repainting, which helps prevent old staining from bleeding through and adds a measure of resistance. Use a quality paint, and in humidity-prone rooms consider a mold-resistant formulation. Crucially, none of this substitutes for fixing the moisture source; a beautiful new coat over an unresolved leak will fail. Repair is the final step in a sequence that begins with finding the water, not a shortcut around it. The guide on how to clean mold reinforces why moisture control underpins every durable repair.
When to Call a Professional
Professional help makes sense when wall mold covers more than about 10 square feet, when it has penetrated drywall or spread inside the cavity, when a musty smell has no visible source, or when growth follows a leak or flood. The EPA recommends professional remediation with containment in these cases to prevent spreading spores to clean areas.
Anyone with asthma, allergies, or a weakened immune system should avoid doing wall mold cleanup. A qualified inspector can detect hidden moisture with meters and thermal imaging and define the extent of growth, while a remediation contractor removes contaminated material and verifies the result. For a modest patch on a sound painted wall, careful cleaning plus fixing the moisture source usually resolves the problem for good. The deciding factors are the same ones that govern every mold cleanup: the size of the area, the type of surface, the water source behind it, and the health of the people doing the work. Weigh those honestly, and the choice between a weekend cleanup and a professional call becomes clear.
References
- Mold Cleanup in Your Home — U.S. Environmental Protection Agency
- A Brief Guide to Mold, Moisture and Your Home — U.S. Environmental Protection Agency
- About Mold and Health — Centers for Disease Control and Prevention
- Mold and Your Health — Colorado Department of Public Health and Environment
If wall mold keeps returning and you suspect moisture inside the wall, we can connect Front Range homeowners with a vetted local inspector to find the source. Reach out through our contact page to get started.
Mold removal & cleanup picks
For a small, contained patch (under ~10 sq ft) these EPA-friendly removers handle surface mold. Larger or recurring growth warrants a professional assessment first.
| Product | Why | Buy |
|---|---|---|
 RMR-86 Instant Mold Stain Remover RMR-86 Instant Mold Stain Remover | Fast-acting on stains; ventilate and wear PPE. | Amazon — $18.38 |
 Concrobium Mold Control Concrobium Mold Control | No-bleach formula that also helps prevent regrowth. | Amazon — $13.48 |
 Mold Armor Mold & Mildew Remover Mold Armor Mold & Mildew Remover | Widely stocked bathroom/surface remover. | Amazon — $22.98 |