How to Get Rid of Mold on Walls: A Full Guide
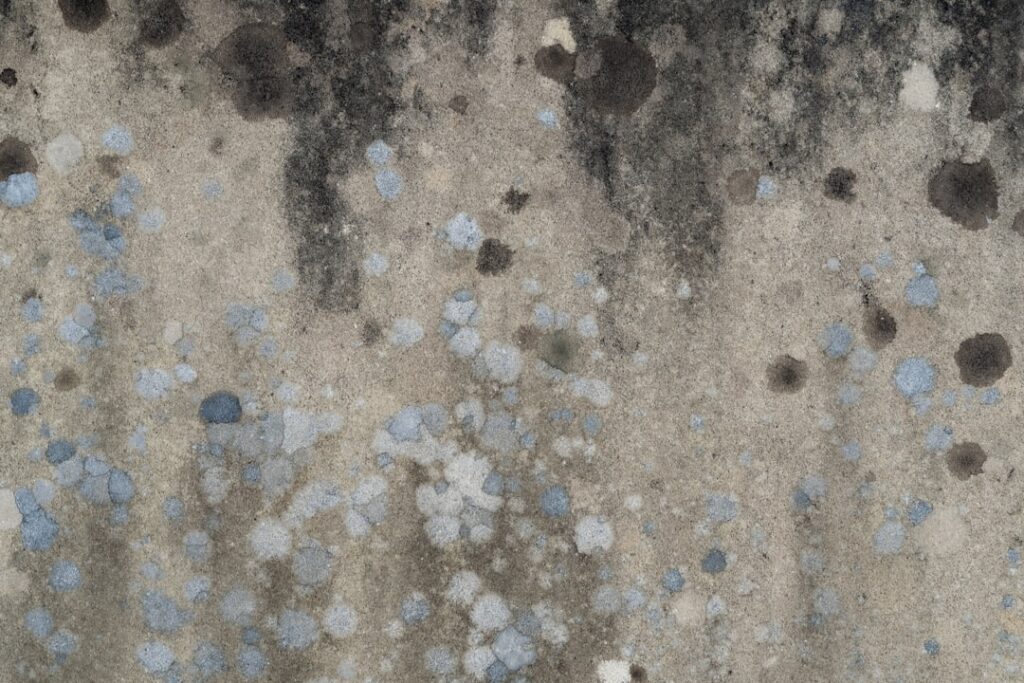
Mold on a wall is both a cosmetic eyesore and a signal that water is reaching a surface it should not. Getting rid of it well takes more than wiping the stain. The full process runs through five stages: assess the extent, contain the area so spores do not spread, clean or remove the affected material, dry everything thoroughly, and prevent the moisture that caused it from returning. Skip any stage and the mold either spreads during cleanup or grows back afterward. This guide walks through how to get rid of mold on walls step by step, including the line between a DIY job and one that needs a professional. It summarizes EPA and CDC guidance current as of 2026; consult your physician about symptoms and a certified professional for serious contamination.
Part of our Mold Removal & Remediation guide — start there for the full picture →
Is this mold, asbestos, or water damage? Get a free instant screen
Upload a clear photo of the suspect area. You'll get an instant AI screening opinion and what to do next. This is screening guidance, not a professional determination.
Screening guidance only. AI can be wrong. Confirm asbestos, mold type, or lead with lab testing or a licensed professional before acting.
Step 1: Assess the Extent
Before touching anything, judge how big and how deep the problem is. Surface area is the first measure. The EPA’s general guideline is that a contained patch under about 10 square feet is usually manageable for a homeowner, while larger areas warrant professional remediation. Depth is the second measure. Press the wall: if it feels soft, spongy, or crumbles, the material is compromised and growth has gone beyond the surface. Look for the moisture source too, since a wall that is actively wet from a leak needs that repair before any cleaning makes sense.
Reading the Wall Before You Touch It
The assessment in Step 1 rewards a closer look at what the wall is telling you. Color and texture offer clues, though they do not identify the exact organism, and the CDC notes that species identification rarely changes the cleanup response. More useful is the pattern. A patch confined to one spot suggests a localized source like a pipe or a cold bridge, while growth spread across a wall or several walls points to broader humidity. Growth low on a basement wall after wet weather suggests seepage; growth high or on a ceiling suggests a leak from above.
Texture and firmness tell you about depth. Surface growth on intact paint usually wipes off and indicates a cleanable problem. Growth on a wall that feels soft, bubbled, or crumbling indicates the material is compromised and the colony has gone into the substrate, which moves the job from cleaning to removal. A musty smell with no visible mold is a signal that growth is hidden inside the cavity. Reading these signs before you start shapes the whole plan, telling you whether you are cleaning a surface or about to open a wall, and whether the scope is within DIY range at all.
Step 2: Contain the Area
Disturbing mold releases spores into the air, and the goal is to keep them in one room. Close doors to other parts of the home. Cover vents and open a window to the outdoors for fresh air, but do not run a fan that blows across the moldy wall toward clean living spaces. For larger patches, hang plastic sheeting to seal the work zone. The CDC and EPA recommend protective equipment at this stage: an N95 respirator, gloves that cover the forearm, and sealed eye protection. People with asthma, allergies, or weakened immune systems should not be in the room during the work.
Step 3: Clean or Remove
What you do here depends entirely on the surface, a decision our guide to the best way to remove mold from walls by surface breaks down in detail.
Cleanable Surfaces
Painted, sealed, tile, glass, and metal walls are nonporous or semi-porous and can usually be cleaned and kept. Lightly mist the area to reduce spore release, wipe with a detergent solution, scrub gently, and follow with a disinfecting cleaner if you choose. The CDC notes that for hard surfaces, soap and water or a commercial cleaner is generally sufficient.
Porous Material
Unpainted or saturated drywall, ceiling tile, insulation, and carpet absorb mold into their structure. The EPA advises removing and replacing porous materials that stay contaminated, because cleaning cannot reach embedded growth. Cut out and bag the affected drywall rather than trying to scrub it clean.
Choosing the Right Cleaner for the Wall
The cleaner you reach for in Step 3 should suit the surface and the staining. For a painted or sealed wall, detergent and water lifts most surface growth, and a disinfecting cleaner or household-strength hydrogen peroxide follows for the staining, with peroxide being the lower-odor option for occupied rooms. For tile and glass, a bleach-based or commercial mold cleaner clears nonporous surfaces quickly. For grout, a clinging gel or a spray with a brush reaches into the porous lines.
Whatever the product, technique decides the result. Pre-clean grease and soap scum so the cleaner binds to mold rather than soil. Respect the contact time on the label rather than wiping immediately. Never mix products, since bleach with ammonia or acids releases toxic gas. And remember the EPA’s caveat that dead mold can still cause reactions, so the residue must be physically removed, not left in place. A correctly chosen cleaner used with the full contact time clears the wall in one pass, while the wrong product or a rushed application leaves a shadow that tempts a second, stronger attempt.
Step 4: Dry Everything Thoroughly
Drying is the stage homeowners rush and regret. Any residual moisture invites regrowth within days. Use fans and a dehumidifier to bring the wall and surrounding air well below the dampness that supports mold. The EPA recommends drying wet materials within 24 to 48 hours. Confirm the wall is genuinely dry, not just dry to the touch, before closing up the area or repainting. A moisture meter gives a more honest reading than your hand.
Verifying the Wall Is Truly Dry
The drying stage deserves more rigor than it usually gets, because a wall that feels dry can still hold enough moisture to restart growth. The surface dries faster than the material behind it, so a quick touch test gives a false sense of completion. The honest check is a moisture meter, which reads the actual moisture content of the wall material rather than the surface film. Comparing the reading at the cleaned spot to a known-dry area of the same material tells you whether drying is genuinely complete.
Time and airflow do the work. Running fans and a dehumidifier for a day or more, with the EPA’s 24-to-48-hour window as a guide, brings most walls down to a safe level, though thicker materials and cooler rooms take longer. Resist the urge to repaint or close up the area until the meter confirms dryness, since sealing in residual moisture is a common cause of recurrence that appears weeks later as a fresh stain. Verifying dryness with a tool, not a hand, is the small discipline that protects all the earlier work.
Step 5: Prevent Recurrence
The final stage is what makes the work last. Mold returns whenever moisture does, so eliminating the water source is the real cure. The EPA’s guidance is unambiguous: mold control is moisture control. Keep indoor humidity between 30 and 50 percent, repair leaks within a day or two, run exhaust fans in bathrooms and kitchens, and improve airflow and insulation on cold exterior walls. Understanding what causes mold on walls in a house helps you target the specific source behind your situation.
DIY Versus Professional: Where the Line Sits
The threshold is both size and circumstance. Handle it yourself when the affected area is under about 10 square feet, the surface is cleanable, the water source is obvious and fixable, and no one in the home has a mold-related health condition. Call a professional when the area is larger, when mold has spread inside wall cavities or HVAC ducts, when sewage or flood water was involved, or when an occupant is medically vulnerable. A remediation contractor sets up containment, uses HEPA filtration and negative air pressure, and removes contaminated material safely. The mold inspection and testing hub explains how a pre-remediation assessment confirms the true extent so you are not tearing out material that could have been cleaned.
Tools and Supplies You Will Need
Gathering the right supplies before starting keeps a mold cleanup contained and efficient. For protection, you need an N95 respirator, forearm-length gloves, and sealed goggles. For containment, plastic sheeting and painter’s tape seal the work zone, and heavy-duty bags hold removed material. For cleaning, a detergent, a disinfecting cleaner suited to the surface, microfiber cloths, and a stiff brush handle the growth. A spray bottle of water lets you mist the area first to reduce airborne spores.
For the drying stage, fans and a dehumidifier are essential, and a moisture meter gives an honest reading of when the wall is truly dry rather than dry to the touch. If porous material must come out, a utility knife, a pry bar, and patching materials round out the kit. Assembling everything in advance means you are not leaving a partly disturbed moldy wall to run to the store, which is exactly when spores spread. A complete kit also signals whether the job is within DIY range; if the supply list starts to look like a remediation operation, that is a sign to call a professional.
Mistakes That Make Wall Mold Worse
Several well-intentioned actions backfire. Painting over mold hides it briefly while the growth continues beneath and eventually bleeds through; the wall must be cleaned and dried first. Scrubbing dry mold aggressively without misting first sends a cloud of spores into the air and across the home. Running a box fan pointed at the moldy wall to “air it out” spreads spores into clean rooms rather than removing them. Soaking a porous wall with cleaner drives moisture inward and feeds the next bloom.
The biggest mistake is treating the stain and ignoring the water. A wall cleaned without fixing the leak, condensation, or humidity behind it is guaranteed to mold again, often in weeks. Another frequent error is underestimating the extent, cleaning a visible patch while a larger hidden colony grows inside the cavity. When growth keeps returning or feels larger than it looks, that is the signal to stop guessing and have the moisture source professionally diagnosed rather than repeating a cleanup that cannot succeed.
Front Range Considerations
Wall mold in Colorado is usually an indoor-moisture story, not a wet-climate one. Below-grade basements, weakly ventilated bathrooms, and cold exterior walls where winter condensation forms are the common culprits in Denver-area homes. Evaporative coolers and humidifiers can raise indoor humidity past the 60 percent line the EPA flags as risky. Matching the fix to the regional source is what keeps a cleaned wall clean.
References
- Mold Cleanup in Your Home — U.S. Environmental Protection Agency
- You Can Control Mold — Centers for Disease Control and Prevention
- A Brief Guide to Mold, Moisture and Your Home — U.S. Environmental Protection Agency
Frequently asked questions
What is the first step to getting rid of mold on walls?
Assess the extent. Measure the area and check whether the wall is soft or compromised. The EPA suggests a patch under about 10 square feet on a cleanable surface is manageable DIY, while larger or deeper growth warrants a professional.
Do I need to remove drywall to get rid of mold?
If mold has penetrated the drywall paper or the board is soft, yes. The EPA advises removing and replacing porous materials that stay contaminated, because cleaning cannot reach embedded growth. Painted drywall with surface mold can sometimes be wiped.
How long should I dry a wall after cleaning mold?
Dry thoroughly within 24 to 48 hours using fans and a dehumidifier. Residual moisture restarts growth. Confirm the wall is genuinely dry with a moisture meter, not just dry to the touch, before repainting or closing up.
When should I call a professional for wall mold?
Call a pro when the area exceeds about 10 square feet, mold is inside wall cavities or HVAC, sewage or flooding was involved, or an occupant has a health condition. Professionals use containment and HEPA filtration to prevent spread.
Front Range homeowners facing wall mold that is larger or deeper than a quick wipe can reach out through our contact page to connect with a vetted local inspector.
Mold removal & cleanup picks
For a small, contained patch (under ~10 sq ft) these EPA-friendly removers handle surface mold. Larger or recurring growth warrants a professional assessment first.
| Product | Why | Buy |
|---|---|---|
 RMR-86 Instant Mold Stain Remover RMR-86 Instant Mold Stain Remover | Fast-acting on stains; ventilate and wear PPE. | Amazon — $29.99 |
 Concrobium Mold Control Concrobium Mold Control | No-bleach formula that also helps prevent regrowth. | Amazon — $11.26 |
 Mold Armor Mold & Mildew Remover Mold Armor Mold & Mildew Remover | Widely stocked bathroom/surface remover. | Amazon — $22.98 |