How to Get Rid of White Mold On Walls: A Plain-Language Guide
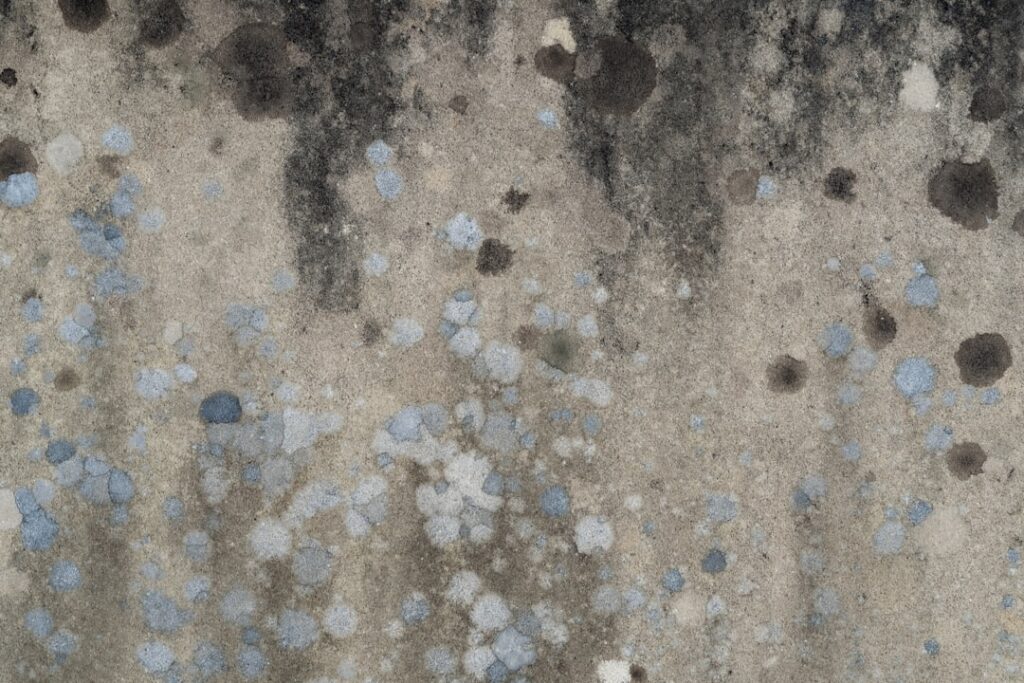
White growth on basement and crawlspace walls trips up more homeowners than almost any other mold problem because it can be one of two completely different things. White mold — typically lighter-pigmented strains of Aspergillus, Penicillium, or Cladosporium — is a true fungus that demands a moisture and cleanup response. Efflorescence — mineral salts pushed to the surface by water moving through concrete or brick — looks superficially similar but is not biological and requires a different fix entirely. Getting rid of one will not address the other. This guide summarizes EPA and CDC guidance current as of 2026 — consult a certified mold professional for confirmed growth larger than ten square feet, and your physician for respiratory symptoms.
Part of our Mold Removal & Remediation guide — start there for the full picture →
Is this mold, asbestos, or water damage? Get a free instant screen
Upload a clear photo of the suspect area. You'll get an instant AI screening opinion and what to do next. This is screening guidance, not a professional determination.
Screening guidance only. AI can be wrong. Confirm asbestos, mold type, or lead with lab testing or a licensed professional before acting.
Step 1: Confirm It Is Actually Mold
The single most important diagnostic step costs nothing. White mold is soft and fuzzy. Wipe it with a damp cloth and it smears. Spray it lightly with water and the fuzziness remains. It returns to the same spot within days or weeks if the moisture problem is not corrected. Under a magnifying glass, fine hyphae (root-like fibers) are visible extending into the surface.
Efflorescence is hard and crystalline. Wipe it with a damp cloth and the powder comes off, often with a slight gritty feel. Spray it with water and it dissolves visibly. It typically does not return to the same exact spot in the same way once the surface is cleaned, though it may appear elsewhere as water continues moving through the substrate. Under magnification, it shows as geometric salt crystals rather than fibers.
This distinction matters because efflorescence cleanup is a simple brush-and-rinse operation, while white mold cleanup follows full mold-remediation protocol. Treating efflorescence with bleach wastes effort; treating white mold with a water rinse alone spreads spores and accomplishes little.
Step 2: Identify the Moisture Source
White mold growing on a basement wall, crawlspace surface, stored cardboard, or wooden framing always has a moisture source. Common pathways:
- Foundation water seepage through cracks or porous concrete
- High basement humidity (above 60%) from inadequate ventilation
- Condensation on cold walls during winter when warm humid air contacts cold concrete
- Plumbing leaks behind walls or under floors
- Exterior grading that directs surface water toward the foundation
- Failed sump pump or French drain
Cleaning the mold without correcting the moisture source guarantees recurrence. Most homeowners learn this the hard way after one or two cleaning cycles. Our cluster on what causes mold to grow on walls covers the moisture pathways in depth.
Step 3: Assess Whether to DIY or Call a Pro
The EPA recommends professional remediation when affected area exceeds approximately ten square feet, when sewage or floodwater contamination is involved, when occupants have asthma or immune compromise, or when HVAC systems are affected. Most consumer-cleanable white mold sits below the ten-square-foot threshold on a single basement wall, a crawlspace beam, or a stored cardboard box.
Borderline cases — five to ten square feet on a basement wall in a finished living area, recurring growth after past attempts, occupants with respiratory conditions — usually justify a call to a certified inspector for assessment before committing to DIY cleanup. A Front Range inspection runs $300 to $600; remediation runs $1,500 to $6,000 depending on scope.
Step 4: Wear Proper Protective Equipment
Disturbing white mold aerosolizes spores. Required PPE for any cleanup larger than a hand-sized colony:
- N95 respirator (or P100 for larger areas)
- Nitrile gloves extending past the wrist
- Safety goggles (not glasses — full-seal protection)
- Disposable coveralls or clothing that will be laundered separately and immediately
- Hair covering
The CDC’s homeowner mold cleanup guide reinforces this list. Skip the PPE and the cleanup itself becomes an exposure event for the person doing the work.
Step 5: Contain the Work Area
Close doors and HVAC supply vents in the affected room. Tape plastic sheeting over openings if the work will take more than an hour. Run a HEPA air cleaner in the work area if available. The goal is to prevent spores aerosolized during cleanup from traveling through the home’s air handling system into living spaces.
Containment is the single biggest difference between consumer cleanup and professional remediation. Professionals use negative-pressure HEPA-filtered air movers to create a one-way airflow out of the affected area. Consumers cannot match that, but they can at least avoid spreading spores by closing doors and ducts.
Step 6: Clean the Visible Growth
For non-porous surfaces (concrete, sealed wood, tile, metal): scrub with detergent and water using a stiff brush, then rinse with clean water. The detergent disrupts spore adhesion better than bleach alone. Follow with an EPA-registered antimicrobial spray or a non-biocide encapsulant like Concrobium for surface treatment. Allow to dry completely with active ventilation or dehumidification.
For porous surfaces (unsealed wood, drywall, insulation, carpet pad): physical removal is usually required. Cleaning rarely reaches mold embedded in the porous structure, and growth returns. The InterNACHI guidance on remediation treats porous-material removal as the standard response for any meaningful colony.
Step 7: Dry the Area Aggressively
Mold cannot grow without moisture. After cleaning, the area must dry completely — usually 48 to 72 hours with active ventilation and dehumidification. Run a dehumidifier sized for the space (50-pint units cover most basements, 70-pint units handle larger areas). Run fans. Open exterior windows when outdoor humidity is lower than indoor humidity.
Track relative humidity with a $15 hygrometer. Target below 50% during summer, below 60% during winter. Sustained humidity above those thresholds will allow regrowth regardless of how thoroughly the surface was cleaned.
Step 8: Address the Moisture Source
This is the step homeowners most often skip — and the reason mold returns. Possible interventions depending on the source:
- Seal foundation cracks with hydraulic cement or polyurethane injection
- Improve exterior grading so soil slopes away from the foundation
- Extend downspouts to discharge at least six feet from the foundation
- Install or upgrade a sump pump and French drain
- Add vapor barriers in crawlspaces (encapsulation typically $3 to $7 per square foot installed)
- Install a basement dehumidifier with a continuous drain
- Repair plumbing leaks promptly
- Insulate cold exterior walls to reduce condensation potential
One or more of these usually applies. Without correcting the source, every cleaning cycle is temporary.
Step 9: Verify the Cleanup
Visual inspection after 30 days is the simplest verification: did the growth return? If yes, the moisture source is still active. If no, the cleanup was at least temporarily successful. For more rigorous verification — useful in pre-sale documentation, post-insurance-claim cleanup, or sensitive-occupant situations — a post-remediation spore-trap air test from a direct lab or a certified inspector provides documented data.
Our piece on mold spore testing covers the verification side in more depth.
What Not to Do
Several common mistakes make white mold worse:
- Spraying bleach onto efflorescence (does nothing — it is not biological)
- Painting over mold without cleaning first (growth continues underneath the paint)
- Skipping containment and spreading spores through the HVAC system
- Ignoring the moisture source and cleaning repeatedly
- Disturbing colonies without PPE and triggering exposure symptoms
- Treating drywall mold as a surface-clean problem when the substrate is porous
The largest single error is the moisture-source omission. Every other mistake on the list can be recovered from with proper cleanup; this one perpetuates indefinitely.
Materials That Need Removal Versus Cleaning
One of the more difficult judgment calls in white mold cleanup is deciding which materials can be cleaned in place and which require removal. The general rule from EPA and IICRC remediation guidance is that porous materials with visible growth usually need removal; non-porous materials usually can be cleaned in place.
Materials that typically need removal:
- Drywall with growth on the paper face (the paper is the food source; cleaning rarely reaches embedded hyphae)
- Insulation showing visible discoloration or compression
- Carpet pad in affected areas
- Acoustic ceiling tiles
- Cardboard storage boxes
- Upholstered furniture with visible growth
Materials that typically can be cleaned in place:
- Concrete walls and floors
- Sealed wood framing and trim
- Glazed tile and grout (sealed)
- Metal fixtures and ductwork
- Glass and mirror surfaces
- Sealed stone
Borderline materials — bare wood subfloor, unsealed concrete, painted drywall with surface-only growth — depend on the extent of penetration. A small surface colony on painted drywall in a dry room can sometimes be cleaned; the same colony on water-damaged drywall in a chronically wet basement usually cannot.
Front Range Basement Specifics
Colorado’s semi-arid climate suppresses some mold pressure compared to coastal regions, but basement white mold remains common because of the unique combination of expansive clay soils, snowmelt cycles, and finished-basement construction patterns. Older Front Range homes (pre-1980) often lack adequate basement vapor barriers, allowing moisture to migrate through foundation walls during snowmelt and monsoon weeks.
Newer construction (post-2000) typically includes engineered drainage systems and better vapor barriers, but the homeowner-driven finishing of unfinished basement spaces sometimes covers issues that should have been addressed first. White mold appearing on the back of newly finished basement drywall is a common discovery during the second-year occupancy period, when accumulated moisture issues finally produce visible growth.
Crawlspaces in older Denver-area homes present a related set of issues — exposed earth releases moisture vapor, inadequate ventilation traps it, and white mold colonizes wood framing, subfloor undersides, and stored items. Crawlspace encapsulation typically resolves the source for $3 to $7 per square foot installed. Without encapsulation, repeated cleaning is the indefinite alternative.
When to Stop and Call a Professional
Stop and call a certified remediator when growth exceeds about ten square feet on hard surfaces (smaller on porous surfaces — drywall, insulation, carpet), when growth is suspected inside wall cavities, when occupants have respiratory conditions or immune compromise, when HVAC contamination is suspected, or when DIY cleanup has been attempted twice without success. Our hub on mold inspection and testing covers the next step.
DIY Cleaning Solution Options
For non-porous surfaces with small white mold colonies, several effective cleaning solutions work:
Detergent and water — the EPA’s first-line recommendation. Effective at disrupting spore adhesion and removing visible growth. Safe for most surfaces. Requires thorough rinsing and drying.
White distilled vinegar — kills many mold species on contact. Effective on tile, glass, and sealed grout. Slower than bleach but safer in occupied spaces. Acidic — avoid on natural stone, which etches.
Hydrogen peroxide (3%) — kills mold and lifts staining without chlorine off-gassing. Effective on most surfaces including porous wood. Decomposes to water and oxygen, leaving no chemical residue.
EPA-registered antimicrobial sprays — Concrobium, RMR-86, Mold Armor, Tilex, and similar products. Effective at advertised dwell times. Some bleach surfaces; check label compatibility before use.
Avoid mixing products. Bleach plus ammonia produces toxic chloramine gas. Bleach plus vinegar produces chlorine gas. Stick to one chemistry at a time and rinse thoroughly between products if switching.
References
- EPA Mold Cleanup in Your Home — U.S. Environmental Protection Agency
- CDC Homeowner Mold Cleanup Guide — Centers for Disease Control and Prevention
- InterNACHI Mold Inspection Standards — International Association of Certified Home Inspectors
- EPA Brief Guide to Mold, Moisture, and Your Home — U.S. Environmental Protection Agency
Frequently asked questions
How do you tell white mold from efflorescence?
White mold is soft and fuzzy, smears when wiped with a damp cloth, and returns to the same spot within days or weeks. Efflorescence is hard and crystalline, dissolves visibly in water, and does not regrow in the same exact pattern. The distinction matters because efflorescence is mineral salt, not biological, and needs different treatment.
Is white mold dangerous?
White-pigmented Aspergillus and Penicillium strains can trigger allergic reactions, asthma symptoms, and respiratory irritation in sensitive occupants. Most strains are less acutely toxic than Stachybotrys chartarum but warrant proper PPE and cleanup nonetheless. Occupants with immune compromise should not perform cleanup themselves.
Can white mold be cleaned with vinegar?
White distilled vinegar kills many mold species on non-porous surfaces and is a reasonable choice for occupied spaces where bleach fumes are a concern. It works more slowly than concentrated bleach and does not bleach the staining. For visible growth larger than a hand-sized area, EPA-registered antimicrobials or mechanical encapsulants are more reliable.
Why does white mold keep coming back?
Recurrence within 30 days indicates the moisture source has not been corrected. Foundation seepage, basement humidity above 60%, condensation on cold concrete walls, or slow plumbing leaks will keep regrowing colonies regardless of how thoroughly the surface was cleaned. Cleanup must pair with moisture-source repair.
If white growth keeps reappearing on a Front Range basement wall — or a crawlspace inspection turns up more than a hand-sized area — connect with a vetted local inspector through our contact page before committing to repeated DIY cleanup.
Mold removal & cleanup picks
For a small, contained patch (under ~10 sq ft) these EPA-friendly removers handle surface mold. Larger or recurring growth warrants a professional assessment first.
| Product | Why | Buy |
|---|---|---|
 RMR-86 Instant Mold Stain Remover RMR-86 Instant Mold Stain Remover | Fast-acting on stains; ventilate and wear PPE. | Amazon — $29.99 |
 Concrobium Mold Control Concrobium Mold Control | No-bleach formula that also helps prevent regrowth. | Amazon — $11.26 |
 Mold Armor Mold & Mildew Remover Mold Armor Mold & Mildew Remover | Widely stocked bathroom/surface remover. | Amazon — $22.98 |