How to Eradicate Mold: A Plain-Language Guide
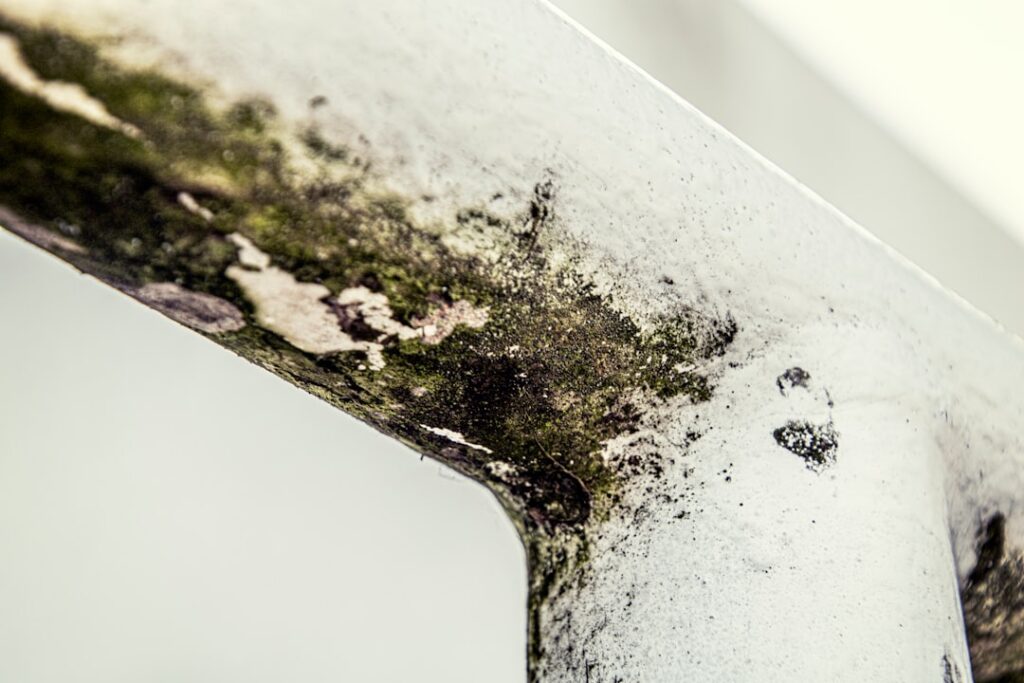
“Eradicate” is a strong verb. The dictionary definition implies complete removal — root and branch. In mold work, complete eradication is rare without ongoing humidity control, because spores are present in all indoor environments and only need sustained moisture to reestablish. How to eradicate mold from a home, then, means executing a five-step framework to drive growth out and then maintaining the conditions that prevent return. This guide walks through both halves. This guide summarizes EPA and CDC guidance current as of 2026 — consult a certified mold inspector for testing decisions and your physician for symptom evaluation.
Is this mold, asbestos, or water damage? Get a free instant screen
Upload a clear photo of the suspect area. You'll get an instant AI screening opinion and what to do next. This is screening guidance, not a professional determination.
Screening guidance only. AI can be wrong. Confirm asbestos, mold type, or lead with lab testing or a licensed professional before acting.
Why “Eradicate” Needs an Honest Definition
Outdoor air carries thousands of mold spores per cubic meter on any given day. Those spores enter homes through doors, windows, HVAC fresh-air intakes, and on clothing. Eliminating spores from indoor air is impossible. What’s achievable is eliminating active colonies and keeping conditions inhospitable to new colonies. That is the working definition of “eradication” used by the EPA, CDC, and remediation professionals.
Realistic eradication has two phases: a one-time removal of the active colony plus the moisture source, and ongoing humidity and ventilation control that prevents reestablishment. Skip the second phase and the first phase becomes temporary. The parent mold inspection and testing hub covers diagnostic sequencing.
The Five-Step Eradication Framework
Step 1 — Assess
Determine scope, substrate, moisture source, and occupant sensitivity before touching anything. Walk the affected room with a flashlight, moisture meter, and notebook. Document visible extent. Probe nearby substrates with the moisture meter to find hidden wetness. Trace upward and outward to find the water source. The moisture-source guide covers the trace-back process.
Decide the work category:
- Under 10 sq ft on non-porous substrate, no sensitized occupants: DIY-eligible.
- Larger, on porous substrate, HVAC-involved, sewage-related, or sensitized occupants: remediator.
Step 2 — Contain
Close doors. Tape plastic sheeting across openings for jobs larger than a few square feet. Turn off HVAC. Cover registers in the work area. A box fan blowing out a window provides crude negative pressure; a HEPA-filtered air scrubber does it properly. Wear N95 or higher PPE — P100 cartridges on a half-face mask for larger work.
Step 3 — Source-Moisture Fix
This is the step most homeowners skip and the step that determines whether eradication is durable. Identify and correct the moisture source — plumbing leak, condensation surface, foundation drainage, missing ventilation, roof leak. No subsequent cleanup matters if the source still flows. Photograph and document the repair.
Step 4 — Remove
Physical removal of the active colony. On non-porous surfaces: scrub with detergent and water, rinse, then apply an EPA-registered antimicrobial respecting the labeled dwell time. On porous substrates: bag and discard. Cut drywall 6 to 12 inches past visible staining. Bag in 6-mil plastic; wipe the outside of bags before carrying through clean areas. HEPA-vacuum the cleaned area and surrounding surfaces. The homeowner removal walkthrough covers the substrate decisions.
Step 5 — Verify
Dry the area to under 20 percent moisture content on a pinless meter before any reconstruction. Run dehumidifiers and fans for 48 to 72 hours. For larger jobs or sensitized-occupant homes, run a post-remediation clearance air-spore sample compared to outdoor baseline. Pass criteria typically include indoor counts at or below outdoor, no dominant water-damage indicator genera, and visual confirmation of complete removal.
Why Complete Eradication Is Rare
Three realities limit “complete” eradication:
- Outdoor spores re-enter homes constantly. Suspended-spore counts indoors track outdoor levels closely.
- Hidden growth in wall cavities, behind cabinets, in HVAC ductwork, and in crawl spaces often goes undetected during the first remediation.
- Moisture sources are rarely permanently fixed. Aging plumbing, weather events, seasonal humidity, and human behavior all reintroduce moisture over time.
What’s achievable is keeping active colonies absent and indoor spore counts at or below outdoor baseline. That’s the realistic eradication target.
The Ongoing Humidity-Control Half
Long-term eradication requires ongoing moisture management. The EPA recommends indoor relative humidity between 30 and 50 percent. Practical implementation:
- Hygrometers in three zones — bathroom, basement, primary bedroom. $30 each. Set alerts at 55 percent.
- Bath fans on humidity-sensing switches — automate operation during showers and for 15 to 20 minutes after.
- Range hood vented outdoors — not recirculating into the kitchen.
- Dehumidifier in basement and crawl space — target 45 to 50 percent year-round.
- HVAC tuned for dehumidification — properly sized AC pulls humidity below 55 percent during cooling season.
- Annual HVAC service — including evaporator coil drain pan cleaning.
- Quarterly visual checks — under sinks, behind appliances, basement walls, attic from access hatch.
The prevention overview covers the daily-habits side.
When DIY Eradication Falls Short
Common reasons a DIY eradication attempt fails:
- Source-moisture-fix skipped. Painted over or sprayed without identifying and correcting the water source. Regrowth within weeks.
- Substrate replacement skipped. Cleaned porous material rather than replacing. Hyphae embedded in the matrix survive and regrow.
- HEPA capture skipped. Cleaned visible growth but left settled spores in surrounding carpet, dust, fabric. Air-quality and allergen-load issues persist.
- Dry-down skipped. Closed up the wall before substrate reached safe moisture content. Trapped moisture restarts the cycle.
- Scope underestimated. Visible patch turned out to be tip of a larger iceberg in the wall cavity.
When to Hire a Remediator
The EPA’s published thresholds for professional remediation:
- Contaminated area over 10 square feet.
- HVAC contamination.
- Sewage-related water damage.
- Occupants with documented mold sensitization or immunocompromise.
- Recurring mold despite previous DIY attempts.
Certified remediators bring containment barriers, negative-air HEPA scrubbers, full PPE, and post-remediation clearance testing that homeowners cannot replicate. Look for IICRC S520 certification or equivalent industry credentials. The professional hiring guide covers credentials.
Documentation
For insurance claims, real-estate disclosure, or rental disputes, document the eradication process:
- Pre-remediation photos with date stamps.
- Moisture-meter readings before, during, and after.
- Source-repair receipts and contractor invoices.
- Material disposal logs.
- Post-remediation clearance air-spore sample results.
The Realistic Long-Term Outcome
A well-executed eradication delivers:
- No visible growth in the originally affected area for at least 12 months.
- Indoor humidity reliably between 30 and 50 percent across zones.
- Sustained moisture-meter readings under 1 percent on drywall and under 15 percent on wood.
- No persistent musty odor.
- No occupant symptoms that correlate with home environment.
That outcome requires both the one-time removal and the ongoing humidity-control discipline. The spore-cleanup workflow guide covers verification.
Why “Eradicate” Often Misleads Homeowners
The strong-verb framing of eradication suggests a one-shot fix. Marketing copy from some remediation contractors reinforces that framing — “permanent mold removal,” “guaranteed eradication,” and similar phrasing. The honest reality is that eradication is a two-part commitment: a one-time removal project plus an ongoing maintenance discipline. Homeowners who accept the second half generally achieve durable results. Homeowners who treat the first half as the whole project face recurrence.
Building a Post-Eradication Maintenance Plan
After completing the five-step framework, a written maintenance plan locks in the long-term result. A simple plan includes:
- Monthly hygrometer readings logged for each zone.
- Quarterly visual checks of all high-risk areas — under sinks, behind washing machine, basement walls, attic from access hatch.
- Annual HVAC service including evaporator coil drain pan cleaning.
- Spring and fall gutter cleaning and downspout extension verification.
- Bath fan and dryer vent function checks twice yearly.
- Photographic documentation of any recurrence with date stamps.
Tools and Equipment for Long-Term Eradication
Maintaining the eradicated state requires modest equipment:
- Hygrometers ($15 to $30 each) — three to five units placed in critical zones. Connected models with phone apps log continuously.
- Pinless moisture meter ($30 to $80) — spot-check suspect substrates quarterly.
- Basement dehumidifier ($200 to $400) — sized to basement volume and humidity load.
- Humidity-sensing bath fan switch ($25 to $40) — automates exhaust during and after showers.
- HEPA vacuum ($200 to $500) — captures spore-size particles during routine cleaning.
- Wireless thermometer ($30 to $50) — finds cold-condensation surfaces during seasonal checks.
Total long-term equipment investment: $500 to $1,000. The math compares favorably to one $2,500 recurring remediation bill.
Recurrence Patterns
Mold recurrence in eradicated areas follows predictable patterns. Three common scenarios:
- Same location, same season — the moisture source wasn’t fully fixed. The leak slows in winter and returns in spring rain.
- Different location, similar conditions — humidity control hasn’t kept up with seasonal changes. Different cool-surface condensation site.
- Same location, different season — incomplete drying before reconstruction trapped residual moisture. The colony reestablishes from the embedded substrate.
Each pattern points to a different correction. Same-location recurrence usually means revisit the source fix. Different-location recurrence means tighten the humidity-control discipline.
The Role of Air Quality Monitoring
Post-eradication air-quality monitoring catches problems early. Connected hygrometers with phone apps log humidity continuously across multiple zones. Some systems integrate with HVAC to automate dehumidifier or ventilation response when humidity exceeds setpoints. The investment runs $100 to $400 for a basic multi-zone system and pays back through early problem detection.
Cost of Long-Term Eradication versus Recurring Remediation
A reasonably executed one-time eradication plus ongoing maintenance typically costs:
- $300 to $4,000 for the initial removal depending on scope.
- $200 to $500 for ongoing monitoring equipment (hygrometers, dehumidifier, moisture meter).
- $300 to $500 annually for HVAC service and maintenance.
The alternative — repeated mold remediations every 1 to 3 years from inadequate source-moisture fix — typically costs $1,500 to $4,000 per occurrence. Over a decade, durable eradication produces large cumulative savings.
Eradication versus Routine Cleanup
The differences between full eradication and routine cleanup matter:
- Routine cleanup addresses a visible patch with surface cleaning and disinfection. Acceptable for small non-porous cases. Doesn’t necessarily fix sources or capture settled spores.
- Eradication addresses a confirmed mold problem through scope assessment, containment, source fix, complete removal, drying, verification, and ongoing maintenance. Required when remediation goals matter — health, insurance, real estate, or sensitized occupants.
Confusing the two — applying routine-cleanup effort to a problem that needs eradication — produces the recurrence pattern that frustrates many homeowners.
Building Occupant Confidence After Eradication
After completing an eradication project, occupants sometimes remain anxious about lingering effects. Practical steps to build confidence:
- Share clearance test results showing indoor counts at or below outdoor baseline.
- Run a HEPA air purifier in primary sleeping rooms for 1 to 2 weeks after work completes.
- Wash bedding, throw blankets, and removable upholstery covers in hot water.
- Replace HVAC filters with fresh MERV 11 to 13 units.
- Monitor occupant symptoms over 30 to 60 days to verify resolution.
Eradication Project Timeline
For a typical professional eradication of a moderate-scope mold problem (30 to 100 square feet of contaminated area):
- Day 1: Pre-work inspection, scope assessment, contract execution.
- Day 2: Source-moisture repair (plumber, roofer, or HVAC contractor).
- Day 3: Containment setup, negative-air machine deployment, PPE staging.
- Days 3-4: Physical removal of contaminated materials, HEPA capture.
- Days 4-6: Drying with dehumidifiers and air movers; moisture content verification.
- Day 6: Antimicrobial application and HEPA final-pass.
- Day 7: Independent third-party post-remediation clearance air-spore sampling.
- Days 8-10: Lab analysis turnaround for clearance results.
- After clearance pass: Reconstruction of removed substrate.
Total elapsed time: 10 to 14 days for a moderate scope. Larger or more complex jobs extend proportionally.
References
- Mold Cleanup in Your Home — U.S. Environmental Protection Agency
- Mold Cleanup Guide — Centers for Disease Control and Prevention
- Mold Resource Guide — InterNACHI
- Mold Workplace Safety — Occupational Safety and Health Administration
Front Range homeowners planning an eradication project and wanting professional scope assessment before committing to DIY or remediator can reach a vetted local inspector through our contact page for an on-site walk-through.