Tub Spout Replacement: Slip-On vs Threaded and Diverter Leaks
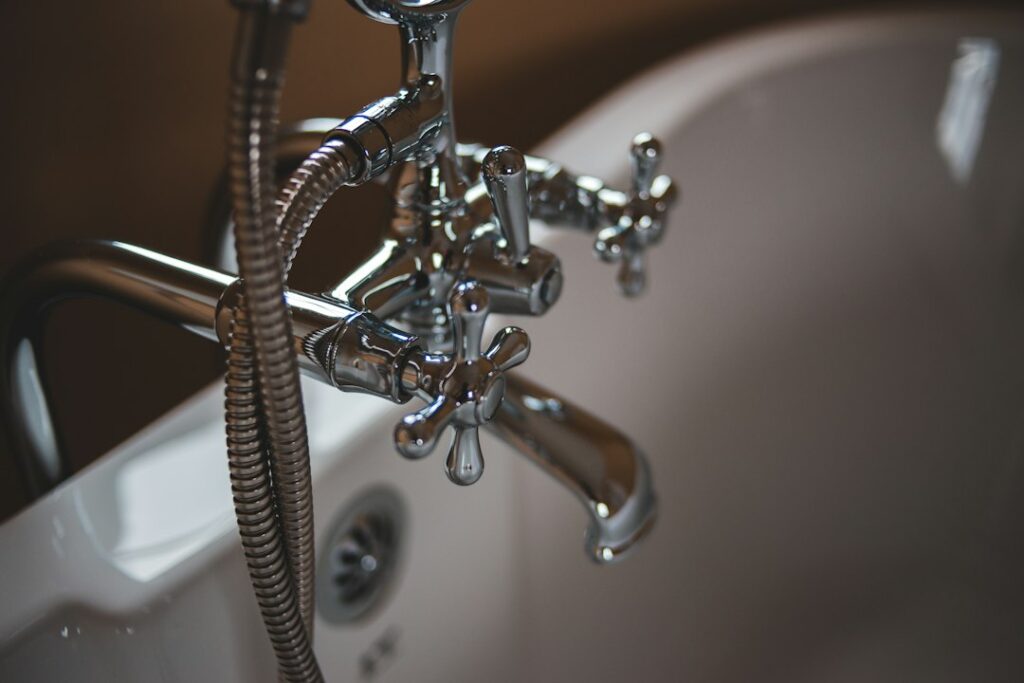
A bathtub spout looks like the simplest piece of plumbing in the bathroom. It has no handle, no cartridge and no supply line of its own. Yet it is one of the most common fixtures to fail, usually in a way that is easy to misread: water keeps pouring from the spout while the shower is running, a drip appears below the tub wall, or the spout slowly loosens until it wobbles. A tub spout replacement is often a short project, but only if the new spout matches the pipe sticking out of the wall. Choose the wrong connection type, get the stub-out length wrong or skip the seal against the tile, and the new spout can leak into the wall cavity where nobody sees it for months. This guide explains the three connection styles, how to measure before buying, how diverters fail, when the real problem is the valve, and what the work typically costs on the Front Range.
Part of our Plumbing & Water guide — start there for the full picture →
Tub Spout Replacement: The Short Answer
Most tub spouts are replaced because the built-in diverter has worn out, the finish has corroded or the spout was damaged. The job comes down to identifying how the existing spout attaches to the pipe, removing it without twisting the pipe inside the wall, and installing a new spout designed for that same pipe. In most homes that means one of three setups:
- Slip-on spouts slide over a smooth copper pipe and clamp with a set screw, usually hidden under the spout.
- Threaded spouts screw onto a threaded nipple, typically 1/2-inch pipe thread, though some use 3/4-inch threads at the front of the spout.
- Copper-sweat spouts are soldered directly to the copper pipe and are less common in residential work; replacing one usually involves cutting the pipe and either soldering a new spout or converting to a slip-on or threaded style.
When the spout is the only part that has failed, a homeowner with basic tools can often swap it in under an hour. When water appears inside the wall, the spout drips constantly with the valve closed, or the pipe is corroded or too short, the problem has moved behind the tile and a plumber is usually the better call. The ASHI Standard of Practice directs home inspectors to inspect interior water supply and distribution systems, including fixtures and faucets, but it does not require them to fill shower pans and fixtures to test for leaks. Inspectors also cannot see inside the wall, which is why visible clues around the spout matter.
Slip-On, Threaded and Copper-Sweat Connections
Before buying anything, look underneath the existing spout. That one glance usually identifies the connection.
Slip-on spouts
A small hole on the underside of the spout, often holding an Allen (hex) set screw, means a slip-on spout. Loosen the set screw a few turns and the spout should pull straight off the pipe, sometimes with a slight twist to break the old seal. Underneath is a smooth copper stub, most often 1/2-inch nominal copper. Slip-on spouts seal with an internal O-ring or compression gasket that grips the pipe, and the set screw holds the spout in position. They need a clean, round, undamaged copper end with no burrs. A slip-on spout generally should not be installed on galvanized steel, PEX or threaded pipe unless the manufacturer specifically provides an adapter for that.
Threaded spouts
No set screw usually means a threaded spout. It unscrews counterclockwise, often with considerable resistance after years of mineral buildup. A common trick is to insert the handle of a wooden spoon, a large screwdriver handle or a dowel into the spout opening and use it as a lever, or to wrap the spout in a cloth and use a strap wrench. Behind it is a threaded nipple, which might be brass, galvanized steel or copper with a threaded adapter. Some spouts thread on at the back of the spout body, and others thread deeper inside at the front. That difference changes the length of pipe needed, so manufacturer instructions matter.
Older homes in Denver, Lakewood and Colorado Springs sometimes still have galvanized nipples behind the tub wall. Galvanized pipe corrodes from the inside and can snap at the threads when torqued, so a rusty or thin nipple may need replacing too.
Copper-sweat spouts
Some spouts, particularly in older or builder-grade installations, are soldered to a copper stub with a female sweat fitting inside the spout body. These have no set screw and will not unscrew. Removal usually means cutting the pipe behind the spout, then either sweating on a new spout of the same type, soldering on a threaded adapter, or leaving a clean copper stub for a slip-on spout. Soldering next to finished tile and a plastic tub surround carries fire and heat-damage risk, so this is one version of the job many homeowners hand to a plumber.
Measuring the Pipe Stub-Out Before Buying
Most failed tub spout installations start at the store, not in the bathroom. Spout manufacturers specify how far the pipe must extend from the finished wall surface, and those numbers vary between brands and models. A spout that is too long for the pipe will not seal or will hang away from the wall. A spout that is too short will not cover the pipe end at all.
To measure, remove the old spout and measure from the face of the finished wall, meaning the tile or surround surface rather than the drywall behind it, to the end of the pipe. Record the following details:
- Stub-out length from finished wall to pipe end, ideally to the nearest 1/8 inch.
- Pipe type: smooth copper, threaded brass, threaded galvanized, or PEX with an adapter.
- Thread size if threaded, usually 1/2-inch pipe thread, occasionally 3/4-inch.
- Diverter needs: whether the spout must have a lift-gate diverter because a showerhead is plumbed above it.
Many universal or adjustable spouts include adapters for both slip-on and threaded connections, which helps when the exact pipe length is uncertain. Even so, the manufacturer’s installation sheet usually lists an acceptable range. If the existing pipe falls outside that range, the fix is changing the pipe, not forcing the spout. Extending a pipe that is too short normally requires opening the wall or working through an access panel.
One caution applies to every style: a pipe that rotates while a spout is removed can crack its connection at the valve, creating a leak inside the wall. Holding the stub with a pipe wrench reduces that risk.
Diverter Failures: Water From the Spout During a Shower
The most common reason homeowners shop for a new tub spout is a diverter that no longer diverts. In a typical tub-shower combination with a single valve, water from the valve flows down to the spout first. Pulling up the knob or lever on the spout closes a gate inside it, which forces water up the riser pipe to the showerhead. When that gate wears, water leaks past it, and some of the flow keeps coming out of the spout during a shower.
Signs of a failing diverter include:
- A steady stream or heavy dribble from the spout while the shower is on.
- Weak shower pressure that improves when the spout opening is temporarily blocked.
- A diverter knob that drops back down mid-shower or will not stay up.
With most spout-mounted diverters, the gate and seals are built into the spout and are not sold separately, so replacing the whole spout is the standard fix. A small amount of leakage through even a new diverter can be normal at low pressure, and some manufacturers mention this in their documentation. The goal is a mostly diverted flow, not necessarily a perfect seal.
Not every tub has a spout diverter. Older three-handle setups use a separate diverter handle, and some valves build the diverter into the trim. If the spout has no lift knob, a new spout will not fix shower-to-spout leakage. A related guide on shower head replacement covers the other end of the riser, which is worth checking at the same time if pressure seems low.
Caulking the Gap Between Spout and Wall
A new spout should sit flush or nearly flush against the finished wall. The joint between the back of the spout and the tile or surround needs a seal. Without one, water running down the wall during every shower can track behind the spout, along the pipe and into the wall cavity. Over time that hidden water can rot framing and feed mold growth.
Most manufacturers call for a bead of silicone or a recommended sealant around the back of the spout, sometimes leaving a small gap at the bottom so any water that does get behind can drain out instead of being trapped. Follow the specific instructions for the spout, because some include a gasket instead. If the tile around the pipe has an oversized hole, fill and seal it before installing the spout rather than relying on the spout to cover it.
This is also a good time to look at the surrounding tub joints. Cracked or missing caulk along the tub-to-wall seam and crumbling grout lines let water reach the same wall cavity from a different direction. Guides on caulking a bathtub and grout repair walk through those fixes. The EPA’s guidance on mold and moisture warns against caulking or painting over moldy surfaces: clean the mold and dry the area first, because paint and sealants applied over mold are likely to fail.
Leaks Behind the Wall and When the Valve Is the Problem
A tub spout replacement fixes problems in the spout, not in the valve, the pipes behind the wall or the drain. Telling them apart avoids replacing a perfectly good spout.
Clues that point to the valve
- Spout drips with the handle fully off. A spout cannot leak on its own; if water flows with the valve closed, the cartridge or valve seals are passing water. The guide on shower cartridge replacement explains that repair.
- Temperature swings or hard-to-control mixing. These point to the valve’s cartridge or pressure-balancing parts, not the spout.
Clues that point to a hidden leak
- Water stains on the ceiling below a second-floor bathroom, especially after showers.
- Soft, swollen or discolored drywall on the wall behind the tub, often in a closet or adjacent room.
- Loose tiles or cracked grout around the spout and valve.
- A spout that wobbles or rotates, which may mean the pipe has loosened inside the wall.
Many tub valves have an access panel on the back side of the wall, behind a closet or in a hallway. Opening it while someone runs the tub and then the shower can reveal drips at the spout drop, the valve body or the shower riser. If there is no access panel, a plumber may use a moisture meter or a small inspection opening.
The EPA’s WaterSense program notes that common household leaks include worn toilet flappers, dripping faucets and other leaking valves, and that the average household’s leaks can waste more than 9,300 gallons per year. A slow tub drip adds to that total and can signal a valve that will eventually fail more severely.
Any repair involving the pipes or valve should start by shutting off the water. Some tub valves have built-in stops behind the trim, but many older valves do not, which means shutting off the house supply. Knowing where the main water shut-off valve is, and confirming that it actually closes, is worth doing before the spout comes off.
Anti-Scald Protection and Water Temperature
Replacing a tub spout does not change water temperature, but it is a natural time to think about scald risk, because tubs are where young children and older adults are bathed. The U.S. Consumer Product Safety Commission’s publication on avoiding tap water scalds states that the majority of tap water scald injuries and deaths involve the elderly and children under age five. CPSC urges users to lower water heaters to 120 degrees Fahrenheit and notes that most adults will suffer third-degree burns from two seconds of exposure to 150-degree water, six seconds at 140 degrees, or thirty seconds at 130 degrees. Even at 120 degrees, CPSC says a five-minute exposure could cause third-degree burns, and it advises always hand-testing water before bathing infants and young children.
Many newer tub and shower valves are pressure-balancing or thermostatic designs with an adjustable limit stop that caps how far the handle turns toward hot. Those features live in the valve, not the spout. Whether an older valve must be upgraded depends on the code edition a jurisdiction has adopted, so the local building department or a licensed plumber is the right source for specifics.
Refinishing, Remodels and Spout Timing
Tub spout replacement often comes up alongside other bathroom work. If the tub is being reglazed, the spout and overflow plate are usually removed or masked so the coating can be applied evenly, and a worn spout can be swapped at the same time. The guide on bathtub refinishing explains how that process works and what refinishing can and cannot fix.
Inspection reports frequently note loose spouts, missing caulk at the spout and leaking diverters. Individually these are small items, but a cluster of them in one bathroom can point to water getting into walls. Buyers comparing the general condition of several bathrooms may find the broader plumbing and water inspection hub useful.
What a Tub Spout Replacement Costs
Costs vary with the spout, the connection type and whether the pipe behind the wall needs work. These are rough planning ranges and will differ by contractor, region and the condition of the plumbing:
- Spout only, DIY: basic chrome diverter spouts commonly cost roughly $15 to $50, while brand-matched or specialty finishes can run around $40 to $150 or more.
- Plumber swap with no pipe work: often roughly $125 to $300 including the trip charge, depending on the market and whether the spout is supplied by the homeowner.
- Stub-out changes or nipple replacement: commonly higher, sometimes around $200 to $500, because of the extra time and any access-panel work.
- Valve or cartridge repair, or opening the wall: a separate scope that can range from a few hundred dollars to considerably more if tile, backer board or framing needs repair.
Front Range plumbers often charge a minimum service fee, so bundling a spout replacement with other small plumbing tasks can lower the per-item cost.
When to Call a Plumber
Call a licensed plumber when the pipe is corroded, galvanized and fragile, too short or too long for any available spout, soldered in place, or when there are signs of water inside the wall. A plumber is also the better choice when the spout drips with the valve off, when the valve lacks scald protection, or when the house shut-off valve will not close fully. For buyers, the general guide to hiring a home inspector explains how inspectors evaluate bathrooms and what lies outside a visual inspection.
References
- Avoiding Tap Water Scalds (Publication 5098) — U.S. Consumer Product Safety Commission
- A Brief Guide to Mold, Moisture and Your Home — U.S. Environmental Protection Agency
- Fix a Leak Week — U.S. EPA WaterSense
- ASHI Standard of Practice for Home Inspections — American Society of Home Inspectors
Frequently asked questions
How do I know if my tub spout is slip-on or threaded?
Look underneath the spout. A small hole with a hex set screw means it is a slip-on spout that clamps onto smooth copper. No set screw usually means it threads onto a nipple, though some older spouts are soldered directly to copper.
Why does water come out of the tub spout when the shower is on?
The diverter gate inside the spout is usually worn, letting water bypass it instead of sending it all up to the showerhead. On most spout-mounted diverters the gate is not replaceable, so the standard fix is a new spout. A small trickle at low pressure can be normal.
Should I caulk around a tub spout?
Most manufacturers call for silicone or a specified sealant where the spout meets the wall to keep shower water out of the wall cavity. Some recommend leaving a small gap at the bottom for drainage. Always follow the instructions supplied with the spout.
Can a dripping tub spout be fixed by replacing the spout?
Usually not. If water drips from the spout with the handle fully off, the valve cartridge or seals are passing water. Replacing the cartridge or valve components is the repair, not the spout.
How much does it cost to replace a tub spout?
A basic diverter spout often costs roughly $15 to $50, with designer finishes higher. Plumber labor for a straightforward swap commonly runs around $125 to $300 including the trip charge, and pipe or valve work adds more.
Noticing a loose spout, stained ceiling or soft drywall near the tub in a home under contract? Contact us and we can connect you with a Front Range inspector who looks closely at bathroom plumbing before closing.