Thermal Imaging Home Inspection: What Homeowners Need to Know
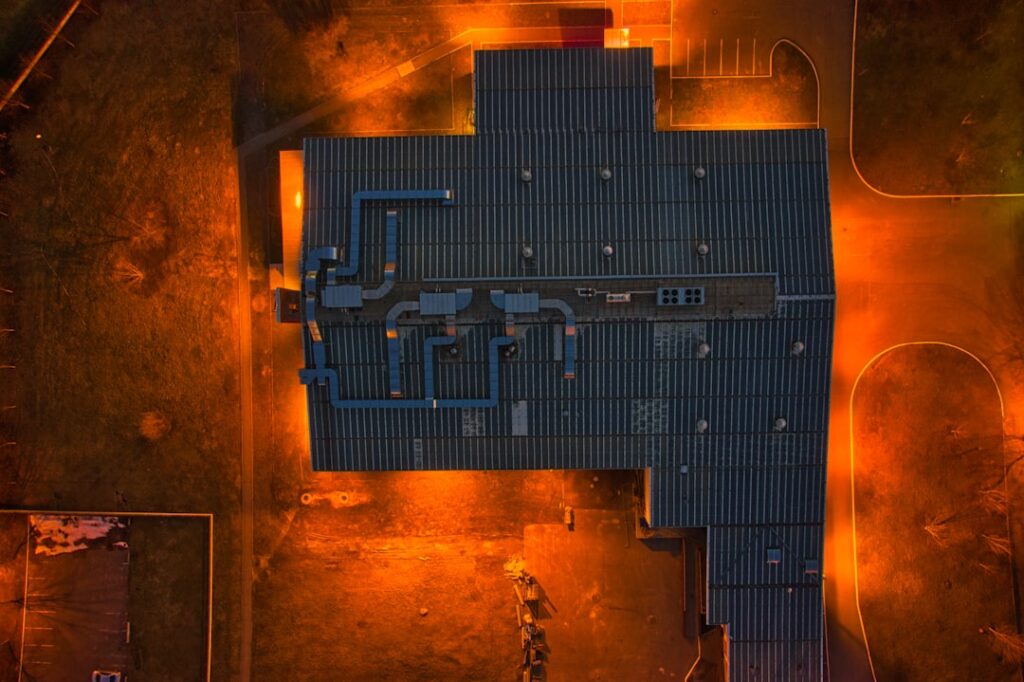
A thermal imaging home inspection uses an infrared camera to reveal temperature differences across walls, ceilings, and floors — differences that often point to hidden moisture, missing insulation, air leaks, or overheating electrical components. It is a non-invasive add-on to a standard inspection, valued precisely because it shows problems a visual walkthrough alone would miss. This guide explains what the technology does, what it cannot do, and how to judge the equipment, drawing on guidance from home-inspection standards bodies rather than manufacturer marketing.
What a thermal imaging home inspection actually finds
Infrared cameras do not see through walls or detect moisture directly. They detect surface temperature, and an inspector interprets those temperature patterns. Wet drywall, for example, is usually cooler than the surrounding dry material because of evaporative cooling, so a damp area shows up as a darker, cooler patch. The camera flags the anomaly; the inspector confirms it with a moisture meter. InterNACHI and ASHI both frame infrared as a diagnostic aid that supports, rather than replaces, hands-on verification.
In a typical scan, an inspector looks for several signatures. Missing or settled insulation appears as cooler stripes between studs in winter. Air leaks around windows, doors, and outlets show as streaks where conditioned air escapes. Moisture intrusion behind drywall or under flooring reads as cooler patches. Overheating breakers, loose electrical connections, and overloaded circuits show up as hot spots. Radiant-floor heating loops and plumbing runs trace as warm lines. Each finding is a lead the inspector then verifies, not a final verdict on its own.
The non-invasive nature of the scan is a large part of its value. Rather than cutting into a wall to check for a suspected leak, an inspector can sweep the surface and see whether the temperature pattern supports the concern before any destructive testing happens. That saves homeowners from unnecessary repairs and helps target the ones that are genuinely needed. A scan can also reveal problems the homeowner never suspected — a slow roof leak that has not yet stained the ceiling, or a section of exterior wall where the insulation slumped years ago and has been quietly raising the heating bill ever since.
There is a real distinction between detecting a problem and diagnosing it. The camera is excellent at the first and useless at the second on its own. A cool rectangle on a ceiling could be a roof leak, condensation, an air-conditioning duct running above, or simply a thermally bridged framing member. Only an inspector who understands the building and follows up with the right verification tool can tell which it is. That interpretive layer is why a thermal scan in skilled hands is worth far more than the same camera in untrained ones.
How the technology works
Every object above absolute zero emits infrared radiation in proportion to its temperature. A thermal camera’s sensor — typically a microbolometer focal-plane array — converts that radiation into a temperature map displayed as a false-color image, with hot and cold rendered in contrasting palettes. Performance hinges on a few specifications worth understanding before relying on any camera’s results.
- Detector resolution — measured in pixels (for example, 160×120, 320×240, or 640×480). Higher resolution shows finer detail and lets the inspector stand farther back while still resolving a problem.
- Thermal sensitivity (NETD) — how small a temperature difference the camera can distinguish, expressed in millikelvin. A NETD around 50 mK is sharper than one at 100 mK, which matters for subtle moisture patterns.
- Temperature range — the span the camera can measure, relevant for electrical hot spots at the high end.
- Refresh rate — frames per second; a smoother 9 Hz or higher feed makes scanning faster and steadier.
- Emissivity adjustment — the ability to compensate for how different materials radiate heat, which affects accuracy.
Two of these specs do most of the work. Resolution sets how much detail the image holds, and it matters because a low-resolution camera forces the inspector to stand close to every surface, slowing the job and risking missed problems on large walls and high ceilings. Thermal sensitivity sets how subtle a difference the camera can resolve, and moisture detection in particular depends on it — a damp patch may be only a degree or two cooler than the dry wall around it, a difference a 100 mK camera may blur but a 50 mK camera renders clearly. The other specs are secondary refinements that improve speed and accuracy rather than fundamental capability.
For homeowners comparing options, our thermal camera for home inspection guide breaks these specs down by use case, and the broader home inspection tools hub places infrared alongside moisture meters and borescopes. A useful mental model is that the camera shows you where to look, and the supporting tools tell you what is actually there.
What a thermal inspection costs and what it includes
Some inspectors include a thermal scan in a standard inspection; others charge an add-on, commonly in the range of $100 to $250 depending on the home and region, while a standalone infrared survey can run higher. Dedicated handheld inspection cameras themselves span a wide price band: entry-level smartphone attachments start around $200 to $400, mid-range standalone units run roughly $500 to $2,000, and professional-grade cameras with high resolution and low NETD can exceed $3,000 to $5,000.
What you are paying for with a professional scan is interpretation as much as equipment. A high-resolution image in untrained hands produces false alarms; an experienced inspector knows that a cool spot near an exterior corner in winter may be normal thermal bridging rather than a defect. The report should include thermal images paired with the inspector’s findings and the verification method used.
Whether the add-on is worth it depends on the home and the season. For an older home, a recent water-damage history, or a purchase in cold weather when the indoor-outdoor temperature gap is wide, a thermal scan often pays for itself by catching a single hidden problem. For a newer home inspected in mild weather, the conditions may limit what the camera can reveal, and the value is lower. Ask the inspector whether conditions on the day will support a meaningful scan before paying for one — an honest professional will tell you when the timing is poor.
Common use-cases around the home
Beyond the headline categories, thermal imaging earns its place in several specific situations homeowners encounter. Chasing a roof or window leak is a classic one: water travels along framing before it stains a surface, and the cooler track of evaporative cooling often reveals the true entry point rather than the spot where the drip finally appeared. Tracing radiant-floor heating loops before drilling or cutting into a slab prevents an expensive mistake. Locating a buried hot-water line, or confirming whether a section of in-floor heating has failed, are both well within the technology’s reach.
Electrical screening is another high-value use. An overloaded circuit, a corroded connection, or a failing breaker runs hotter than its neighbors long before it becomes a visible hazard, and the camera flags that heat signature during a routine sweep of the panel. Energy assessments round out the list: the Department of Energy recognizes thermographic scanning as a way to map air leakage and insulation gaps, turning a vague high utility bill into a specific list of places to seal and insulate. Each of these is a screening step the inspector confirms before recommending work.
Accuracy, conditions, and limitations
Thermal imaging is reliable only under the right conditions. It depends on a temperature differential between the inside and outside of the building, ideally at least 10 to 20 degrees Fahrenheit, so scans done in mild shoulder-season weather may reveal little. Sunlight loading on exterior walls, recent HVAC operation, and reflective surfaces can all create misleading patterns. The camera also reads surface temperature only, so deeply buried problems may not telegraph to the surface at all.
This is why standards bodies stress that infrared is a screening tool. A cool patch is a candidate for moisture, not proof of it — confirmation comes from a pin or pinless moisture meter, and sometimes a borescope to look inside a cavity. Used this way, thermal imaging meaningfully widens what an inspection can catch. Used as a standalone gadget without verification, it generates both false positives and missed defects.
It is worth being explicit about what the camera cannot do, because marketing often blurs this. It does not see through walls; it reads the surface and infers what lies behind only when that hidden thing changes the surface temperature. It cannot detect mold directly — it finds the moisture conditions mold needs, which is a related but separate thing. It cannot measure how deep a problem goes or quantify damage. And it cannot work without a temperature differential, which is why a scan on a 70-degree spring day with the heat and air conditioning both off may show almost nothing useful. Knowing these boundaries is what separates a realistic expectation from disappointment.
Accuracy also depends on operator technique. Scanning too quickly, holding the camera at a steep angle to a reflective surface, or failing to set emissivity for shiny materials all degrade results. A methodical sweep, perpendicular to surfaces, with attention to the conditions, produces images an inspector can actually trust. This is part of why training matters as much as hardware quality.
Choosing equipment and an inspector
If you are hiring, ask whether the inspector is trained in thermography and how they verify thermal findings; a competent inspector pairs the camera with a moisture meter every time. If you are buying a camera for personal use, match the specs to the job. For spot-checking insulation and drafts, a modest 160×120 unit is adequate. For chasing subtle moisture or doing it semi-professionally, prioritize at least 320×240 resolution and a NETD near 50 mK. Compare a couple of models in the same price tier rather than the cheapest available, and look at our handheld thermal imaging camera buyer’s guide for class-by-class comparisons. Maintenance is light — keep the lens clean, store the camera dry, and follow the manufacturer’s recommended periodic calibration so temperature readings stay trustworthy over time.
Two alternatives are worth weighing against a dedicated camera. A smartphone thermal attachment costs far less and is adequate for occasional homeowner checks of insulation and drafts, but its low resolution and reliance on the phone limit serious use. At the other end, a high-resolution professional camera with a low NETD, interchangeable lenses, and full measurement features is the right tool for someone inspecting many homes, though it is overkill for an occasional personal scan. Most homeowners who want their own tool land in the middle, and most buyers are better served hiring a trained inspector than buying any camera at all.
When a thermal scan makes sense
A thermal imaging home inspection is most worthwhile in a few clear situations. Buying an older home, especially one with any history of water intrusion, is a strong case, because hidden moisture and degraded insulation are common and expensive to discover after closing. A purchase or refinance in cold weather gives the camera the temperature differential it needs to perform well. Chasing a specific complaint — a musty smell, a cold room, a stain that keeps returning, or an unexplained spike in energy bills — is another, since the scan can localize the source.
For a brand-new home inspected in mild weather with no specific concern, the marginal value is lower, though even then a scan of the electrical panel and any radiant heating can catch installation faults. The decision comes down to the home’s age and history, the season, and whether there is a problem to investigate. When those line up, pairing the scan with proper verification turns it into one of the more cost-effective parts of an inspection. When they do not, the honest answer is that the camera may show little, and a good inspector will say so up front rather than charge for a scan that conditions will not support.
References
- Infrared Thermal Imaging in Home Inspections — InterNACHI
- Standard of Practice — American Society of Home Inspectors
- Home Energy Assessments and Thermographic Inspections — U.S. Department of Energy
- Building Codes and Standards Resources — International Code Council
Thermal imaging cameras
Infrared cameras reveal hidden moisture, missing insulation, and air leaks. Phone-attachment models are the budget entry point; standalone units have higher resolution.
| Product | Why | Buy |
|---|---|---|
 FLIR ONE Pro (phone) FLIR ONE Pro (phone) | Plugs into iPhone/Android; inspector favorite. | Amazon — $349.00 |
 Topdon TC001 Topdon TC001 | High-res phone module at a low price. | Amazon — $199.99 |
 FLIR C5 Compact FLIR C5 Compact | Standalone pocket camera with Wi-Fi. | Amazon — $560.00 |