Thermal Imaging Building: What Homeowners Need to Know
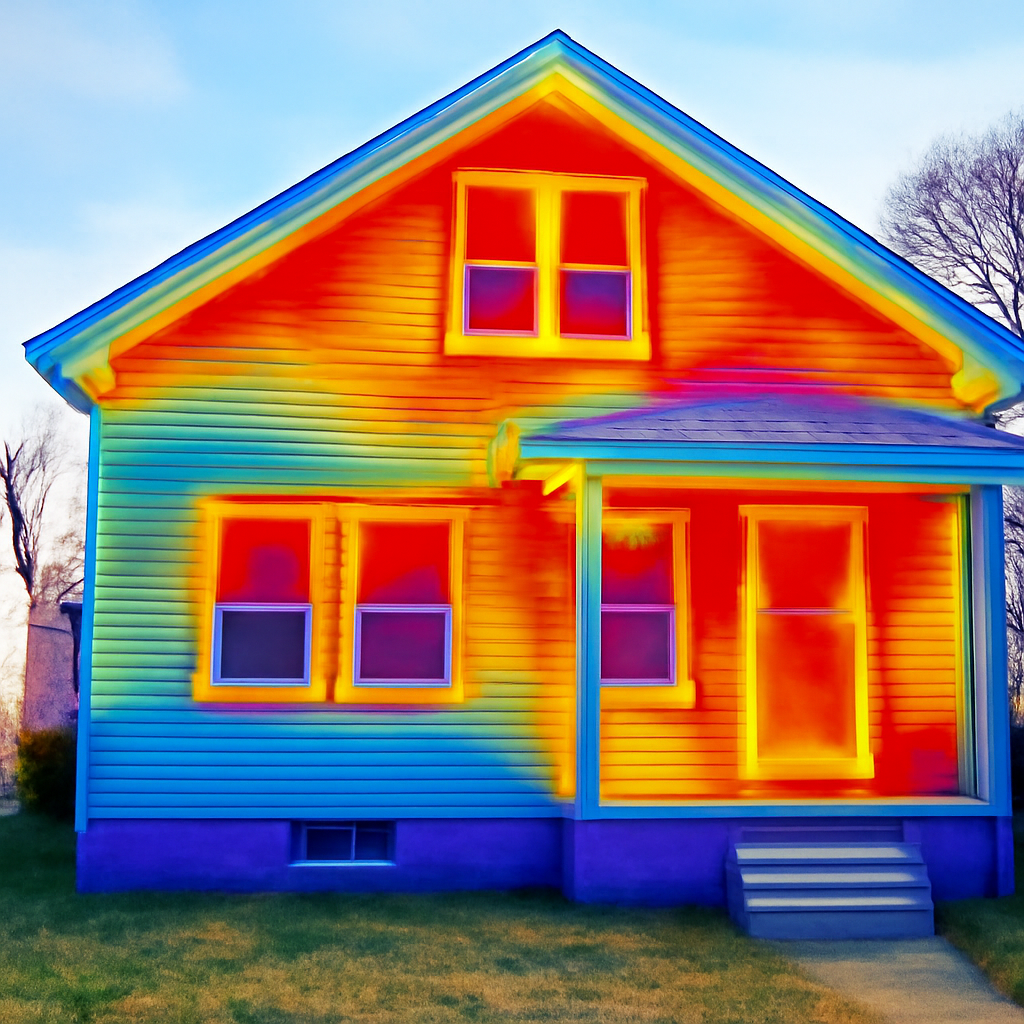
Thermal imaging building inspection uses an infrared camera to map surface temperature differences across a structure’s walls, roof, foundation, and mechanical systems. The technology reveals hidden defects that visual inspection cannot detect — air leaks, missing insulation, moisture intrusion, electrical hot spots, and HVAC distribution problems. Homeowners encounter thermal imaging building inspection during home purchase due diligence, energy audits, post-construction quality verification, and targeted troubleshooting. This guide explains what the inspection covers, what conditions affect accuracy, how to read the findings, and how to choose a qualified provider for the specific job you need done.
What thermal imaging building inspection covers
A typical residential thermal building inspection covers six categories of observation systematically.
Exterior wall thermal patterns
The inspector scans every accessible exterior wall from the interior, looking for cold patches in winter or warm patches in summer that indicate missing or compressed insulation, air leaks, or moisture intrusion.
Ceilings under attic spaces
Top-floor ceilings reveal insulation coverage gaps, air leakage around recessed lights and attic hatches, and roof leak indicators that appear as cool patches with no insulation explanation.
Floors over unheated spaces
Floors above garages, crawl spaces, and unheated basements show insulation status and air-sealing quality from the conditioned side.
Foundation and rim joist
The rim joist where the foundation meets framing is a chronic energy-loss area in many homes. Thermal imaging reveals whether air sealing and insulation were properly installed.
Electrical panel
A panel scan with the dead-front cover removed by qualified personnel reveals breakers running hotter than their neighbors, indicating loose connections, overloaded circuits, or failing components.
HVAC equipment and distribution
Furnace, air handler, condenser, and accessible ductwork. Cold rooms with normal-looking supply registers often turn out to have kinks or disconnections inside cavity ducts.
What the camera measures and what it does not
The fundamentals matter for interpretation.
What it measures
Long-wave infrared radiation emitted by every object above absolute zero, converted into pixel-by-pixel temperature readings and displayed as false-color images.
What it infers
Building defects often produce surface temperature anomalies. Wet areas cool through evaporation. Missing insulation lets exterior temperature bleed through. Loose electrical connections heat up under load. The camera shows anomalies; the inspector interprets causes.
What it does not see
Moisture, mold, gas leaks, electrical voltage, pests, or anything that does not change the surface temperature. The camera also does not see through walls — it sees the wall surface, which can be influenced by what is behind it but is not a window into the cavity.
Conditions that determine accuracy
Four environmental factors decide whether the inspection produces useful images.
Temperature delta
Residential building scans typically need at least 18 degrees Fahrenheit difference between indoor and outdoor temperatures. Front Range winters easily exceed this. Mild shoulder-season days produce ambiguous images that need careful interpretation or rescheduling.
Stable conditions before the scan
Recent HVAC setpoint changes, weather shifts, and sun exposure all introduce noise. A stable 24-hour window before the inspection produces cleanest data.
Solar loading management
South and west-facing walls warmed by sun produce warm patterns unrelated to defects. Early morning scans before sun loading produce the cleanest exterior readings. Cloudy days can be ideal.
Accessibility
The camera reads what it can see. Furniture against exterior walls, stored boxes in basements, and crowded closets block the scan. Preparation by the homeowner improves coverage.
Common findings on a thermal imaging building inspection
Five patterns appear in nearly every residential thermal report.
Settled or missing insulation
Cold rectangular patches between warmer vertical framing studs on an exterior wall in winter. Blown-in insulation that has settled by gravity leaves the upper third of the cavity uninsulated. Common in homes from the 1980s and 1990s.
Air leaks around penetrations
Cold streaks spreading from electrical outlets on exterior walls, around window frames, near attic hatches, and at the rim joist. Sealing these is often the highest-impact air-leak fix.
Stack-effect attic loss
Warm air rising through the building escapes through ceiling penetrations. Recessed lights, ceiling fans, and attic hatches show up as warm spots on the attic floor (when scanned from above) and cool patches on the ceiling drywall (from below in winter).
Moisture indicators
Localized cool patches with no insulation explanation, especially on ceilings below bathrooms, under roof valleys, and on basement walls. The inspector confirms with a moisture meter; thermal alone is suggestive, not diagnostic.
Electrical hot spots
One breaker noticeably warmer than its neighbors. Loose connections, overloaded circuits, and failing components show heat under load. Catching these early prevents failures and fires.
Worked example: an energy audit thermal inspection
A Westminster homeowner schedules a thermal imaging building inspection as part of an energy audit. Outdoor temperature 28 degrees Fahrenheit, indoor 70 degrees, delta-T 42 degrees — well within useful range.
The inspector finds six issues across a two-hour scan. First, the master bedroom north-facing exterior wall shows settled blown-in insulation in the upper third of every stud bay. Second, the attic hatch in the upstairs hallway shows a cold-air streak spreading outward, indicating failed weatherstripping. Third, the rim joist in the basement reads consistently colder than the basement walls themselves — no air sealing at the band. Fourth, the basement electrical panel shows one breaker 14 degrees warmer than its neighbors under normal household load. Fifth, a finished basement supply register reads close to room temperature with the furnace running. Sixth, a small cool patch on the kitchen ceiling above the dishwasher prompts a moisture meter check that confirms elevated moisture content.
The report ranks fixes by impact and cost. Top the attic insulation ($600). Weatherstrip the hatch ($40). Air-seal and insulate the rim joist ($800). Have the electrician torque the warm breaker ($150). Have HVAC service straighten the kinked flex duct ($200). Investigate the kitchen ceiling moisture immediately — likely a slow leak from the dishwasher supply line. Estimated annual heating savings from the air-sealing and insulation work: $400 to $600.
Choosing a thermal imaging building inspection provider
Three credential and equipment factors matter for usable reports.
Formal thermography certification
Look for inspectors with Infrared Training Center Level I, II, or III certification, or InterNACHI’s infrared thermography program. The certification level reflects training depth. A general home inspector license does not include thermography training.
Camera capability
Resolution drives image clarity. 80-by-60 detectors produce blurry results. 160-by-120 is the practical floor for residential work. 320-by-240 or higher gives cleaner patterns. Higher resolution does not invent defects but makes existing ones easier to read.
Report depth
Useful reports pair thermal images with normal-light photos, document environmental context (indoor temperature, outdoor temperature, delta-T, weather), and include specific recommendations. Ask for a sample report before booking. Thin reports without context are warning signs.
For more on the broader inspection-tools landscape, the homeowner guide to home inspection tools covers thermal imagers alongside moisture meters and borescopes.
What thermal imaging building inspection costs
Pricing reflects scope and report depth.
Add-on to home inspection
$100 to $250 added to a base general inspection. Limited scope — exterior walls, ceilings under attics, accessible electrical, focused troubleshooting.
Standalone whole-house scan
$250 to $600 depending on house size and inspector experience. Comprehensive scope with paired images and recommendations.
Energy audit with thermal imaging
$300 to $700 typically, sometimes higher with blower-door testing included. Quantified leakage rates and prioritized improvement list.
Focused single-area scan
$150 to $300 for a short-call appointment investigating one specific concern.
The companion homeowner field guide to infrared camera inspection covers the workflow in more detail.
How to prepare for a thermal imaging building inspection
Four preparation steps improve the quality of findings.
Schedule for stable conditions
Winter early morning before solar loading produces the most usable exterior images. Summer scans work with air conditioning providing the indoor-outdoor delta. Inspectors typically advise on timing.
Set the thermostat 24 hours in advance
A single setpoint for at least 24 hours before the scan lets the building equilibrate. Wild setpoint changes leave confusing residual patterns.
Move furniture from exterior walls
Couches, beds, and bookcases against exterior walls block the camera. Pulling furniture out a few feet improves coverage.
Note specific concerns in advance
Tell the inspector about specific cold rooms, drafts, stains, or comfort complaints. Focused scans of these areas usually yield specific findings.
Limits homeowners should expect
Three limitations affect how the results should be read.
Time-bound snapshots
The scan captures conditions during the visit. Problems that only appear under specific weather may not show up on a sunny-day scan. A follow-up rescan after a rain event sometimes resolves intermittent issues.
Surface-only measurement
Deep defects under multiple layers of finished construction may not produce clear patterns at the visible surface. Drywall, plaster, and tile damp temperature transmission from the cavity.
Reflective surface complications
Polished metals, glass, and glossy paint reflect ambient infrared rather than emitting their own. Inspectors recognize reflective surfaces and avoid overinterpretation.
When to commission a thermal imaging building inspection
Four scenarios make the inspection cost-effective.
During home purchase
Adding thermal imaging to a buyer’s inspection catches insulation, moisture, and electrical issues that visual-only inspections miss. Negotiation leverage often pays for the cost several times over.
Energy bill investigation
Higher-than-expected heating or cooling costs are a textbook use case. The scan identifies specific paths losing energy and ranks fixes by impact.
Post-construction or post-renovation
Verify insulation installation quality, identify air-leak paths, and confirm work completeness before final payment. Catching defects before sign-off is much easier than after.
Comfort complaints
One cold room, one always-drafty area, or chronic temperature imbalance benefits from a focused scan. The cause is usually identifiable.
References
- Using Infrared Thermography to Find Air Leaks — U.S. Department of Energy
- Infrared Certified Thermographer — InterNACHI
- ASHI Standards of Practice — American Society of Home Inspectors
- Building Science Resources — ASHRAE
Thermal imaging cameras
Infrared cameras reveal hidden moisture, missing insulation, and air leaks. Phone-attachment models are the budget entry point; standalone units have higher resolution.
| Product | Why | Buy |
|---|---|---|
 FLIR ONE Pro (phone) FLIR ONE Pro (phone) | Plugs into iPhone/Android; inspector favorite. | Amazon — $349.00 |
 Topdon TC001 Topdon TC001 | High-res phone module at a low price. | Amazon — $199.99 |
 FLIR C5 Compact FLIR C5 Compact | Standalone pocket camera with Wi-Fi. | Amazon — $449.00 |