Stud Finder: Magnetic vs Electronic and Hidden Hazards
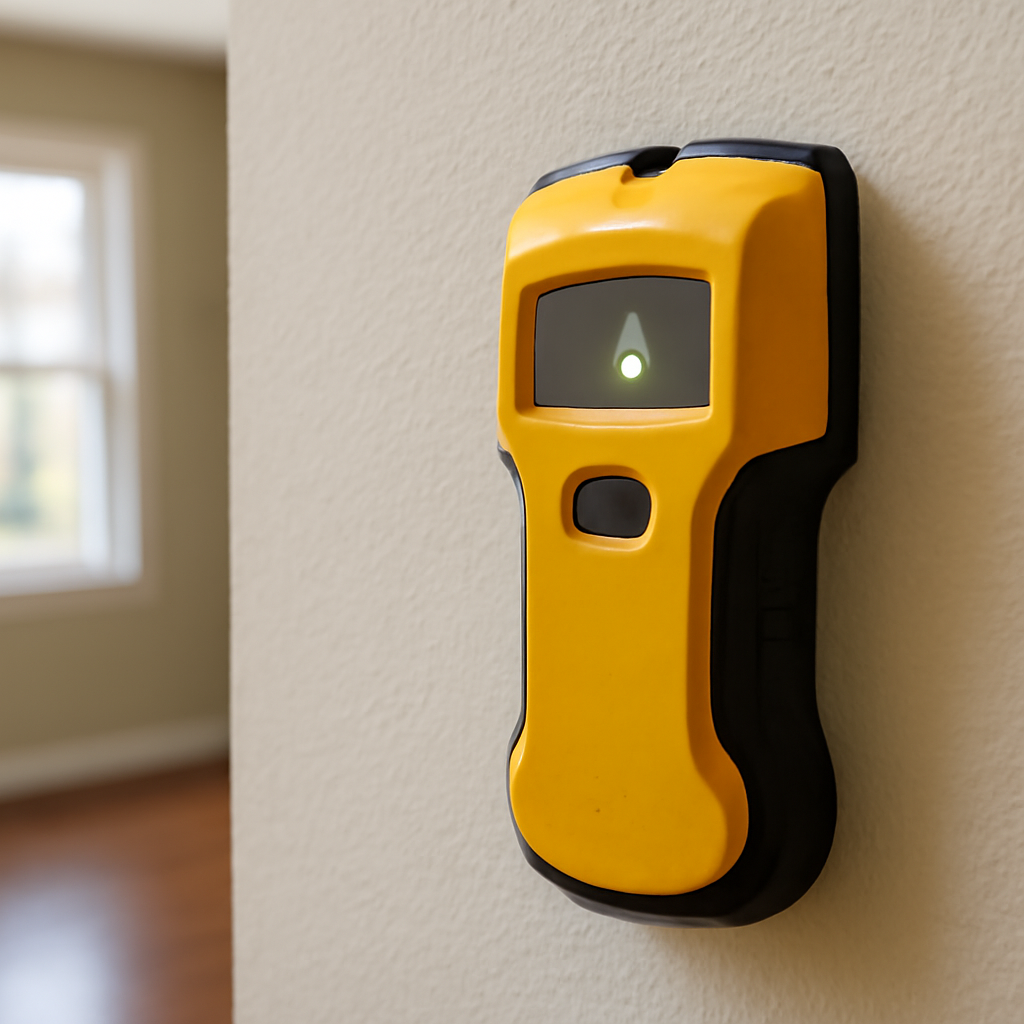
Hanging a television, mounting kitchen cabinets, anchoring a dresser or installing a grab bar all start with the same question: where is the framing behind the wall? A stud finder answers that question without cutting holes, and it is one of the cheapest tools a homeowner can own. It is also one of the most misunderstood. Some models only find nails and screws, some read changes in wall density, and some add a live-wire warning that people mistake for a full electrical safety check. This guide covers magnetic versus electronic models, the walls where they struggle, mounting heavy items, drilling safety, moisture checks, what inspectors carry and typical prices.
Part of our Home Inspection Tools guide — start there for the full picture →
How a Stud Finder Works
Most interior walls in Front Range homes are gypsum drywall fastened to wood studs, usually spaced 16 inches on center in newer construction and sometimes 24 inches in garages, basements or some later framing. A stud finder locates those vertical framing members from the finished side of the wall. There are two broad families of tools, and they work on completely different principles.
Magnetic stud finders
A magnetic stud finder contains a small, strong magnet that is attracted to the steel drywall screws or nails driven into each stud. Slide it across the wall, and it clicks or sticks where a fastener sits beneath the paint. Because drywall installers fasten along each stud, a vertical line of hits usually traces the stud.
- Strengths: no batteries, very little to go wrong, works through many paint layers and textured finishes, and confirms a real fastener rather than guessing from density.
- Weaknesses: it finds fasteners, not studs, so it can be fooled by a screw in a blocking piece, a corner bead or an old nail. It also takes patience, since screws may be 12 inches or more apart vertically.
Electronic stud finders
Electronic models measure changes in capacitance, essentially how the wall’s electrical properties shift when a dense object such as a stud sits behind the surface. The tool is calibrated against the wall when switched on, then signals with lights, a beep or a display when the reading changes.
- Edge-finding models signal at the leading edge of the stud. The user marks one edge, scans from the opposite direction to mark the other, and the stud center sits between the two marks.
- Center-finding models use multiple sensor plates to estimate the full width of the stud and point to its center in one pass. Some display a bar or outline of the framing beneath the sensor.
- Deep-scan modes increase sensitivity for thicker wall assemblies, such as double layers of drywall, at the cost of more false readings.
- AC detection warns when the tool senses the electric field from an energized wire. It is a helpful extra, but it has real limits, covered below.
Whichever type is used, the tool infers what is behind the wall from indirect clues, so every reading is an estimate until confirmed.
Getting Accurate Readings
Most frustration with a stud finder comes from technique rather than the tool itself. A few habits improve results considerably:
- Calibrate on a hollow spot. Electronic models zero themselves when switched on. Starting directly over a stud gives a false baseline, so the tool may never signal. Start a few inches away from where framing is expected and restart if readings seem odd.
- Keep the tool flat and moving slowly. Tilting or lifting the tool changes the reading. Slide it steadily with even pressure.
- Scan in both directions. Mark the edge from the left, then from the right. The two marks should be roughly 1.5 inches apart for standard dimensional lumber.
- Check multiple heights. Scanning at several heights confirms the framing runs straight up and down and is not a horizontal fire block or a diagonal brace.
- Use the spacing pattern. After finding one stud, measuring 16 inches in either direction usually lands near the next. If a reading falls well off that pattern, it may be a pipe, a duct or a doubled stud near a window or door opening.
- Confirm before drilling. A small finish nail driven at the mark, or a tiny pilot hole in an area that will be covered by the mounted item, confirms solid wood. If the nail pushes through with little resistance, the mark missed.
Where Stud Finders Struggle
Every stud finder is designed around a typical wall: half-inch drywall on wood studs. Departures from that assembly cause most of the false readings homeowners report.
Plaster and lath
Many older homes in Denver, Boulder and Colorado Springs have plaster walls over wood lath. The lath strips run horizontally across every stud, and the plaster is dense and uneven. Electronic tools often read the whole wall as solid or produce signals every few inches. Magnetic finders can still work by locating the nails that hold the lath to each stud, though the nails are small and the plaster may be thick. Some homes have metal lath, which can make magnetic tools stick almost everywhere. In plaster homes, patience with a magnet and the spacing pattern usually beats an electronic scan.
Tile, stone and paneling
Ceramic tile over cement board, stone veneer and thick wood paneling add mass and depth that confuse electronic sensing. Grout lines and the cement board’s own fasteners can create misleading signals. For bathrooms and kitchen backsplashes, locating studs above or below the tiled area and extending a plumb line up or down is often more reliable than scanning through tile.
Metal studs
Steel studs are common in commercial buildings and appear in some basement finishes and condo interiors. A magnetic stud finder will respond to steel framing directly, which makes it useful there. Electronic tools can detect metal studs as well, but mounting methods differ: heavy loads on steel studs generally require fasteners designed for thin-gauge steel or toggle-style anchors, not standard wood screws.
Textured, foil-faced or damp walls
Heavy texture lifts the tool off the surface, and foil-backed insulation or foil-faced drywall can block or scramble electronic readings. A wall that is wet behind the surface may also read differently from dry areas. That last point matters: an odd stud finder reading is not a moisture measurement, and the tool should not be used as one.
Using a Stud Finder Before Mounting Heavy Items
The most common reason homeowners buy a stud finder is to mount something that would otherwise pull out of drywall. Hollow-wall anchors have their place, but heavy and dynamic loads generally belong in framing.
Televisions and wall mounts
Wall-mount brackets usually list the stud spacing they accept and the fastener type required. Locating two studs within the bracket’s span, marking their centers and confirming with a test nail is standard practice. Articulating arms that extend away from the wall create more leverage than flat mounts, which is one more reason to fasten into solid wood.
Furniture tip-over restraints
Tall dressers, bookcases and TV stands can tip onto children who climb them. Anti-tip straps and brackets work best when screwed into a stud rather than into drywall alone. The guide to furniture anchors covers strap types, how to attach them and what to do when no stud sits where the furniture needs to go.
Cabinets and shelving
Upper kitchen cabinets carry dishes, cans and appliances, so installers fasten them through a mounting rail into studs. Before ordering or installing, mapping the studs along the wall shows whether cabinet backs will land on framing or whether blocking is needed. The guide to kitchen cabinet installation walks through layout, leveling and fastening.
Grab bars, railings and light fixtures
Grab bars and stair handrails must resist sudden pulling force from a person who slips, so they are normally fastened into framing or solid blocking. Ceiling fixtures and fans hang from an approved electrical box rather than from a stud alone. The guide to installing a light fixture explains box ratings and the power shutoff steps involved.
AC Detection Is Not a Voltage Test
Many electronic stud finders include a live-wire indicator. It can flag an energized cable behind the wall, which is a useful warning before drilling. It is not a substitute for a dedicated tester, for several reasons:
- It senses the electric field from current-carrying conductors, so a cable that is switched off, a circuit with the breaker open, or a wire shielded by metal conduit or armored cable may not register.
- Sensing depth and sensitivity vary by tool and wall material. A wire deeper in the cavity, or behind tile or plaster, may be missed.
- Readings can bleed along the wall, making the indicated location of a cable imprecise.
- Low-voltage wiring such as doorbell, thermostat, network and speaker cables usually will not trigger it at all.
Before opening a box, replacing a switch or cutting into a wall near outlets, a non-contact voltage tester or a two-probe tester is the appropriate tool, used after shutting off the breaker and confirming the circuit is dead. The guide to digital voltage testers explains how these tools differ and how to verify them on a known live source first. For receptacle wiring checks, an outlet tester reports common wiring faults at the plug.
Drilling Safety: Pipes and Wires in Walls
Finding a stud does not mean the area around it is clear. Electrical cables are often stapled along the side of a stud or routed horizontally through holes bored in the framing. Supply pipes, drain lines, gas piping and ductwork also travel inside wall cavities, especially in kitchen, bathroom and laundry walls. Driving a long screw or drill bit into one of these can cause a shock, a hidden leak or a fire hazard.
OSHA’s electrical safety overview notes that working with electricity can be dangerous and that electrical hazards include electric shock, electrocution, fires and explosions. Its standards are written for workplaces, but the hazards are the same inside a home wall. Practical precautions include:
- Note what is nearby. Outlets, switches and fixtures usually have cables running vertically above or below them, and sometimes horizontally to the next device. Avoid drilling directly above or below an electrical box.
- Think about plumbing. A wall behind a sink, toilet, tub or washer, or below a bathroom on the floor above, is likely to carry pipes. Drain stacks can run floor to ceiling.
- Use the shortest fastener that works. A screw that only needs to reach an inch or so into the stud is less likely to hit a cable or pipe deep in the cavity.
- Watch for protective plates. Metal nail plates on the face of a stud often mark a spot where a pipe or cable passes close to the surface. A magnetic finder will often locate them.
- Shut off power when working near circuits. If drilling close to known wiring is unavoidable, turning off the relevant breaker reduces the shock risk.
- Stop if something feels wrong. A sudden give, metal shavings, water or a spark means stop immediately, shut off power or water as needed and call a licensed electrician or plumber.
Slow drips inside a cavity can feed mold and rot for months before showing up as a stain. If a fastener went somewhere unexpected, it is worth checking the area over the following days.
Moisture Questions Need a Moisture Meter
Because electronic stud finders respond to density and dielectric changes, a wet section of wall can produce unusual signals. That leads some homeowners to treat the tool as a leak detector. It is not designed or calibrated for that purpose, and a normal reading does not mean a wall is dry.
The EPA’s guide to mold and moisture states that the key to mold control is moisture control, and that wet materials dried within 24 to 48 hours usually will not grow mold. Confirming whether drywall is actually damp calls for a moisture meter, either a pin type that measures resistance between probes or a pinless type that scans the surface. The guide to drywall moisture meters explains readings, reference scales and how to compare a suspect area with a known dry wall. Inspectors often pair a meter with an infrared camera or an infrared thermometer to spot temperature patterns worth probing.
What Home Inspectors Carry, and Why
Home inspectors are generalists who look at visible, readily accessible systems. The ASHI Standard of Practice states that inspectors are not required to move personal property or furniture, and not required to dismantle systems and components except as the standard explicitly requires. It also notes that inspections are not technically exhaustive and are not required to identify concealed conditions. In short, the inspection describes what can be seen and tested without opening walls.
Within that scope, tools that see past the surface without damage are valuable. Many inspectors carry a moisture meter, a non-contact voltage tester, an outlet tester and often an infrared camera. A stud finder is less central to an inspection than to a renovation, but some inspectors use one to understand framing layout around a suspicious crack or to check whether a heavy wall-mounted item appears to be fastened into framing. The inspection tools hub groups the instruments inspectors commonly bring, and the main home inspection tools guide covers how homeowners can use similar tools between inspections.
For buyers, the takeaway is that an inspector will not open walls or certify that a TV mount or cabinet is fastened correctly. If wall-mounted items will stay with the house, it is fair to ask the seller how they were installed or to check them with a stud finder and a gentle pull test.
Choosing a Stud Finder and Typical Prices
The right tool depends on the walls in the house and the projects ahead. A rough decision guide:
- Mostly drywall, occasional picture or shelf: a basic magnetic finder or simple edge-finding electronic model is usually enough.
- Frequent mounting projects, cabinets or TVs: a center-finding electronic model with deep-scan mode saves time and gives clearer marks.
- Older plaster walls: a strong magnetic finder is often more dependable than electronic sensing.
- Mixed wall types: owning both a magnet and an electronic finder lets each confirm the other.
Prices change and vary by retailer, so these are broad 2026 estimates rather than quotes. Simple magnetic finders often cost roughly $10 to $25. Basic electronic edge finders commonly fall around $15 to $40. Multi-sensor and center-finding electronic models with deep-scan and AC detection may run roughly $30 to $80. Specialized wall scanners that use radar-style or multi-sensor imaging to show pipes, wires and framing can cost several hundred dollars or more and are mostly bought by contractors.
Whatever the price, the habits matter more than the model: calibrate on a hollow spot, scan in both directions, confirm with a test nail and treat any live-wire signal as a hint rather than proof.
References
- Electrical Safety Overview — Occupational Safety and Health Administration
- A Brief Guide to Mold, Moisture and Your Home — U.S. Environmental Protection Agency
- ASHI Standard of Practice for Home Inspections — American Society of Home Inspectors
Frequently asked questions
Is a magnetic or electronic stud finder better?
Each has strengths. A magnetic stud finder locates the screws or nails in a stud and is reliable on plaster and textured walls. An electronic model reads density changes and can show stud edges or centers faster on drywall. Many homeowners keep one of each so they can confirm readings.
Why does my stud finder beep everywhere?
Common causes are calibrating over a stud, plaster and lath walls, tile, foil-faced materials or heavy texture. Restarting the tool over a hollow area, scanning slowly in both directions and checking the 16-inch spacing pattern usually sorts out false readings.
Can a stud finder detect live wires safely?
Many electronic models include AC detection, but it can miss switched-off, shielded or deep cables. It is a warning, not a safety check. A non-contact or two-probe voltage tester, used with the breaker off, is the proper tool before electrical work.
Will a stud finder find water leaks inside a wall?
Not reliably. Damp areas can change electronic readings, but the tool is not calibrated for moisture. A moisture meter, sometimes paired with an infrared camera, is the right instrument for checking suspected wet drywall.
How much does a stud finder cost?
General 2026 estimates put simple magnetic finders around $10 to $25, basic electronic models around $15 to $40, and center-finding multi-sensor units around $30 to $80. Professional wall scanners can cost several hundred dollars or more.
Planning to mount cabinets or a TV in a house you are buying and want to know what is behind the walls first? Get in touch with us and we can connect you with a Front Range home inspector who checks moisture, wiring and framing clues before you close.