Mini Split Repair: Common Problems, Fixes and Costs
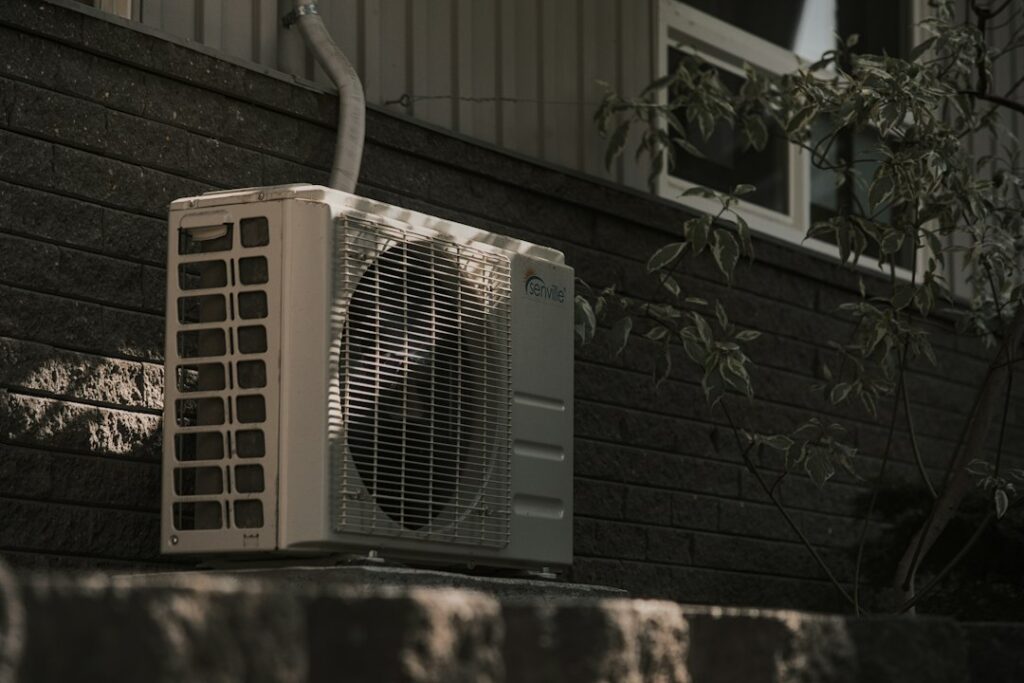
Ductless mini-split systems have become a popular way to add cooling and efficient heating to Front Range homes, especially older houses without ductwork, finished basements, additions and garages converted to living space. They are generally reliable, but when one stops cooling, starts dripping water from the indoor head or flashes a cryptic error code, many owners are unsure what they can safely check and what needs a technician. This mini split AC repair guide covers the most common problems, the homeowner checks worth doing first, the repairs that require a licensed and EPA-certified technician, rough repair cost ranges for 2026, maintenance that prevents repeat calls, and a few cold-climate notes for heat pump mini-splits in Colorado winters. Costs vary by brand, system size, parts availability and local labor rates, so treat all figures as general estimates.
Part of our Heating, Cooling & Ventilation guide — start there for the full picture →
Heating or cooling trouble? Talk to a local HVAC technician.
📞 Call (833) 491-1876Mini Split AC Repair: What Usually Goes Wrong
A mini-split has two main parts: an outdoor unit containing the compressor and outdoor coil, and one or more indoor air handlers, often called heads, mounted on walls or ceilings. Refrigerant lines, a communication cable and a condensate drain connect them. ENERGY STAR’s ductless heating and cooling page describes how the outside unit extracts heat from the air even when it is cold and how refrigerant carries that heat to the indoor heads, with the process reversing in warm months for cooling.
Most service calls trace back to a handful of causes: dirty filters and coils, clogged condensate drains, refrigerant leaks at flare connections, failed sensors or circuit boards, communication faults between the indoor and outdoor units, and outdoor units blocked by debris, snow or ice. Many of these start small. A filter that has not been cleaned in months reduces airflow, which can lead to coil icing, which can then lead to water leaking from the head when the ice melts.
The good news is that several common problems can be checked, and sometimes fixed, by a homeowner in a few minutes. The rest, especially anything involving refrigerant or electrical boards, belongs to a qualified technician.
Common Mini Split Problems and Likely Causes
Not Cooling or Not Heating
Weak or no cooling or heating is the most frequent complaint. Before assuming a major failure, check that the remote is set to the correct mode, the setpoint is reasonable and the system is not in “dry” or “fan” mode. Dirty filters, a blocked outdoor unit or a tripped breaker are common culprits. If those check out, possible causes include low refrigerant from a leak, a failing compressor or fan motor, a faulty sensor, or a problem with the electronic expansion valve. Low refrigerant is not a normal maintenance item; a system that is low has a leak that needs to be found and repaired.
Blinking Lights and Error Codes
Most mini-splits report faults through blinking LEDs on the indoor head or codes on the remote or display. Codes vary by brand and model, so look up the exact code in the owner’s manual or the manufacturer’s support site. Common categories include sensor faults, communication errors between indoor and outdoor units, high or low pressure protection, and overcurrent or inverter board faults. Recording the exact code, how many times a light blinks, and when the fault appears saves time when calling a technician.
Water Leaking from the Indoor Head
Water dripping or running down the wall below an indoor unit usually points to the condensate drain. The drain line can clog with dust, biological growth or debris, or it can lose its downward slope if the line is kinked or the head is not mounted level. Units that rely on a condensate pump can leak when the pump fails. Ice that forms on the indoor coil and then melts can also overflow the drain pan. The EPA’s guide to mold and moisture recommends keeping air conditioning drip pans clean and drain lines unobstructed and flowing properly, since chronic leaks can damage drywall and feed mold growth.
Ice on the Coils or Refrigerant Lines
Frost or ice on the indoor coil or the copper lines usually signals reduced airflow, a dirty coil, low refrigerant or a sensor problem. In cooling mode, switch the system off or to fan-only to let the ice melt, clean the filters, and see whether it returns. Recurring icing after the filters are clean is a call for a technician. In heating mode, some frost on the outdoor coil is normal in cold weather, and the system will periodically run a defrost cycle; steam rising from the outdoor unit during defrost is expected.
Musty or Sour Odors
A musty or sour smell when the unit starts often comes from biological growth on the blower wheel, coil or drain pan inside the head. The barrel-shaped blower wheel in wall-mounted heads collects dust and moisture and can develop dark buildup that is hard to see without removing covers. Light cleaning of filters and accessible surfaces is a homeowner task, but a deep cleaning of the blower wheel and coil usually requires partial disassembly and is commonly done by a technician using a bag-and-rinse method. Persistent odors in a home with other moisture problems may be worth investigating more broadly.
Noise and Vibration
Rattles, buzzing or clicking may come from loose panels, a blower wheel out of balance, a failing fan motor or an outdoor unit sitting unevenly on its pad or wall brackets. Hissing at the indoor unit can be refrigerant moving normally, but a persistent hiss near connections, combined with poor performance, can indicate a leak.
Remote, Wi-Fi and Communication Problems
A system that ignores the remote may simply have dead batteries or a remote set to a different unit address. Wi-Fi modules lose connection after router changes. A communication error between indoor and outdoor units, however, may involve wiring damage, a loose terminal or a failed control board, all of which need a technician.
Best Mini Split: our top 3 picks
| Product | Best for | Key features | Price | Buy |
|---|---|---|---|---|
| COSTWAY Blast Pro 12K | Best overall single room |
| $459.99as of Nov 19, 2026 6:31 pm GMT+0000 | Buy now →Check current price |
| Rellytech 11,500 BTU | Bedrooms and cold snaps |
| $319.99as of Nov 19, 2026 6:31 pm GMT+0000 | Buy now →Check current price |
| Rellytech 9,000 BTU | Small rooms, stated HSPF2 |
| $309.99as of Nov 19, 2026 6:31 pm GMT+0000 | Buy now →Check current price |


Prices are Amazon’s listed prices as of the time shown and change often; check Amazon for today’s price. As an Amazon Associate we earn from qualifying purchases.
Homeowner Checks Before Calling for Service
These checks are safe for most owners and can resolve a surprising number of complaints:
- Check the power. Confirm the breaker for the outdoor unit and, where separate, the indoor unit is on, and that the outdoor disconnect switch has not been pulled. If a breaker trips repeatedly, stop and call a professional.
- Check the remote and settings. Replace remote batteries, confirm the mode and setpoint, and turn off any schedule or “eco” setting that might limit output.
- Clean the filters. Most wall-mounted heads have washable mesh filters behind the front panel. Rinse them, let them dry completely and reinstall. Many manufacturers suggest checking them every few weeks during heavy use.
- Check clearances. Keep furniture, curtains and shelves from blocking the indoor head’s airflow. Outdoors, clear leaves, grass clippings, cottonwood fluff and stored items from around the condenser.
- Clear snow and ice in winter. Colorado storms can bury outdoor units or build ice beneath them. Keep snow cleared from the top and sides, and make sure the unit sits high enough on its stand or brackets for defrost water to drain away. Never chip ice from the coil fins with tools.
- Look at the drain. Check where the condensate line exits outside to make sure water is dripping out and the end is not crushed, frozen or buried.
- Write down codes. Note any error codes, blink patterns and when the problem occurs.
Avoid opening the outdoor unit’s electrical panel or tampering with refrigerant fittings. Inverter mini-splits contain capacitors that can hold a dangerous charge even after power is turned off.
Repairs That Need a Licensed, EPA-Certified Technician
Any work that involves refrigerant requires a qualified technician. The EPA’s Section 608 program prohibits intentionally venting refrigerants, including HFCs, while maintaining, servicing, repairing or disposing of air conditioning equipment, and it runs the technician certification program for people who handle these refrigerants. Jobs that fall into this category include:
- Refrigerant leak detection and repair, including leaking flare connections, which are a common weak point on mini-split line sets.
- Recharging refrigerant after a leak is repaired, which typically involves evacuating the system with a vacuum pump and weighing in the correct charge.
- Compressor, reversing valve and expansion valve replacement.
- Control board, inverter board and sensor replacement, which involves high-voltage components.
- Line set replacement or relocation of indoor or outdoor units.
Many mini-split manufacturers also require installation and repairs by a licensed or authorized contractor to keep the warranty valid, and some require proof of registration within a set period after installation. Check the warranty terms and registration status before authorizing major repairs. ENERGY STAR’s ductless page notes that mini-splits should be professionally installed and that a contractor should verify system size with a Manual J load calculation, which matters if a repair discussion turns into a replacement.
Mini Split Repair Costs
Rough 2026 ranges for common jobs, before warranty coverage, are:
- Service call and diagnosis: about $100 to $250, sometimes credited toward the repair.
- Clearing a clogged condensate line: about $100 to $300.
- Condensate pump replacement: about $150 to $450.
- Deep cleaning of an indoor head, including blower wheel and coil: about $150 to $400 per head.
- Sensor or remote replacement: about $100 to $350.
- Fan motor replacement, indoor or outdoor: about $300 to $800.
- Leak repair plus refrigerant recharge: about $300 to $1,500, depending on the leak’s location and the amount of refrigerant needed.
- Control or inverter board replacement: about $400 to $1,200.
- Compressor replacement: often $1,500 to $3,500 or more, which can approach the cost of a new outdoor unit.
Parts covered by a manufacturer warranty can reduce these costs considerably, though labor is often billed separately. On a system more than 12 to 15 years old, a major failure such as a compressor may make replacement the better value. Units that use older refrigerants may also face rising refrigerant costs and limited parts availability.
Maintenance That Prevents Repeat Repairs
Regular care prevents most of the problems above. ENERGY STAR’s heating and cooling maintenance checklist recommends annual pre-season check-ups by a contractor, inspecting and cleaning the condensate drain, cleaning evaporator and condenser coils, checking refrigerant levels, and inspecting or cleaning air filters monthly. A plugged drain, the checklist notes, can cause water damage and affect indoor humidity. Those principles apply to ductless systems as well.
- Clean indoor filters every few weeks during heavy use.
- Have heads professionally cleaned when coils or blower wheels show buildup.
- Keep the outdoor unit clear of vegetation and snow, and check that it sits level.
- Inspect line set insulation outdoors; UV-damaged insulation can crack and should be replaced or protected.
- Schedule a professional check before peak cooling or heating season.
- Keep a simple log of filter cleanings, service visits and any error codes, which helps technicians diagnose intermittent faults and supports warranty claims.
More detail on seasonal tune-ups is in the guide to AC maintenance, and problems with ducted central systems are covered in the air conditioner repair guide.
Repair or Replace a Mini-Split?
The repair-or-replace question usually comes up after a compressor failure, a second refrigerant leak or a board failure on an older system. Several factors help frame the decision:
- Age: Heat pumps and air conditioners past roughly the 10-year mark are commonly treated as replacement candidates when a major component fails, while a newer mini-split with a single failed part is usually worth repairing. Actual service life varies with installation quality, climate and maintenance history, and well-maintained systems often run longer.
- Warranty status: Many manufacturers offer long parts warranties on registered systems, sometimes with a longer term on the compressor. A covered compressor changes the math considerably.
- Refrigerant type and parts supply: Older systems using phased-down refrigerants may face higher refrigerant prices and harder-to-find boards and sensors.
- Repeat problems: A system with recurring leaks at multiple connections or repeated board failures may have installation issues that a repair alone will not address.
- Multi-zone systems: On a multi-head system served by one outdoor unit, an outdoor failure takes out every zone, which can raise the stakes on an aging unit.
When replacement is on the table, ask for at least two written quotes, confirm the new system is sized with a load calculation rather than matched to the old nameplate, and ask whether existing line sets and wiring can be reused safely or should be replaced.
Cold-Climate Mini-Splits on the Front Range
Many mini-splits sold today are heat pumps, and cold-climate models are designed to keep heating at low outdoor temperatures. ENERGY STAR’s air-source heat pump page notes that certified cold-climate heat pumps are tested down to 5°F, continue working below that, and heat most efficiently with a back-up energy source when temperatures drop even lower. Denver-area cold snaps can approach or dip below that range, so a system that struggles on the coldest nights is not necessarily broken.
Signs that point to a real problem rather than normal cold-weather behavior include an outdoor unit that stays encased in ice after defrost cycles, error codes during heating, a fan that will not spin, or heat output that drops sharply during mild weather. Frequent defrost cycles are normal in cold, humid conditions; blocked drainage that lets meltwater refreeze around the base is not. Mounting outdoor units on stands or wall brackets above typical snow depth, with a clear path for defrost water, helps avoid repeated ice problems.
Buying a Home With a Mini-Split System
A general home inspection evaluates permanently installed cooling equipment in a visual, non-invasive way, but it is not a refrigerant or electrical diagnosis. Buyers can ask the seller for installation dates, warranty registration and service records, and check whether the heads are clean and the outdoor unit is level and clear. When a system is older or shows leaks, odors or error codes, an evaluation by an HVAC technician can clarify repair needs. The HVAC inspector guide explains when a specialist makes sense, and the home inspector hiring guide covers how to schedule specialist evaluations within an inspection window.
More Questions About Mini Split Repair
How long do mini split systems last?
Ductless mini split systems typically last about 15 to 20 years with regular maintenance, according to industry estimates, and sometimes longer in mild climates. Neglected filters and coils shorten that lifespan considerably.
Lifespan depends on installation quality, refrigerant line sealing, outdoor unit placement, and how hard the system works. Outdoor units in coastal areas or exposed to heavy snow and debris may wear faster. Annual professional maintenance and monthly filter cleaning during heavy use help a system reach the upper end of the range.
How do you clean mini split filters?
Mini split filters are usually cleaned by lifting the front panel of the indoor unit, sliding out the mesh filters, vacuuming loose dust, and rinsing them in lukewarm water with mild soap if needed. Let them air dry completely before reinstalling.
Most manufacturers suggest checking filters every few weeks during heavy use and cleaning them at least monthly. Dirty filters reduce airflow, which can cause icing, poor cooling, and higher energy bills. Never run the unit without filters, because dust then collects directly on the coil and blower wheel, which is much harder to clean.
Is a mini split covered by a home warranty?
Mini splits are covered by some home warranty plans, but coverage varies and some plans exclude ductless systems or cap repair amounts. Read the contract’s HVAC section before relying on coverage.
Manufacturer warranties often cover parts for a set period, commonly with longer coverage on the compressor, and many require registration within a short time after installation. Labor is usually covered by the installer for a shorter period. Keeping maintenance records helps when filing any warranty claim.
How do you reset a mini split system?
Most mini split systems can be reset by turning off power at the breaker or disconnect for a few minutes and then turning it back on, which clears temporary faults and error codes. Some units also have a reset button on the indoor head.
If the same error code returns after a reset, the cause is likely a real fault, such as a sensor, communication wiring, drainage, or refrigerant problem. Note the code and model number before calling a technician, as it helps them bring the right parts.
References
- Section 608 of the Clean Air Act: Stationary Refrigeration and Air Conditioning — U.S. Environmental Protection Agency
- Ductless Heating and Cooling (Mini Split Heat Pumps) — ENERGY STAR
- Heating and Cooling Maintenance Checklist — ENERGY STAR
- A Brief Guide to Mold, Moisture and Your Home — U.S. Environmental Protection Agency
- Air-Source Heat Pumps and Cold Climate Considerations — ENERGY STAR
Frequently asked questions
Why is my mini split not cooling?
Common causes include the wrong mode or setpoint, dirty filters, a blocked outdoor unit and a tripped breaker. If those check out, low refrigerant from a leak, a failing fan motor, a sensor fault or a compressor problem may be involved, which requires a technician.
Why is water leaking from my mini split indoor unit?
Most leaks come from a clogged or poorly sloped condensate drain, a failed condensate pump, or ice on the coil that melts and overflows the drain pan. Cleaning the filters and checking the drain outlet are good first steps.
How much does mini split repair cost?
As rough 2026 ranges, a service call runs about $100 to $250, drain or sensor repairs often a few hundred dollars, leak repair with recharge about $300 to $1,500, and compressor replacement $1,500 or more. Warranty coverage can lower parts costs.
Can I add refrigerant to my mini split myself?
No. Refrigerant work requires EPA Section 608 certified technicians and proper equipment, and a system that is low on refrigerant has a leak that should be repaired. DIY charging can also void the manufacturer warranty.
Do mini splits work in Colorado winters?
Cold-climate heat pump mini-splits are designed to keep heating at low outdoor temperatures, and ENERGY STAR certified cold-climate units are tested down to 5 degrees Fahrenheit. Backup heat is often recommended for the coldest nights.
Can you clean a mini split yourself?
Homeowners can usually clean mini split filters and wipe the front panel and outdoor unit area themselves. Deep cleaning the coil and blower wheel involves disassembly and is generally best left to a technician or done with a manufacturer-approved coil cleaning kit.
Why is my mini split outdoor unit not running?
An outdoor unit that will not run can be caused by a tripped breaker, a disconnected power switch, a failed capacitor, communication errors, or a defrost cycle in winter. Check power first. Electrical and refrigerant faults need a licensed technician.
Why does my mini split keep turning off by itself?
A mini split that shuts off by itself is often responding to a timer or sleep setting, a dirty filter causing overheating or icing, a power interruption, or a fault protection mode. Check settings and filters first, then note any error code shown before calling a technician.
Thinking about a Front Range home with ductless heating and cooling and want a clear read on its condition? Send us a message and we can help connect you with a local inspector.