IR Thermal Imaging Camera: Dual-Term Guide for Buyers
“IR thermal imaging camera” stacks two related-but-not-identical terms — “IR” (infrared) and “thermal imaging” — into one search query. The phrasing usually shows up when buyers want to make sure they are looking at the right product class. This guide clarifies what each term means, explains why most consumer products that claim “IR” and “thermal” are actually long-wave infrared microbolometer cameras, and walks through the buying tiers. References lean on the U.S. Department of Energy, InterNACHI, and ASHRAE rather than detector manufacturers.
Part of our Thermal Imaging for Homes guide — start there for the full picture →
What is an IR thermal imaging camera?
An IR thermal imaging camera is a device that captures long-wave infrared radiation (LWIR, 8 to 14 micrometers) and converts the radiation pattern into a visible image showing temperature differences. The “IR” describes the spectrum the camera operates in. The “thermal imaging” describes what the camera does with that spectrum — visualize heat patterns. The two terms are nearly synonymous for residential and commercial inspection use, though some technical contexts distinguish them more precisely.
The U.S. Department of Energy notes infrared thermography is an effective tool for finding missing insulation and air leakage when paired with proper interpretation skills. The camera does the imaging; the operator interprets the patterns. For broader context, see our home inspection tools guide.
Why does the terminology cause confusion?
“Infrared” as a term covers four bands of the electromagnetic spectrum — NIR, SWIR, MWIR, and LWIR. Only the LWIR band detects heat from room-temperature objects. NIR detects reflected light, similar to visible-light cameras. SWIR is between the two. MWIR is the band for high-temperature industrial work. When buyers see “IR camera” advertised, they should check whether it means LWIR (true thermal imaging) or NIR (reflected light, like security camera night vision).
Consumer and pro-handheld products sold for building inspection are essentially always LWIR microbolometer cameras. Consumer “IR security cameras” with night vision are essentially always NIR. The two product categories are not interchangeable; a security camera cannot find missing insulation, and a thermal inspection camera makes a poor security camera.
What does an LWIR microbolometer detector actually do?
A microbolometer is an array of tiny resistors (typically vanadium oxide or amorphous silicon) coated to absorb LWIR radiation. Each resistor changes temperature slightly when struck by infrared photons, and the change in resistance is read out as a pixel value. The full array — 160×120, 320×240, or 640×480 in common consumer and pro tiers — produces a thermal image at 8 to 60 frames per second.
Microbolometers do not require cryogenic cooling, which is why LWIR cameras are compact and affordable compared to cooled MWIR systems. The downside is sensitivity: uncooled microbolometers cannot match the noise performance of cooled detectors, which is why scientific and military infrared systems still use cooled designs.
What can you do with an IR thermal imaging camera?
Find missing or compressed insulation
Insulation gaps show up as warmer or cooler patches on interior walls and ceilings, depending on the outdoor temperature. The Department of Energy’s residential audit guidance treats thermal scanning as a primary tool for insulation surveys.
Locate air leakage
Drafts around windows, doors, recessed lighting, and electrical penetrations create distinctive thermal patterns. Combined with a blower-door test, thermal imaging produces an actionable air-sealing plan.
Detect moisture intrusion
Wet drywall and saturated insulation cool through evaporation, appearing as cooler patches on the camera. Moisture meters confirm the thermal finding. InterNACHI’s IR certification teaches the difference between true moisture patterns and lookalike artifacts.
Spot overheating electrical components
Loose connections in panels and breakers run hotter than properly tightened terminals. Thermal scanning is standard practice in industrial predictive maintenance and increasingly common in residential pre-purchase inspections.
Diagnose HVAC distribution problems
Uneven duct delivery, blocked registers, and refrigerant line issues all produce visible thermal patterns. ASHRAE standards describe how to interpret thermal patterns in HVAC commissioning work.
What does an IR thermal imaging camera cost?
The market splits into four tiers. Consumer smartphone attachments (Seek CompactPRO, FLIR ONE Pro, Hikmicro Mini2) run $250 to $700. Entry standalone handhelds run $700 to $2,000. Pro inspection handhelds run $2,000 to $10,000. Commercial and research-grade systems run $5,000 to $50,000+.
For residential inspection, the practical floor is a 320×240 pro-handheld in the $3,000 to $6,000 range. Homeowners can solve diagnostic questions with the consumer tier under $700 or by renting at $50 to $150 per day.
What detector resolution should buyers target?
Resolution determines how small a defect can be identified at a given distance. A 160×120 detector struggles to resolve small features beyond a few feet. A 320×240 detector handles residential interior inspection comfortably. A 640×480 detector helps with distant subjects (rooftop equipment, building facades, distribution transformers) and produces report-quality images for commercial clients.
Each resolution step roughly doubles or triples the price. Buyers should match resolution to the highest-value job they expect to do, not to budget or ambition.
How is “IR” different from “thermal” in technical contexts?
In careful technical usage, “infrared” describes the wavelength band and “thermal” describes the application — visualizing heat. An infrared camera is any camera that detects infrared light. A thermal camera is an infrared camera used to detect heat. The two terms overlap heavily, and in consumer marketing they are essentially synonyms.
A useful distinction: NIR cameras (security camera night vision) are infrared but not thermal — they detect reflected light, not heat. LWIR cameras (inspection cameras) are infrared and thermal — they detect emitted heat radiation. SWIR and MWIR cameras are infrared and can do thermal work but at different temperature ranges.
How does training affect outcomes?
A trained operator with a 320×240 camera produces more accurate reports than an untrained operator with a 640×480 camera. The camera reveals patterns; the operator distinguishes real defects from artifacts. Common artifacts include solar gain on exterior walls, evaporative cooling on damp surfaces, reflections off shiny materials, and emissivity variation across different paint finishes.
InterNACHI’s IR-certification course runs roughly $500 to $1,500 depending on format and is the most widely recognized U.S. residential credential. Energy auditors typically pursue additional certifications through BPI (Building Performance Institute) or RESNET (Residential Energy Services Network).
What is the right starting point?
Homeowners with a one-off question: rent for $50 to $150 per day or buy a $250 to $700 smartphone attachment. Working home inspectors adding thermal services: budget $3,000 to $6,000 for a 320×240 pro-handheld plus $500 to $1,000 for IR-certification training. Commercial and energy-audit buyers: budget $7,000 to $15,000 for a 640×480 camera and the corresponding software suite.
The brand selection — Fluke, FLIR, Hikmicro, Seek — comes after the tier decision. Within a tier, the major brands are functionally close enough that dealer support and software preference tend to drive the choice.
How does the IR thermal imaging camera interact with other tools?
An IR thermal imaging camera works best as part of a multi-tool inspection workflow rather than in isolation. The camera identifies suspicious patterns; other tools confirm or rule out the underlying cause. A moisture meter distinguishes wet drywall from cool drafts. A borescope inspects inside walls and ducts to verify findings without destructive opening. A combustion analyzer characterizes gas-appliance issues that thermal alone cannot diagnose.
Working inspectors who use thermal imaging without these complementary tools tend to produce reports with more “needs further investigation” findings than reports written with the full toolkit. The camera reveals questions; the other tools answer them. For an overview of how thermal scanning integrates into broader inspection work, see the thermal imaging scan primer.
What about the optics decisions?
Most pro-handheld cameras ship with a fixed lens — either a 24-degree or 45-degree horizontal field of view, depending on the model. The wider lens (45 degrees) suits tight interior spaces — utility closets, crawl spaces, small bathrooms. The narrower lens (24 degrees) helps when measuring distant targets — rooftop HVAC units, distribution transformers, building facades from across a parking lot.
Some pro models accept interchangeable lenses. Optional wide-angle lenses (55 degrees and above) help in extreme tight-space work. Optional telephoto lenses (15 degrees and below) help with distant targets. Macro lenses, less commonly used, allow detailed inspection of small features. Optional lenses typically cost $1,000 to $3,000 each; the decision to add one should follow a specific use case.
How long does the on-site inspection take?
A residential thermal-included inspection typically adds 30 to 45 minutes to a standard home inspection. The thermal scanning sequence covers the exterior elevations, interior walls and ceilings room by room, attic and crawl space if accessible, electrical panels (with appropriate safety precautions), and HVAC supply registers and return grilles. Total time on-site for the thermal portion depends on home size and the inspector’s familiarity with the camera workflow.
For homeowner self-inspection with a smartphone attachment, expect 45 to 90 minutes to walk through a typical 2,000 square foot home methodically. Rushed scans miss the patterns the camera is designed to reveal; slow scans give the detector time to settle and produce more reliable imagery.
What environmental conditions produce the best images?
The image quality depends on the temperature differential between the building interior and exterior. The ideal indoor-outdoor temperature gap is 20 to 40 degrees Fahrenheit; the bigger gap produces clearer patterns. For Front Range residential work, the most productive thermal-imaging seasons are November through March (heating-dominated) and June through August during heat waves (cooling-dominated). Shoulder seasons with smaller temperature gaps produce weaker results.
Solar loading is the main environmental confounder. An exterior wall in afternoon sun shows a heat pattern unrelated to envelope performance — the sun’s energy stored in the wall mass dominates the image. Best practice for exterior thermal surveys is to capture before sunrise or after sunset, when solar loading has dissipated. Cloudy days also work well because the surface heating is more uniform.
What does post-capture analysis involve?
Captured radiometric files transfer from the camera to a desktop computer via USB-C cable or wirelessly to a phone. Desktop reporting software opens each file, displays the underlying temperature data, allows the inspector to add region-of-interest markers, isotherms, and spot temperature readings, and exports a PDF report or pushes images into an inspection-report platform.
The post-capture step is where palette switching becomes valuable. A subtle moisture pattern that is barely visible in the default Iron palette might be obvious in Rainbow because the color discontinuities highlight the temperature gradient differently. Most reporting software supports post-capture palette switching on radiometric images, which is one reason inspectors should always capture in radiometric (rather than display-only) mode.
What does the calibration cycle entail?
Inspection-grade cameras require periodic factory recalibration to maintain accurate temperature measurement. Most manufacturers recommend a two to three year recalibration cycle and offer factory service. The cost typically runs $300 to $600 per calibration plus shipping. Turnaround is usually two to four weeks. Inspectors who quote absolute temperatures (rather than relative anomalies) to clients should stay current on the calibration schedule.
For inspectors who report relative pattern recognition rather than absolute temperatures, the calibration cycle can stretch slightly. The risk is gradual drift in detector output over multiple years; most inspectors prefer to stay on the manufacturer’s recommended schedule to avoid arguments over report accuracy.
What is the maintenance routine between calibrations?
Between factory calibrations, daily maintenance is minimal. Inspectors should keep the lens clean (a lens-pen tool is the standard cleaning device), avoid pointing the camera at the sun (which can damage the detector permanently), store the camera in a hard case during transport, and remove the battery for storage periods longer than a few weeks. The detector and electronics are robust under normal use; physical damage from drops or moisture exposure is the most common failure mode.
InterNACHI’s inspector standards assume routine equipment maintenance and care. Cameras stored properly and used carefully typically deliver 7 to 12 years of service before the detector or interface becomes the limiting factor.
References
- ENERGY STAR: Seal and Insulate — U.S. Environmental Protection Agency (ENERGY STAR)
- Infrared-Certified Inspector Training — InterNACHI
- ASHRAE Standards and Guidelines — ASHRAE
Frequently asked questions
Is an IR camera the same as a thermal imaging camera?
For residential inspection work, yes. Both refer to a long-wave infrared (LWIR) microbolometer camera that visualizes heat patterns. In strict technical usage, IR is broader — it includes NIR security cameras that do not detect heat — but consumer products called IR cameras for inspection are almost always LWIR thermal devices.
Will an IR security camera find missing insulation?
No. Security cameras with night vision use near-infrared (NIR) and detect reflected light, not emitted heat. Finding missing insulation requires a long-wave infrared (LWIR) thermal imaging camera. The two technologies are not interchangeable.
What detector resolution should a homeowner buy?
For one-off use, a 206x156 or 256x192 smartphone attachment is sufficient. For homeowners planning recurring annual energy audits, a 240x180 or 320x240 standalone handheld is the next step up. Higher resolutions rarely justify the price for residential homeowner use.
Do home inspectors need certification to use thermal cameras?
Certification is not legally required in most U.S. states but is strongly recommended. InterNACHI's IR-certified inspector credential signals interpretation training to clients and reduces the risk of misreading thermal artifacts as real defects. The certification typically costs $500 to $1,500.
Thermal imaging cameras
Infrared cameras reveal hidden moisture, missing insulation, and air leaks. Phone-attachment models are the budget entry point; standalone units have higher resolution.
| Product | Why | Buy |
|---|---|---|
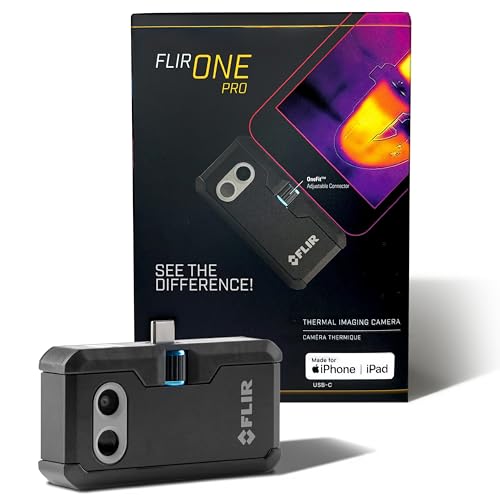 FLIR ONE Pro (phone) | Plugs into iPhone/Android; inspector favorite. | Amazon — $349.00 |
 Topdon TC001 | High-res phone module at a low price. | Amazon — $262.99 |
 FLIR C5 Compact | Standalone pocket camera with Wi-Fi. | Amazon — $649.00 |