How to Look for Mold: A Room-by-Room Search
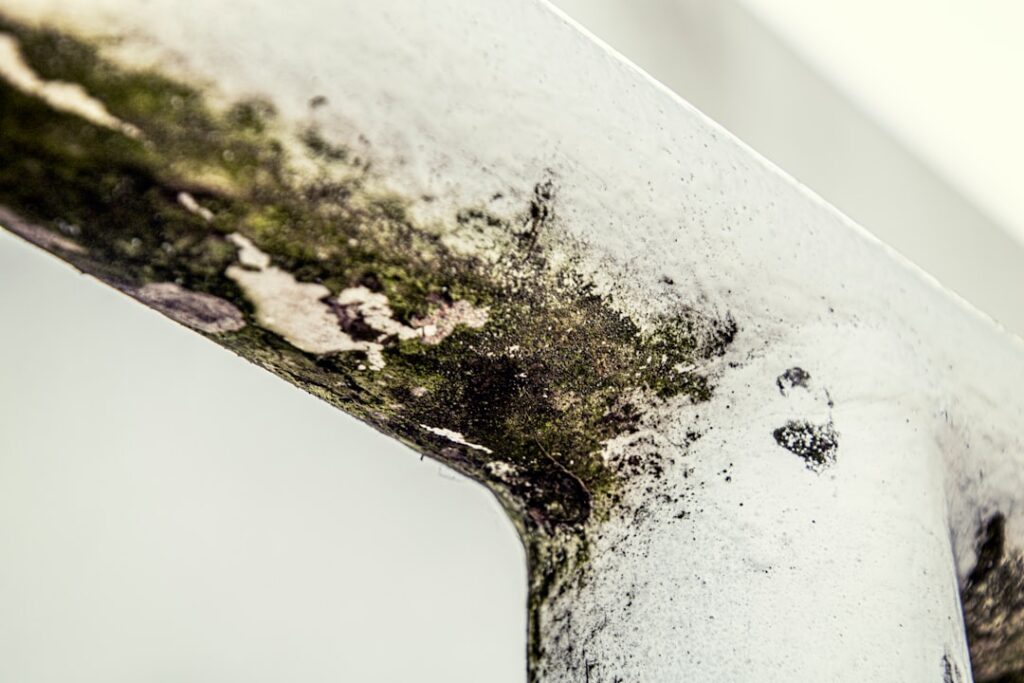
Finding mold before it spreads saves money, materials, and stress, and a careful homeowner can do a lot of the searching without special equipment. The key is knowing where to look and what the early signs really are. This guide lays out how to look for mold as a step-by-step visual search you can run yourself, room by room, with a flashlight and your own senses. It summarizes EPA and CDC guidance current as of 2026 and is for general education only; consult a physician for health symptoms and a certified professional for testing and removal decisions.
Part of our Types of Mold guide — start there for the full picture →
Is this mold, asbestos, or water damage? Get a free instant screen
Upload a clear photo of the suspect area. You'll get an instant AI screening opinion and what to do next. This is screening guidance, not a professional determination.
Screening guidance only. AI can be wrong. Confirm asbestos, mold type, or lead with lab testing or a licensed professional before acting.
How to Look for Mold: The Basic Approach
Mold needs moisture, so a good search is really a hunt for water and the conditions it creates. Before you start, gather a few simple tools: a bright flashlight, a small mirror for seeing behind and under fixtures, and an inexpensive humidity gauge. If you have allergies or asthma, wear an N95-style mask, and avoid disturbing any heavy growth you find.
Work methodically. Go room by room rather than wandering, and in each space check three things: visible surfaces, hidden corners, and your nose. A persistent musty or earthy smell is one of the most reliable indicators, often present before any stain appears. The EPA notes that if you can smell mold or see signs of water damage, you likely have a moisture problem worth addressing whether or not growth is yet visible.
Start With the Wet Rooms
Bathrooms and kitchens see the most water, so they are the highest-yield places to begin.
Bathrooms
Shine your light along grout lines, caulk seams, and the corners of the shower or tub. Check the ceiling above the shower, where steam condenses, and behind the toilet tank where condensation collects. Look under the sink at the supply lines and trap for staining or dampness. Pull back the corner of any vinyl flooring near the tub if it lifts easily. Run the exhaust fan and confirm it actually moves air; weak ventilation is a leading cause of bathroom mold.
Kitchens
Inspect under the sink, around the dishwasher, and behind the refrigerator, including the drip pan and water-line connection. Check the seal of the refrigerator door, a common spot for Cladosporium. Look at the wall behind any appliance that uses water and at the base of cabinets for swelling or discoloration.
Move to Basements, Crawl Spaces, and Laundry
Below-grade and utility spaces combine moisture sources with poor airflow, which is why they shelter so much hidden growth. In the basement, scan the foundation walls for efflorescence or staining, check around the water heater and any floor drains, and look at the underside of the floor above. In a crawl space, the ground moisture and cool temperatures favor slow growth, so inspect the framing, subfloor, and any vapor barrier.
The laundry area deserves attention because washers leak and dryers vent moisture. Check behind and beneath the washer, around the supply hoses, and confirm the dryer vents fully to the outside. Along the Front Range, swamp-cooler systems and finished basements are frequent trouble spots, so give them a close look.
Check the Quiet Zones
Mold concentrates in places people rarely open. Look inside closets on exterior walls, behind furniture pushed against cool walls, and around window frames where condensation forms in winter. Examine the attic for roof leaks, paying attention to the underside of the sheathing and around any roof penetrations. Inspect window sills and the wall just below them for staining.
Do not overlook the HVAC system. Glance at the area around the air handler, the condensate drain, and any visible duct interiors. A musty smell that intensifies when the system runs can point to growth in the ductwork distributing spores through the house. For the concealed cases, our guide on recognizing mold inside walls goes deeper on hidden growth.
What Mold Actually Looks Like
Mold appears in many forms, so do not expect only black spots. It can be green, blue-green, gray, brown, white, pink, or black, with textures ranging from fuzzy and woolly to slimy or powdery. It often starts as small clustered spots that merge into larger patches. People sometimes confuse it with dirt, soot, or mineral deposits, so when in doubt, note the location, the moisture history, and whether it returns after cleaning.
Pay attention to surface clues too: bubbling or peeling paint, warped drywall, soft baseboards, and recurring condensation all signal the moisture mold needs even where growth is not yet visible. Our overview of mold inspection and testing connects these visual cues to underlying causes.
Track the Moisture, Not Just the Mold
Because mold is a symptom of water, the most useful thing your search can find is the moisture source. A humidity gauge reading consistently above 60 percent indicates conditions that favor growth across the whole home. Localized dampness points to a specific leak, condensation problem, or grading issue. Finding and correcting that source matters more than wiping away the visible patch, which will simply return if the water remains.
How to Search Safely
Looking for mold means getting close to it, so a few precautions protect you during the search. If you have asthma, allergies, or a weakened immune system, wear an N95-style respirator and consider having someone else do the closest inspection. Do not disturb or scrub heavy growth while searching, since agitating a colony releases spores into the air.
Ventilate as you go by opening a window in the area you are inspecting, and avoid stirring up dust in spaces like crawl spaces and attics where it can carry spores. Wear gloves when checking damp materials, and wash up afterward. The goal of a search is to find and document, not to clean; save cleanup for a separate, properly prepared effort once you understand the scope. Treating the search itself as a low-disturbance activity keeps your exposure minimal while you gather information.
Documenting What You Find
A search is far more useful when you record it rather than relying on memory. Photograph every suspicious spot, capturing both a close view and a wider shot that shows the location in the room. Note the date, the room, the surface, and any smell. Record humidity readings from your gauge and, if you have a moisture meter, the readings at each spot compared with nearby dry areas.
This record does several jobs. It lets you track whether a spot grows, darkens, or returns over time, which distinguishes active growth from an old stain. It gives a professional a head start if you later hire one, showing exactly what you observed and where. And in a real-estate context, dated documentation supports any conversation with a seller or agent. A few minutes of note-taking turns a casual look into evidence you can act on.
A Seasonal Search Routine
Mold risk shifts with the seasons, so a search done at the right time catches more. In late winter and early spring, check for condensation damage around windows and on exterior walls, where months of cold glass meeting warm indoor air leave moisture behind. This is also a good time to inspect the attic and roofline for leaks revealed by snowmelt.
In summer, when air conditioning and swamp coolers run, focus on the HVAC system, condensate drains, and the humidity those systems add or remove. After any heavy rain or rapid snowmelt, walk the basement and foundation perimeter, since that is when grading and drainage problems show themselves. Building a short search into each season turns mold detection from a one-time panic into a manageable habit, and it catches slow problems while they are still small.
Tools That Extend a DIY Search
A flashlight and your senses cover most of a search, but a few inexpensive additions sharpen it. A consumer humidity gauge, often under twenty dollars, tells you whether whole-home conditions favor growth; readings consistently above 60 percent are a red flag. A basic moisture meter, available to homeowners at modest cost, lets you compare the dampness of a suspicious wall against nearby dry areas, hinting at hidden moisture.
A small inspection mirror helps you see behind toilets, under sinks, and along the backs of appliances. A phone camera on a selfie stick can photograph tight spots you cannot reach. None of these match professional thermal imaging or laboratory sampling, but together they meaningfully extend what an attentive homeowner can find without opening walls or hiring anyone.
Telling Mold Apart From Look-Alikes
Not every dark spot is mold, and mistaking one for the other wastes effort. Soot from candles or a fireplace can streak walls and ceilings but usually wipes away cleanly and has no musty smell. Mineral deposits, or efflorescence, appear as white, crystalline, powdery patches on masonry and basement walls; they are salt left by evaporating water, not a living organism, though they do signal moisture worth investigating.
Dirt and general grime accumulate in predictable, even patterns, while mold tends to grow in clusters that spread outward from a moisture source. When in doubt, note three things: whether the spot has a musty odor, whether it sits where moisture collects, and whether it returns after cleaning. Growth that smells, follows dampness, and comes back is far more likely to be mold than a cosmetic stain.
Following the Water Trail
The most productive searches treat mold as a clue and the water behind it as the real quarry. When you find a suspicious spot, trace backward to ask where the moisture comes from. A stain on a ceiling points upward to a roof leak or a leaking pipe on the floor above. Growth at the base of a wall suggests water entering low, perhaps from grading, a foundation crack, or a slow leak in a nearby fixture.
Condensation-driven growth around windows and on exterior walls signals a temperature and ventilation issue rather than a plumbing leak. Mold near the HVAC system or in ductwork points to condensation on cooling components. By following each spot back to its water source, you find not just the growth but the cause, which is the only thing whose correction actually solves the problem. A search that stops at the visible patch misses the point; one that traces the water trail gives you something you can fix.
When DIY Searching Reaches Its Limit
A visual search is powerful, but it has boundaries. You cannot see inside intact walls, you cannot quantify airborne spores, and you cannot confirm species by eye. The EPA suggests homeowners can generally handle visible growth under about 10 square feet on hard surfaces, but larger areas, hidden growth, water that has soaked porous materials, or any case involving a household member with respiratory issues calls for a professional.
Professionals add tools you do not have: moisture meters, infrared cameras, borescopes, and accredited laboratory sampling. If your search turns up strong smells with no visible source, repeated regrowth, or signs of long-term water damage, that is the moment to bring in a certified inspector and, for any health concern, to consult a physician.
References
- Mold Cleanup in Your Home — U.S. Environmental Protection Agency
- A Brief Guide to Mold, Moisture and Your Home — U.S. Environmental Protection Agency
- About Mold and Your Health — Centers for Disease Control and Prevention
Frequently asked questions
Where should I look for mold first?
Start with the wettest rooms: bathrooms and kitchens. Check grout, caulk, under sinks, behind appliances, and the shower ceiling. Then move to basements, crawl spaces, and laundry areas, which combine moisture with poor airflow. Use your nose throughout, since a musty smell often precedes visible growth.
What does mold look like when searching?
Mold can be green, gray, brown, white, pink, or black, with fuzzy, slimy, or powdery textures, often starting as small clustered spots that merge. People confuse it with dirt or mineral deposits, so note the location, moisture history, and whether it returns after cleaning.
What tools do I need to look for mold myself?
A bright flashlight, a small mirror for behind fixtures, and an inexpensive humidity gauge cover most of a DIY search. Wear an N95-style mask if you have allergies or asthma, and avoid disturbing heavy growth you find.
When should I stop searching and call a professional?
Call a certified professional for visible growth larger than about 10 square feet, strong musty smells with no visible source, repeated regrowth, water that soaked porous materials, or any case involving someone with respiratory issues. Pros add moisture meters, thermal cameras, and lab sampling.
If your own search turns up a musty smell or stains you cannot trace, Front Range homeowners can reach a vetted inspector through our contact page for a professional look.