How Do You Identify Black Mold: Lab Workflow Guide
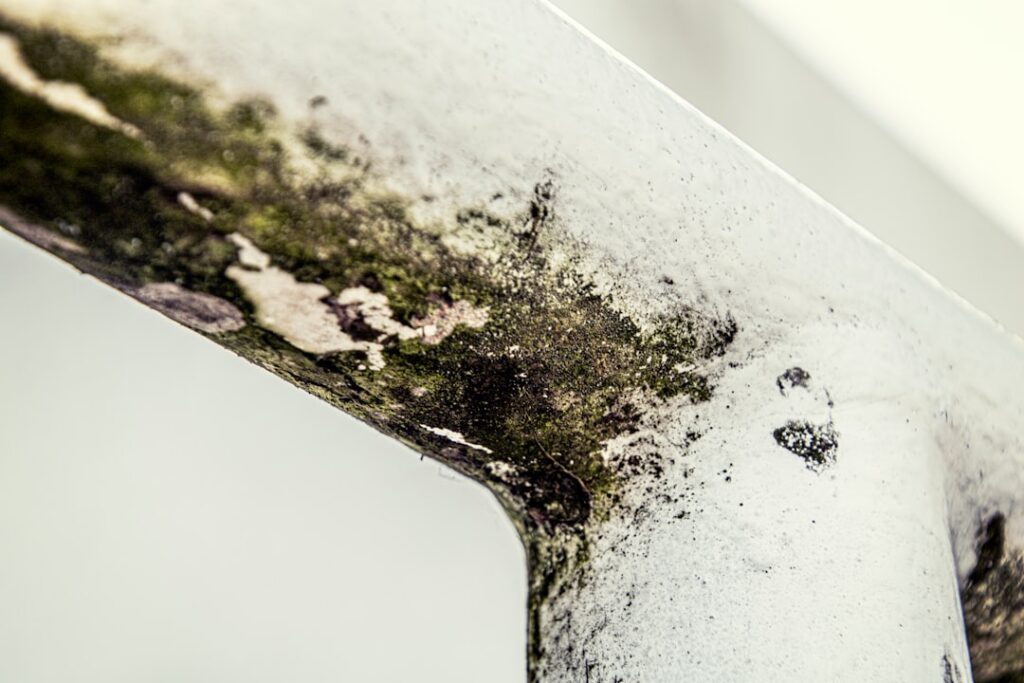
Homeowners who have read past the surface-level “look for dark patches” advice eventually arrive at the laboratory question. How do you actually identify black mold beyond visual guesswork? The answer is a small set of professional sampling methods — surface swabs, air spore traps, and ERMI dust analysis — each with a different cost, a different turnaround time, and a different best use case. This guide walks through what each method measures, what its report looks like, and when each one is the right next step. This guide summarizes EPA and CDC guidance current as of 2026 — consult a certified mold inspector for testing decisions and your physician for symptom evaluation.
Is this mold, asbestos, or water damage? Get a free instant screen
Upload a clear photo of the suspect area. You'll get an instant AI screening opinion and what to do next. This is screening guidance, not a professional determination.
Screening guidance only. AI can be wrong. Confirm asbestos, mold type, or lead with lab testing or a licensed professional before acting.
The three primary laboratory methods for mold identification
Field identification by eye is unreliable for species-level questions. The CDC and EPA both note that visual or photographic identification cannot confirm species, and that laboratory methods are required when the species question matters for medical, insurance, real estate, or remediation-scoping reasons. Three methods dominate professional practice. Direct surface sampling captures material directly from a visible patch. Air sampling measures the spore load in indoor air over a controlled time period. ERMI dust analysis quantifies fungal DNA in settled house dust using qPCR. Each method answers a different question.
Selecting the right method starts from the question you are trying to answer, not from the method you happened to read about first. A visible patch on drywall with unknown species identity calls for surface sampling. Air quality concerns or comparisons of indoor versus outdoor spore loads call for air sampling. A whole-house assessment for occupants with chronic exposure symptoms calls for ERMI dust analysis. A certified inspector following the InterNACHI mold inspection standard chooses the method that fits the diagnostic question rather than running all three by default.
Surface sampling: tape lift, swab, and bulk samples
Surface sampling captures material from a visible mold patch and submits it to an accredited microbiology laboratory for identification. Three sub-methods cover the common cases.
Tape lift
A clear adhesive strip is pressed against the suspect surface, lifted, and mounted on a microscope slide. The lab examines the sample under direct microscopy to identify species by spore morphology, conidiophore structure, and hyphal pattern. Tape lift is fast, inexpensive (typically $30 to $60 per sample), and non-destructive. It identifies species present at the visible surface, including non-viable spores. The limitation: it captures only the surface biomass, not what is growing inside porous substrate.
Swab culture
A sterile cotton or polyester swab is rolled across the suspect area and submitted to the lab, where the sample is plated on growth media. The lab incubates the plate for several days to a week, then identifies the resulting colonies. Swab culture distinguishes viable from non-viable organisms — important when the question is whether the colony is actively growing or already dried out. Cost runs $50 to $100 per sample with a one to two week turnaround.
Bulk sampling
A small physical piece of the affected material — a corner of drywall, a chunk of insulation, a wood splinter — is removed and submitted to the lab for full microbiological analysis. Bulk sampling reaches species growing inside porous substrate that surface methods miss. The destructive nature of bulk sampling makes it the right choice when documentation for insurance, legal, or scoping purposes requires definitive species identification. Cost runs $75 to $150 per sample.
Air sampling: spore trap cassettes
Air sampling measures the airborne spore load in indoor air. The standard method uses an Andersen-style or spore-trap cassette pulled through a calibrated pump for a fixed time period (typically 5 to 15 minutes per sample at 15 liters per minute). The cassette traps spores on a sticky impaction surface, which the lab analyzes under microscopy. The report lists spore counts by genus for each sample location.
Standard practice takes paired samples: one outdoor sample plus one indoor sample per investigated area. The indoor count is compared to the outdoor baseline. Indoor counts that exceed outdoor counts for the same species, or indoor samples showing species not present outdoors, suggest indoor amplification. The EPA and AIHA (American Industrial Hygiene Association) both note that no single threshold defines “too much” indoor mold — interpretation requires the indoor-versus-outdoor comparison plus the species pattern.
Air sampling is the standard method for evaluating air quality during occupant symptom investigations and post-remediation clearance testing. It is not the right method for confirming a visible patch is Stachybotrys — surface sampling is faster and more direct for that question. Cost runs $150 to $300 per pair of samples (one indoor plus one outdoor) including laboratory analysis.
ERMI: qPCR-based dust analysis
The Environmental Relative Moldiness Index (ERMI) is a dust-sample method developed by the EPA’s National Exposure Research Laboratory. The homeowner or inspector collects settled house dust from a defined sampling area (typically several square feet of carpet or floor surface). The dust sample is sent to a specialized lab that uses quantitative polymerase chain reaction (qPCR) to identify 36 specific mold species DNA sequences. The lab calculates an ERMI score from the species pattern and compares it to a national database of homes.
ERMI’s strength is that it integrates exposure across the whole home and includes hidden mold growing inside walls, under floors, and in HVAC systems that surface or air sampling might miss. It is particularly useful when occupants report chronic symptoms in a building with no obvious visible mold. The score is research-derived rather than regulatory, so interpretation should come from a clinician or industrial hygienist familiar with the methodology. Cost runs $250 to $400 per sample.
ERMI does have limitations. It does not localize where the mold is growing, only that DNA from specific species is present in settled dust. A high ERMI score still requires a visual and moisture-mapping inspection to find the colony for remediation. The lab workflow comparison guide covers the trade-offs in more depth.
How to read a mold laboratory report
A typical surface sample report lists the genera and species identified, the relative abundance (often as “rare,” “occasional,” “many,” or “numerous”), and sometimes a viability indicator. An air sample report lists raw spore counts per cubic meter of air, organized by genus, with paired outdoor counts for comparison. An ERMI report lists species DNA quantities and a composite score.
Read the report against the question that motivated the test. If the question was “is this Stachybotrys,” look at whether Stachybotrys was identified. If the question was “is the indoor air quality concerning,” look at the indoor-versus-outdoor ratios and species pattern. If the question was “is there hidden mold somewhere in my house,” look at the ERMI composite score and the species list. A report that does not answer the original question often means the wrong method was selected.
When laboratory identification is actually necessary
Most home mold cleanup does not require laboratory identification. The EPA and CDC both note that cleanup recommendations are species-agnostic — fix the moisture, remove the contaminated material, dry the structure, verify the result. Specific situations where lab identification adds value include real estate transactions requiring disclosure documentation, insurance claims requiring confirmed mycotoxin presence, occupant symptom investigations where the exposure source is uncertain, and post-remediation clearance testing required by contract.
Outside those situations, lab testing often introduces delay and cost without changing the action. A homeowner who has spent two weeks waiting for swab-culture results to come back has lost two weeks of remediation time without learning anything that would change what the remediator does. The mold inspection and testing hub walks through the decision framework for when testing pays off versus when it is procedural overhead.
Choosing the right laboratory
Not all microbiology labs are equally qualified for indoor mold work. Look for laboratories accredited under one or both of the AIHA Environmental Microbiology Laboratory Accreditation Program (EMLAP) or the equivalent ISO/IEC 17025 standard. AIHA EMLAP-accredited labs follow validated methods and participate in proficiency testing, which improves the reliability of species identification across the industry. A certified inspector typically has established relationships with accredited labs and includes lab fees in the inspection cost.
Avoid using consumer-grade mold test kits sold at hardware stores for any decision that matters. Those kits typically use a settle-plate methodology that produces unreliable results, no outdoor baseline comparison, and no validated species identification. The CDC explicitly cautions against drawing conclusions from such kits.
Common mistakes that invalidate sampling results
Sample collection technique matters more than most homeowners realize. A swab dragged across a dry, dusty surface picks up settled dust rather than active colony material. An air sample taken with the HVAC fan off captures a different spore population than one taken with the fan running. A bulk sample stored in a paper envelope can grow new colonies in transit that were not present at sampling. A tape lift contaminated by a fingerprint or by repeated re-pressing introduces species that were not on the original surface.
Certified inspectors follow chain-of-custody protocols that document the sampling location, date, time, conditions, technician, and seal. Sample integrity affects whether the lab results stand up in an insurance claim, a real estate disclosure dispute, or a legal proceeding. Homeowners attempting DIY sampling for any of those purposes usually find that the resulting reports are inadmissible or easily disputed because the chain of custody is missing.
Pairing inspection with sampling
Sampling without inspection produces decontextualized data. A spore count tells you nothing about where the spores originated. A species identification tells you nothing about the colony size or the substrate. Pairing every sampling event with a visual inspection, moisture mapping, and HVAC assessment is what converts laboratory data into actionable findings.
A typical professional mold investigation runs in this sequence: client interview about symptoms and timeline, walk-through inspection identifying visible patches and odor zones, moisture mapping with pin or pinless meters, decision about sampling method based on the question being investigated, sample collection following chain of custody, laboratory analysis, and finally a written report integrating the lab results with the inspection findings. Skipping any of those steps reduces the reliability of the final conclusion.
Post-remediation verification testing
After a professional remediation, clearance testing confirms that the affected area is no longer above background spore loads and that no visible mold remains. Clearance is typically done with paired indoor-outdoor air samples plus a visual re-inspection. The IICRC S520 standard specifies clearance criteria for remediation contracts, and many remediation contracts require passing clearance before final payment is released. Clearance testing is one of the most common legitimate uses of air sampling in residential mold work.
Homeowners signing a remediation contract should confirm in writing whether clearance testing is included and who performs it. Independent third-party clearance (a different firm than the remediator) carries more weight than self-testing by the remediation contractor. The cost is modest relative to the remediation itself, typically $300 to $600 for a small project.
References
- Mold Testing or Sampling — U.S. Environmental Protection Agency
- About Mold — Centers for Disease Control and Prevention
- InterNACHI Mold Inspection Standard — International Association of Certified Home Inspectors
- Mold Health Effects — National Institute of Environmental Health Sciences
Front Range homeowners who need professional sampling and a documented mold report can reach a vetted local inspector through our contact page.