Gas Line Pressure Test: How It’s Done and When Required
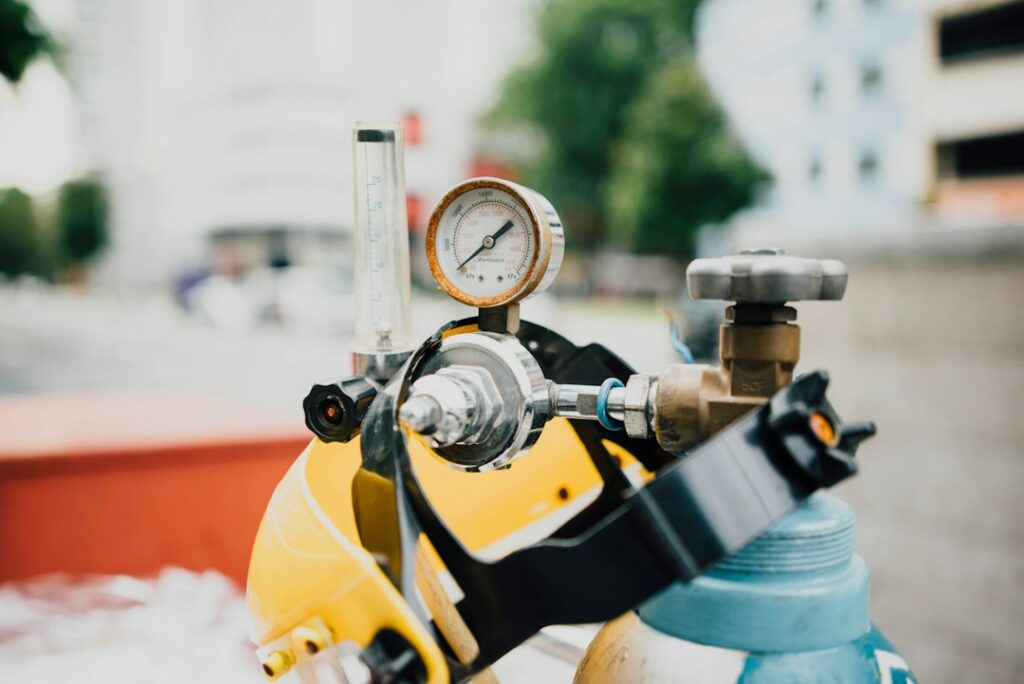
Before new gas piping is put into service, someone has to prove it holds pressure without leaking. That proof is the gas line pressure test, a standard step in new construction, remodels, appliance additions and many repairs. Homeowners usually encounter it in one of a few ways: a permit inspection after a new line to a range or generator, a utility requirement before restoring service, a propane supplier’s check after running out of fuel, or a recommendation in a home inspection report after someone smelled gas. This guide explains when a pressure test is typically required, how the test works, how it differs from leak detection, who is allowed to perform it, what a failed test means and what it tends to cost. Exact pressures, hold times and rules are set by the code your jurisdiction has adopted, so figures here are general and should be confirmed locally. Cost ranges are rough 2026 estimates.
Part of our Heating, Cooling & Ventilation guide — start there for the full picture →
What a Gas Line Pressure Test Is and When It’s Required
A gas line pressure test checks the tightness of a section of fuel gas piping by isolating it, filling it with air or an inert gas to a specified pressure, and watching a gauge for a set period to confirm the pressure does not drop. If the pressure holds, the piping is considered tight. If it falls, there is a leak somewhere in the tested section.
Situations where a test is commonly required include:
- New gas piping in new construction or additions, usually as part of the rough-in inspection before walls are closed.
- Extensions and new branch lines, for example to a range, dryer, fireplace, pool heater, outdoor kitchen or standby generator.
- Repairs that open the system, such as replacing a damaged section of pipe or fittings.
- Permitted gas work where the building department requires a pressure test as part of the inspection.
- Restoring service after the utility or propane supplier shut off gas because of a leak, an incident or an out-of-fuel event.
- Some real estate or insurance situations, such as when a lender, insurer or buyer requests evidence that a suspected leak has been addressed. These are not universal requirements.
Requirements differ between jurisdictions. Many Colorado communities adopt versions of the International Fuel Gas Code or the fuel gas chapter of the International Residential Code, and some areas reference NFPA 54, the National Fuel Gas Code, with local amendments. The local building department is the authority on whether a test is required and what parameters apply.
How a Gas Line Pressure Test Works
The general process is similar from one job to the next, even though pressures and durations vary.
1. Isolate the section being tested
The technician shuts off the gas supply at the meter or tank and isolates the piping to be tested. Appliances and equipment that are not designed to handle the test pressure are disconnected or isolated with closed valves, and open ends are capped or plugged. Gas regulators and some appliance controls can be damaged by test pressures, which is one reason this step matters.
2. Connect a gauge and a pressure source
A test gauge or manometer is installed on the piping, often at a test tee or in place of a cap. The gauge needs to be appropriate for the test pressure, with increments fine enough to show small drops. Low-pressure tests and service checks may use a water column manometer or a digital manometer, while higher-pressure rough-in tests often use a dial gauge reading in pounds per square inch (psi).
3. Pressurize with air or inert gas
The piping is filled with air, nitrogen or another inert gas using a compressor or cylinder. Fuel gas and oxygen are not used as test media. Model codes generally set a minimum test pressure based on the system’s working pressure, and many jurisdictions require a pressure higher than the minimum, so numbers differ by location.
4. Hold and observe
The pressure source is disconnected and the gauge is watched for the required duration. Model codes specify a minimum hold time, often measured in minutes for typical residential piping and longer for larger systems, and some building departments set their own longer durations. Temperature changes during the test can cause small pressure swings, so testers account for conditions such as sun on exposed piping.
5. Locate leaks if pressure drops
If the gauge shows a drop, the technician checks joints with leak detection solution or an electronic detector, repairs the leak, and repeats the test until the piping holds.
6. Purge and restore service
Once the test passes and any required inspection is complete, test air is purged from the lines in a controlled way, fuel gas is introduced, and appliances are relit and checked. Purging large or long lines has its own safety procedures and is a job for a qualified technician.
Reading the Results: Gauges, Temperature and Documentation
A pressure test sounds simple, but interpreting it well takes some care. A few factors explain why professionals sometimes repeat a test or extend the hold period.
Gauge choice and scale
A gauge with a very wide range, such as one reading up to several hundred psi, makes a small pressure loss hard to see on a low-pressure test. Inspectors and installers typically want a gauge scaled so the test pressure falls well within its range, with fine graduations. Digital gauges and manometers can show smaller changes, which helps on low-pressure systems.
Temperature effects
Air expands as it warms and contracts as it cools. Piping in an attic warmed by afternoon sun, or an outdoor run on a cold Front Range morning, can show pressure changes that have nothing to do with leaks. Testers often let the system stabilize before starting the clock and may note air temperature during the test. A reading that drops and then levels off can point to temperature rather than a leak, while a steady decline usually means a leak.
Isolation leaks
Sometimes the leak is not in the new piping at all but past a closed valve that does not fully seal, or through a cap that was not tightened. That is why technicians check the isolation points themselves when a test fails.
Documentation
For permitted work, the building inspector’s sign-off is the main record. For non-permitted service tests, ask the technician to note the date, test pressure, duration, gauge used and result on the invoice. That record is useful for future sales, insurance questions and any later troubleshooting. It also gives a baseline if the system is retested after a remodel.
Pressure Testing vs Leak Detection
The terms are often used loosely, but the two are different tools.
- Pressure test: answers whether a section of piping is tight overall. It is a pass/fail test of the whole isolated section and is the standard acceptance test for new or repaired piping.
- Leak detection: answers where a leak is. It uses soap solution, electronic gas sniffers, ultrasonic tools or other methods to pinpoint a specific joint or spot.
In practice they work together. A pressure drop tells the technician there is a leak; leak detection finds it. For a closer look at the tools used to locate leaks, see our guide to gas line leak detection. Utilities and gas suppliers may also do a simpler check when restoring service, such as watching the meter dial with all appliances off, which can reveal a leak downstream without a full code test.
Who Performs a Gas Line Pressure Test
Pressure tests are typically performed by a licensed plumber or gas fitter, an HVAC contractor licensed for gas work, or a propane supplier’s technician on propane systems. In Colorado, plumbing work, including fuel gas piping, generally falls under state plumbing licensing, though local rules and permit requirements vary. Check with the local building department.
When a permit is involved, a building inspector usually verifies the test, often by looking at the gauge during the rough-in inspection. Utilities such as Xcel Energy, Colorado Springs Utilities and Black Hills Energy are typically involved at the meter: they may require proof of a passed inspection before setting a meter or turning on gas to new piping, and they respond to leak reports. Propane suppliers generally do their own leak checks before filling a system for a new customer or after an out-of-gas event.
A home inspector does not normally pressure test gas piping. Under the ASHI Standard of Practice, inspectors inspect fuel storage and fuel distribution systems and describe the location of main fuel shutoff valves. If an inspector notes a gas odor, corroded piping, an unsupported line or questionable fittings, the usual recommendation is evaluation by a licensed professional, which may include a pressure test. Our overview of how to hire a home inspector explains how these referrals fit into a purchase timeline.
What It Means If a Gas Line Fails a Pressure Test
A failed test means gas, or test air, is escaping somewhere in the tested section. That can range from a single loose union to widespread problems.
Common causes include:
- Loose or poorly sealed threaded joints.
- Damaged flare fittings or connectors.
- Corroded steel pipe, especially in damp crawl spaces or buried runs.
- Damaged corrugated stainless steel tubing (CSST) from nails, screws or other physical damage.
- Leaking valves, including old shutoff valves that no longer seal.
- Buried line damage from digging, settling or root growth.
When the leak is in accessible piping, the repair may be quick. When it is in a wall, under a slab or underground, the fix can involve opening finishes, rerouting a line or replacing an entire run. After repairs, the section is retested until it passes. Depending on the location and size of the leak, the utility may leave gas off until repairs and a retest are complete.
If you ever smell gas, follow emergency steps before thinking about testing. Our guide to what to do if you smell gas covers leaving the house, avoiding ignition sources and calling the utility from a safe distance.
Gas Line Pressure Test Costs
Costs vary with the size of the system, accessibility, whether a permit is required and local labor rates.
- Pressure test as part of a new installation: usually built into the installer’s price for the line.
- Standalone pressure test on existing piping: commonly in the range of roughly $100 to $400 for a typical house, with more for large homes, multiple branches or difficult access.
- Leak location after a failed test: often billed hourly, plus the cost of the repair itself.
- Permit fees: set by the local building department and vary widely.
- Propane out-of-gas leak check: often around $75 to $250, depending on the supplier.
These are general 2026 estimates, not quotes. Emergency and after-hours calls cost more, and mountain or rural locations may add travel charges. If you are adding a new line, our guide to gas line installation cost covers how testing fits into overall pricing.
Questions to Ask Before Scheduling a Test
A short conversation up front helps avoid surprises. Ask whether the price includes isolating and relighting appliances, whether a permit is needed and who pulls it, how long gas will be off, and what happens if the test fails, including whether leak location is billed separately. On propane systems, ask whether the supplier must be present or will accept a test by an independent licensed contractor. For a home under contract, confirm that the seller has authorized the work and that gas can be safely shut off and restored on the scheduled day, especially in winter when heat loss in an empty house can matter.
Gas Line Pressure Tests in Real Estate Transactions
A pressure test is not a standard part of most Colorado home sales, but it comes up in a few circumstances:
- The inspection report notes a gas odor, corroded piping or improper fittings.
- The house has been vacant with gas off, and the utility requires a check before restoring service.
- The seller recently added or modified gas piping without a permit.
- The house uses propane and the supplier requires a leak check for the new account.
- An older home has unusual piping, such as early CSST without visible bonding, or a mix of materials from multiple remodels.
Buyers can ask sellers for permit records showing that gas work was inspected and passed. If records are missing for obvious additions, a pressure test by a licensed professional during the inspection period can provide reassurance or support a repair request. Our page on specialty inspections describes other follow-up evaluations buyers commonly schedule.
Propane homes add a supplier layer. Our guide to propane tank inspection explains what suppliers check at the tank and why many require a leak check before the first delivery to a new customer.
Safety Tips Around Gas Piping
- Do not test your own gas lines with compressed air unless you are qualified. Overpressurizing can damage regulators and appliance controls.
- Know where the main shutoff is at the meter or tank, and keep a suitable wrench nearby if a tool is needed.
- Call 811 before digging anywhere near buried gas lines, and remember that lines between the meter and the house, or the tank and the house, are often customer-owned and may not be marked by the utility.
- Install CO alarms and, if you want an added layer, a natural gas or propane detector. See our gas detector product category for options.
- Keep records of permits, tests and repairs. They help with future sales and insurance questions.
When to Call a Professional
Call a licensed plumber or gas fitter when adding or modifying gas piping, when an appliance connection keeps showing bubbles in a soap test, when the gas meter moves with all appliances off, when a utility or supplier will not restore service until the system is tested, or when an inspection report recommends evaluation. For any active gas odor, leave first, then call the utility or 911 from a safe distance.
References
- NFPA 54, National Fuel Gas Code: Code Information — National Fire Protection Association
- 2021 International Fuel Gas Code, Chapter 4: Gas Piping Installations — International Code Council
- 2021 International Residential Code, Chapter 24: Fuel Gas — International Code Council
- ASHI Standard of Practice for Home Inspections — American Society of Home Inspectors
Frequently asked questions
How long does a gas line pressure test take?
The hold portion is often measured in minutes for typical residential piping, but setup, isolating appliances, the test itself and restoring service can take an hour or more. Larger systems and some local codes call for longer hold times.
What pressure is used to test a gas line?
It depends on the system's working pressure and the code your jurisdiction has adopted. Model codes set minimums, and many building departments require higher test pressures. Your installer or local building department can confirm the exact figure.
Can a home inspector do a gas line pressure test?
Generally no. Home inspectors inspect visible fuel distribution systems and note concerns such as gas odors or corrosion, then recommend evaluation by a licensed plumber or gas fitter. That professional can perform a pressure test if needed.
Is a pressure test required when replacing a gas appliance?
A simple appliance swap with an existing valve is often checked with a soap-solution leak test rather than a full pressure test. New piping, extensions and repairs usually require a pressure test, often as part of a permit inspection.
What happens if my gas line fails the pressure test?
The leak has to be located and repaired, then the section is retested until it holds pressure. The utility or propane supplier may keep gas off until repairs and any required inspection are complete.
Questions about the gas piping in a house you are buying on the Front Range? Reach out through our contact page and we can connect you with a local inspector who can flag issues worth a closer look.