Garbage Disposal Repair: Jams, Leaks and Replacement
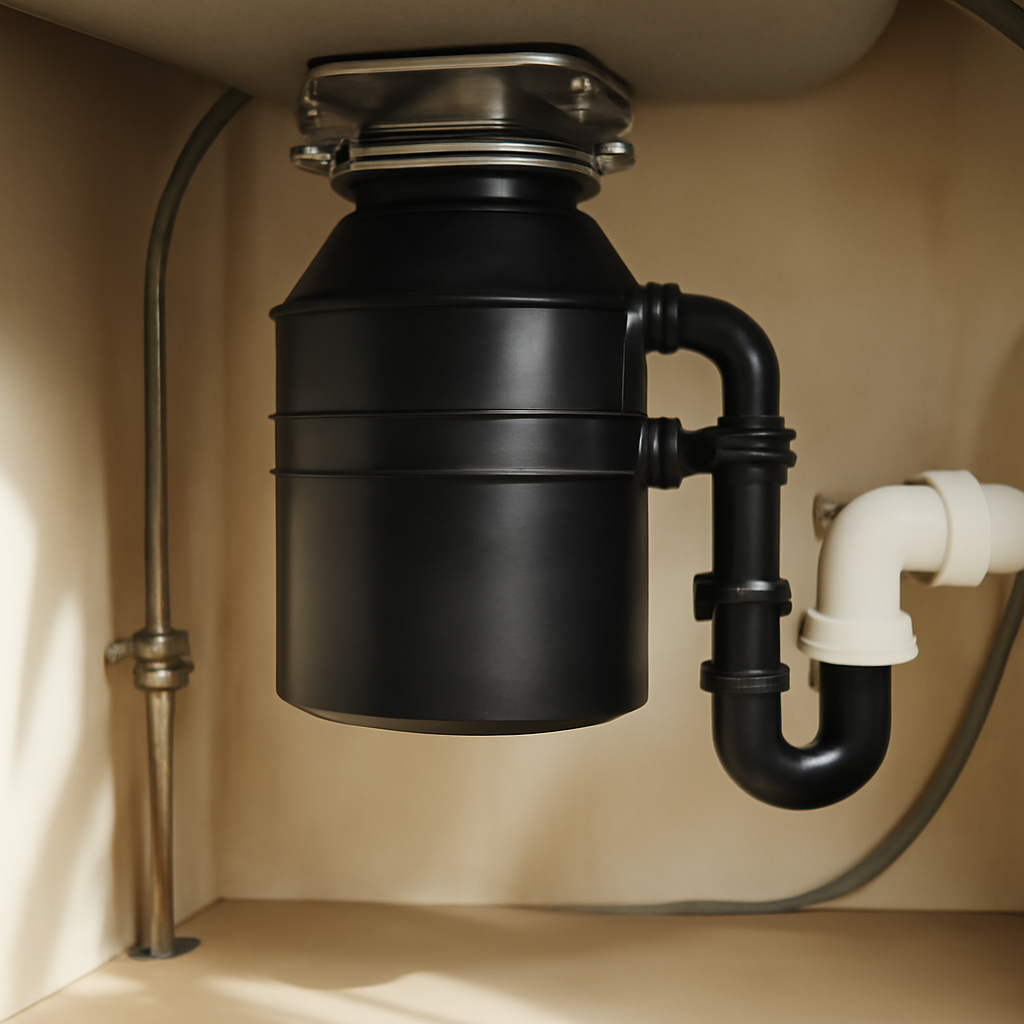
A garbage disposal that hums, leaks or refuses to start is one of the most common kitchen complaints, and many of the causes are simple. A jammed flywheel, a tripped overload switch or a loose drain connection accounts for a large share of service calls. Other symptoms, such as water dripping from the bottom of the unit itself, usually mean the disposal has reached the end of its life. This guide explains how to fix sink disposal problems in a safe order: cutting power first, clearing jams with the hex key and reset button, tracing leaks to the right connection, and recognizing when replacement makes more sense than repair. It also covers what should never go into a disposal, why homes on septic systems need extra caution, and what plumbers typically charge. Cost figures are general industry estimates, not quotes.
Part of our Plumbing & Water guide — start there for the full picture →
The Quick Answer: Most Disposal Problems Fall Into Four Groups
Nearly every disposal complaint fits one of four categories, and each has a different first step:
- Silent, no response at all: the unit has lost power. Check the red reset button on the bottom of the disposal, the wall switch, the plug under the sink and the circuit breaker.
- Hums but does not spin: the flywheel is jammed. Cut power, free the flywheel with a hex key from below, then press the reset button.
- Leaks: the source determines the fix. Leaks at the sink flange, the dishwasher inlet or the drain outlet are often repairable. Leaks from the body of the unit usually are not.
- Drains slowly or backs up: the clog is often downstream of the disposal, in the trap or branch drain, rather than in the grinding chamber.
Work through the safe steps below before calling a plumber. Many homeowners resolve a jam in under ten minutes with a tool that came in the box.
Safety First: Power Off and Hands Out
A disposal is a motor-driven appliance sitting in a wet location. Before any troubleshooting that goes beyond flipping the wall switch, take two precautions every time.
Cut the Power Completely
Turning off the wall switch is not enough, because someone can flip it back on while a hand or tool is in the unit. If the disposal is plug-in, unplug it from the outlet under the sink. If it is hardwired, switch off the circuit breaker that feeds it and confirm the unit will not run by trying the wall switch. Many kitchens label this breaker, but labels in older Front Range homes are often wrong or faded, so test rather than trust.
Never Put Hands in the Grinding Chamber
Even with the power off, the chamber holds sharp debris such as broken glass, bone shards or a dropped paring knife. Retrieve objects with long-handled tongs or pliers, and use a flashlight to see what is down there. The impellers on most units are blunt, but the debris they are jammed against may not be.
Check the Cord
The U.S. Fire Administration advises replacing any appliance that has a cracked, damaged or loose cord. Under-sink cabinets are cramped and damp, and cords get pinched by trash cans and cleaning supplies. If the disposal cord is cracked, cut or loose at the plug, do not keep using it.
How to Clear a Jammed Disposal
A jam happens when something hard, such as a fruit pit, a bottle cap or a piece of bone, wedges between the spinning flywheel and the stationary grind ring. The motor tries to turn, cannot, and either hums or trips its internal overload protector.
Step 1: Use the Hex Key From Below
Most residential disposals have a small hexagonal socket in the center of the bottom of the unit. Most units ship with a matching hex key, often a 1/4-inch size, and replacements are inexpensive at any hardware store.
- Confirm power is off at the plug or breaker.
- Insert the hex key into the socket on the bottom of the unit.
- Work the key back and forth. Resistance at first is normal. Keep rocking it until the flywheel turns a full rotation freely in both directions.
- Remove the key.
If no hex socket exists, some older units allow freeing the flywheel from above using a disposal wrench or a broom handle against an impeller. Power must be off for this approach as well.
Step 2: Remove the Object
Once the flywheel moves, the object that caused the jam is usually loose in the chamber. Pull it out with tongs. Skipping this step means the jam will return on the next run.
Step 3: Press the Reset Button
The overload protector shuts off the motor when it overheats, which is exactly what happens when it strains against a jam. The reset button is usually a small red button on the bottom or lower side of the unit. Wait a few minutes for the motor to cool, then press it firmly. A click means it has reset.
Step 4: Test With Cold Water Running
Restore power, run cold water, and switch on the disposal. Cold water helps solidify any fat so the unit can chop it rather than smear it into the pipes. If the motor spins freely, the job is done.
When the Disposal Hums but Will Not Spin
A humming sound means electricity is reaching the motor but the motor cannot turn. In most cases this is a jam, and the hex-key steps above solve it. If the flywheel turns freely by hand but the unit still only hums when powered, the problem is more likely internal.
- Seized bearings: older units can develop bearing wear or corrosion that stops the motor from starting under load.
- Failed start components: some motors rely on start windings or switches that fail with age.
- Repeated tripping: if the reset button pops again within seconds of starting, the motor is likely drawing excessive current.
Avoid leaving the switch on while the unit hums. A stalled motor heats quickly, which is why the overload protector exists. Repeated attempts can burn out the windings. Internal motor problems are rarely worth repairing on a residential disposal, because the labor approaches the cost of a new unit.
When Nothing Happens at All
Silence usually means a power problem. Check, in order:
- The reset button on the unit.
- The plug under the sink, which can work loose.
- The wall switch, which can fail like any switch.
- The breaker, and any GFCI outlet that feeds the circuit. A tripped GFCI elsewhere in the kitchen can cut power to downstream outlets. The guide to a GFCI outlet not working covers how to find and reset one.
If the breaker trips every time the disposal starts, stop resetting it and have an electrician or plumber diagnose the circuit or motor.
Finding and Fixing Disposal Leaks
Leaks under the sink should be traced to their exact source before any parts are bought. Dry everything with a towel, put a sheet of paper towel or a shallow pan under the unit, then run water and watch. Adding a few drops of food coloring to the sink water can make the path easier to see.
Sink Flange Leaks (Top of the Unit)
The sink flange is the metal collar in the drain opening. It is sealed to the sink with plumber’s putty or a gasket and clamped from below by the mounting assembly. Water that appears around the top of the disposal often means the putty has dried out or the mounting ring has loosened from vibration.
The fix is to tighten the mounting ring first. If that does not stop the leak, the disposal has to be removed, the old putty scraped off, and the flange reseated with fresh putty. This is a moderate DIY job for a handy homeowner, though the unit is heavier and more awkward to support than it looks.
Dishwasher Connection Leaks (Side Inlet)
Most kitchens route the dishwasher drain hose into a small inlet on the side of the disposal. Leaks here are usually a loose hose clamp or a cracked hose end. Tightening or replacing the clamp often solves it. When a new disposal is installed, the knockout plug inside that inlet must be removed if a dishwasher will drain into it, otherwise the dishwasher cannot drain. If water seems to come from the dishwasher side rather than the disposal, the guide to a dishwasher leaking can help separate the two.
Drain Line Leaks (Discharge Outlet)
The discharge tube connects the disposal to the trap and branch drain. A gasket and a pair of bolts or a clamp hold it in place. Drips here often come from a worn gasket or loosened bolts. Replacing the gasket is inexpensive. If the leak is further downstream, at the slip nuts on the trap, the guide to the P-trap explains how these joints seal and when the trap itself should be replaced.
Body Leaks (Bottom of the Unit)
Water dripping from the bottom of the disposal, or from the reset button area, almost always means the internal seals have failed or the housing has corroded through. These leaks are not practical to repair. The unit should be replaced, and the power should be kept off in the meantime, since water and the motor compartment do not mix.
What Not to Put in a Garbage Disposal
Many jams, clogs and early failures trace back to what goes down the drain. Manufacturer manuals vary, but these items commonly cause trouble:
- Fats, oils and grease: they pass through as liquid, then cool and coat the drain line.
- Fibrous scraps: celery strings, corn husks, onion skins and artichoke leaves can wrap around the flywheel.
- Starchy foods: potato peels, rice and pasta can form a paste that settles in the trap.
- Coffee grounds and eggshell fragments: they tend to settle in pipes and build sludge rather than wash away.
- Hard items: bones, fruit pits and shells cause jams.
- Non-food items: twist ties, bottle caps, utensils, paper towels and produce stickers.
- Harsh chemical drain openers: many manufacturers advise against them, and they create a splash hazard if anyone later has to open the drain or clear the unit.
Running cold water before, during and for several seconds after grinding helps move waste through the trap. Feeding scraps gradually rather than all at once reduces jams.
Garbage Disposals and Septic Systems
Homes on septic systems need to think carefully about disposal use. Many properties in rural parts of Douglas, Elbert, El Paso and Jefferson counties rely on onsite wastewater systems rather than municipal sewer. The EPA’s septic care guidance recommends eliminating or limiting garbage disposal use, noting that doing so significantly reduces the fats, grease and solids that enter the septic tank and could clog the drainfield. The same guidance lists coffee grounds among the items not to put down the drain.
A disposal adds solids that the tank has to store until it is pumped. Households that run a disposal heavily may find they need pumping more often. The guide to septic tank pumping cost covers typical intervals and pricing.
Buyers looking at a home on septic should note that the ASHI Standard of Practice excludes septic and other sewage disposal systems from a standard home inspection. A separate septic inspection is commonly arranged during the contract period.
Repair or Replace? How Age and Symptoms Decide
Garbage disposals are relatively inexpensive appliances, so the repair-versus-replace decision tends to favor replacement sooner than it would for a water heater or furnace.
| Situation | Usual direction |
|---|---|
| Jam cleared with hex key, unit runs normally | Keep using it |
| Flange, dishwasher hose or discharge gasket leak | Repair the connection |
| Leak from the body or bottom of the unit | Replace |
| Motor hums with a free-turning flywheel | Usually replace |
| Reset button trips repeatedly | Diagnose; often replace |
| Unit is old, noisy and grinds poorly | Replace |
Manufacturers and trade sources commonly cite a service life somewhere around 8 to 15 years, depending on build quality, horsepower and how the unit is used. Budget units with smaller motors and galvanized grinding parts tend to sit at the low end of that range. Stainless components and higher horsepower generally last longer and jam less.
DIY Replacement Considerations
Swapping a plug-in disposal for a similar model is within reach for many homeowners. Hardwired units involve electrical connections that should be handled with the breaker off and, ideally, by someone comfortable with wiring. Local codes and permit requirements vary by jurisdiction, so check with the city or county building department if wiring changes are involved.
What Garbage Disposal Repair and Replacement Cost
Costs vary with region, brand, access and whether electrical work is needed. The ranges below are rough industry estimates and should be confirmed with local quotes.
- DIY jam clearing: often free, or the cost of a replacement hex key.
- Gaskets, clamps and plumber’s putty: commonly under about $25 in parts.
- Plumber service call for a jam or leak: often in the range of roughly $100 to $300, depending on the local minimum charge.
- New disposal unit: retail prices commonly run from roughly $100 for a basic 1/3 HP model to $400 or more for quieter, higher-horsepower units.
- Professional replacement, installed: frequently estimated in the range of roughly $250 to $700 including the unit, with higher totals if a new outlet, switch or circuit is needed.
Front Range labor rates tend to run higher in the Denver metro and Boulder County than in smaller towns. After-hours or weekend calls usually cost more.
What a Home Inspector Checks
For buyers, a disposal is a small but visible item. The ASHI Standard of Practice directs inspectors to inspect installed food waste grinders by using normal operating controls to activate the primary function. In practice, that means an inspector typically turns the unit on, listens for unusual noise, and looks for leaks underneath while water runs. Inspectors also inspect interior drain, waste and vent systems, which includes the visible piping under the sink.
An inspection report may note a disposal that does not operate, leaks, is wired with an improper cord, or lacks a cover plate on the electrical connection. These items are usually inexpensive but useful for negotiating. For more on what a standard inspection covers, see the guide to hiring a home inspector.
When to Call a Plumber
Call a licensed plumber when:
- The hex key will not free the flywheel, or the jam returns repeatedly.
- The reset button trips again within seconds of startup.
- Water leaks from the body of the unit.
- Water backs up into the other sink basin or the dishwasher, which may point to a clog further down the line.
- The breaker trips when the disposal runs.
- The installation involves hardwiring or a new circuit.
If several drains in the house are slow at the same time, the problem is probably not the disposal at all. A clogged drain deeper in the system needs a different approach.
References
- How to Care for Your Septic System — U.S. Environmental Protection Agency
- ASHI Standard of Practice for Home Inspections — American Society of Home Inspectors
- Appliance and Electrical Fire Safety — U.S. Fire Administration
Frequently asked questions
Why does my garbage disposal hum but not work?
A hum usually means the flywheel is jammed and the motor cannot turn. Cut the power, insert a hex key into the socket on the bottom of the unit, rock it until the flywheel spins freely, remove the object, then press the reset button. If the flywheel already turns freely, the motor itself may be failing.
Where is the reset button on a garbage disposal?
On most units it is a small red button on the bottom or lower side of the disposal housing. It pops out when the motor overheats. Let the motor cool for a few minutes before pressing it firmly until it clicks.
Can a leaking garbage disposal be repaired?
It depends on where the water comes from. Leaks at the sink flange, dishwasher hose or discharge gasket are usually repairable. Water dripping from the body or bottom of the unit generally means internal seals have failed, and replacement is the practical fix.
Is it safe to use a garbage disposal with a septic system?
It can be done, but EPA septic guidance recommends eliminating or limiting disposal use because it adds fats, grease and solids to the tank. Homes that use a disposal heavily may need more frequent septic pumping.
How long does a garbage disposal last?
Trade sources commonly cite roughly 8 to 15 years, depending on the motor size, materials and how the unit is used. Budget models with smaller motors tend to wear out sooner than stainless, higher-horsepower units.
Buying a Front Range home and want the kitchen plumbing and appliances checked before closing? Contact InspectandTest to schedule an inspection or ask a question.