Deck Staining: Prep, Stain Types and Colorado Sun Exposure
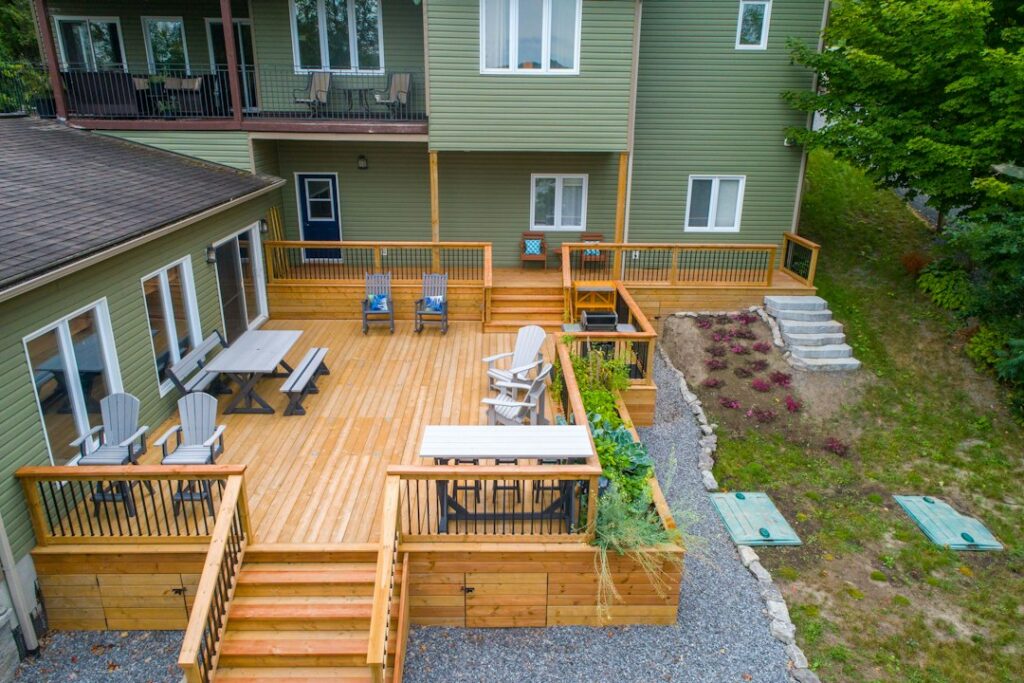
A wood deck takes more abuse than almost any other part of a house. It sits in direct sun, catches snow and meltwater, dries out fast and gets walked on every day. On the Colorado Front Range, high-altitude sunlight and very dry air add to that wear, and many decks go gray, split and splinter within a few seasons if nobody maintains them. Deck staining is the routine maintenance step that slows that decline. A good stain job is mostly preparation: knowing when the wood is ready, cleaning it properly, choosing the right type of stain and applying it in the right weather. This guide walks through each of those steps, flags the safety issues with older treated lumber and solvent-based products, and gives rough, hedged cost ranges for doing the work yourself or hiring a painting contractor. Cost figures are general industry estimates, not quotes.
Part of our Structure & Exterior guide — start there for the full picture →
Building or repairing a deck? Talk to a local deck builder.
📞 Call (888) 268-1507When Does a Deck Need Staining?
A deck needs staining when water stops beading on the surface and starts soaking in, when the color has faded or turned gray, or when the old finish is peeling or worn through in traffic lanes. The simplest way to check is the water bead test. Sprinkle a small amount of water on several boards, including a sunny spot and a high-traffic spot. If the water beads up and sits on top, the existing finish is still repelling moisture. If it darkens the wood and soaks in within a few minutes, the surface is ready for cleaning and a fresh coat.
Other signs that deck staining is overdue include:
- Graying or silvering on boards, which is surface damage from sunlight.
- Small surface checks and splinters on the tops of boards.
- Peeling or flaking on solid-color stains, especially on horizontal surfaces.
- Dark staining or mildew in shaded corners and between boards.
- Uneven color, where sunny sections look washed out and shaded sections still look new.
Run the test on the stairs and railing caps too. Those surfaces often wear faster than the main deck field because they shed water differently and get handled more.
Check the Structure Before You Stain
Stain is a cosmetic and protective coating. It does not fix soft boards, loose railings or rotted joists, and a fresh coat can hide damage for a season or two. Before spending a weekend on prep, walk the deck and look for boards that flex, fasteners that have backed out, rusted joist hangers and posts that wobble. Push a screwdriver gently into suspicious areas, especially around stair stringers, the ledger board where the deck attaches to the house and anywhere water collects. If the tip sinks in easily, the wood may be decaying. The guide to wood rot repair covers what can be patched and what needs replacement.
Railings deserve a separate look. A wobbly guard is a fall hazard regardless of how nice the finish looks, and many older decks have railings shorter than current guidance suggests. See the article on stair railing height for typical requirements. A full deck inspection covers the ledger connection, flashing, footings, joists, guards and stairs. The ASHI Standard of Practice lists attached and adjacent decks, balconies, stoops, steps, porches and their railings among the exterior items a home inspector inspects, so a pre-purchase inspection is a natural point to find out whether a deck needs structural repair before it needs stain.
How to Prep a Deck for Staining
Most premature stain failures trace back to poor preparation. Stain needs clean, dry, open wood fibers to soak into. Dirt, mildew, old loose finish and gray sun-damaged fibers all block penetration and shorten the life of the new coat.
Clean the Surface
Sweep off debris and clear the gaps between boards with a putty knife. Then apply a deck cleaner made for the job. Oxygen bleach (sodium percarbonate) cleaners are common for general dirt, graying and mildew, and are often described by manufacturers as gentler on wood and plants than chlorine bleach. Wet nearby plants before and after, follow the label for dwell time and scrub with a stiff brush. Rinse thoroughly. If the deck has an old film-forming finish that is peeling, a stain stripper may be needed to remove it so the new product can bond.
Use a Brightener
Cleaners and strippers can leave wood darker and slightly alkaline. A wood brightener, usually based on oxalic acid, is applied afterward to neutralize the surface and restore a lighter, more even color. It also helps remove some tannin and rust stains around fasteners. Many stain manufacturers recommend the clean-then-brighten sequence in their application instructions.
Pressure Washing and Sanding
A pressure washer speeds rinsing but can easily gouge soft woods like cedar and raise fuzz on the surface. If one is used, keep the pressure low, use a wide fan tip and keep the wand moving with the grain. Raised fibers or rough patches can be lightly sanded once dry. Sanding with too fine a grit can close the wood pores and reduce stain absorption, so manufacturers often suggest a medium grit for decks. Sanding produces fine wood dust. OSHA notes that airborne wood dust from sanding and cutting can cause respiratory symptoms, so a dust mask or respirator and eye protection are sensible.
Let the Wood Dry
After washing, let the deck dry thoroughly before applying stain. Many manufacturers suggest waiting at least 24 to 48 hours of dry weather, though the right wait depends on the product, the wood and conditions. In Colorado’s low humidity, surfaces often dry quickly, but the wood beneath the surface can still hold moisture, especially in shaded sections and on boards close to the ground.
Staining New Pressure-Treated Lumber
New pressure-treated lumber often arrives wet from the treating process. Stain applied too soon may not penetrate and can peel or look blotchy. A common rule of thumb is to wait several weeks to a few months before staining new treated wood, but guidance varies by manufacturer and by how wet the boards were when installed. Some kiln-dried-after-treatment lumber can be finished sooner. The water bead test helps here as well: if water still beads on brand-new boards, the wood is not ready to accept stain.
A moisture meter takes some of the guesswork out of the decision. Many stain makers publish a maximum moisture content for application, often in the range of roughly 12 to 15 percent, though the exact figure depends on the product. A pin-type meter pushed into several boards, especially in shade, gives a more reliable picture than touch alone. The site’s moisture meter selection lists options suitable for wood. Readings vary by wood species and meter calibration, so treat them as a guide and follow the stain label.
Types of Deck Stain
Deck stains run along a spectrum from almost invisible to fully opaque. The more pigment a stain contains, the more UV protection it usually provides and the more it hides the grain. More pigment also tends to mean more film on the surface, which can peel if the wood is not prepped well.
Clear Sealers and Toners
Clear water repellents and lightly tinted toners let the most grain show. They help shed water but offer limited protection from sunlight, so wood can still gray. In high-sun locations, they may need recoating every year or so. They are often chosen for new cedar or redwood when owners want a natural look and accept more frequent maintenance.
Semi-Transparent Stains
Semi-transparent stains add enough pigment to color the wood and slow UV graying while still showing grain. They soak in rather than forming a thick film, so they tend to wear away gradually instead of peeling. Many homeowners consider them a practical middle ground for decks, and recoating is usually straightforward because the old coat does not need to be fully stripped if the surface is cleaned well.
Solid Stains
Solid or opaque stains behave more like thin paint. They hide grain, color mismatches and some weathering, and they typically offer the most UV protection. The tradeoff is that on horizontal deck boards they can peel in traffic areas, and once a solid stain is on, switching back to a transparent look usually means stripping or sanding. They are often used on older decks with patched boards, or on railings and vertical surfaces.
Oil-Based vs Water-Based Stains
Oil-based stains, often made with alkyd or natural oils, tend to soak deeply into the wood and enrich its color. They often take longer to dry and many contain higher levels of solvents. Water-based (acrylic or waterborne) stains usually clean up with soap and water, dry quickly and are generally available in lower-VOC formulations. Product chemistry has changed a lot, and many hybrid products now blend characteristics of both. Performance depends more on the specific product and on prep than on the oil-versus-water label. Check whether a new stain is compatible with what is already on the deck; some manufacturers advise against putting a water-based product over a fresh oil-based coat without preparation.
Colorado Sun and Climate: Why Finishes Wear Faster
Front Range decks face a harsh combination. Higher elevation generally means more intense UV exposure than at sea level, and Denver-area humidity is often low. Sunlight breaks down lignin in the wood surface and degrades the stain itself, which is why south- and west-facing decks often fade first. Low humidity and big day-to-night temperature swings make wood shrink and swell, opening small checks where water can get in during snowmelt. Freeze-thaw cycles then work that moisture deeper.
The practical effect is that finishes on exposed Front Range decks may need attention more often than label claims written for milder climates suggest. This is not a hard rule. A shaded deck in Evergreen may behave very differently from a full-sun deck in Aurora. Pigmented stains generally hold up better than clear products in strong sun, and some homeowners recoat only the most exposed horizontal surfaces on a shorter cycle while leaving railings and vertical boards for longer.
Best Weather for Staining
Most stain labels specify a temperature window, commonly somewhere around 50 to 90 degrees Fahrenheit, and no rain for a day or more after application. On the Front Range, intense afternoon sun can make boards much hotter than the air, causing stain to flash-dry and lap-mark. Many applicators work in the morning or on shaded sections, and they watch for afternoon thunderstorms in summer. Late spring and early fall often offer the most workable conditions.
Safety: VOCs, Ventilation and Older Treated Wood
Many stains, strippers and cleaners contain solvents. EPA lists paints, paint strippers, other solvents and wood preservatives among household sources of volatile organic compounds (VOCs), and advises increasing ventilation and following label precautions when using products that emit them. Outdoors, ventilation is less of a concern, but the same products are often stored in garages and basements. Store them sealed, away from living spaces, and buy only what the project needs. Oil-soaked rags can spontaneously combust as they dry, so many labels instruct users to lay them flat outdoors to dry or store them in a sealed, water-filled metal container before disposal.
CCA-Treated Lumber on Older Decks
Decks built before 2004 may be made with wood treated with chromated copper arsenate (CCA). According to EPA, manufacturers voluntarily stopped making chromated arsenical-treated wood for most homeowner uses at the end of 2003, and EPA does not require removing existing structures. EPA notes that regularly applying a penetrating coating, such as an oil- or water-based stain, may reduce the leaching of chemicals from older CCA-treated decks. EPA also advises wearing goggles and a dust mask when sawing this wood, washing hands after handling and never burning CCA-treated scraps. Heavy sanding of an older treated deck creates the kind of dust worth avoiding, so cleaning and light sanding with collection, protective gear and good cleanup are prudent.
How Often to Recoat a Deck
There is no universal schedule. Clear and toner products may need recoating roughly every year in strong sun. Semi-transparent stains often last somewhere in the range of two to three years on horizontal surfaces, and solid stains may last longer on vertical surfaces but can peel sooner on floors. Front Range sun exposure can push these numbers toward the shorter end. The water bead test each spring is a better guide than the calendar. Recoating before the wood turns gray is usually less work than restoring a neglected deck, because a lighter clean and a single maintenance coat may be enough.
Deck Staining Costs: DIY vs Hiring a Pro
Costs vary widely with deck size, condition, height, railing complexity and local labor rates, so treat these as rough industry estimates. A DIY job typically involves cleaner, brightener, stain, brushes or pads and possibly a rented pressure washer or sander. For a moderate-size deck, homeowners commonly spend a few hundred dollars on materials, more if stripping or multiple coats are needed. Professional deck staining is often priced per square foot, and many quotes land somewhere in the low single dollars per square foot for cleaning and staining, rising for stripping, heavy repairs, elaborate railings or elevated decks.
Hiring a contractor can make sense for multi-level decks, extensive railings, or decks with peeling solid stain that needs stripping. Ask what prep is included, which product will be used, how many coats are planned and whether minor board replacement is part of the price. For a broader view of exterior coatings, the guide to concrete sealer covers patios and walkways that often sit beside a deck.
When a Deck Needs More Than Stain
If the deck has soft spots, a ledger without visible flashing, sagging joists, wobbly stairs or loose guards, a new coat of stain is not the right first step. Buyers in particular benefit from having a qualified inspector look at the deck before closing, since repairs can be negotiated while there is still leverage. Learn how to choose an inspector and what a standard inspection includes in the guide to hiring a home inspector. Some buyers also order a dedicated deck evaluation through specialty inspections when the deck is large, elevated or clearly older.
More Questions About Deck Staining
How long does deck stain take to dry?
Most deck stains are dry to the touch in about 4 to 12 hours and ready for light foot traffic within 24 hours, though oil-based products and cool, humid weather can extend drying to 48 hours or more.
Full curing, when the stain reaches its final hardness, can take several days. Wait longer before returning furniture, rugs and planters. Check the product label for specific drying and recoat times, and plan staining for a stretch of dry weather so rain or heavy dew does not interrupt drying.
Can you stain a deck in the fall?
A deck can be stained in the fall as long as temperatures stay above the minimum on the stain label, often around 50 degrees Fahrenheit, during application and for the following day or night.
Fall staining has benefits: milder sun and fewer bugs. Shorter days, cold nights and morning dew can slow drying, so start late in the morning after dew evaporates and finish early enough for the surface to dry before evening. Check the forecast for rain, and avoid staining when frost is likely.
How many coats of stain does a deck need?
Most semi-transparent deck stains need one to two coats, often applied wet-on-wet, while solid stains usually need two coats for even coverage. Follow the product’s instructions, since some stains are designed for a single coat.
Applying too much stain can leave a sticky or peeling surface because wood can only absorb so much. Back-brushing helps work stain into the grain. On weathered wood, a second coat may be needed, but test absorption first. Clean wood absorbs stain better, improving coverage and durability.
Should you stain the underside and ends of deck boards?
Staining the ends and underside of deck boards can reduce moisture absorption and cupping, especially before new boards are installed. End grain absorbs water much faster than faces.
On an existing deck, staining the underside is usually not practical. Focus instead on sealing cut ends during installation and keeping the area below the deck well ventilated. Many builders apply end-cut preservative to pressure-treated board ends. Staining all sides is more common with expensive woods like cedar or hardwood decking.
What happens if it rains after staining a deck?
Rain soon after staining a deck can wash off uncured stain, cause blotchy spots or leave a surface with poor adhesion. How much damage occurs depends on how long the stain dried before rain.
Many stains need at least 12 to 24 hours of dry weather to resist light rain. If rain causes spotting, let the deck dry fully, then clean and reapply to affected areas following the product instructions. Checking the forecast for 24 to 48 hours of dry weather before staining avoids the problem.
References
- Chromated Arsenicals (CCA) — U.S. Environmental Protection Agency
- Volatile Organic Compounds’ Impact on Indoor Air Quality — U.S. Environmental Protection Agency
- Wood Dust — Occupational Safety and Health Administration
- ASHI Standard of Practice for Home Inspections — American Society of Home Inspectors
Frequently asked questions
How do you know when a deck is ready for staining?
Use the water bead test. Sprinkle water on several boards; if it soaks in within a few minutes instead of beading, the old finish has worn and the deck is ready to clean and stain. New pressure-treated wood that still beads water usually needs more drying time.
Is semi-transparent or solid stain better for a deck?
Semi-transparent stain shows grain, wears gradually and is easier to recoat. Solid stain hides imperfections and usually offers more UV protection but can peel on walking surfaces. Many homeowners use semi-transparent on deck boards and solid on railings or older, patched decks.
How long should new pressure-treated wood dry before staining?
Guidance varies, but many manufacturers suggest waiting several weeks to a few months for wet-treated lumber. A moisture meter reading below the stain maker's stated limit, often around 12 to 15 percent, and water soaking in rather than beading are good signs it is ready.
How often should a deck be restained in Colorado?
It depends on sun exposure and the product. Clear finishes may need annual recoating in strong sun, while semi-transparent stains often last two to three years on deck boards. High-altitude UV and dry air can shorten those intervals, so check with a water bead test each spring.
Should an old CCA-treated deck be stained?
EPA notes that regularly applying a penetrating coating such as an oil- or water-based stain may reduce chemical leaching from older CCA-treated wood. Avoid heavy dry sanding, wear goggles and a dust mask when cutting, wash hands after handling and never burn treated scraps.
How much stain does a deck need?
A gallon of deck stain typically covers about 150 to 300 square feet, depending on wood condition and stain type. Rough or weathered wood absorbs more. Measure the deck surface, railings and stairs, and buy extra for a second coat or touch-ups.
Is it better to brush, roll or spray deck stain?
Brushing works stain into the wood grain best, while rollers and sprayers cover large areas faster. A common approach is rolling or spraying, then back-brushing to even out the finish. Spraying requires careful masking to protect siding and plants from overspray.
Why is deck stain sticky after drying?
Sticky deck stain usually means too much stain was applied and the wood could not absorb it, or the weather was too cool or humid for it to cure. Wiping off excess with a rag soon after application helps. Stripping or cleaning may be needed in severe cases.
Buying a Front Range home with a deck that looks tired, soft or wobbly? Contact us to be connected with a local inspector who can check the ledger, framing and railings before you commit.