Asbestos Home Testing Kits: Lab Mail-In vs Instant Kits
Popcorn ceilings, old vinyl floor tiles, crumbling pipe wrap and textured drywall joint compound all prompt the same question in older homes: does this contain asbestos? Hardware stores and online retailers sell a range of products that promise an answer, and they are not all the same thing. Some are simply a sampling kit plus a prepaid lab fee, while others claim to give a result on the spot. This guide explains how asbestos home testing kits actually work, how reliable each type tends to be, how to collect a sample with the least possible risk, how to read a lab report, and when it makes more sense to hire an accredited inspector instead. It draws on EPA and OSHA guidance and is meant for general education. It does not replace advice from a licensed asbestos professional or your local regulator, and rules for sampling and abatement vary by state and by the type of building.
Part of our Asbestos in the Home guide — start there for the full picture →
Is this mold, asbestos, or water damage? Get a free instant screen
Upload a clear photo of the suspect area. You'll get an instant AI screening opinion and what to do next. This is screening guidance, not a professional determination.
Screening guidance only. AI can be wrong. Confirm asbestos, mold type, or lead with lab testing or a licensed professional before acting.
What an Asbestos Home Testing Kit Really Is
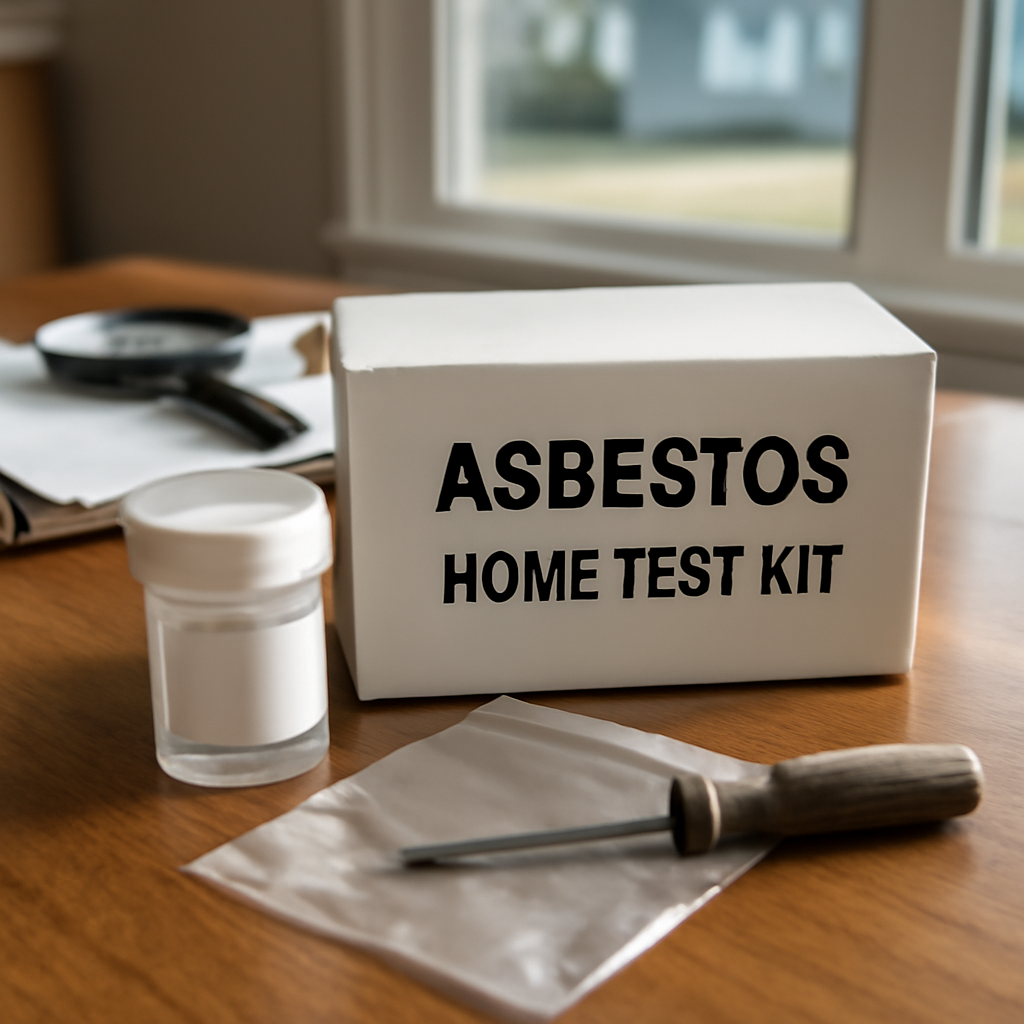
The phrase “asbestos test kit” covers two very different products. The first, and by far the more common, is a mail-in lab kit. It is essentially packaging: sample bags or vials, gloves, sometimes a disposable mask, a small tool or instructions on what to use, a chain-of-custody form and a prepaid or prepay-online lab analysis. The kit itself does not detect anything. A laboratory examines the sample and reports what it found. The second type is the so-called instant or rapid kit, which claims to show a color change or other visual result at home without a lab. These are far less common, and their claims deserve more skepticism.
Understanding that difference is the key to buying sensibly. When you compare mail-in kits, you are really comparing the laboratory behind them, the analysis method, the turnaround time, what the lab fee includes, and how clear the instructions are. The plastic bag and gloves are a small part of the value. For an overview of how retail kits are packaged and sold, see our guides to asbestos test kits and the shop category for asbestos test kit products.
It also helps to know why testing matters at all. EPA describes asbestos as a mineral fiber that occurs in rock and soil and notes that, because of its fiber strength and heat resistance, it was used in a variety of building construction materials for insulation and as a fire retardant. OSHA describes asbestos as a group of naturally occurring minerals resistant to heat and corrosion, including chrysotile, amosite and crocidolite among others, and states that breathing the fibers can cause scar-like tissue in the lungs known as asbestosis, as well as cancer. Our explainer on chrysotile asbestos covers the most common type found in homes. Because the fibers are too small to see, a lab analysis is the practical way to answer the question for a specific material.
Mail-In Lab Kits vs Instant Kits Compared
The table below summarizes the main categories sold to homeowners. Reliability notes are general and hedged, because actual quality depends on the specific laboratory, how the sample is collected, and the material being tested.
| Kit type | How it works | Reliability (hedged) | Notes |
|---|---|---|---|
| Mail-in bulk lab kit | You collect a small piece of the suspect material, seal it and ship it to a lab, which typically analyzes it by polarized light microscopy (PLM) | Generally considered the standard approach for bulk building materials when the lab is accredited and the sample is representative | Lab fee may be included or paid separately; check whether each additional sample costs extra |
| Mail-in kit with layered or point-count options | Same as above, with optional extra analysis for multi-layer materials or low-concentration results | Can help clarify borderline or “trace” results; quality still depends on the lab | Useful for joint compound, textured coatings and flooring with mastic |
| Instant or rapid home kit | Claims a visual or chemical indicator result at home without lab analysis | Not widely accepted as a substitute for lab analysis; results may be unreliable or hard to interpret | Treat as a screening curiosity at best; confirm any decision with a lab result |
| Air or dust sampling kit | Collects settled dust or an air sample for lab analysis, often by a different microscopy method | Interpretation is complex and depends on sampling conditions | Usually better handled by a professional, especially after a disturbance |
The bottom line from the table: for a homeowner trying to learn what a specific ceiling, floor or wall material contains, a mail-in bulk kit sent to an accredited laboratory is the option most likely to give a usable answer. If you are weighing a product marketed as instant, our deeper look at the instant asbestos test kit category explains why we treat those claims cautiously.
How PLM analysis works in plain terms
Polarized light microscopy is the method most labs use for bulk building materials. A trained analyst examines the sample under a microscope that uses polarized light, which lets different minerals show characteristic optical properties. The analyst identifies whether asbestos fibers are present, which type they are, and estimates their percentage in the material. The method is well established for bulk samples, but it has limits. Very fine fibers, very low concentrations, and some heavily processed materials such as certain floor tiles can be harder to read, which is why some labs offer additional analysis on request.
What to look for in a mail-in kit
- Lab accreditation. Look for a clear statement that the analysis lab holds recognized accreditation for bulk asbestos analysis. Vague claims about “certified testing” without naming the accreditation are a warning sign.
- What the price includes. Some kits bundle one sample’s lab fee; others charge the lab fee separately once the sample arrives. Multi-sample projects can add up quickly.
- Turnaround options. Standard turnaround is often several business days after receipt, with rush options at a higher price.
- Clear instructions and chain of custody. Good kits explain how much material to take, how to label it and how to fill in sample location details.
- Report format. A useful report lists each sample, the layers analyzed, the asbestos type if found and the estimated percentage.
For a product-focused comparison, see our guides to the asbestos test kit and the asbestos home test kit, which cover what typically comes in the box.
Should a Homeowner Take the Sample at All?
This is the part most kit packaging glosses over. EPA’s homeowner guidance is clear that sampling is best left to a professional. On its Protect Your Family page, EPA states that a trained and accredited asbestos professional should take samples for analysis, since a professional knows what to look for and because there may be an increased health risk if fibers are released. EPA adds that, if done incorrectly, sampling can be more hazardous than leaving the material alone, and that taking samples yourself is not recommended. In its list of do’s and don’ts, EPA says it is highly recommended that sampling and minor repair also be done by a trained and accredited asbestos professional.
EPA also makes a point that saves many homeowners time and money: if building materials are not damaged and will not be disturbed, you do not need to have your home tested for asbestos. Material in good condition that will not be disturbed by remodeling should be left alone. EPA notes that exposure generally occurs when asbestos-containing material is disturbed or damaged in a way that releases particles and fibers into the air.
So the honest framing is this. A home kit does not make sampling safe. It only makes lab analysis easy to order. If the material is intact and you have no plans to cut, sand, drill or demolish it, testing may not be needed at all. If the material is damaged or you are planning a remodel, EPA recommends a trained and accredited professional for the sampling itself. Some homeowners still choose to sample a small, intact, accessible material on their own, and local rules may allow that in a single-family home. If you go that route, the steps below are general risk-reduction practices, not a guarantee of safety.
General risk-reduction steps if you do sample
- Check local rules first. Some states and localities regulate who may sample or disturb suspect materials, especially in rentals, multifamily buildings and commercial spaces.
- Isolate the area. Shut off heating and cooling so air does not carry fibers to other rooms. Keep children and pets out and close the door if possible.
- Wear protection. Use disposable gloves, eye protection, and a properly fitted respirator rated for fine particles rather than a basic dust mask. Our guide to masks for asbestos removal explains the difference between filter types and why fit matters.
- Wet the material. Lightly mist the spot with water containing a few drops of detergent before cutting. EPA notes in its contractor guidance that wet fibers do not float in the air as easily as dry fibers, which is the reason wetting is standard practice.
- Take a small sample. Use a clean tool to remove a small piece that goes through all layers, roughly the size the kit instructions specify. Do not scrape, sand or break off large pieces.
- Seal it immediately. Place the sample directly into the kit bag or vial, seal it, and label it with the location and material.
- Seal the hole. Cover the sampled spot with a patch, sealant or tape so the exposed edge cannot shed fibers.
- Clean up wet. Wipe the area and tools with a damp disposable cloth. EPA advises against dusting, sweeping or vacuuming debris that may contain asbestos with an ordinary vacuum. Bag the cloth, gloves and any debris for disposal according to local rules.
If any step feels uncertain, or the material is crumbling, powdery or hard to reach, stop and call a professional. For cleanup questions after an accidental disturbance, see our guide to asbestos cleaning.
Which Materials Are Worth Testing
EPA notes that you generally cannot tell whether a material contains asbestos simply by looking at it unless it is labeled, and that when in doubt you should treat the material as if it contains asbestos. That advice shapes how to prioritize testing. Focus on materials you actually plan to disturb, in roughly this order:
- Textured ceilings such as acoustic or popcorn finishes, which can shed easily when scraped.
- Drywall joint compound and wall texture, especially before sanding or demolition. Our guide to the asbestos drywall test explains why joint compound is usually sampled separately from the board.
- Resilient flooring and mastic, including older vinyl tiles, sheet flooring and the adhesive beneath. Our asbestos tile testing guide covers sampling the tile and adhesive as separate layers.
- Pipe and boiler insulation, which is often friable and is a strong candidate for professional sampling rather than DIY.
- Vermiculite attic insulation, which EPA’s Learn About Asbestos page flags as a known source of asbestos-contaminated insulation; it is a poor candidate for DIY sampling and is best left undisturbed until a professional assesses it.
- Exterior siding, roofing and window glazing, which may matter before exterior renovation.
Each distinct material usually needs its own sample. Two ceilings that look identical may have been installed at different times with different products, so one result does not necessarily cover the whole house.
How to Read Lab Results From a Home Kit
A typical bulk report lists each sample, describes the layers the analyst observed, and states whether asbestos was detected, which type, and an estimated percentage. Common outcomes include:
- None detected (ND). The analyst did not find asbestos in the portion examined. That is reassuring for that sample, but it is only as representative as the sample itself.
- Trace or less than 1 percent. A small amount was seen. Regulatory thresholds and how they apply vary, so a trace result often warrants a follow-up conversation with a professional or an additional analysis method the lab may offer.
- Positive with a type and percentage. For example, a chrysotile result in a stated percentage range. This indicates the material should be managed as asbestos-containing.
- Layered results. Multi-layer materials may show one layer positive and another negative, which matters for removal planning.
We walk through report language line by line in our guide to asbestos test results. The key takeaways: read each layer, note the asbestos type, and remember that a single negative sample does not clear an entire house.
A positive result does not automatically mean removal. EPA explains that if asbestos-containing material is more than slightly damaged or could be disturbed, trained and accredited professionals can either repair it, usually by sealing or covering it, or remove it. Intact material that will be left alone may simply be monitored.
Costs: Home Kits vs Professional Inspection
Prices vary by region, lab and the number of samples, so the ranges below are rough and should be confirmed with current quotes:
- Mail-in home kits commonly run from a few tens of dollars to around a hundred dollars or so for a single sample including lab fees, with additional samples and rush turnaround priced extra.
- Instant kits may be cheaper per test, but because their reliability is uncertain, the money saved may not buy a usable answer.
- A professional asbestos inspection with sampling typically costs more, often several hundred dollars and sometimes more for larger homes or many materials. It includes a visual survey, sample collection by a trained person, lab analysis and a written report.
When comparing, count the real number of materials you need tested. A remodel touching ceilings, walls and floors in three rooms can easily involve six or more distinct samples. At that point the gap between DIY kits and a professional survey narrows, and the professional route adds safer sampling, better sample selection and documentation that a contractor or buyer may accept.
When to Hire an Accredited Inspector Instead
EPA describes two main types of accredited asbestos professionals for homes. Inspectors can examine a home, assess conditions, take samples for testing and advise on corrections, and can later check that a contractor followed proper procedures, including cleanup and air monitoring. Contractors repair or remove asbestos-containing material. EPA recommends that a professional inspection include a complete visual examination and the careful collection and laboratory analysis of samples, followed by a written evaluation if asbestos is present.
A professional is the better choice in situations like these:
- The material is damaged, crumbling, powdery or friable.
- You are planning a remodel, demolition or flooring removal that will disturb several materials.
- The home is a rental, condo or multifamily building where local rules may restrict who can sample.
- You need documentation for a sale, a contractor or an insurer.
- Someone in the household has a health condition that makes any exposure a greater concern.
- Accidental disturbance has already happened and you need to know whether cleanup is required.
OSHA’s asbestos pages focus on workplace protections, but they reinforce the same principle: asbestos is well recognized as a health hazard and its use is highly regulated by both OSHA and EPA. If you hire a contractor for any work that could disturb suspect material, ask about their training and how they will protect their crew and your household.
Practical Workflow for Front Range Homeowners
Many homes across the Denver metro and the wider Front Range were built or remodeled during decades when asbestos-containing products were common in ceilings, flooring and joint compound. A sensible sequence before a project looks like this:
- List what the project will disturb. Walk the space and note every material that will be cut, sanded, drilled or removed.
- Decide what is intact and untouched. If a material will not be disturbed and is in good condition, EPA says testing is not needed for that material.
- Choose your path. For one or two small, intact, accessible materials, a mail-in lab kit may be reasonable where local rules allow it. For damaged materials or a bigger project, hire an accredited inspector.
- Read every result carefully. Treat trace or borderline results as a reason to ask questions, not as a clean bill of health.
- Plan the work around the results. Positive materials should be repaired, enclosed or removed by trained professionals, with cleanup handled properly.
Within our broader asbestos and lead testing section, the asbestos hub collects our guides on specific materials, testing and cleanup so you can go deeper on whichever step you are facing.
Common Mistakes With Home Asbestos Kits
- Testing only one layer. Floors and walls often have several layers. A sample that misses the backing or adhesive can miss the asbestos.
- Sampling dry. Skipping the wetting step increases the chance of releasing fibers.
- Leaving the hole open. An unsealed sample spot can keep shedding material.
- Assuming one result covers the house. Similar-looking materials can differ.
- Trusting an instant result for a big decision. Confirm with a lab before planning demolition or deciding a material is safe to sand.
- Vacuuming debris with a household vacuum. EPA advises against dusting, sweeping or vacuuming debris that may contain asbestos.
- Testing material that will never be disturbed. Intact material left alone may not need testing at all.
Avoiding these mistakes does more for accuracy and safety than choosing between kit brands. The biggest variables are the lab, the sample and how carefully it was taken.
References
- U.S. EPA. Protect Your Family from Exposures to Asbestos
- U.S. EPA. Learn About Asbestos
- Occupational Safety and Health Administration. Asbestos
Frequently asked questions
Are asbestos home testing kits accurate?
Mail-in kits that send a sample to an accredited lab for polarized light microscopy are generally considered a reliable way to analyze bulk materials, provided the sample is representative and includes all layers. Instant kits that claim results without a lab are far less established and should not be relied on for major decisions.
Is it safe to take an asbestos sample yourself?
EPA recommends that a trained and accredited asbestos professional take samples and says sampling done incorrectly can be more hazardous than leaving the material alone. If local rules allow DIY sampling and the material is small, intact and accessible, wetting it, wearing a fitted respirator, taking a small piece and sealing the hole reduce but do not eliminate the risk.
Do intact materials need to be tested?
According to EPA, if building materials are not damaged and will not be disturbed, testing is not needed. Material in good condition that will be left alone can usually stay in place.
What does a trace asbestos result mean?
A trace or less-than-one-percent result means the analyst saw a small amount of asbestos. Rules about how such material must be handled vary, so it is worth asking the lab about additional analysis and talking with an asbestos professional before disturbing it.
How much does a professional asbestos inspection cost compared with a kit?
Home kits often cost tens of dollars per sample including lab fees, while a professional inspection typically runs several hundred dollars or more depending on home size and sample count. For projects involving many materials, the professional route can be close in cost and adds safer sampling and documentation.
Planning a remodel and unsure which materials need testing first? Send us a note describing the project and the age of the home, and we can help you think through whether a home kit or an accredited inspection is the better fit.