Residential Mold Removal: What Homeowners Know
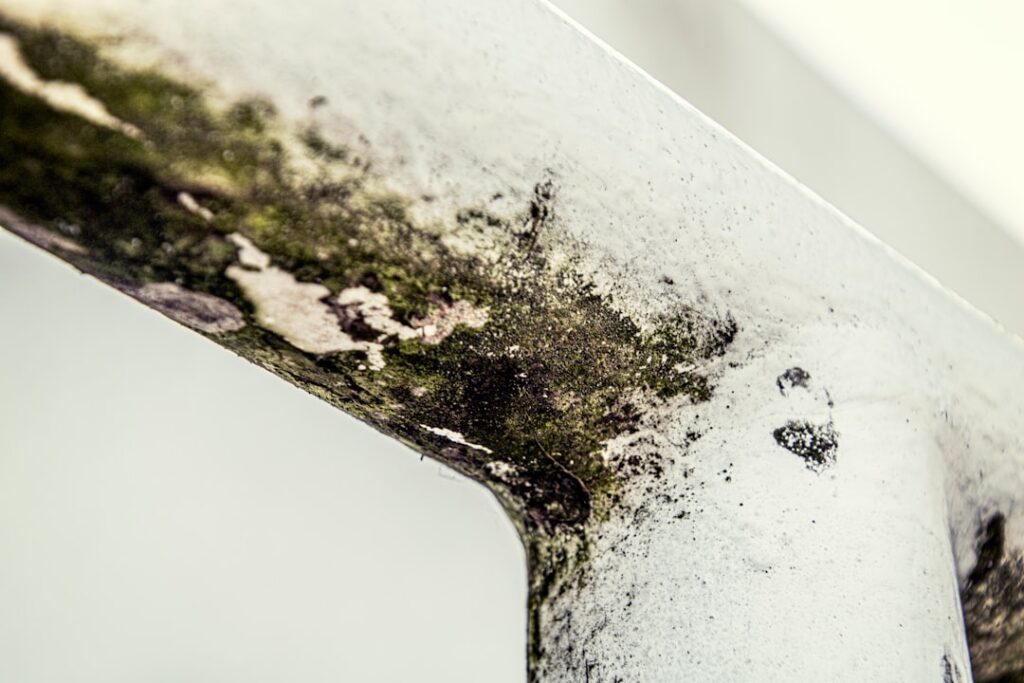
Residential mold removal covers everything from wiping a small patch off a bathroom ceiling to a full professional remediation after a basement flood. The right approach depends almost entirely on how much mold there is, what surface it is on, and why it grew. This guide walks through the process, the line between a do-it-yourself job and one for a pro, and what removal typically costs. It summarizes EPA and CDC guidance current as of 2026 — consult a physician about symptoms and a certified professional for testing and removal decisions. Treating mold as a moisture problem, not just a stain, is the mindset that keeps it from coming back.
Part of our Mold Removal & Remediation guide — start there for the full picture →
Is this mold, asbestos, or water damage? Get a free instant screen
Upload a clear photo of the suspect area. You'll get an instant AI screening opinion and what to do next. This is screening guidance, not a professional determination.
Screening guidance only. AI can be wrong. Confirm asbestos, mold type, or lead with lab testing or a licensed professional before acting.
What residential mold removal involves
At its core, mold removal means physically eliminating the growth and correcting the moisture that fed it. The EPA frames the goal plainly: remove the mold and fix the water problem, because cleaning alone without addressing moisture guarantees a return. A complete job, whether DIY or professional, moves through the same stages.
It starts with assessment — finding the extent of growth and the moisture source. Next comes containment for anything beyond a small patch, isolating the area so spores do not spread. Then removal: cleaning hard surfaces and discarding porous materials that cannot be salvaged. Drying the space thoroughly follows, and finally verification that the area is clean and dry. Our guide to how mold removal and remediation works details each stage for larger projects.
DIY versus professional removal
The EPA’s working guideline is that mold covering less than about 10 square feet is generally a homeowner job, while larger areas call for professional remediation. Size is not the only factor, though.
When DIY is reasonable
A contained patch on a hard, non-porous surface — tile, glass, a sound painted wall — with a clear and fixable moisture source is well within reach for most homeowners. Surface cleaning with detergent and water, proper protective gear, and thorough drying handles these cases. Our walkthrough of how to get rid of mold covers the technique for these smaller jobs.
When to hire a professional
Bring in a pro when the area exceeds 10 square feet, when mold grows inside walls or HVAC systems, when it returns after cleaning, or when it followed sewage backup or major flooding. Health is also a trigger: if anyone in the home has asthma, allergies, or a weakened immune system, the spore disturbance of DIY removal poses a real risk. Professionals contain the area, use HEPA filtration and negative air pressure, remove affected materials safely, and verify the result.
Step-by-step DIY mold removal
For a qualifying small job, work through these steps. Gear up first with an N95 respirator, rubber or nitrile gloves, and unvented goggles, and open a window with a fan venting outward.
Stop the moisture source before cleaning — a leak, condensation, or high humidity. Cleaning while the area stays wet is wasted effort. Then clean hard surfaces by scrubbing with detergent and water; the EPA recommends physical removal over relying on a biocide. Discard porous materials that are saturated or heavily colonized, such as soaked drywall, carpet, and ceiling tiles, because cleaning cannot fully remove mold rooted in them. Bag debris in plastic and seal it before carrying it through the house.
Dry everything completely with fans and a dehumidifier, aiming to get the area dry within 48 hours. Monitor the spot over the following weeks; regrowth means the moisture problem is unresolved.
Which materials can be saved and which must go
A large part of residential mold removal is deciding what to clean and what to discard, and the answer turns on whether a material is porous. Non-porous materials — glass, metal, hard plastic, glazed tile, and finished surfaces with an intact seal — can almost always be cleaned and kept, because mold grows on top rather than rooting in.
Semi-porous materials like solid wood and concrete can often be saved with scrubbing and, where staining persists, sanding or grinding, though heavily colonized or softened wood may need replacing. Porous materials are the difficult category. Drywall, ceiling tiles, carpet and padding, fabric, upholstery, and most insulation absorb water and let mold root deep into their structure, so once they are saturated and colonized the EPA generally recommends removal rather than cleaning. Trying to salvage moldy drywall or carpet usually means the growth returns, and the cost of repeated cleaning exceeds the cost of replacement. A clear-eyed sort at the start — keep the non-porous, scrub the salvageable semi-porous, discard the saturated porous — saves time and prevents the frustration of regrowth.
The role of moisture mapping before removal
Skilled removal starts with finding where the water went, not where the mold shows. Visible growth marks where conditions were right long enough to colonize, but the wet zone driving it often extends well beyond the stain. Removing only the visible patch leaves the surrounding damp, contaminated material in place.
Professionals use moisture meters to read dampness inside materials and thermal imaging to reveal cold, wet areas behind surfaces, mapping the full extent before cutting anything. This is why a contractor may remove drywall a foot or two past the edge of the visible mold — the meter shows the material is still wet and likely colonized beyond what the eye sees. Homeowners attempting DIY removal can borrow the principle even without the tools: probe for soft spots, look for staining and warping past the obvious patch, and treat the whole damp area rather than just the discolored center. Understanding the moisture map also points to the source, which is the part that must be fixed for the removal to last. Our broader walkthrough of how to get rid of mold reinforces this source-first approach.
What residential mold removal costs
Costs scale with the size of the affected area, the materials involved, and the difficulty of access. Treat figures as planning ranges. A small DIY cleanup may cost only the price of supplies and protective gear. Professional removal of a contained area such as a single wall or closet commonly lands in the few-hundred to low-thousand-dollar range, while room-scale or whole-home remediation after significant water intrusion can run into the thousands or more.
Factors that push costs up include mold inside walls or ductwork, the need to remove and replace drywall and insulation, structural drying equipment, and pre- and post-removal testing. Insurance sometimes covers removal when the moisture came from a sudden covered event but typically not from gradual leaks or humidity. Our overview of basement mold removal costs shows how affected-area size drives the price.
Room-by-room: where removal differs around the home
The removal approach shifts with the room, because each space presents different materials and moisture sources. A quick tour clarifies what to expect.
Bathrooms involve tile, grout, caulk, and drywall around wet fixtures; surface cleaning handles grout and caulk, but recurring growth usually means a hidden leak behind the tile that needs investigation. Kitchens center on the areas behind sinks, dishwashers, and refrigerators, where slow leaks wet cabinetry and drywall out of sight. Basements deal with concrete walls, finished drywall close to the foundation, and high humidity; the concrete tolerates aggressive cleaning, but finished surfaces near a damp foundation often hide growth behind them.
Attics show mold on roof sheathing and framing, typically from ventilation problems or a bathroom fan dumping humid air into the space; the fix is as much about airflow and ducting as cleaning. Crawlspaces grow mold on joists and subfloor above damp soil, and a vapor barrier plus dehumidification is usually central to the solution. Living spaces and bedrooms most often see mold around windows, on cold exterior walls from condensation, and behind furniture pushed against those walls. Matching the removal method and the moisture fix to the room — rather than applying a single approach everywhere — is what makes the work effective. Our walkthrough of how to get rid of mold reinforces tailoring the response to the setting.
Drying: the step homeowners most often shortchange
If removal has a weak link in DIY hands, it is drying. Homeowners clean the visible mold, see a clean surface, and move on — but a surface that looks clean while the material underneath stays damp will grow mold again, often within weeks. Thorough drying is not optional; it is the step that makes the removal permanent.
Effective drying combines air movement and dehumidification. Fans push air across wet surfaces to speed evaporation, while a dehumidifier pulls the released moisture out of the air so it does not simply resettle elsewhere. The goal is to return the material to a normal dry condition, which can take a day for a small surface patch and several days for materials that absorbed significant water. Professionals confirm dryness with a moisture meter rather than guessing; homeowners can approximate by checking that surfaces feel and read dry and that no condensation or musty smell returns over the following weeks. In humid conditions, drying takes longer and the dehumidifier does more of the work. Rushing this stage — sealing or repainting before the material is fully dry — traps moisture and undoes the entire effort, which is why drying deserves at least as much patience as the cleaning itself.
Preventing mold from returning
Removal without prevention is a temporary fix. Keep indoor humidity below 50 percent, which the CDC recommends, using ventilation and dehumidifiers where needed. Front Range basements and crawlspaces benefit most, since they trap moisture even in a dry regional climate.
Run bathroom and kitchen exhaust fans, repair plumbing and roof leaks within a day or two, and dry any water event within 24 to 48 hours. Improve air circulation around furniture on exterior walls to limit winter condensation. For the full picture across testing, inspection, and remediation, the mold inspection and testing hub connects these topics so you can match the right response to the size of the problem.
Safety gear and protecting the rest of the home
Whatever the scale of a removal, protecting yourself and the unaffected parts of the home is non-negotiable, because the act of removing mold releases more spores than leaving it alone. The basic personal kit is an N95 or N100 respirator, nitrile or rubber gloves past the wrist, and unvented goggles; a paper dust mask does not filter spores and is not adequate.
Protecting the rest of the home starts with isolation. Close doors to other rooms, cover floors and nearby furniture with plastic, and seal vents in the work area so the HVAC system does not carry spores elsewhere. A fan venting out a window pushes airborne spores outside rather than circulating them. Lightly misting moldy material before disturbing it keeps spores from billowing up during removal.
Disposal deserves equal care. Bag removed material in heavy plastic, seal it inside the contained area, and wipe the bag’s exterior before carrying it through the house. Launder the clothes you wore separately, and discard or thoroughly clean tools rather than returning spore-laden brushes to storage. After finishing, run the room’s ventilation longer to clear residual airborne spores, and HEPA-vacuum settled dust if you have access to one. These precautions are simple and inexpensive, but skipping them is the most common way a contained removal becomes a whole-house spore problem, undoing the benefit of the work.
When testing is worth it
Visible mold rarely needs a test before removal — the EPA notes that if you can see it, you should remove it regardless of species. Testing earns its cost in specific situations: when you smell mold but cannot find it, when growth recurs despite cleaning, when you need documentation for a real estate deal, or to verify that a large remediation succeeded. In those cases, professional sampling adds clarity that a visual check cannot.
References
- Mold Cleanup in Your Home — U.S. Environmental Protection Agency
- About Mold and Your Health — Centers for Disease Control and Prevention
- A Brief Guide to Mold, Moisture and Your Home — U.S. Environmental Protection Agency
Frequently asked questions
How big a mold problem can I remove myself?
The EPA's general guideline is that mold covering less than about 10 square feet on a hard, cleanable surface is reasonable for a homeowner to handle, provided the moisture source is fixable. Larger areas, mold inside walls or HVAC, recurring growth, or any sewage or flood involvement call for a professional.
Does residential mold removal kill the mold or just clean it?
Effective removal physically eliminates the growth rather than only killing it, because dead spores can still trigger health reactions. The EPA emphasizes scrubbing hard surfaces clean and discarding heavily colonized porous materials, then fixing the moisture so it cannot regrow.
How much does professional mold removal cost?
It depends on size, materials, and access. Contained single-wall or closet jobs commonly run from a few hundred to a low-thousand dollars, while room-scale or whole-home remediation after major water damage can reach several thousand or more. Mold in walls or ductwork and the need to replace materials raise the cost.
Do I need a mold test before removing visible mold?
Usually not. The EPA notes that visible mold should be removed regardless of type, so identifying the species rarely changes the response. Testing is worth it when you smell mold but cannot find it, when growth keeps returning, for real estate documentation, or to verify a large remediation.
Not sure whether your mold is a weekend cleanup or a remediation job? Connect with a vetted Front Range inspector through our contact page for an honest assessment.
Mold removal & cleanup picks
For a small, contained patch (under ~10 sq ft) these EPA-friendly removers handle surface mold. Larger or recurring growth warrants a professional assessment first.
| Product | Why | Buy |
|---|---|---|
 RMR-86 Instant Mold Stain Remover RMR-86 Instant Mold Stain Remover | Fast-acting on stains; ventilate and wear PPE. | Amazon — $29.99 |
 Concrobium Mold Control Concrobium Mold Control | No-bleach formula that also helps prevent regrowth. | Amazon — $11.26 |
 Mold Armor Mold & Mildew Remover Mold Armor Mold & Mildew Remover | Widely stocked bathroom/surface remover. | Amazon — $22.98 |