Radon Mitigation Installation Near Me: A Guide

A radon test that comes back at or above the action level turns an abstract worry into a concrete project, and the next search is almost always for radon mitigation installation near me. Colorado homeowners face this often, because the Front Range corridor, from Fort Collins through Denver to Colorado Springs, sits in a high-radon region where elevated readings are common rather than rare. Choosing the right installer determines whether the system actually lowers your radon and whether it lasts. This guide explains how to vet local contractors, what the main system types cost, and the Colorado-specific factors that shape installation. It summarizes EPA and Colorado Department of Public Health and Environment guidance current as of 2026; it is educational and not a substitute for a certified radon professional or medical advice from your physician.
Part of our Radon Mitigation Systems guide — start there for the full picture →
How Do You Find a Qualified Radon Mitigation Installer Nearby?
The first filter is certification. National radon proficiency programs certify mitigation professionals who have met training and competency standards, and choosing a certified installer is the clearest way to ensure the work is done correctly. From there, weigh local experience, insurance, references, a written scope, and a post-installation test included in the price. Proximity matters for service calls, but credentials matter more than distance.
Beware of the cheapest bid that skips certification or omits a follow-up test, since a system that does not actually lower radon is worse than worthless, it provides false reassurance. Homeowners can ground their search in the broader hub on radon testing in Colorado to understand how testing and mitigation connect before requesting quotes.
Why Certification Is the First Thing to Check
Radon mitigation is engineering, not handyman work. A system has to depressurize the soil beneath the slab reliably, route the exhaust safely above the roofline, and avoid creating backdrafting or moisture problems. Certified professionals through national radon proficiency bodies have demonstrated they understand these principles, and many real estate transactions and lenders expect certified work.
Ask any candidate for their certification number and verify it. A certified installer will also follow recognized mitigation standards for system design, fan placement, and labeling. The EPA references these proficiency programs precisely because radon work done wrong can fail silently. Verifying the credential up front weeds out the operators most likely to cut corners.
The Main Radon Mitigation Systems and What They Cost
Most residential mitigation uses some form of active soil depressurization, but the specifics vary with foundation type, and so does the price.
Sub-Slab Depressurization
The most common system for homes with a slab or basement, sub-slab depressurization inserts a vent pipe through the slab and uses an inline fan to draw soil gas up and out above the roof. It is the EPA-recognized workhorse method and suits the majority of Front Range homes. Installation for a straightforward single-foundation home commonly falls in a range of several hundred to roughly two thousand dollars, depending on layout and routing.
Sub-Membrane Depressurization for Crawlspaces
Homes with crawlspaces use a sealed plastic membrane laid over the soil, with a fan drawing radon from beneath it. The membrane work adds labor, so crawlspace systems often cost more than a simple slab installation. Many Front Range homes mix foundation types, which can require a combined approach and a higher quote.
Drain-Tile and Sump-Pit Suction
Where a home already has perimeter drain tile or a sump pit, an installer can tap into it to draw radon, sometimes simplifying the installation. The cost depends on the existing drainage configuration. A certified installer evaluates which method best fits the home rather than applying one design to every house. The overview of how radon mitigation works compares these approaches in plain language.
What Drives the Final Price
Several factors move a quote up or down. Foundation type is the biggest: a single slab is cheaper than a multi-level home with mixed foundations. Routing matters too, since an exterior pipe run is often simpler than threading through finished interior space. Fan capacity, the number of suction points, and electrical work all add to the total.
Colorado homes can carry their own complications. High-permeability soils may need a more powerful fan, and the winter stack effect, where warm indoor air rising pulls soil gas in, can push readings higher and demand a more capable system. Homeowners comparing quotes should match scope, not just price, and can reference the guide on the average cost of a radon mitigation system for context. A bargain that omits a suction point or a verification test is not a bargain.
Questions to Ask Before Hiring an Installer
A short interview separates the careful from the careless. Ask for the certification number and verify it. Ask how many systems they install annually and how long they have worked in your specific area. Confirm they carry liability insurance and will provide a written scope listing the system type, number of suction points, fan model, and exhaust routing.
Critically, ask whether a post-installation radon test is included. A reputable installer guarantees the system will bring levels below 4.0 pCi/L and proves it with a follow-up measurement. Ask about the warranty on the fan and labor, and whether they will return if the post-test still shows elevated radon. Vague answers on these points are a reason to keep looking.
What a Written Quote Should Include
A professional quote spells out the diagnostic basis, the proposed system design, the materials and fan, the exhaust path, the projected radon reduction, the post-installation test, and the warranty terms. A one-line price with no detail invites disputes and corner-cutting. The written scope is your protection if the system underperforms.
The Installation Process and Timeline
A typical residential installation takes a single day for a straightforward system, longer for complex or multi-foundation homes. The installer locates the best suction point, cores the slab or accesses the crawlspace, runs and seals the vent pipe, mounts the fan, routes the exhaust above the roofline away from windows, and installs a monitor such as a manometer to show the fan is working.
After installation, the system should run continuously, and a post-mitigation test confirms the result. The EPA and the state health department both recommend verifying the reduction before considering the job complete. Front Range homeowners arranging installation around a sale should build in time for that confirmatory test, since lenders and buyers may want documented proof the level dropped below the action threshold.
Why a Pre-Installation Diagnostic Matters
The best installers do not guess at a system design; they measure first. A sub-slab communication test, sometimes called a pressure field extension test, tells the installer how readily air moves beneath the slab from a single suction point. That measurement determines how many suction points the home needs and what fan capacity will reliably depressurize the soil. Skipping this step risks an underpowered system that fails to lower radon or an oversized one that wastes energy.
This diagnostic is especially valuable along the Front Range, where soil permeability varies considerably from one property to the next. A home over tight, low-permeability soil behaves very differently from one over loose gravel, and the same fan will perform differently in each. When comparing quotes, ask whether the installer performs a diagnostic before finalizing the design. A contractor who proposes a system without measuring how the home’s sub-slab actually responds is working from assumption rather than data.
Radon Mitigation During a Real Estate Transaction
Many Front Range mitigation installations happen under the time pressure of a home sale, and the dynamics differ from a homeowner fixing their own residence at leisure. When a transaction radon test comes back elevated, buyers commonly request that the seller install a system or credit the cost before closing. Coordinating the installation and the confirmatory post-test within the inspection or resolution period takes planning, since a rushed install with no verification test can leave the buyer unsure the problem was actually solved.
Documentation is the currency here. Buyers, agents, and lenders want a certified installer’s paperwork showing the system design and a post-installation test confirming the level dropped below 4.0 pCi/L. A system installed by a non-certified handyman, or one without a verification test, can stall a closing even if the work looks fine. Building realistic time into the contract for installation plus a multi-week confirmatory test prevents last-minute scrambles and gives both parties confidence the home is safe.
How Radon Systems Affect Home Value and Marketability
A properly installed, documented radon mitigation system is generally viewed as an asset rather than a liability in the Front Range market, where elevated radon is common enough that buyers expect to encounter it. A home advertised with an existing, verified mitigation system removes a point of negotiation and signals that the seller addressed a known regional concern proactively. The modest cost of the system is small against the smoother transaction it can enable.
Conversely, an untested home, or one with a high radon reading and no mitigation, invites buyer requests for credits or repairs that can erode the sale price. For owners not currently selling, installing a system still pays off in health protection and in having documentation ready when the time comes. Because the system lowers radon for the life of the home rather than for a single occupant, the investment benefits every future resident, which is part of why it tends to hold value rather than depreciate like a consumable repair.
After Installation: Verification and Maintenance
Installing the system is only the first half; confirming it works is the second. Run a post-mitigation radon test, ideally a few weeks after the fan starts, to verify the level fell below 4.0 pCi/L. Keep the fan running continuously and check the monitor periodically. A manometer that drops to level signals the fan has failed and needs replacement.
Radon fans generally last several years before wearing out, and the EPA recommends retesting every couple of years even with a working system. Colorado’s seasonal cycling makes periodic verification worthwhile, since winter conditions can change indoor radon. A maintained system is a permanent reduction in a leading cause of lung cancer, which is why the modest installation cost is widely considered money well spent.
Local vs. National Companies
Both local independents and larger regional companies install radon systems along the Front Range. Local installers often know the area’s soils and housing stock intimately and may offer more personal service. Larger companies may have more capacity and standardized warranties. The deciding factors should be certification, the inclusion of a post-test, transparent pricing, and responsiveness, not company size alone.
Whichever you choose, get multiple quotes and compare scope line by line. A certified, insured installer who guarantees the result and proves it with a test is the right hire, whether they operate from a nearby town or a regional hub. Matching the installer’s credentials to the seriousness of the health risk is the throughline that should guide the decision.
Warranty, Guarantees, and What They Should Cover
A reputable installer stands behind the work with two distinct assurances, and a homeowner should understand both. The first is a performance guarantee: the installer commits that the system will bring radon below the EPA action level of 4.0 pCi/L, and proves it with a post-installation test. If the level does not drop sufficiently, a good installer returns to add a suction point, upsize the fan, or otherwise adjust the system at no extra charge. This guarantee is the heart of the value, since a system that does not lower radon is worthless regardless of how it looks.
The second assurance is a product and labor warranty. Radon fans typically carry a manufacturer warranty measured in years, and the installer should warrant their own labor and the system components for a defined period. Ask what happens if the fan fails early, who covers the replacement, and whether the labor to swap it is included. A clear, written warranty distinguishes a professional operation from a fly-by-night installer. Vague verbal promises are worth little; insist on the guarantee and the warranty terms in writing before work begins.
Avoiding Common Installation Mistakes
Even an installed system can underperform if the work was done poorly, and knowing the common mistakes helps a homeowner evaluate quality. Placing the fan inside conditioned living space rather than in an attic or on the exterior violates safety practice, because a leak on the pressurized side of the pipe would discharge radon back indoors. Terminating the exhaust too close to a window or below the roofline allows the gas to re-enter. Undersizing the fan for the home’s soil leaves radon elevated despite a running system.
Other errors include failing to seal major openings like sump pits and large slab cracks, which forces the fan to work harder than necessary, and omitting the system monitor that tells the homeowner whether the fan is working. A poorly pitched pipe can trap condensation that freezes in Colorado winters and restricts flow. The surest defense against these mistakes is hiring a certified installer who follows recognized mitigation standards and confirms the result with a post-test. When comparing local quotes, a contractor who can explain how they avoid each of these pitfalls demonstrates the competence the job requires.
References
- Consumer’s Guide to Radon Reduction — U.S. Environmental Protection Agency
- Radon Program and Mitigation Guidance — Colorado Department of Public Health and Environment
- Radon and Lung Health — American Lung Association
Frequently asked questions
How do I choose a radon mitigation installer near me?
Start with certification through a national radon proficiency program and verify the number. Then weigh local experience, insurance, references, a written scope, and whether a post-installation test is included. Certification and a guaranteed result matter more than proximity or the lowest bid.
How much does radon mitigation installation cost?
A straightforward single-foundation sub-slab system commonly falls in a range of several hundred to roughly two thousand dollars installed. Crawlspaces, multiple foundations, complex routing, and powerful fans for high-permeability Colorado soils push the price higher.
Should the installer include a follow-up test?
Yes. A reputable installer guarantees the system will bring radon below 4.0 pCi/L and proves it with a post-installation test. If a quote omits the verification test, treat it as incomplete, since a system that fails to lower radon offers only false reassurance.
How long does installation take?
A straightforward residential system is typically installed in a single day. Complex or multi-foundation homes take longer. After installation the fan runs continuously, and a post-mitigation test a few weeks later confirms the radon level dropped below the action threshold.
If you are buying or own a Front Range home with elevated radon and want a vetted, independent professional to evaluate a mitigation plan or confirm an installer’s work, reach out through our contact page and we will help connect you with a qualified local specialist.
Test your home for radon
Radon is invisible and odorless, so a test is the only way to know your level. A short-term kit gives a first reading in days; a digital monitor tracks it over time.
| Product | Why | Buy |
|---|---|---|
 AirChek Charcoal Radon Test Kit | Lab fee usually included; EPA short-term protocol. | Amazon |
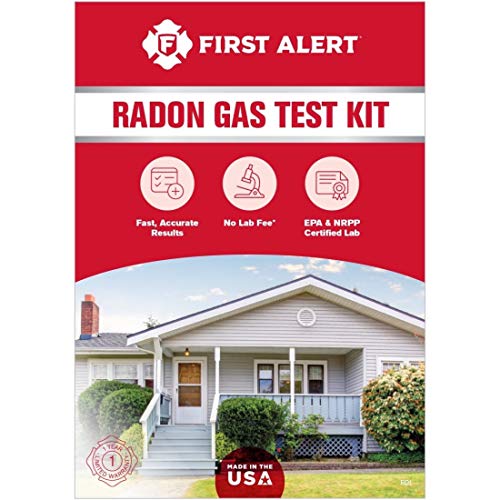 First Alert RD1 Radon Test Kit | Widely stocked; 48-hour charcoal test. | Amazon — $17.95 |
 Airthings Corentium Home | Digital monitor with a long-term average. | Amazon — $142.99 |