Plumbing Access Panels: Reaching Valves Behind Tubs and Walls
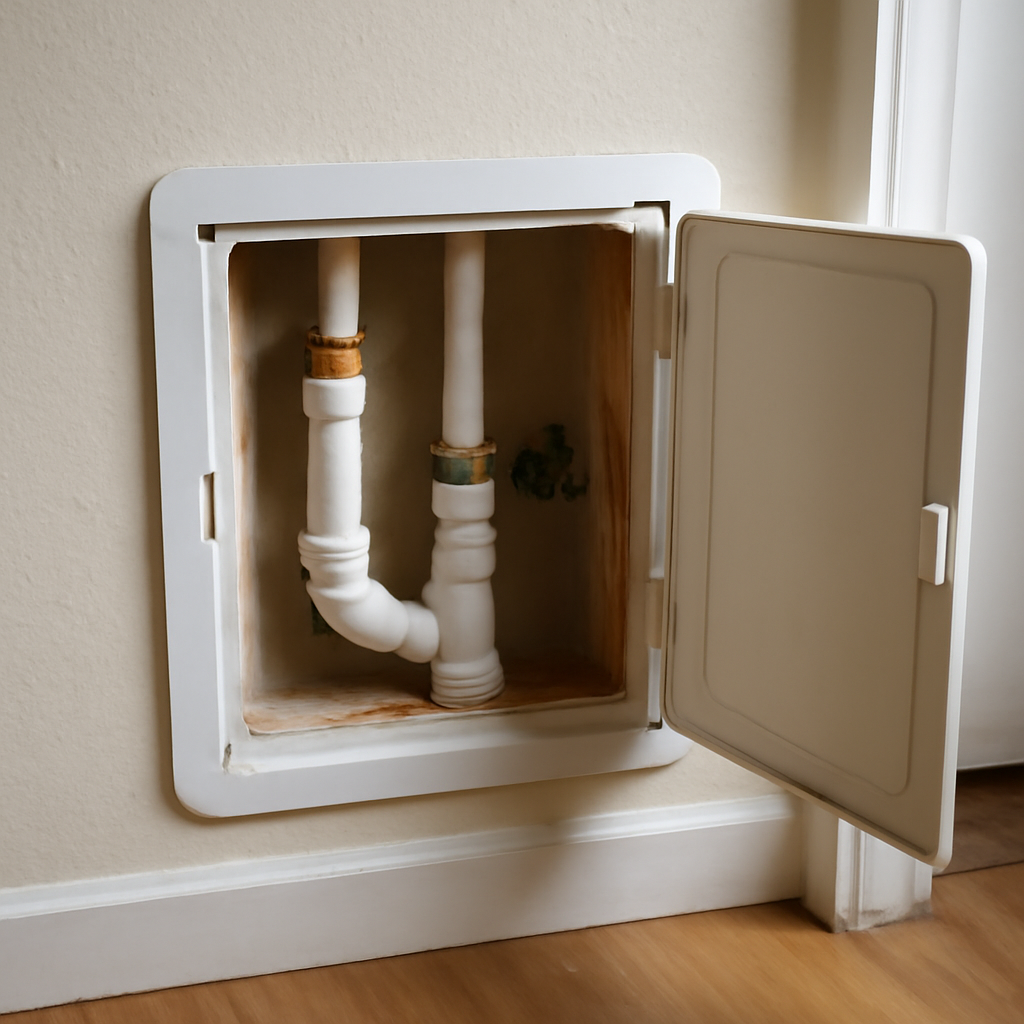
Most plumbing lives inside walls, under floors and behind fixtures, and that is fine until something needs to be repaired. A plumbing access panel is a removable cover that lets a plumber reach a shower valve, a whirlpool tub pump, a drain cleanout or a set of shutoffs without cutting into finished tile or drywall. Many older homes have one in a hall closet behind the main bathtub. Many remodeled homes do not, because the opening was tiled over, drywalled shut or hidden behind a new vanity. That choice saves a little money during a remodel and can cost a lot later, both in demolition and in leaks that go unnoticed for months. This guide covers where access panels belong, what they reveal during an inspection, how sealed-up plumbing hides water damage, how hidden moisture can feed mold, and what installing or enlarging a panel typically involves.
Part of our Plumbing & Water guide — start there for the full picture →
What a Plumbing Access Panel Is For
An access panel is a framed opening with a removable or hinged cover. It is placed where plumbing components may need service, adjustment or replacement during the life of the house. Typical locations include:
- Behind a tub or shower valve. Usually on the opposite side of the wet wall, in a closet, hallway or adjacent bedroom.
- At a whirlpool or jetted tub pump. The pump and its electrical connection sit under the tub deck and need to be reachable.
- At drain cleanouts. Cleanouts let a plumber run a cable into a drain line without pulling a toilet or cutting a pipe.
- At concealed shutoffs, manifolds and valves. PEX manifolds, ice-maker valves, and the occasional main shutoff in a finished basement.
- At tub drain and overflow assemblies. These connect where they cannot be seen from the bathroom and can leak at the gasket.
Panels range from a simple painted plywood cover screwed to a frame, to a flush-mount metal or plastic frame with a spring latch, to tile-ready panels that hold a piece of matching tile and sit nearly invisible in a shower wall.
The inspection connection
The ASHI Standard of Practice defines a readily openable access panel as one provided for homeowner inspection and maintenance that is readily accessible, within normal reach, can be opened by one person, and is not sealed in place. That definition matters. A panel painted shut, caulked closed, blocked by stored boxes or screwed in with corroded fasteners may not meet it, and an inspector working under that standard is not obligated to force it open. The plumbing section of the same standard directs inspectors to inspect interior water supply and distribution, drain, waste and vent systems, including fixtures and faucets, but general inspections remain visual and non-invasive. Plumbing that is hidden behind a sealed wall is outside what a general inspector can actually see.
Shower and Tub Valves Behind the Wall
The shower valve is the most common reason for an access panel. The valve body is soldered, crimped or threaded into the supply lines inside the wall, and its cartridge, stops and pressure-balancing parts eventually need attention. Many cartridges can be replaced from the front after removing the trim. Valve body replacement, failed solder joints, leaking supply connections and some stop adjustments are much easier from behind. Our shower valve guide covers the types of valves and their typical failure points.
The tub spout is the other connection that commonly leaks inside the wall. A threaded spout that is loose on its nipple, a slip-on spout with a worn O-ring, or a cracked copper stub can send water down the inside of the wall every time the diverter is engaged. The tub spout replacement guide explains how the different spout connections work. With an access panel, a homeowner can open the wall and watch for drips while someone runs the tub; without one, that leak may go unnoticed until the floor below is stained.
Tub drains and overflow gaskets
The drain shoe and overflow plate connect to the waste-and-overflow assembly beneath the tub. Gaskets at these points dry out and shrink over time. A slow leak at the overflow may only appear when the tub is filled high, which happens infrequently, so it can wet the subfloor intermittently for years. An access panel at the drain end of the tub is the best way to check those gaskets periodically.
Whirlpool Tub Pumps and Electrical Access
Jetted and whirlpool tubs have a pump, motor, and sometimes a heater and air blower mounted under the deck. Manufacturers typically require service access to the pump. Tub surrounds that were fully tiled or framed in during a remodel sometimes leave no way to reach the motor without demolition.
Pumps fail, seals weep, and jet lines can hold stagnant water. The electrical connection to the pump is also a concern. Whirlpool tubs are normally on a dedicated circuit with GFCI protection, and the GFCI device or test button needs to be reachable. When there is no access to the pump area, neither an inspector nor an electrician can easily verify the connection or look for water near energized components. If a jetted tub is a selling point of a home, buyers may want to ask where the pump access is before closing.
Cleanouts: The Drain Line’s Access Point
A cleanout is a capped fitting that opens into a drain line, giving a plumber a straight path to run a snake or camera. Cleanouts commonly appear at the base of drain stacks, at changes in direction, near where the building drain exits the house, and outside near the foundation. In finished basements, cleanouts are frequently covered by drywall during a remodel, which turns a routine drain clearing into a demolition job. An access panel over a buried cleanout keeps it serviceable.
When drains back up, the location of the nearest cleanout determines how quickly a plumber can work and whether a fixture has to be pulled. Homeowners in older Front Range neighborhoods with clay or cast-iron sewer laterals often use cleanouts for periodic camera inspections.
Sealed-Up Valves and Hidden Leaks
Covering plumbing without access rarely causes a problem on day one. The issue is that it removes the easiest way to notice a small leak early. Signs that water may be leaking inside a wall or under a tub include:
- Stained or bubbling paint on the wall behind or below a shower.
- Loose, cracked or discolored tile grout near a valve or spout.
- A ceiling stain on the floor below a bathroom.
- Warped baseboards or flooring near the tub.
- A musty smell in a closet that shares a wall with a bathroom.
- A water meter that moves when everything is off.
Using the water meter
EPA’s WaterSense program suggests a simple whole-house check: read the water meter before and after a two-hour period when no water is being used; if the meter changes at all, there is probably a leak. The same page notes that leak detection and flow monitoring devices can help identify leaks or alert homeowners to irregular water use. A meter test does not pinpoint a leak, but it confirms whether one exists on the supply side. Drain leaks, which only flow when fixtures are used, will not show up on the meter.
Thermal imaging and moisture meters
Some inspectors and plumbers use infrared cameras or pin and pinless moisture meters to screen walls for anomalies. These tools can suggest where moisture may be present, but they do not see through the wall and can be fooled by temperature differences, insulation gaps and surface conditions. An access panel, or a small inspection hole that later becomes one, remains the direct way to confirm what is happening.
Moisture, Mold and Wall Damage
The EPA’s brief guide to mold, moisture and the home lists areas inside walls around pipes with leaking or condensing pipes among the places where hidden mold may grow, alongside the back side of drywall and paneling. EPA states that the key to mold control is moisture control and that drying water-damaged areas within 24 to 48 hours generally prevents mold growth. A slow leak inside a sealed wall does the opposite; it keeps materials wet continuously.
EPA also advises against painting or caulking moldy surfaces and suggests considering an experienced professional if hidden mold is suspected, because disturbing it can release spores. When a leak is found behind a tub, the usual repair sequence is to stop the leak, open the wall enough to dry it fully, remove water-damaged materials, and close the wall again with an access panel added so the next problem is easier to catch. If the leak is under a sink rather than behind a tub, our guide to a leak under the kitchen sink covers the common sources.
Tub refinishing is sometimes used to refresh an older tub, but it does not address leaks at the drain, overflow or valve. If a refinish is planned, it is a good moment to open an access panel and check connections first. The bathtub refinishing guide explains what that process covers.
Installing or Enlarging an Access Panel
Adding a panel to an existing house is usually straightforward when the back of the wet wall is a closet or bedroom. The typical steps:
- Locate the valve, spout or drain from the bathroom side, often by measuring from the trim center.
- Cut a test hole or score the drywall on the back side and check for wiring, framing and blocking.
- Open to the needed size. Many plumbers prefer an opening large enough to fit both hands and a tool around the valve body, often a foot or more each way.
- Add framing or blocking if the panel frame needs a nailing surface.
- Install a frame and cover. Spring-latch and magnetic covers are common; plain screwed covers also work and are easy to remove.
When the back of the shower is an exterior wall, a stairwell, or a tiled wall on both sides, options narrow. Tile-in access panels can be set into a shower or tub surround, though they must be detailed carefully so they do not become a water entry point themselves.
Panel size and placement tips
- Put the panel where it can actually be reached, not behind a fixed shelf or built-in.
- Make it big enough to work through; a panel that only lets someone look is of limited use.
- Avoid sealing it with paint or caulk. A panel that cannot be removed easily is not much better than no panel.
- Label hidden shutoffs and manifolds so future owners know what they are looking at.
Other Places Access Panels Earn Their Keep
Bathrooms get most of the attention, but several other spots in a typical house benefit from the same thinking.
Finished basement ceilings
When a basement is finished with drywall ceilings, supply lines, drain lines and sometimes the main shutoff end up above the ceiling. A few strategically placed panels below toilet flanges, shower drains and known fittings make it far easier to check for drips. Some homeowners choose a drop ceiling in a utility area for the same reason. In Front Range homes with basements finished years after construction, it is common to find a main shutoff hidden behind drywall that nobody has operated in a decade.
Laundry and kitchen walls
Recessed washing machine boxes put the hot and cold valves and the drain standpipe within reach, but some laundry rooms have shutoffs buried behind stacked units or cabinetry. Kitchen islands with sinks hide supply and drain connections inside the cabinet base, and a removable back panel helps when the trap or air admittance valve needs attention.
Water heater and softener closets
Closets around water heaters, softeners and filtration equipment sometimes get trimmed in with shelving that blocks valves. Keeping a clear path to every shutoff matters most in an emergency, when nobody wants to unload a closet to stop a flood.
Hidden PEX manifolds
Many newer Front Range homes use PEX plumbing with a central manifold that has individual shutoffs for each fixture. Builders often place the manifold near the water heater, behind a panel in a basement wall or inside a mechanical room. A labeled manifold behind an easily opened door lets a homeowner isolate one leaking fixture without shutting off water to the whole house.
Typical Costs
Costs vary with wall finish, access and whether repairs are needed once the wall is open. The ranges below are rough and informal; obtain written quotes locally.
- Simple panel in a drywall closet wall: often in the low hundreds of dollars when done by a handyman or as part of another service call. Off-the-shelf panels themselves are relatively inexpensive.
- Tile-ready or flush-mount panels: more expensive in parts and labor, especially when set into existing tile.
- Access opening plus valve repair: adds plumber time and parts, often several hundred dollars or more depending on what is replaced.
- Leak repair with drying and drywall: can run from several hundred to a few thousand dollars, depending on how long the leak ran and whether flooring, subfloor or ceilings below were affected.
- Mold remediation: highly variable; small areas may be manageable, while larger areas warrant a professional assessment.
Compared with any of the later items, a panel installed during a remodel is usually the least expensive option. When bids come in for a bathroom renovation, asking how valves and pumps will be accessed is a reasonable question.
What Buyers and Homeowners Should Ask
During a home purchase, it is worth asking the seller or listing agent where the access panels for tubs, showers and whirlpool pumps are located, and whether any have been sealed. Ask if there have been past leaks and whether walls were opened and repaired. An inspector may note when an access panel is missing, blocked or sealed. Further evaluation by a plumber can follow when stains or soft spots suggest concealed leaks. For broader guidance on lining up inspectors and specialists, see the hiring process guide and the plumbing and water hub.
References
- ASHI Standard of Practice for Home Inspection — American Society of Home Inspectors
- A Brief Guide to Mold, Moisture and Your Home — U.S. Environmental Protection Agency
- Fix a Leak Week: Checking for Leaks — U.S. EPA WaterSense
Frequently asked questions
Is a plumbing access panel required behind a shower?
Requirements vary by code edition, fixture type and local jurisdiction, and many valves can be serviced from the front. Even where not strictly required, an access panel makes valve, spout and drain repairs far easier. Check with your local building department for specific requirements.
Will a home inspector open a plumbing access panel?
Under the ASHI Standard of Practice, a readily openable access panel is one that can be opened by one person and is not sealed in place. Panels that are painted shut, caulked or blocked may not be opened during a general inspection.
How big should a plumbing access panel be?
Large enough to work through, not just to look through. Many plumbers prefer an opening that fits both hands and a tool around the valve body, often a foot or more in each direction. Size depends on what needs to be reached.
How can I tell if a sealed-up shower valve is leaking?
Look for stained or bubbling paint behind or below the shower, loose grout, ceiling stains on the floor below and musty odors. A water meter test can confirm a supply-side leak, while drain leaks only show up when fixtures run.
Does a jetted tub need an access panel?
Whirlpool and jetted tub manufacturers typically require service access to the pump and motor. Without it, repairs, electrical checks and leak inspection under the tub deck usually require removing tile or framing.
Buying a home with a remodeled bathroom and no visible access to the valves? Contact Inspect and Test to book an inspection that looks closely at signs of concealed leaks.