Lead Check Test Kit: What Homeowners Need to Know
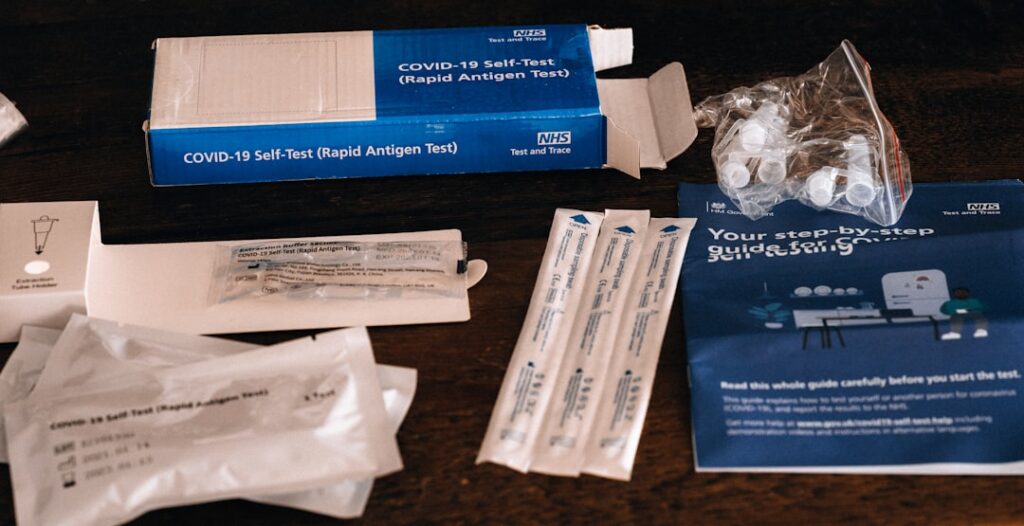
A lead check test kit is one of the cheapest ways to get a first read on whether the paint, trim, or old finish in your home contains lead. The rapid swab style sold in hardware stores can turn pink or red in seconds when lead is present on a surface. That speed is useful, but the result is a screening signal, not a lab verdict. This guide summarizes EPA, HUD, and CDC guidance current as of 2026; it is not a substitute for a certified lead inspection or risk assessment, and you should consult your physician about any exposure symptoms.
Part of our Lead Paint & Lead Testing guide — start there for the full picture →
Asbestos or biohazard concern? Speak with a certified contractor.
📞 Call (877) 742-8496What a lead check test kit actually tells you
A consumer lead check test kit detects lead on the surface it touches at the moment you test. The common rhodizonate and sodium sulfide chemistries react with lead ions, producing a color change. A positive result means measurable lead is present on that spot. A negative result means the kit did not detect lead at its sensitivity threshold on that spot.
That distinction matters. These kits do not measure how much lead is in the full paint film, and they do not see lead buried under newer layers of paint. The EPA recognizes some spot-test kits for certain Renovation, Repair and Painting (RRP) uses, but the agency is clear that a negative consumer-kit result does not guarantee a surface is lead-free. For a defensible answer, paint-chip lab analysis or an XRF inspection by a certified professional is the standard.
How the swab chemistry works
Most kits sold today use a sodium rhodizonate reagent. You crush or activate the swab, rub it on a small test spot, and watch for color. Pink to red usually signals lead. The chemistry is sensitive but not perfectly specific: certain pigments and metals can interfere, and a heavily colored surface (deep red or burgundy paint) can mask or mimic a reaction.
Older sulfide-based kits turn dark gray or black in the presence of lead. Those can be harder to read on dark surfaces and are less common now. Whichever chemistry you use, the manufacturer’s confirmation card is essential. Reputable kits include a lead-positive test card so you can confirm the swab is working before you trust a negative on your wall.
Why you must test through every paint layer
Lead paint in a pre-1978 home is often the bottom layer, covered by decades of newer latex. If your swab only contacts the top coat, it can read negative while leaded paint sits a millimeter beneath. Make a small angled cut through all layers down to the substrate, then run the swab along the exposed edge so it touches every layer. Skipping this step is the single most common reason a home test gives a false sense of safety.
Which surfaces a kit can and cannot read reliably
Lead check kits perform best on smooth, light-colored painted wood and metal. They struggle on porous, textured, or very dark surfaces. Plaster, masonry, and heavily weathered exterior paint can give ambiguous results. The kits are also not designed for soil or dust, which are major lead-exposure routes the swabs simply cannot evaluate.
If your concern is settled lead dust on floors and sills rather than intact paint, a surface swab is the wrong tool. For dust, homeowners use a wipe-sample sent to an accredited lab, an approach covered in our guide to a lead dust test for floors and window sills. For drinking water, a kit on the faucet tells you nothing useful about waterborne lead.
Lead in pre-1978 Front Range homes
Lead-based paint was banned for residential use in the United States in 1978. Homes built before that year across Denver, Jefferson, Arapahoe, and Adams counties have a meaningfully higher chance of containing lead paint, especially on original window sashes, door frames, porches, and baseboards. The older the home, the higher the likelihood and the higher the typical lead concentration.
A lead check test kit is a sensible first move before sanding, scraping, or remodeling any pre-1978 surface. It can also flag whether you should pause a project and bring in an RRP-certified contractor. To understand how those federal renovation rules apply to your remodel, see our explainer on what RRP means for renovation work. The parent guide to asbestos and lead in pre-1978 housing walks through the full hazard picture.
How to use a lead check test kit step by step
Read the instructions first; activation methods differ by brand. Then work through a consistent routine on each surface you care about.
- Confirm the kit works using the included lead-positive card.
- Choose a low-traffic test spot and clean off loose dirt.
- Cut through all paint layers to the substrate at a shallow angle.
- Activate the swab and rub the exposed cut edge for 30 seconds.
- Watch for the color change within the time window on the package.
- Re-confirm against the positive card to be sure the reagent is still active.
- Photograph the result with the test spot for your records.
Test each distinct painted component separately. The window trim, the door, and the wall may all have different paint histories. One negative reading does not clear the whole room.
Interpreting positive, negative, and uncertain results
A clear positive should be treated as confirmed lead and handled accordingly: stop dry sanding, contain the area, and follow lead-safe work practices or hire an RRP-certified pro. A clean, confirmed negative on a surface you cut through fully is reassuring but not absolute, because consumer kits can miss lead at low concentrations.
Ambiguous results are common on dark or textured paint. When in doubt, send a paint chip to an accredited laboratory or schedule a professional inspection. The cost of a single lab sample is small next to the health stakes for children and pregnant residents, who are most vulnerable to lead.
Why lead still matters in older homes
Lead-based paint was used heavily in American housing from the early twentieth century until the 1978 residential ban. The older the home, the higher both the likelihood of lead paint and its typical concentration, because earlier formulations contained more lead. Original surfaces that have never been replaced, such as window sashes that rub and abrade with every open and close, are prime hazard locations.
The danger is not intact paint sitting quietly on a wall. The danger is lead in a form a body can absorb: chips a child might mouth, and fine dust generated when paint is disturbed, abraded, or weathered. Window friction surfaces, door jambs, porches, and stair rails generate dust through ordinary use. That is why a lead check kit is most useful applied to these high-friction, high-disturbance components rather than to large flat walls that nobody touches.
Children under six are most vulnerable because their developing nervous systems are sensitive and their hand-to-mouth behavior increases ingestion. The CDC has lowered its blood-lead reference value over the years as evidence accumulated that even low levels cause harm, reinforcing that there is no known safe blood-lead level. Understanding this is the reason homeowners test before disturbing paint rather than after.
Limitations every homeowner should accept
No spot-test kit is a substitute for a lead-based paint inspection or risk assessment. The EPA’s own testing found variability in consumer-kit performance, with both false negatives and false positives depending on surface and color. Kits also tell you nothing about lead dust, soil, or water, which together account for much of the real exposure in occupied homes.
Treat the kit as a triage tool. It is excellent for quickly flagging surfaces that obviously contain lead before a renovation. It is poor for proving a surface is safe, and it should never be the only basis for letting children near a suspect surface.
Lead check kits versus lab analysis and XRF
It helps to see where a consumer kit sits among the three common ways to assess lead. The swab kit is the fastest and cheapest, gives an immediate yes-or-no on a single spot, and needs no appointment. Its weakness is reliability: it can miss low-level lead and cannot quantify how much is present. It is a triage tool, best for confirming obvious lead before a project.
Paint-chip laboratory analysis sits in the middle. You collect a small chip of paint, including all layers down to the substrate, and mail it to an accredited lab. The lab reports lead concentration as a percentage or weight per area, a quantitative result a swab cannot match. Turnaround takes days and each sample carries a modest fee, but the answer is defensible for disputes and decisions.
XRF (X-ray fluorescence) testing is the professional gold standard for intact paint. A certified inspector passes a handheld analyzer over the surface and reads lead concentration through every layer without cutting or damaging the paint. It is fast, non-destructive, and quantitative, but the equipment and certification mean it is a paid professional service rather than a DIY option. For most homeowners, a swab triages and a lab or XRF confirms.
Special situations: children, rentals, and renovations
Some circumstances raise the stakes enough that a swab alone is not appropriate. Households with children under six or a pregnant resident should lean toward lab confirmation or a professional risk assessment, because young children absorb lead more readily and the developmental effects are serious and permanent. A clean swab is not enough reassurance when a toddler crawls and mouths surfaces near suspect paint.
Rental properties bring legal obligations. Federal disclosure rules require landlords of pre-1978 housing to disclose known lead hazards, and some renovations in occupied rentals fall under the EPA’s RRP rule requiring certified contractors. A swab can inform a landlord’s decision but does not satisfy formal inspection requirements where those apply.
Renovations are the highest-risk moment because they actively disturb paint. Before sanding, scraping, demolishing, or window replacement in a pre-1978 home, test the surfaces you will disturb. A positive should redirect the project toward lead-safe work practices or a certified contractor. The cost of testing first is trivial next to the cost of contaminating a home with lead dust during a remodel.
Common mistakes that produce misleading results
Most false reassurance from lead check kits traces to a handful of avoidable errors. Knowing them improves the value of every test you run.
- Testing only the top coat instead of cutting through all paint layers.
- Skipping the positive-confirmation card, so a dead reagent reads as a false negative.
- Reading the result outside the package’s time window.
- Testing dark or richly colored paint that masks the color change.
- Treating one negative spot as clearing an entire room or surface.
- Using a swab to judge dust, soil, or water exposure it cannot evaluate.
Slowing down and following the instructions precisely turns a rough screening tool into a genuinely useful first step. Sloppy technique is worse than no test, because it breeds false confidence.
When to call a certified professional
Bring in a certified lead inspector or risk assessor when you have young children, a pregnant household member, peeling paint in a pre-1978 home, or a renovation that will disturb painted surfaces. A professional uses an XRF analyzer that reads lead concentration through layers without cutting, and a risk assessor can sample dust, soil, and water for a complete exposure picture.
Professionals are also required for clearance testing after lead work, confirming the area is safe for re-occupancy. For homeowners weighing the choice between DIY swabs and a full evaluation, our overview of a home lead test kit and its alternatives compares the options. Across the Front Range, many pre-1978 homes in older Denver-area neighborhoods are reasonable candidates for a professional assessment before a family moves in or a remodel begins.
References
- EPA guidance on lead test kits and their limitations — U.S. Environmental Protection Agency
- CDC overview of lead exposure and prevention — Centers for Disease Control and Prevention
- HUD lead-based paint regulations and inspection standards — U.S. Department of Housing and Urban Development
Frequently asked questions
Are lead check test kits accurate?
They are reliable at flagging obvious lead on smooth, light surfaces, but they can produce false negatives on dark or textured paint and may miss low concentrations. A negative result does not prove a surface is lead-free; lab analysis or a certified inspection is the standard for confirmation.
Do I need to cut through the paint before testing?
Yes. Lead paint is often the bottom layer under newer coats. Cut at a shallow angle through all layers to the substrate and rub the swab on the exposed edge, or the kit may only read the safe top coat.
Can a lead check kit test water or dust?
No. These swabs detect lead on solid painted surfaces only. Lead in drinking water needs a water sample sent to a lab, and settled lead dust needs a wipe sample analyzed by an accredited laboratory.
What should I do after a positive result?
Treat the surface as confirmed lead. Avoid dry sanding or scraping, keep children away, and follow lead-safe work practices or hire an RRP-certified contractor for any disturbance of that surface.
If you are in the Denver metro or anywhere along the Front Range and want a certified lead inspection before a renovation or purchase, reach out through our contact page and we will connect you with a vetted local professional.