Knockdown Ceiling Texture: Repair, Matching and Asbestos Checks
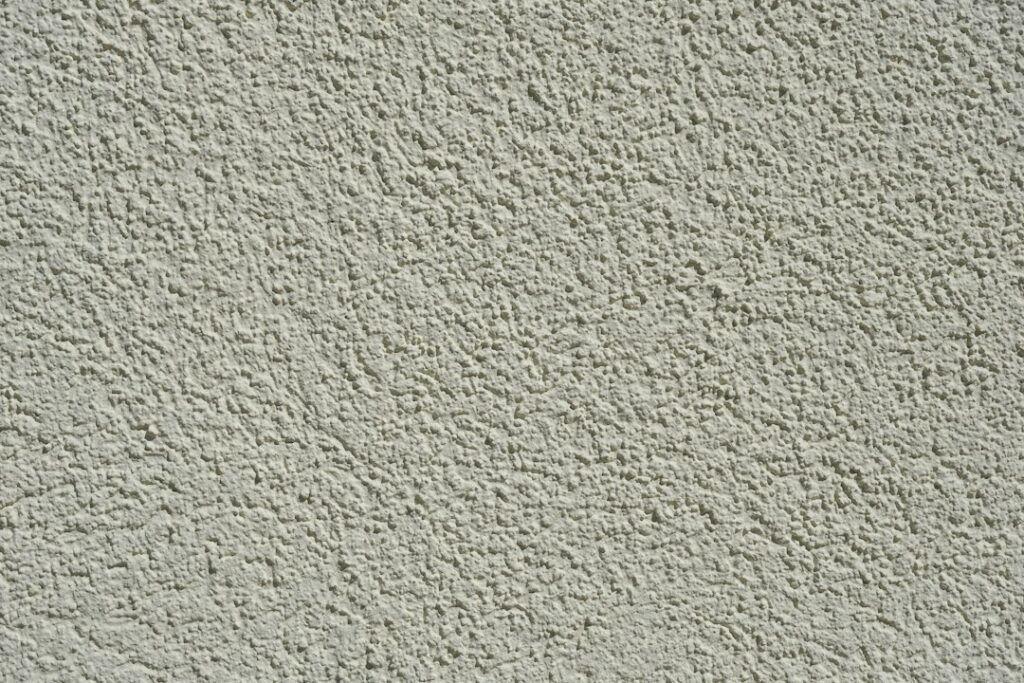
Look up in many homes built across the Front Range since the 1980s and the ceiling surface has a flattened, mottled pattern, like small islands of plaster pressed smooth. That is knockdown ceiling texture, one of the most common drywall finishes in the western United States. It hides minor flaws in drywall, softens light and costs less than a perfectly smooth finish. It also complicates repairs, because patching a hole or crack means matching a hand-applied pattern, and in older homes the texture or the paint over it may contain asbestos or lead. This guide explains how knockdown differs from popcorn and orange peel, how patches are blended, why older textures should be tested before sanding or scraping, what cracks and nail pops mean, how painting affects the finish and what typical costs look like. It summarizes EPA guidance current as of 2026; testing and abatement decisions belong with accredited professionals.
Part of our Structure & Exterior guide — start there for the full picture →
What Knockdown Ceiling Texture Is
Knockdown is a drywall texture created by spraying or splattering thinned joint compound onto a ceiling, letting it set briefly, then running a wide, flat knockdown knife or trowel lightly across the surface. The knife flattens the tops of the droplets into irregular, flat-topped shapes while the lower areas stay recessed. The result is a two-level surface with a subtle stucco-like look.
The finish became popular because it is fast to apply over large areas and hides imperfections such as slightly visible seams, minor waviness and fastener spots that would require extra finishing work on a smooth ceiling. It also diffuses light rather than reflecting it in a flat sheet, which helps disguise shadows from raking light near windows.
Variations are common. Splatter size, compound thickness, how long the material sets before knocking down and the pressure of the knife all change the look. Some ceilings have large, widely spaced splats; others have a fine, dense pattern. Skip-trowel finishes, applied by hand with a curved trowel, look similar but are a separate technique. These differences are exactly why matching a repair can be tricky.
Knockdown vs Popcorn vs Orange Peel
Three ceiling textures dominate American homes, and they differ in look, era and repair concerns.
Popcorn (acoustic) texture
Popcorn, also called acoustic or cottage cheese texture, is a thick, bumpy, spray-applied coating. It was common from the mid-20th century into the 1980s. Older popcorn texture is the one most often associated with asbestos, which is why the popcorn ceiling guide and the guide to asbestos in popcorn ceilings both stress testing before removal. Popcorn texture also collects dust and cobwebs and is hard to clean or patch.
Orange peel texture
Orange peel is a fine spray texture that leaves a surface resembling the skin of an orange. It is subtler than knockdown and is used on walls as well as ceilings. It hides fewer flaws but is easier to clean and paint.
Knockdown texture
Knockdown sits in between: more pronounced than orange peel, flatter and far easier to clean than popcorn. It is widely used on both ceilings and walls in newer construction and in many remodels where popcorn has been removed and replaced with a more modern finish.
Smooth (Level 5) ceilings
Some newer and higher-end homes use a smooth ceiling with a skim coat over the whole surface. Smooth ceilings look clean and contemporary but show every imperfection and require more skilled labor, which is part of why textured ceilings remain so common.
Asbestos in Older Ceiling Textures
Many people assume only popcorn ceilings can contain asbestos. EPA’s list of places asbestos may be found in homes includes textured paint and patching compounds used on walls and ceilings, alongside vinyl flooring, some insulation and other building products. That means an older knockdown or other textured ceiling, along with the joint compound underneath, can also be suspect, depending on when the materials were made and installed.
Why the age of the house matters
Homes built or remodeled before the mid-1980s are the usual focus of concern, though no single cutoff date guarantees a material is free of asbestos. Ceilings in older homes may also have newer texture sprayed over an older layer, so a modern-looking knockdown finish does not rule out an older material beneath it. The asbestos in drywall guide covers joint compound and wallboard in more detail.
What EPA advises
EPA states that a material generally cannot be identified as containing asbestos simply by looking at it unless it is labeled, and that when in doubt, homeowners should treat the material as if it contains asbestos and leave it alone. According to EPA, asbestos-containing materials can release fibers when they are disturbed, damaged, removed improperly, repaired, cut, sanded, sawed, drilled or scraped. Material in good condition that will not be disturbed is generally best left in place.
For anyone planning to remodel, EPA suggests considering an inspection by a trained and accredited asbestos professional, and it states that taking samples yourself is not recommended. It also recommends that sampling and minor repair be done by trained and accredited professionals, and says removal is complex and must be done only by a trained and accredited asbestos professional. In Colorado, asbestos inspections and abatement are also subject to state regulation, so homeowners planning work on older ceilings should confirm the current rules before starting.
In practical terms, sanding a patch, scraping texture, cutting a hole for a recessed light or ceiling fan, or removing a ceiling in a pre-1980s home are all activities that warrant testing first.
Lead Paint on Pre-1978 Ceilings
Asbestos is not the only concern above an older room. In 1978 the federal government banned the sale of lead-based paint for use in homes, and EPA notes that approximately three-quarters of U.S. homes built before 1978 still contain some lead-based paint. Ceilings painted before then can have lead in older layers even when the visible paint is newer.
EPA’s Renovation, Repair and Painting (RRP) Rule requires that anyone paid to perform work that disturbs painted surfaces in homes, childcare facilities and preschools built before 1978 be certified and use lead-safe work practices. EPA explains that the rule generally does not apply to homeowners working on their own homes, but does apply in some situations, such as when part of the home is rented or a childcare center operates there. For RRP projects in pre-1978 homes, EPA recommends that homeowners hire a lead-safe certified contractor.
Scraping, sanding and power-washing painted ceilings can create fine lead dust that settles throughout a room. Households with young children or pregnant occupants have particular reason to plan the work carefully.
Cracks, Nail Pops and Water Stains
Textured ceilings hide minor flaws, but some problems still show through, and a few deserve a closer look.
- Hairline cracks along seams: Often caused by normal framing shrinkage, seasonal humidity swings or tape that was not fully embedded. Common in Colorado’s dry climate and usually cosmetic.
- Nail or screw pops: Small round bumps or circles, often in rows, where fasteners have pushed through the finish as framing dries and shifts. Typically cosmetic and repaired by re-fastening and patching.
- Long or widening cracks: Cracks that grow, run across the ceiling diagonally, or appear with sticking doors and sloping floors can point to structural movement, which is a concern on some expansive Front Range soils.
- Sagging areas: Drooping drywall may indicate failed fasteners, water damage or excessive weight such as wet insulation above.
- Stains and bubbling: Brown rings, soft spots or bubbling texture usually mean water from a roof, plumbing or HVAC condensate line, and the source needs to be fixed before the ceiling is repaired.
The ceiling cracks guide helps sort cosmetic cracking from cracks that warrant a structural evaluation, and the drywall repair guide covers patching methods for holes, pops and water damage.
Patching and Matching Knockdown Texture
The hardest part of most knockdown repairs is not the patch itself but making it disappear. A smooth patch in a textured ceiling stands out as soon as light rakes across it.
Typical repair sequence
- Confirm the existing materials are safe to disturb, testing first in older homes.
- Repair the underlying problem: re-fasten loose drywall, replace water-damaged sections, or tape and mud cracks.
- Finish the patch smooth and flush with the surrounding surface.
- Apply texture with a hopper gun, an aerosol knockdown product for small spots, or a brush or sponge splatter method, then knock it down once it has set slightly.
- Prime and paint the patched area, usually feathering paint wider than the patch or repainting the whole ceiling for a uniform sheen.
Why matching is difficult
Matching depends on splatter size, compound consistency, set time and knife pressure. Practicing on a scrap of drywall before touching the ceiling is common advice. Even a well-matched texture may look different until the ceiling is painted, because new compound and older painted texture absorb paint differently. On large or highly visible ceilings, experienced drywall finishers sometimes retexture an entire plane so the pattern reads consistently.
Removing knockdown for a smooth finish
Unlike popcorn, knockdown texture is usually painted and fairly hard, so it often cannot simply be scraped off. Converting to a smooth ceiling commonly involves skim-coating over the texture or, in some cases, hanging new drywall. Both approaches should be preceded by testing in older homes.
Tools, Materials and Common Mistakes
Most knockdown work uses ordinary drywall supplies, but the choice of applicator changes the result and the amount of mess.
- Hopper gun and compressor: The standard tool for whole ceilings. A hopper gun sprays thinned all-purpose or lightweight joint compound, and adjusting the nozzle size and air pressure changes splatter size. It is fast but throws compound everywhere, so walls, floors, fixtures and windows need thorough masking.
- Aerosol texture cans: Convenient for patches of a few square feet. Spray patterns are less adjustable, and several light passes generally look better than one heavy one.
- Brush, roller or sponge splatter: Hand methods that can work for small repairs and odd textures when a gun is not practical.
- Knockdown knife: A wide, flexible plastic or rubber-edged blade, often 18 to 24 inches, pulled lightly across the surface. Some finishers wet the blade for a smoother result.
Common mistakes are easy to spot from below. Compound mixed too thick leaves sharp peaks that do not flatten; mixed too thin, it runs and leaves flat blotches. Knocking down too early smears the splatter into a smooth film, while waiting too long leaves rough, uneven tops. Overlapping knife strokes in a regular pattern can create visible lines, and skipping primer before paint can leave the patch looking duller or shinier than the rest of the ceiling.
Weather plays a part too. In dry Front Range air, compound sets faster than many instructions assume, so working in smaller sections can help. In basements or rooms with high humidity, set and dry times may be noticeably longer, and painting before the texture is fully dry can lead to cracking or poor adhesion.
Painting a Knockdown Ceiling
Textured ceilings take more paint than smooth ones because of the added surface area. A thick-nap roller helps push paint into the low spots, and flat ceiling paint hides texture variations and patch edges better than a sheen. Unpainted new texture usually needs a primer first. In older homes, painting over intact surfaces is a lower-disturbance option than scraping or sanding, though any prep that roughens or removes material still raises the asbestos and lead questions above. The interior painting cost guide covers labor and material ranges for ceiling work.
What a Home Inspector Notes About Textured Ceilings
The ASHI Standard of Practice lists walls, ceilings and floors among the interior items an inspector inspects, while paint, wallpaper and other finish treatments are outside what the inspector is required to inspect. In practice, inspectors note cracks, sagging, stains and signs of water damage on textured ceilings and may recommend further evaluation. A standard home inspection does not sample materials for asbestos or lead; that requires separate testing by qualified professionals. The structure and exterior inspection hub explains how ceiling and framing clues are interpreted, and the home inspector hiring guide covers adding specialty tests.
Knockdown Ceiling Texture Costs
These broad 2026 estimates are for planning only and vary with ceiling height, access, room size and local rates.
- Small patch and texture match: often around $150 to $500 for a handyman or drywall finisher, more if painting the whole ceiling is needed for a uniform look.
- New knockdown texture over a whole ceiling: commonly about $1 to $3 per square foot, depending on prep and whether painting is included.
- Skim coating to a smooth ceiling: frequently higher, often $2 to $5 or more per square foot.
- Asbestos testing: lab analysis of a sample is often in the tens of dollars per sample, with professional sampling visits costing more.
- Asbestos abatement: varies widely by area and method and can run into the thousands of dollars for a full ceiling.
- Lead-safe work: certified contractors may charge more for containment and cleanup on pre-1978 surfaces.
Written bids should state whether testing, containment, patching, texture, primer and paint are included.
When to Call a Professional
A small patch in a newer home is a reasonable DIY job for someone comfortable with joint compound and a spray can of texture. Professional help makes sense for large areas, high ceilings, repairs that must blend into a prominent room, any ceiling with recurring water stains, and especially any pre-1980s ceiling that will be sanded, scraped, cut or removed. In those older homes, testing by an accredited asbestos professional and, where paint is disturbed, a lead-safe certified contractor are the safer route.
References
- Learn About Asbestos — U.S. Environmental Protection Agency
- Protect Your Family from Exposures to Asbestos — U.S. Environmental Protection Agency
- Lead Renovation, Repair and Painting Program — U.S. Environmental Protection Agency
- ASHI Standard of Practice for Home Inspections — American Society of Home Inspectors
Frequently asked questions
What is knockdown ceiling texture?
Knockdown is a drywall finish made by spraying or splattering thinned joint compound onto a ceiling and then flattening the peaks with a wide knife. It leaves a mottled, two-level surface that hides minor drywall flaws and is common in western U.S. homes.
Does knockdown ceiling texture contain asbestos?
Newer knockdown texture generally does not, but EPA lists textured paint and patching compounds on walls and ceilings among places asbestos may be found. Older ceilings, or newer texture over older layers, should be tested by an accredited professional before sanding, scraping or cutting.
Can knockdown texture be matched on a patch?
Usually it can be blended closely with a hopper gun, aerosol texture or hand splatter method, followed by knocking down and painting. Exact matches are difficult, so some finishers retexture or repaint the whole ceiling plane for a uniform look.
Is knockdown better than popcorn ceiling?
Knockdown is flatter, easier to clean and paint, and looks more current to many buyers. Popcorn texture absorbs some sound but collects dust and, in older homes, is more commonly associated with asbestos.
How much does it cost to repair knockdown ceiling texture?
General 2026 estimates put small patch-and-match repairs around $150 to $500, with whole-ceiling texture often about $1 to $3 per square foot. Asbestos testing, abatement and lead-safe work in older homes add to the cost.
Seeing ceiling cracks, stains or an old textured finish in a home you are considering? Reach out to our team and we can help you find a local inspector, plus guidance on asbestos or lead testing before any renovation begins.