How to Remove Mold and Mildew: A Plain-Language Guide
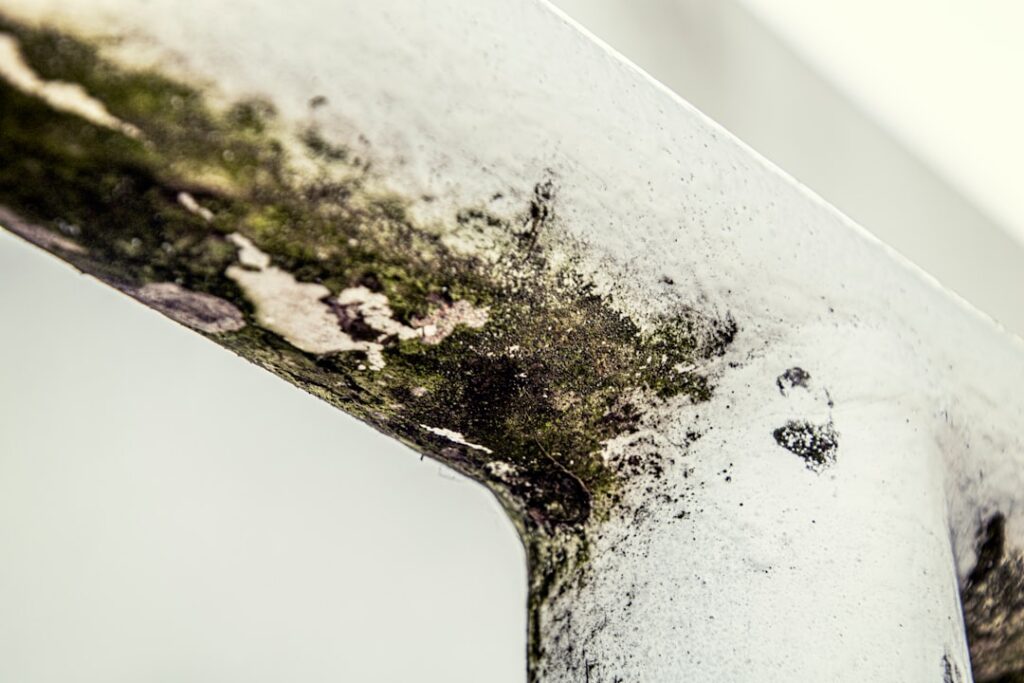
Visible mold and mildew patches on tile grout, drywall, or window sills are common in any house with humid bathrooms, leaky basements, or under-ventilated closets. This guide summarizes EPA and CDC mold cleanup guidance current as of 2026 and walks through how to remove mold and mildew safely at the DIY scale, what tools and PPE actually matter, and where the line sits between a weekend cleanup and a job for a licensed remediation contractor. Mildew is usually a surface organism that wipes off; visible mold on porous material almost always points to a moisture source upstream that needs correction before any scrub work begins.
Part of our Mold Removal & Remediation guide — start there for the full picture →
Is this mold, asbestos, or water damage? Get a free instant screen
Upload a clear photo of the suspect area. You'll get an instant AI screening opinion and what to do next. This is screening guidance, not a professional determination.
Screening guidance only. AI can be wrong. Confirm asbestos, mold type, or lead with lab testing or a licensed professional before acting.
How to Remove Mold and Mildew: The EPA 10-Square-Foot Rule
The single most important threshold for DIY mold removal is the EPA’s 10-square-foot rule. Areas smaller than 10 square feet (roughly a 3-foot by 3-foot patch) can typically be cleaned by the homeowner with detergent and water plus basic PPE. Areas larger than 10 square feet, or any growth tied to sewage water or chronic moisture, should be handled by a licensed remediation contractor with containment, negative air pressure, and HEPA-filtered exhaust. The EPA mold cleanup guidance spells out the threshold and the worker protection ladder that scales with patch size.
Mildew (the powdery surface kind on grout, shower walls, and patio furniture) is almost always within DIY scope. True mold on porous material that’s been wet for more than 48 hours is where DIY ends and the moisture-and-containment workflow begins.
Step One: Identify Whether It’s Mildew or Active Mold
Mildew is typically flat, gray to white, and lives on the surface of grout, caulk, vinyl, painted walls, or tile. It wipes off with a detergent rag. Active mold colonies tend to be raised or fuzzy, range from yellow-green to black, and grow through porous substrates (drywall paper, ceiling tile, particleboard). If a patch wipes off cleanly and doesn’t return, it was mildew. If it returns within two weeks, you have a moisture source, not a surface problem.
Our black mold detection guide covers the visual and texture clues that separate Stachybotrys from look-alike species. Color alone doesn’t identify a genus, but pattern plus location plus moisture history usually does.
Step Two: Find and Fix the Moisture Source First
The EPA’s cleanup guidance is explicit: cleaning without correcting moisture is wasted work. Mold needs three things to grow: a spore (always present in indoor air), a substrate (drywall paper, dust, soap residue), and water. Remove water and the colony cannot regrow. Common moisture sources include leaky plumbing under sinks, condensation on uninsulated supply pipes, ice-dam leaks at roof eaves, sump pump failures in finished basements, bathroom exhaust fans vented into attics instead of outside, and humidifier overuse in dry Colorado winters.
Use a flashlight and a moisture meter to investigate before cleanup. A $30 pin-type meter pushed into baseboards, drywall, or trim gives a moisture content reading. Drywall above 17% on a pinless meter, or wood above 20% on a pin meter, means the substrate is still wet enough to support regrowth. Surface cleaning over a wet substrate is wasted work. Fix the leak, dry the cavity to below those thresholds, and only then clean and refinish the surface.
Step Three: Gather Tools and PPE
For a sub-10-square-foot job you’ll need rubber gloves, an N95 respirator or KN95 mask, eye protection (closed goggles, not glasses), a bucket, a sponge or microfiber rag, and a cleaning solution. The CDC’s mold basics page recommends N95 minimum for any visible mold cleanup. Skip the cheap dust masks; they don’t filter spores. Long sleeves and pants reduce skin exposure. A box fan venting out a window helps move spore-laden air outdoors during cleaning.
Step Four: Pick the Right Cleaner
For most surfaces, plain detergent and water work as well as anything fancier. The EPA does not recommend bleach for routine mold cleanup because the water in bleach soaks into porous materials and can feed regrowth, while the chlorine evaporates within hours. For hard non-porous surfaces (glazed tile, glass, stainless steel) a diluted bleach solution (1 cup bleach in 1 gallon water) is acceptable. Never mix bleach with ammonia (creates toxic chloramine gas). Hydrogen peroxide at 3% household strength kills surface mold without the porous-substrate problems of bleach.
Commercial mold cleaners (Concrobium, RMR-86, Mold Armor) work fine but rarely outperform detergent on routine surface patches. Read labels; many contain quaternary ammonium compounds that demand the same PPE as bleach. White vinegar at full strength is a common DIY substitute and works on light mildew; it does not match the antimicrobial profile of hydrogen peroxide on heavier patches but costs nearly nothing and avoids fumes.
Step Five: Clean in the Right Order
Work from clean areas toward the affected patch. Wet the surface lightly first to suppress spore release. Scrub gently with the cleaning solution. Rinse with clean water. Dry completely (a $20 box fan helps). Discard cleaning rags in a sealed plastic bag rather than reusing them. For porous materials that won’t come fully clean (drywall, ceiling tile, carpet padding), cut out and replace the affected section rather than trying to scrub it back to white.
Vent the work area to the outside during cleanup. Set a box fan in a window pointing outward to create negative pressure in the room and pull spore-laden air out as you scrub. Close the work area off from the rest of the house with painter’s plastic and tape if possible. The point is to keep disturbed spores from spreading to occupied rooms during cleanup. After cleanup, leave the fan running for an additional hour and HEPA-vacuum the floor before removing the plastic barriers.
Specific Surfaces and Tactics
Bathroom grout and caulk usually need scrubbing with a stiff nylon brush and detergent. Re-caulk shower corners every two to three years to prevent recurrence; old caulk holds spores in microscopic cracks regardless of how aggressively you clean it. Painted drywall wipes clean if paint is intact; cut out and replace if the paper backing is soft or stained brown. Bare wood (joists, framing) may need light sanding plus a borate treatment after the surface scrub. Concrete basement floors clean with detergent and hot water; sealing the slab afterward reduces dust accumulation.
Step Six: Verify the Repair Held
Re-check the cleaned area at 48 hours, one week, and one month. Re-growth at any of those checkpoints means moisture wasn’t actually fixed. A moisture meter ($30 pin-type or $80 pinless model) is the cheap diagnostic tool here. Drywall reading above 17% on a pinless meter, or wood above 20% on a pin meter, means the substrate is still wet enough to support regrowth. For longer-term monitoring, our moisture meter physics guide explains capacitive versus resistive sensing.
For documentation needs (real-estate, insurance, clearance), an air sample with a matched outdoor control taken by a certified inspector is the standard verification step. Plan this before cleanup, not after; a baseline reading lets the post-cleanup reading demonstrate improvement. Without the baseline, post-cleanup readings can’t tell you whether the work succeeded or whether numbers always looked that way.
When to Stop DIY and Call a Contractor
Five red flags push the job out of DIY scope. Growth larger than 10 square feet. Growth tied to sewage backup or category-three water. Hidden mold suspected behind walls (warped baseboards, brown staining bleeding through paint, musty odor with no visible source). Occupants with asthma, allergies, or immune compromise. HVAC contamination (mold inside ductwork or on cooling coils). In any of these cases, a licensed remediation contractor with IICRC mold remediation certification (S520 standard) is the right call. Expect $1,500 to $30,000 depending on scope. The IICRC S520 standard covers containment, negative air pressure, HEPA filtration, antimicrobial application, and clearance testing.
Vetting a remediation contractor requires three checks. IICRC certification on file (verify on the IICRC website). General liability and workers’ compensation insurance (request certificates). Reference checks from completed jobs of similar scope. Avoid the lowest bid; mold remediation pricing varies widely because the scope of work depends on judgment about how far the colony extends. The middle-bid contractor with strong references is usually the safe pick.
Preventing Recurrence
Keep indoor humidity below 50% (60% maximum in extreme heat). Run bathroom exhaust fans during showers and for 20 minutes after. Vent exhaust fans to the outside, never into attics. Fix plumbing leaks within 24 hours. In finished basements, use dehumidifiers in summer and ventilate during dry months. Insulate cold supply pipes to stop condensation. Avoid carpet over concrete slabs without a vapor barrier and a thermal break.
A $30 hygrometer in each main living zone lets you watch indoor humidity trends. Move the meter around for the first month to find the wet zones (basement bedrooms, master bathrooms, kitchen near dishwasher) before settling on permanent placement. Once you know where the moisture concentrates, you can deploy localized dehumidifiers or ventilation upgrades that are cheaper and more effective than whole-house solutions.
Front Range Climate Notes
Colorado’s dry climate makes large-scale mold less common than coastal regions, but specific failure modes recur in Denver-area homes: post-flood drying that exceeded 48 hours, humidifier overuse in master bedrooms, basement bathrooms without exhaust fans, and ice-dam leaks at north-facing eaves after heavy snows. Knowing the local pattern speeds diagnosis. Slab-on-grade homes in Aurora, Centennial, and Highlands Ranch concentrate risk in finished basements with carpet against concrete, where summer dewpoint condensation can support growth even without obvious water damage.
Tools and Supplies for a Sub-10-Square-Foot Job
The supply list is short and inexpensive. Two pairs of rubber gloves (nitrile preferred). Two N95 or KN95 respirators (one for application, one for rinse). Sealed safety goggles (not glasses). A bucket with hot water and detergent. Microfiber rags or sponges. A spray bottle. Hydrogen peroxide at 3% household strength. A box fan to vent the work area to the outside. Heavy-duty trash bags for disposal of contaminated rags. A pin-type or pinless moisture meter ($30 to $80) for verifying the substrate dries fully after cleanup. Total supply cost runs under $50 for a one-time job.
Documentation for Insurance or Real-Estate
If a mold cleanup ties to an insurance claim, real-estate transaction, or post-remediation clearance, the DIY workflow ends. Insurance adjusters and buyer attorneys require third-party documentation from a credentialed inspector with chain-of-custody paperwork and AIHA-LAP accredited lab analysis. A homeowner who cleans a patch and then tries to document it after the fact loses credibility. Schedule the third-party assessment before cleanup so the baseline is captured, then a post-cleanup clearance test confirms the work succeeded.
References
- Mold Cleanup in Your Home — EPA
- Mold Basics — CDC
- Mold Remediation in Schools and Commercial Buildings — EPA
- InterNACHI Mold Inspection Standards of Practice — InterNACHI
Frequently asked questions
Is bleach the best way to remove mold?
No. The EPA does not recommend bleach for routine mold cleanup because the water in bleach soaks into porous materials and can feed regrowth while the chlorine evaporates quickly. Detergent and water work as well or better. Reserve bleach for hard non-porous surfaces like glazed tile.
How big a mold patch can I remove myself?
The EPA's 10-square-foot rule is the practical threshold. Patches under 10 square feet can usually be cleaned by the homeowner with detergent, water, and basic PPE (N95, gloves, goggles). Larger areas warrant a licensed remediation contractor with containment and HEPA filtration.
Will mold come back if I clean it without fixing the leak?
Yes. Mold needs water, a spore, and a substrate. The spores and substrate are always present indoors, so removing water is the only durable fix. Re-growth at the 48-hour, one-week, or one-month checkpoint means the moisture source was not actually corrected.
Front Range homeowners facing mold patches beyond DIY scope can reach a vetted remediation pro through our contact page for a written scope and transparent pricing.
Mold removal & cleanup picks
For a small, contained patch (under ~10 sq ft) these EPA-friendly removers handle surface mold. Larger or recurring growth warrants a professional assessment first.
| Product | Why | Buy |
|---|---|---|
 RMR-86 Instant Mold Stain Remover RMR-86 Instant Mold Stain Remover | Fast-acting on stains; ventilate and wear PPE. | Amazon |
 Concrobium Mold Control Concrobium Mold Control | No-bleach formula that also helps prevent regrowth. | Amazon — $12.81 |
 Mold Armor Mold & Mildew Remover Mold Armor Mold & Mildew Remover | Widely stocked bathroom/surface remover. | Amazon — $22.98 |