How to Clean Mold and Mildew: A Plain-Language Guide

Mildew and mold are not the same problem, even though most homeowners use the two words interchangeably. Mildew is a surface organism — usually Cladosporium or Alternaria — that lives on top of grout, caulk, or painted drywall, responds quickly to common cleaners, and tends to return only if the moisture and ventilation issue stays unaddressed. Mold is a deeper colony — Stachybotrys, Aspergillus, Penicillium and others — that drives hyphae into porous materials, needs containment to clean safely, and often requires removal of the substrate. This guide summarizes EPA and CDC guidance current as of 2026 — consult a certified mold inspector for testing decisions and your physician for symptom evaluation. Knowing which one is on the wall changes the whole cleanup plan, the products that work, and the protective gear that matters.
Part of our Mold Removal & Remediation guide — start there for the full picture →
Is this mold, asbestos, or water damage? Get a free instant screen
Upload a clear photo of the suspect area. You'll get an instant AI screening opinion and what to do next. This is screening guidance, not a professional determination.
Screening guidance only. AI can be wrong. Confirm asbestos, mold type, or lead with lab testing or a licensed professional before acting.
How to Tell Mildew from Mold Before You Start
Mildew is almost always flat, gray-to-white, and dusty when dry. It wipes off with a wet cloth and leaves the surface looking essentially clean. Mold tends to be raised, slimy or fuzzy, and often pigmented — black, dark green, olive, or with reddish patches around the edges. Wiping mold with a damp cloth smears it but does not lift it, and the surface underneath usually shows staining or substrate damage.
A practical field test: damp wipe a small patch. If it comes up cleanly and the surface looks unchanged, mildew is the likely culprit. If wiping spreads the growth, leaves a stain, or reveals soft drywall or grout, it is probably mold, and a different cleanup approach starts. Smell is another clue. Mildew has a mild musty odor that fades within a day or two of cleanup; mold carries a heavier, earthy, sometimes sweet smell that persists even after surface wiping because the colony in the substrate keeps producing volatile organic compounds.
The location helps too. Bathroom ceilings, shower grout lines, the rubber seal of a front-load washer, and the bottom edge of a refrigerator door are classic mildew zones. Behind baseboards along an exterior wall, the underside of a kitchen sink cabinet that has had a slow drip, basement framing in a flood-affected room, or the back side of drywall near a roof leak are classic mold zones. The difference is whether moisture sits on the surface or has soaked into the substrate.
Cleaning Mildew on Tile, Caulk, and Painted Surfaces
Surface mildew on a non-porous substrate is one of the few mold-family problems where a homeowner with basic personal protective equipment can finish the job in under an hour. The standard sequence is ventilation first, detergent wash, rinse, then either a diluted bleach solution or a quaternary ammonium cleaner for finish disinfection. EPA-registered tub-and-tile products formulated for mildew are also effective and avoid the lung irritation that comes with bleach in tight bathrooms.
Ventilate by opening windows and running the bathroom fan throughout the project. Wear nitrile gloves and an N95 respirator — surgical masks do not filter spores at the size that matter. Wipe with a clean microfiber cloth so the mildew is captured rather than spread, and switch to a new cloth section every couple of square feet so the cleanup tool is not redepositing organisms farther down the wall. Rinse thoroughly because cleaner residue can feed the next round of growth. Finally, address the underlying issue — usually a humidity or ventilation problem — or the mildew will be back within a few weeks.
Caulk that has mildew growing inside the silicone is generally a removal job rather than a cleaning one. Once the organism is embedded in the caulk matrix, surface cleaning produces a temporary improvement but the staining returns within a season. Cutting the old bead out, drying the substrate, and applying a new mold-resistant caulk is the durable fix.
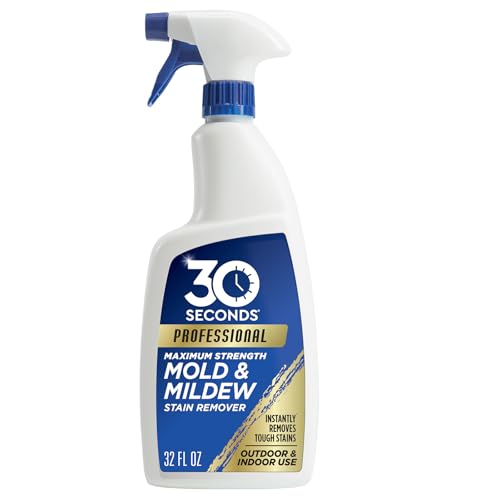
Best Mold and Mildew Remover: our top 3 picks
| Product | Best for | Key features | Price | Buy |
|---|---|---|---|---|
| RMR-86 Instant Stain Remover | Fast mildew stain removal |
| — | Buy now →Check current price |
| Concrobium Mold Control | Mold control and prevention |
| — | Buy now →Check current price |
| 30 SECONDS Pro | Indoor and outdoor stains |
| $17.28as of Nov 5, 2026 6:40 am GMT+0000 | Buy now →Check current price |


Prices are Amazon’s listed prices as of the time shown and change often; check Amazon for today’s price. As an Amazon Associate we earn from qualifying purchases.
Cleaning Mold on Hard Non-Porous Surfaces
Mold on a non-porous surface — tile, glass, sealed concrete, stainless metal — cleans by similar principle but with more attention to spore release. The first change is to damp wipe before any scrubbing so the colony does not aerosolize. Then apply an EPA-registered antimicrobial, allow the dwell time printed on the label, and HEPA vacuum the surrounding area after wiping the surface clean. Dry sweeping or brushing mold colonies lofts spores throughout the room and into adjacent spaces.
Bleach diluted at one cup per gallon of water remains the most common DIY antimicrobial, though it is not approved for porous surfaces and can damage grout sealers and natural-stone finishes. A 3-percent hydrogen peroxide solution or undiluted white vinegar work on smaller jobs and on settings where bleach is not safe. Hydrogen peroxide is the better balance for indoor air quality because it breaks down into water and oxygen rather than leaving chlorine residue.
Hard-surface cleaning ends with a verification pass under bright direct light. Any residual staining on the surface after a proper clean usually means the staining is in the substrate underneath, not on the surface — and a hard-surface clean cannot reach what is beneath.
When Mold Is in Porous Materials
The line between “clean it” and “remove it” usually falls at the porous-material boundary. Drywall, fiberglass insulation, ceiling tile, carpet pad, particleboard, and untreated wood that show visible mold over more than about ten square feet need removal rather than cleaning per EPA guidance. Spores have driven into the matrix, and surface cleaning leaves the colony alive below.
For smaller affected areas of porous material, light surface cleaning sometimes works on solid wood — sanding lightly and HEPA vacuuming after — but rarely on drywall or carpet. Replacing the affected section is faster, more reliable, and usually cheaper than the labor of trying to salvage a compromised substrate. Wood framing with surface mold but firm fiber under a screwdriver probe usually cleans successfully; framing that softens under the probe needs sistering or replacement regardless of how it looks after cleaning. A walk-through of the mold inspection and testing hub covers the substrate-by-substrate decision in more detail.
Containment Steps That Matter
Even small DIY mold jobs benefit from containment basics. Close the door to the room being cleaned and stuff a towel under the gap. Tape plastic sheeting over HVAC supply and return registers in that room so the system does not pull spores into the rest of the home during cleanup. Bag debris and used materials inside the room, then double-bag before walking through the rest of the house. Carry the bags out the most direct route — through a window if practical, through a single door otherwise — and dispose of them in an outdoor bin rather than an indoor wastebasket.
Containment is what separates a cleanup that ends the problem from one that spreads it. Mildew rarely requires this level of care; mold almost always does, even when the colony looks small. The Centers for Disease Control flags HVAC contamination as one of the most expensive secondary outcomes of careless DIY cleanup — what started as a $200 bathroom job becomes a $3,000 duct cleaning when spores ride the return air through the whole house.
The Source-Moisture Fix Comes First
Cleaning mold or mildew without fixing the moisture source is a temporary repair. The CDC and EPA both emphasize that mold cannot grow without sustained moisture, and any cleanup that does not address the leak, the condensation, the grading, or the indoor humidity will fail within a season.
Front Range Colorado homeowners catch a small break on this front — outdoor air is dry enough that ambient-humidity-driven mildew is less common than in coastal regions. The flip side is that when Colorado homes do grow mold, it is usually because of a discrete water event (plumbing leak, sprinkler intrusion, ice dam, snowmelt seepage) rather than baseline humidity. Find the event, fix it permanently, then clean. Reviewing the mildew removal walkthrough can help homeowners decide whether the problem they are seeing is truly surface mildew or has crossed the line into mold territory that demands a different approach.
Common Front Range moisture drivers worth checking before any cleaning: bathroom fans that vent into the attic instead of outside, slow drips at hose-bibb supply lines that surface in the basement wall behind the bibb, ice dams that push water down into soffit details, sprinkler heads aimed at the foundation, and washing machine supply hoses that have started weeping at the connection.
Personal Protective Equipment for Combined Cleanups
The PPE list for a mildew-only job is short — gloves, eye protection, and a fan blowing fresh air across the work zone. The PPE list for a mold-side job is longer. An N95 respirator at minimum, an N100 or half-face elastomeric for larger jobs. Sealed safety glasses or goggles, not loose safety glasses that allow spores to drift around the eye. Nitrile gloves and disposable coveralls if the job will exceed an hour or involve overhead work. Shoe covers if the worker will walk into clean parts of the house after.
The respirator is the single most important piece. Spores at 2 to 10 microns ride deep into the lung if a surgical mask is the only barrier, and short-term DIY exposure has been documented to trigger immediate respiratory symptoms in sensitized occupants.
Verifying the Cleanup Worked
A successful mildew-and-mold cleanup shows three signs at the 48-hour mark. The surface looks visually clean under bright direct light, with no staining shadow. The moisture meter reading on the substrate returns to a dry baseline (under 1 percent relative on a pinless drywall scale, under 15 percent moisture content on solid wood). The musty smell that was present before the cleanup is gone and stays gone for at least two weeks. Failing any of those signs means the cleaning was incomplete, the substrate is still wet, or the moisture source has not actually been corrected.
Mark a calendar reminder to recheck the spot at 30 days and again at 90 days. Mold problems that recur seasonally — basement walls that wet up only during spring snowmelt, bathroom ceilings that grow only in winter when windows stay closed — will pass the 48-hour check and then resurface at the next moisture cycle. A clean spot at 90 days is a real win; a clean spot at 48 hours is only a partial indicator.
When a Professional Takes Over
EPA recommendations point to professional involvement at the 10-square-foot threshold, when HVAC is involved, when the source is sewage or contaminated water, or when a household member has a compromised immune system or respiratory condition. Mold on framing, soft drywall, or warped subfloor falls outside DIY scope regardless of square footage.
A professional brings containment with negative-pressure HEPA exhaust, the right antimicrobials for each substrate, and a clearance protocol that confirms the work succeeded. The cost is usually less than what a failed DIY job adds in re-cleaning, replacement, and possible cross-contamination of HVAC and adjacent rooms. Front Range remediation pricing on a small bathroom job typically runs $500 to $1,500 when no structural work is needed, which compares favorably with the wasted weekends and product costs of a DIY attempt that did not address the underlying moisture.
References
- EPA Mold Cleanup in Your Home — U.S. Environmental Protection Agency
- CDC Mold Cleanup Guidance — Centers for Disease Control and Prevention
- Mold and Dampness Indoor Air — American Lung Association
- HUD Healthy Homes: Mold — U.S. Department of Housing and Urban Development
Frequently asked questions
Is mildew the same as mold?
Mildew is a surface form of fungal growth, usually Cladosporium or Alternaria, that stays flat and cleans off non-porous surfaces. Mold is a broader category with deeper, often porous-substrate growth that requires more careful cleanup and sometimes substrate removal.
Can vinegar kill both mold and mildew?
Undiluted white vinegar kills many surface mildews and small mold colonies on non-porous surfaces. It does not penetrate porous substrates, and it is not strong enough for established colonies in drywall, insulation, or carpet pad.
How much area can I safely clean myself?
EPA guidance points to about 10 square feet as the DIY threshold for hard surfaces. Anything larger, anything involving HVAC, or anything on porous materials should go to a credentialed remediator with containment.
Why does mildew keep coming back?
Mildew returns when the underlying humidity or ventilation issue is not fixed. Running the bathroom fan during and after showers, addressing window condensation, and keeping indoor humidity under 50 percent usually solves recurrence.
Front Range homeowners who want a second opinion before deciding between a DIY cleanup and a professional remediation can connect with a vetted local inspector through our contact page.