Household Mold Testing: 2026 Whole-Home Owner Guide
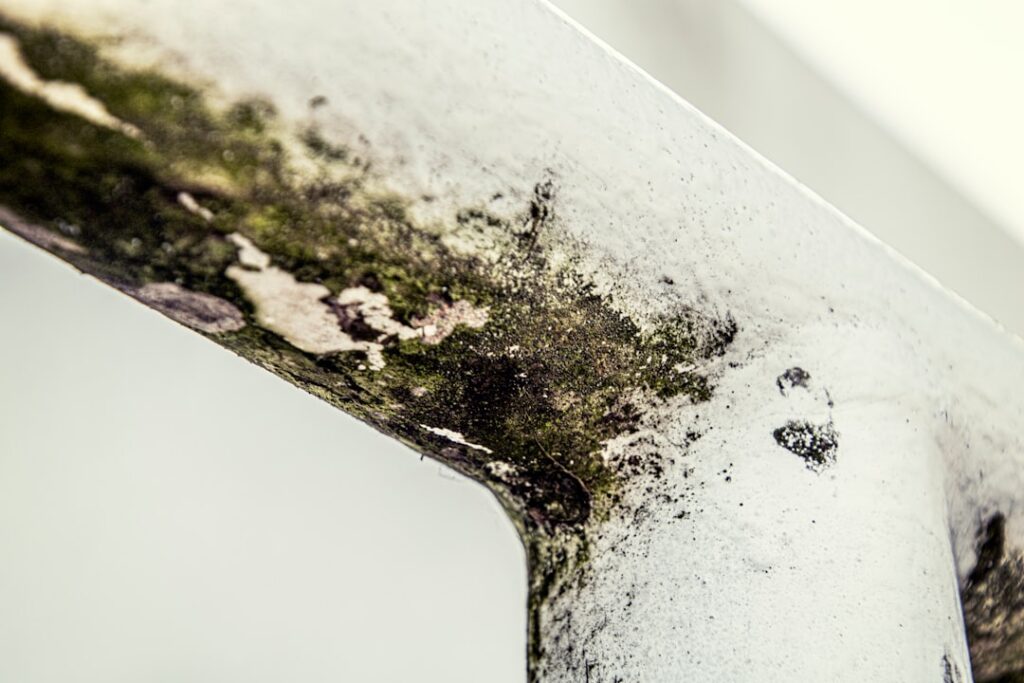
Household mold testing differs from spot testing a single room by aiming at a whole-home picture rather than confirming a specific patch. The right whole-home approach combines outdoor control sampling, multi-zone indoor air sampling, surface samples on any visible growth, and moisture-mapping data layered together. This guide summarizes EPA and CDC guidance current as of 2026 — consult a certified mold inspector for testing decisions and your physician for symptom evaluation. The walkthrough below covers sampling strategy for a typical residential property, DIY versus professional choices, and Front Range pricing.
Part of our Mold Testing & Inspection guide — start there for the full picture →
Is this mold, asbestos, or water damage? Get a free instant screen
Upload a clear photo of the suspect area. You'll get an instant AI screening opinion and what to do next. This is screening guidance, not a professional determination.
Screening guidance only. AI can be wrong. Confirm asbestos, mold type, or lead with lab testing or a licensed professional before acting.
Household Mold Testing Strategy
The framework for whole-home testing follows three principles. First, sample multiple zones so the data can distinguish localized from house-wide problems. Second, always include an outdoor control sample taken the same day to anchor indoor results. Third, integrate moisture-mapping data with air and surface samples so a positive result in one zone can be traced to a likely source. A typical household plan covers one outdoor control plus three to five indoor zones: master bedroom, the most-used living area, the basement, the kitchen (if HVAC pulls return air through it), and any room flagged by occupant symptoms or visible damage.
Why Whole-Home Sampling Beats Spot Testing
Spot testing answers a narrow question about a specific patch or room. Whole-home sampling answers broader questions: is the house generally clean or is something widespread? Is the master bedroom worse than the kitchen, suggesting localized source? Does the basement show different species than the upper floors, suggesting separate growth events? These comparative questions matter for both diagnosis and remediation scope. A single positive sample in one room without comparison data leaves ambiguity; multi-zone data resolves it. The EPA mold course materials note that comparative analysis carries the interpretive weight in residential testing because no federal numerical clean threshold exists.
Room Prioritization for Household Testing
Not every room rewards equal sampling. Prioritize based on three factors: occupant time spent, water-event history, and visible or smelled clues.
Bedrooms
Occupants spend roughly one-third of their time in their bedroom — typically the highest single-room exposure. Sample at least one bedroom (the master) routinely; sample additional bedrooms if occupants in those rooms report symptoms or if the room has water-event history.
Living Areas
The room where the household spends evening hours catches HVAC-distributed air and is often the second-largest exposure room. Sample whichever room sees the most occupied evening time.
Basement
Basements concentrate humidity, host most plumbing infrastructure, and account for the majority of household mold findings in Colorado homes. Always sample the basement on whole-home assessments.
Crawlspace
Crawlspaces below conditioned space serve as a moisture reservoir that affects floors and walls above. If accessible, sample the crawlspace; if not, sample the room directly above it.
DIY Household Mold Testing Approach
A reasonable DIY household plan runs $200–$400 in total cost. Buy a volumetric air-sampling kit with multiple cassettes ($40–$100 plus $50–$75 per cassette analyzed). Run three indoor samples (master bedroom, main living area, basement) plus one outdoor control on the same day. Add tape-lift surface samples if any visible growth warrants species ID ($25–$75 per sample). Total lab fees typically run $200–$300 depending on number of samples. The DIY black mold testing primer covers protocol specifics that apply across household-scale DIY plans.
Professional Household Mold Testing Pricing
Front Range professional household testing typically runs $500–$900 depending on home size, number of zones, and added testing components.
- Base inspection (visual + moisture mapping for 2,500 sq ft): $300–$500.
- Air samples (3 indoor + 1 outdoor): $320–$480.
- Surface samples (2–3 typical): $100–$300.
- Thermal imaging scan: often bundled into base for larger homes, or $100–$200 add-on.
- ERMI settled-dust analysis (optional, for chronic exposure cases): $200–$350.
The mold inspection hub covers what professional protocols include in detail.
Reading Multi-Zone Household Test Results
Lab reports for household tests should be analyzed as a whole rather than zone by zone. The most informative comparisons are indoor versus outdoor (does the house mirror outdoor patterns or differ?) and room versus room (is one zone clearly worse than others?). Three patterns matter most.
- Marker species (Stachybotrys, Chaetomium, certain Aspergillus) appearing in any indoor zone when the outdoor control lacks them — indoor amplification confirmed.
- Total spore counts an order of magnitude higher in one room versus other rooms — localized growth source likely.
- Similar elevated counts across all indoor zones — house-wide HVAC distribution or whole-property humidity problem.
Moisture Mapping for Whole-Home Assessment
Moisture mapping during household testing covers every room methodically rather than just suspected zones. Walk each room with a moisture meter, reading the bottom 24 inches of every exterior wall, around every plumbing fixture, the underside of every ceiling above a wet room, and the basement walls below grade. Mark elevated readings (above 17 percent drywall, 19 percent framing) with painter’s tape and photograph. Return after a weather change to distinguish persistent leaks from transient humidity. The moisture meter physics overview explains how to interpret readings in painted or treated areas.
HVAC Sampling for Household Tests
HVAC ductwork sometimes hosts mold growth in unconditioned crawlspace or attic-run ducts where condensation forms on cold metal. Whole-home assessment should include at least a visual inspection of accessible duct interiors plus a swab or tape-lift from the supply boot of one return register. Positive HVAC findings significantly change the remediation picture because contaminated ducts redistribute spores throughout the house. The InterNACHI mold inspection standard covers HVAC sampling scope for residential mold assessments.
Seasonal Timing for Household Testing
Test results vary with season. High-humidity periods (Front Range late spring and monsoon summer) activate dormant colonies and elevate measurable spore counts. Low-humidity winter periods may produce lower air counts even when colonies exist, because colonies stay metabolically dormant. For household testing aimed at detecting any growth, test during humid periods. For testing aimed at confirming a remediation, test during conditions similar to the original problem — high humidity if the issue was monsoon-related, freeze-thaw period if the issue was winter ice damming.
From Household Test Results to Remediation Plan
Whole-home test results shape remediation scope more precisely than spot tests do. A single positive zone with localized moisture source narrows remediation to that area. Multiple zones positive for the same species with no obvious moisture source point toward HVAC contamination requiring duct cleaning under containment. Marker species in any zone (Stachybotrys, Chaetomium) trigger IICRC S520 protocols regardless of count. Negative whole-home results with persistent occupant symptoms suggest hidden growth, MVOC-only emission, or non-mold air-quality issues — pursue medical consultation and consider radon or VOC testing as differential diagnoses.
Post-Remediation Verification on a Household Scale
After remediation, schedule the same inspector (not the remediator) to perform post-remediation verification across the same zones tested initially. PRV typically includes visual confirmation of removed materials, ATP swab testing for surface cleanliness, post-remediation air samples versus a new outdoor control, and a written clearance letter. Without PRV, you are trusting the remediator’s self-assessment, which is the most common failure point in household mold projects.
Comparing DIY and Professional Household Tests
Homeowners sometimes wonder whether DIY whole-home testing can replace professional household assessment. The honest answer depends on the question being asked. For owner curiosity or general indoor-air-quality screening, DIY testing at $200–$400 covers most of what a professional inspection covers. For documentation supporting insurance claims, real-estate disclosure, or litigation, professional credentialed testing remains substantially more defensible because of AIHA-accredited lab chain-of-custody, inspector credentials, written protocol adherence, and written reports formatted to third-party-review standards. Many homeowners run DIY testing first to decide whether professional follow-up is worthwhile.
The two approaches complement each other. DIY testing identifies whether amplification is happening and roughly where. Professional follow-up confirms findings with defensible documentation and adds thermal-imaging, borescope inspection, and inspector expertise that DIY methods do not provide.
What to Do With Negative Whole-Home Results
Negative whole-home test results with no occupant symptoms confirm no significant amplification at the time of sampling. File the report digitally for future reference; revisit if symptoms develop or after future water events. Negative results with persistent occupant symptoms suggest one of three patterns: hidden growth not currently shedding into ambient air (consider settled-dust ERMI testing), MVOC-only emission from sealed cavities (rare but possible), or non-mold air-quality issues such as radon, VOC off-gassing from new furniture or finishes, dust-mite allergens, pet dander, or particulate matter from outdoor sources. Pursue medical consultation in parallel with environmental investigation; physicians can recommend allergen-specific testing that narrows the differential.
Front Range Seasonal Household Test Timing
Seasonal timing affects household test results meaningfully. Late spring snowmelt period (April–May) elevates basement humidity and activates dormant colonies; this is the high-yield window for detecting marginal amplification. Monsoon summer (July–August) elevates whole-house humidity and produces the highest spore counts of the year for most Front Range homes. Fall (September–November) is the low-incidence season with stable indoor humidity. Winter freeze-thaw periods cause condensation-driven moisture problems on poorly insulated exterior walls but show lower air counts because cold temperatures slow colony metabolism. Schedule whole-home testing during spring or monsoon periods for maximum detection sensitivity; schedule winter testing for documentation of condensation-pattern problems.
Household Testing as Real Estate Due Diligence
Buyers conducting due diligence on a home with mold history, musty smell, or known water-event records often commission whole-home testing during the option period. Scope this carefully: typical buyer-side testing includes one outdoor control plus three to four indoor zones, surface samples on any visible suspect growth, and thermal imaging of suspect areas. Total cost runs $500–$900. Schedule early in the option period so positive findings leave time for negotiation (price reduction, seller remediation as a closing condition) or contract termination. The seller’s prior testing rarely satisfies a buyer’s defensibility requirements; buyers typically hire their own inspector. The insurance home inspection overview covers how testing reports interact with transaction documentation.
Documentation for Household Testing Programs
Save all lab reports as PDFs with the test date in the filename. Photograph each sampling location before and after sample collection with dated phone metadata. Keep chain-of-custody logs if you mail samples — date sent, tracking number, lab receipt confirmation. Build a digital folder for the home covering all environmental testing across years. This longitudinal record helps establish whether new findings represent a new problem or recurrence of a known one, supports insurance claims if mold issues recur after a covered water event, and provides documentation for future real-estate disclosure. Inspectors revisiting the home for follow-up testing benefit from access to the historical record. For homes that change hands, the documentation transfer can support the new owner’s understanding of the home’s moisture history.
References
- EPA — Mold Course: Why and Where Mold Grows — U.S. Environmental Protection Agency
- CDC — Basic Facts About Mold and Dampness — Centers for Disease Control and Prevention
- InterNACHI — Mold Inspection Standard of Practice — International Association of Certified Home Inspectors
- NIEHS — Mold and Health — National Institute of Environmental Health Sciences
Frequently asked questions
How many samples do you need for whole-home mold testing?
A reasonable plan covers one outdoor control plus three to five indoor zones — typically the master bedroom, main living area, basement, and one symptom-flagged room. Smaller homes may require fewer; multi-level homes with separate HVAC zones may require more.
How much does household mold testing cost?
DIY whole-home testing typically runs $200 to $400 with three to four indoor samples plus outdoor control. Professional household testing in Front Range markets runs $500 to $900 depending on home size and additional testing components.
Is household mold testing worth doing if I see no visible mold?
Worth it when occupant symptoms suggest hidden exposure, after a major water event, or before a real-estate transaction. Otherwise, visual inspection plus moisture mapping catches most problems without sampling.
How long does household mold testing take?
DIY whole-home sampling takes one to two hours for sample collection plus three to five business days for lab results. Professional whole-home testing takes three to four hours on site plus five to ten business days for the full written report.
Front Range households planning whole-home mold testing before a real-estate transaction or after a recent water event can reach a vetted credentialed inspector through our contact page. Whole-home assessment scope and pricing varies by property and is best clarified with a short phone consultation.