Hardwood Floor Installation: Acclimation, Moisture and Methods
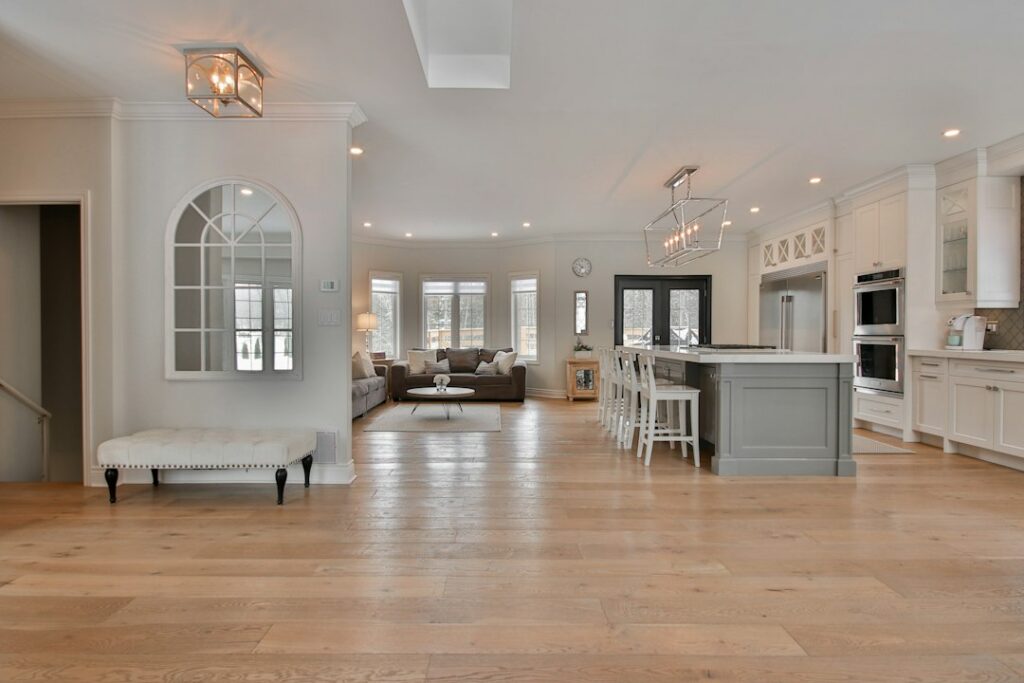
Wood floors are one of the most requested upgrades on the Front Range, and one of the most common sources of disappointment a year or two later. Boards that looked tight in August open up into dark gaps by January. Planks laid over a damp slab start to cup. A floor glued down in a rush squeaks, hollows out or buckles at a doorway. Most of these failures trace back to decisions made before the first board went down: which product was chosen, how the subfloor was prepared, and whether anyone measured moisture. This guide walks through hardwood floor installation from the homeowner’s and buyer’s side, covering solid versus engineered products, the three main installation methods, acclimation and moisture testing, how Colorado’s dry winters affect wood, and what a home inspector tends to notice. It is a planning overview, not a substitute for the flooring manufacturer’s written instructions, which govern the warranty.
Part of our Structure & Exterior guide — start there for the full picture →
What Hardwood Floor Installation Involves
A durable hardwood floor is a system, not just a stack of boards. A typical installation includes five stages:
- Product selection matched to the room, the subfloor and whether the space is above, on or below grade.
- Site and subfloor preparation, including flatness checks, fastening loose panels and correcting problems in the framing.
- Moisture assessment of the wood and the subfloor, with readings recorded before installation.
- Installation by nailing, gluing or floating, with expansion space left at walls and fixed objects.
- Finishing, either a site-applied finish on raw boards or the factory finish on prefinished products, followed by trim.
Skipping stages two and three is the most common shortcut. A crew that arrives, unloads boxes and starts nailing the same afternoon may still produce a good-looking floor, but it has given up the chance to catch a wet subfloor or a dip that will telegraph through the finish. Homeowners comparing bids should ask each contractor to describe the preparation and moisture steps in writing, not just the price per square foot.
Solid vs Engineered Hardwood
The first decision shapes everything else. Both products have a real wood wear surface, but they behave very differently.
Solid hardwood
Solid boards are milled from a single piece of wood, commonly three-quarters of an inch thick, with tongue-and-groove edges. Their main advantages are longevity and the ability to be sanded and refinished several times over the life of the house. Their main limitation is movement. Solid wood expands and contracts across its width as its moisture content changes, and wider boards move more. Most manufacturers do not approve solid hardwood for installation below grade, such as directly over a basement slab, because of the moisture risk. Solid boards are normally nailed or stapled to a wood subfloor.
Engineered hardwood
Engineered flooring uses a hardwood veneer bonded to a core of plywood, high-density fiberboard or other layers. The cross-layered construction makes it more dimensionally stable than solid wood, which is why many engineered products are approved for concrete slabs, radiant heat and some below-grade rooms. The trade-off is the wear layer. A thick veneer may allow a few full refinishes; a thin one may allow only a screen-and-recoat or none at all. Our guide to engineered hardwood flooring covers wear-layer thickness, core types and how to read a spec sheet.
Engineered floors also raise an indoor-air question. EPA’s formaldehyde emission standards for composite wood products, issued under Title VI of the Toxic Substances Control Act, cover hardwood plywood, medium-density fiberboard and particleboard, along with finished goods that contain them, and include provisions for laminated products. EPA states that after March 22, 2019, regulated composite wood products must be labeled as TSCA Title VI compliant. Whether a particular engineered flooring product falls under the rule depends on its construction, so buyers who care about emissions can ask the supplier for compliance documentation and look for the TSCA Title VI label on the packaging.
Where each tends to fit
- Main-floor living areas over a wood subfloor: either product, with solid often chosen for its refinishing life.
- Over a slab on grade: usually engineered, glued or floated, after moisture testing.
- Basements: engineered only where the manufacturer allows it, or a non-wood alternative. Our basement flooring guide compares the options.
- Kitchens and entries: possible with either, but standing water and grit shorten finish life, so mats and prompt cleanup matter.
Installation Methods: Nail-Down, Glue-Down and Floating
The method is usually dictated by the product and the subfloor rather than by preference.
Nail-down or staple-down
This is the traditional method for solid hardwood over a plywood or OSB subfloor. Fasteners are driven at an angle through the tongue with a flooring nailer, so they are hidden by the next board. Fastener spacing, the type of cleat or staple and the subfloor thickness are all set by the manufacturer. Many installers roll out an underlayment paper or a vapor retarder first, depending on the product and what is below the floor. Over-driven staples can split tongues and cause squeaks later, which is a frequent complaint in new construction. If squeaks are already present, our guide to squeaky floor repair explains the usual causes.
Glue-down
Engineered products are commonly glued directly to concrete or to a wood subfloor using a urethane or similar flooring adhesive spread with a notched trowel. Some adhesives double as a moisture barrier up to a stated limit. Glue-down floors feel solid underfoot, but the result depends heavily on flatness, adhesive coverage and slab moisture. Hollow spots that sound different when tapped usually mean the adhesive did not transfer fully.
Floating
A floating floor is not fastened to the subfloor at all. Planks lock or glue to each other at the edges and rest on an underlayment pad. Floating engineered floors are common over slabs and over existing floors. They are quicker to install but can sound hollow, and they need generous expansion space because the whole floor moves as a unit. Heavy kitchen islands or built-ins placed on top of a floating floor can pin it and cause buckling elsewhere, so many manufacturers prohibit that. The same principles apply to laminate flooring, which is usually floated too.
Acclimation and Moisture Testing
Wood is hygroscopic. It takes on or gives up moisture until it reaches balance with the surrounding air, and it swells or shrinks as it does. Acclimation is the process of letting flooring adjust toward the conditions it will live in before it is installed, and it only works if the house itself is at normal living conditions, with the heating or cooling running and any drywall mud, paint or concrete work already dry.
The length of acclimation varies by product and manufacturer. Some engineered floors require none at all; solid boards may need several days or more. More important than the number of days is the measurement. Installers commonly take moisture readings from a sample of boards and from the subfloor, then compare them against the manufacturer’s allowable difference. A wood subfloor that reads much wetter than the flooring is a warning sign that cupping or gapping may follow. Our guide to the hardwood floor moisture meter explains pin and pinless meters, species settings and how to read results.
Subfloor condition
Moisture testing often uncovers deeper issues. Delaminated plywood, swollen OSB edges near an old leak, soft spots around a toilet flange or a subfloor that flexes between joists all need repair before new wood goes down. Fixing these first is far cheaper than lifting a finished floor; our guide to subfloor repair explains the common approaches. Flatness matters too. Manufacturers typically specify a maximum deviation over a set distance, and humps or dips beyond that need sanding, shimming or a patching compound. Where a whole floor is out of level, floor leveling may come before the hardwood conversation. Sagging or cracked framing may call for sistering joists before any finish floor goes on.
Concrete slabs
Slabs bring a separate set of tests. Concrete can release moisture for a long time after it is poured and can draw ground moisture upward if there is no effective vapor retarder below it. Flooring and adhesive manufacturers usually specify a test method and a maximum reading, often a relative humidity probe test or a calcium chloride test, and a floor installed without that data may not be covered by the warranty. Solid hardwood is generally not installed directly on below-grade slabs. Our concrete moisture meter guide covers how slab readings are taken and what they can and cannot tell you.
Colorado’s Dry Winters: Gaps, Cupping and Humidity Control
The Front Range has a semi-arid climate, and heated indoor air in winter can become very dry. Wood floors respond predictably. In winter, boards shrink and gaps appear between them, most visibly in solid strip and plank floors. In late spring and summer, when outdoor humidity rises and windows are open, boards swell and the gaps close. Some seasonal gapping is normal for solid wood and is not, by itself, a defect.
Problems start when the swings are extreme or one-sided:
- Cupping, where board edges are higher than the centers, usually means more moisture is coming from below than above, such as a damp crawl space, a wet slab or a leak.
- Crowning, where centers are higher than edges, is often the aftermath of a cupped floor that was sanded flat before it dried.
- Buckling, where boards lift off the subfloor, generally follows a major water event or a floor installed without expansion space.
- Checking and splitting at board ends can follow long periods of very low humidity.
Many flooring manufacturers state an indoor relative humidity range as a warranty condition. EPA’s mold and moisture guidance recommends keeping indoor humidity below 60 percent, ideally between 30 and 50 percent, which overlaps with the range many wood flooring makers ask for. In a Colorado winter, staying near the bottom of that range may take active humidification. A hygrometer in the main living area costs little and shows whether the house is drifting too low. Our guide to the whole house humidifier covers bypass, fan-powered and steam units, and the guide on how to lower humidity in your house covers the opposite problem in damp basements or tightly sealed homes.
Expansion Gaps, Transitions and Trim
Every wood floor needs room to move at its perimeter. Manufacturers specify an expansion space at walls, cabinets, stair nosings, door jambs and any fixed object, often around the thickness of the flooring itself. That space is hidden by baseboard and shoe molding. When the gap is skipped, or when it fills with drywall debris, a floor that swells in summer has nowhere to go and may buckle.
Transitions deserve attention too. Doorways where wood meets tile, carpet or vinyl need a transition strip that allows movement, and large open floor plans may need expansion breaks if a floating floor exceeds the maximum run its manufacturer allows. Door bottoms may need trimming, and appliances such as dishwashers and refrigerators need to be considered so they can still be pulled out after the new floor raises the height. If tile is part of the same project, our guide to tile installation covers how substrates differ.
Finishing, Refinishing and Long-Term Care
Unfinished boards are sanded and finished on site, which allows custom stain colors and fills small gaps between boards with finish. Site finishing involves dust, odor and drying time, and the house may be off-limits for several days. Prefinished boards arrive with a factory-cured coating, often more abrasion-resistant than a site finish, and the floor can be walked on sooner. The trade-off is the slight bevel along each edge and the fact that the factory finish cannot be easily matched if boards are replaced later.
Over time, every finish wears. A screen-and-recoat refreshes the topcoat without removing wood. A full sand-and-refinish removes the old finish and a thin layer of wood, which is why the thickness above the tongue on solid boards, or the wear layer on engineered boards, limits how many times a floor can be refinished. Our guide to hardwood floor refinishing cost explains the price differences between those options.
Water is the main long-term threat. Dishwasher leaks, refrigerator ice-maker lines, pet accidents and overflowing toilets can all soak wood from above or below. EPA’s mold guidance stresses drying water-damaged areas and items within 24 to 48 hours to prevent mold growth, which is a good rule of thumb for floors too. Our guide to hardwood floor water damage covers what can be dried in place and when boards must come up.
Hardwood Floor Installation Costs
Costs vary widely by species, grade, board width, product type, region, subfloor condition and the amount of trim and furniture moving involved. As a rough industry estimate, professionally installed hardwood often falls somewhere between about $8 and $20 or more per square foot including material and labor, with exotic species, wide planks, herringbone patterns and site-finished floors toward the upper end. Engineered products span a similarly wide range, from budget click-together planks to premium thick-veneer boards that cost as much as solid.
Line items that often surprise homeowners include:
- Removal and disposal of existing flooring, especially glued-down tile or sheet goods.
- Subfloor repairs, leveling compound and additional fastening.
- Moisture mitigation products or vapor retarders over slabs.
- Stair treads and nosings, which are usually priced per step.
- New baseboard, shoe molding and transitions.
- Moving furniture and appliances, and trimming doors.
Treat any figures here as ballpark ranges, and compare written quotes that list the same scope of work. Floors in older homes may also hide older flooring materials underneath, and some vintage tiles and adhesives contain asbestos, so removal of unidentified old floor layers should be discussed with the contractor before demolition starts.
What a Home Inspector Notices
The ASHI Standard of Practice lists walls, ceilings and floors among the interior components a home inspector inspects, while floor coverings themselves are on the list of items an inspector is not required to inspect. In practice, that means an inspector looks at a wood floor for what it reveals about the house: unusual cupping in one area that may point to a leak or crawl space moisture, soft or bouncy spots that suggest subfloor or framing issues, buckling near exterior doors or dishwashers, and fresh flooring that may be hiding past water damage. A moisture meter reading taken where the floor looks suspicious is a common follow-up.
Buyers looking at a recently renovated house can ask the seller for the flooring brand, product line, installation date and installer, and whether moisture readings were recorded. That paperwork makes warranty claims possible and helps a future refinisher understand how much wear layer remains. For guidance on choosing an inspector who will look carefully at floors and the structure below them, see the home inspector hiring guide and the structure and exterior hiring hub.
References
- Formaldehyde Emission Standards for Composite Wood Products — U.S. Environmental Protection Agency
- A Brief Guide to Mold, Moisture and Your Home — U.S. Environmental Protection Agency
- ASHI Standard of Practice for Home Inspections — American Society of Home Inspectors
Frequently asked questions
How long should hardwood flooring acclimate before installation?
It depends on the product. Some engineered floors need no acclimation, while solid boards may need several days or longer. The more reliable approach is to measure moisture in the boards and subfloor and install once the readings fall within the manufacturer's allowable difference.
Can solid hardwood be installed in a basement?
Most manufacturers do not approve solid hardwood directly over a below-grade concrete slab because of moisture risk. Engineered hardwood approved for below-grade use, or a non-wood option such as luxury vinyl plank, is the usual alternative after moisture testing.
Why do my hardwood floors have gaps in winter?
Heated indoor air in a Colorado winter can be very dry, and wood shrinks as it loses moisture. Modest seasonal gaps in solid wood are normal and usually close in summer. Large gaps may mean humidity is dropping too low or the floor was installed wet.
Is it better to nail, glue or float a hardwood floor?
The product and subfloor usually decide. Solid hardwood is normally nailed to a wood subfloor, engineered floors are often glued or floated over concrete, and floating floors need extra expansion space. Follow the manufacturer's instructions to keep the warranty valid.
What humidity is best for hardwood floors?
Many flooring manufacturers state a relative humidity range as a warranty condition. EPA recommends keeping indoor humidity below 60 percent and ideally between 30 and 50 percent, which overlaps with many flooring recommendations. A hygrometer shows whether the house stays in range.
Buying a home with new wood floors and wondering what is underneath? Contact us and we can point you to a Front Range inspector who checks floors, subfloors and moisture sources before you close.