Duct Sealing: Leaky Ducts, Methods and Costs
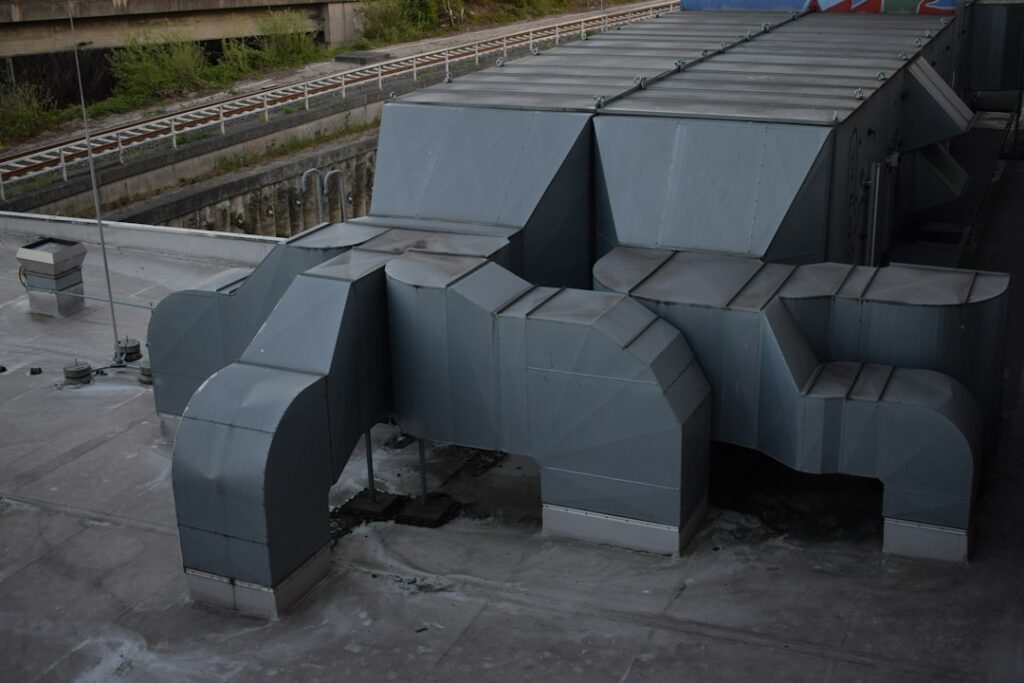
A furnace or air conditioner can be perfectly sized and freshly serviced and still leave a back bedroom cold, a basement dusty and the utility bill higher than it should be. Often the problem is not the equipment at all but the ducts that carry air from it. Joints pull apart, flexible ducts get crushed, and seams that were never sealed leak conditioned air into attics, crawl spaces and wall cavities. Duct sealing closes those leaks so more of the air you pay to heat or cool actually reaches the rooms. This guide covers why leaky ducts matter, the signs to look for, the main sealing methods, how ducts are tested, the safety checks that should come with the work, what it typically costs and how sealing differs from duct cleaning. Cost figures are general ranges rather than quotes.
Part of our Crawl Space & Attic Guide guide — start there for the full picture →
What Is Duct Sealing and Why Does It Matter?
Duct sealing is the process of closing leaks, gaps and disconnected joints in the supply and return ducts of a forced-air heating and cooling system. It usually goes hand in hand with insulating ducts that run through unconditioned spaces such as attics, crawl spaces and garages.
The stakes are bigger than most homeowners expect. According to ENERGY STAR, in a typical house about 20 to 30 percent of the air that moves through the duct system is lost to leaks, holes and poorly connected ducts. That lost air shows up as higher utility bills and rooms that are hard to keep comfortable no matter how the thermostat is set. ENERGY STAR also notes that leaky ducts can reduce heating and cooling system efficiency by as much as 20 percent.
Leaks work in both directions. Leaky supply ducts push heated or cooled air into the attic or crawl space instead of the living room. Leaky return ducts pull air in from wherever they run: hot attic air in summer, cold crawl space air in winter, or dusty, musty air from an unfinished basement or garage. That second effect is why duct leakage is an indoor air quality issue as well as an energy issue.
Signs Your Ducts Leak
ENERGY STAR lists several signs that a home may have poorly performing ducts:
- High summer and winter utility bills.
- Rooms that are difficult to heat and cool.
- Stuffy rooms that never seem comfortable.
- Ducts located in an attic, crawl space or garage.
- Tangled or kinked flexible ducts.
Its guidance on identifying home problems adds dust and smells from the attic or crawl space, and suggests looking for cracks, kinks, loose supply boots and missing insulation.
Other clues homeowners notice:
- A dusty house. Return-side leaks can pull in dust and insulation fibers, leaving surfaces dusty soon after cleaning.
- Weak airflow at some registers. Rooms at the end of long duct runs, or above garages, often get the least air.
- Visible gaps. Separated joints, crumbling old cloth tape, torn flex duct jackets or registers loose from the drywall.
- Hot or cold attic and crawl space. A crawl space that feels noticeably warm in winter may be absorbing heat from leaking supply ducts.
- Condensation or mold near ducts. Leaking cold air in summer can cause condensation on nearby surfaces.
Homes in the Front Range with ducts in vented crawl spaces or hot summer attics are especially prone to these symptoms, because the air around the ducts is far from indoor temperature for much of the year.
Where Ducts Leak Most
Leaks are rarely spread evenly along a duct system. They cluster at connections, where two pieces of duct meet or where a duct meets a piece of equipment or a building surface. The usual trouble spots include:
- The air handler and plenums. Joints where the supply and return plenums attach to the furnace or air handler often carry the highest pressure in the system, so even small gaps leak a lot of air. Unsealed filter slots are another frequent culprit.
- Register boots. The connection between the boot and the floor, wall or ceiling is often left unsealed, leaking air into the wall or joist cavity instead of the room.
- Takeoffs and branch connections. Where branch ducts leave a main trunk, collars are often fastened with a few screws and little or no sealant.
- Flexible duct connections. Flex duct that has slipped off a collar, or that was attached with tape alone, can separate completely over time.
- Building cavities used as ducts. Some older homes use the space between joists or studs as a return path, sometimes called panned returns. These cavities are difficult to seal and can pull air from unexpected places.
Because the air handler, plenums and nearby trunk lines carry the most air at the highest pressure, many contractors start there and work outward.
Duct Sealing Methods
Mastic sealant
Duct mastic is a thick, paste-like sealant brushed or troweled onto seams, joints and connections. It cures into a flexible, durable seal and handles irregular joints well. For gaps wider than about a quarter inch, installers typically embed fiberglass mesh tape in the mastic. Mastic is messy but long-lasting, which is why many contractors prefer it for accessible joints.
Foil and metal tape
UL-listed foil or metal tapes designed for ductwork are a cleaner alternative on smooth, clean metal joints. ENERGY STAR recommends sealing air leaks with mastic sealant or metal tape.
Why not cloth “duct tape”?
Despite the name, ordinary cloth-backed duct tape is a poor choice for sealing ducts. ENERGY STAR says plainly to never use duct tape, because it is not long-lasting. Heat cycling breaks down the adhesive, and the tape eventually curls, dries out and falls off. Many older homes have exactly this problem: decades-old cloth tape hanging loose from joints it once covered.
Aerosol internal sealing
Aerosol duct sealing systems, such as Aeroseal and similar products, take a different approach. Registers are temporarily blocked, the duct system is pressurized, and a sealant mist is blown through the ducts. Particles collect at leak edges and gradually build up until the holes are closed, while a computer tracks leakage in real time. ENERGY STAR lists aerosol-based sealants alongside mastic and metal tape as acceptable methods for professional contractors.
Aerosol sealing can reach leaks inside walls, floors and ceilings that would otherwise require opening drywall. It does not fix crushed or disconnected ducts, so those repairs still need to be made first. Cost, product chemistry and how long the seal lasts are worth discussing directly with the contractor.
Repairing before sealing
Sealing works best on a sound system. Reconnecting separated sections, replacing crushed flex duct, straightening kinked runs and properly supporting sagging duct all come before the sealant. Register boots, where ducts meet the floor, wall or ceiling, deserve special attention; ENERGY STAR identifies those connections as common locations for leaks and disconnected ductwork.
Insulating Ducts in Unconditioned Spaces
Sealing stops air from escaping. Insulation slows heat loss or gain through the duct walls. Ducts in attics, crawl spaces, unfinished basements and garages usually need both. ENERGY STAR recommends insulating ducts in unconditioned areas with duct insulation that carries an R-value of 6 or higher.
Seal first, then insulate. Wrapping leaky ducts in insulation hides the leaks without fixing them, and air leaking through the insulation can carry moisture that leads to condensation and mold. In cooling season, insulation with an intact vapor jacket helps prevent condensation on cold supply ducts.
Another option is bringing ducts inside the thermal envelope. In a sealed and insulated crawl space, ducts are effectively in semi-conditioned space, and leakage matters less for energy, though it still affects airflow and comfort. The overview of crawl space insulation and encapsulation options explains how that strategy works and when it makes sense.
How Duct Leakage Is Tested
Like whole-house air leakage, duct leakage can be measured rather than guessed. The common tool is a duct blaster, a small calibrated fan connected to the duct system, usually at the air handler or a large return. Registers are taped off, and the fan pressurizes the ducts, typically to 25 pascals. The airflow needed to hold that pressure shows how much the ducts leak.
There are two common ways to report the result:
- Total duct leakage. All leakage from the ducts, whether into the living space or outdoors.
- Leakage to outside. Measured with a blower door test running at the same time to equalize the house, isolating leakage into attics, crawl spaces and other spaces outside the conditioned envelope.
Many energy codes require duct leakage testing for new homes and some HVAC replacements, with limits that depend on the code edition and whether ducts are inside or outside conditioned space. Local building departments can confirm current requirements.
Testing before and after sealing confirms that the work made a measurable difference. It also helps a contractor decide where to focus, since some systems have a few large leaks and others have many small ones. A home energy audit often includes both a blower door test and duct testing.
Combustion Safety After Sealing
Sealing ducts changes pressure relationships in the house, and that can affect fuel-burning appliances. ENERGY STAR explains that gas appliances such as water heaters, clothes dryers and furnaces release combustion gases like carbon monoxide through their vents, and that leaky ductwork can cause backdrafting, pulling those gases into the living space. Sealing leaks can reduce that risk, but changing duct pressures can also create new problems in a mechanical room.
ENERGY STAR advises that a contractor should make sure there is no backdrafting of gas or oil-burning appliances and conduct a combustion safety test after ducts are sealed. Unsealed return ducts in a furnace closet or basement mechanical room are a particular concern, because they can depressurize the space around a naturally vented water heater. EPA lists back-drafting from furnaces and gas water heaters among indoor sources of carbon monoxide, which is one more reason every home with fuel-burning appliances should have working CO alarms.
A DIY Approach for Accessible Ducts
ENERGY STAR notes that some homeowners take on duct sealing as a do-it-yourself project. Ducts that are easy to reach in an unfinished basement, a crawl space with good clearance or a walkable attic are reasonable candidates. A typical sequence looks like this:
- Turn off the system. Switch the thermostat off so the blower does not run while you work.
- Map the system. Follow the supply trunk from the furnace or air handler to each branch, and the return path back. Note any obvious disconnections or crushed sections.
- Clean the joints. Wipe dust and old, failed tape from the seams so mastic or foil tape can bond.
- Repair first. Reconnect loose sections with sheet metal screws or proper clamps for flex duct.
- Seal. Brush mastic over seams and joints, embedding mesh tape over wider gaps, or apply UL-listed foil tape to clean, smooth metal.
- Seal the boots. Seal where register boots meet the floor, wall or ceiling, from the room side or the cavity side.
- Insulate. Once mastic has cured, insulate ducts that run through unconditioned space.
Wear gloves, eye protection and a dust mask in attics and crawl spaces, and avoid attic work on hot summer afternoons. Stop and call a professional if you find signs of mold, animal activity, asbestos-type wrap on older ducts, or damaged wiring near the ductwork. After any DIY sealing in a home with a gas furnace or water heater, a combustion safety check by a qualified technician is a sensible step. Routine system care, covered in the guide to AC maintenance, is a good time to have a technician look at the ductwork as well.
How Much Duct Sealing Costs
Costs vary by home size, duct accessibility, method and region. As a rough guide:
- DIY sealing. Mastic, mesh tape, UL-listed foil tape and duct insulation for accessible joints in a basement or attic often cost under a couple of hundred dollars in materials.
- Professional manual sealing. A contractor sealing accessible ducts with mastic and tape, including some repairs, commonly charges several hundred to around two thousand dollars, depending on the extent of the work.
- Aerosol sealing. Interior aerosol sealing typically costs more than manual sealing, often in the range of one to a few thousand dollars for a typical home.
- Duct insulation. Insulating attic or crawl space ducts adds material and labor costs that depend on duct length and access.
- Testing. Duct leakage testing may be included or billed separately, often a few hundred dollars.
ENERGY STAR notes that sealing and insulating ducts can often pay for itself in energy savings, and that a well-sealed system may allow a smaller, less costly unit when equipment is replaced. If a new furnace or air conditioner is on the horizon, it makes sense to address the ducts at the same time; the guide to furnace replacement cost covers how duct work can factor into a replacement quote. Some utilities offer rebates for tested duct sealing, so check before hiring.
Hiring a contractor
ENERGY STAR suggests looking for a contractor who will inspect the whole duct system including attics and crawl spaces, evaluate supply and return balance, repair damaged and disconnected ducts, seal leaks with mastic, metal tape or aerosol sealant, seal registers to the ducts, insulate ducts in unconditioned areas, include a new filter, evaluate airflow after repairs and run a combustion safety test.
Duct Sealing vs Duct Cleaning
The two services are often confused but solve different problems. Duct sealing closes leaks to improve efficiency, comfort and air quality by keeping unconditioned air out. Duct cleaning removes dust and debris that have collected inside the ducts. The guide to air duct cleaning explains when cleaning is worth it and what to watch for in sales pitches.
If a duct system shows visible growth, persistent musty odors or water intrusion, the issue goes beyond a routine cleaning; the guide to mold in ductwork covers what to do. Sealing a system that has a moisture problem without fixing the source can lock the problem in. Where both services make sense, cleaning generally comes first, then sealing, so sealant is applied to clean surfaces.
During a home inspection, inspectors commonly note visible duct disconnections, damaged flex duct, missing insulation on attic or crawl space ducts and old cloth tape. A detailed duct leakage measurement, however, requires separate testing.
References
- Duct Sealing — ENERGY STAR
- Benefits of Duct Sealing — ENERGY STAR
- Hire a Professional Contractor for Duct Improvement Projects — ENERGY STAR
- Identify the Problems You Want to Fix — ENERGY STAR
- Carbon Monoxide’s Impact on Indoor Air Quality — U.S. Environmental Protection Agency
Frequently asked questions
Is duct sealing worth it?
Often, especially when ducts run through attics, crawl spaces or garages. ENERGY STAR says a typical duct system loses about 20 to 30 percent of the air moving through it to leaks and poor connections, and that sealing and insulating ducts can often pay for itself in energy savings.
Can I use duct tape to seal ducts?
No. ENERGY STAR advises never using ordinary cloth duct tape because it is not long-lasting. Use duct mastic or UL-listed foil or metal tape designed for ductwork instead.
How long does duct sealing last?
Properly applied mastic and quality foil tape on clean surfaces can last many years. Aerosol seals are designed to be long-lasting as well. Ask any contractor about product warranties and request before-and-after leakage testing.
How do I know if my ducts are leaking?
Common signs include high bills, rooms that are hard to heat or cool, a dusty house, and ducts in attics or crawl spaces with visible gaps or crushed sections. A duct blaster test can measure leakage directly.
Should I clean or seal my ducts first?
When both are needed, cleaning usually comes first so sealant goes onto clean surfaces. If you see mold, water intrusion or persistent musty odors, address the moisture source before sealing.
Wondering whether the ducts in a home you are buying are wasting energy? Contact us here and we can help you find a qualified Front Range inspector or energy professional to take a closer look.