Door Casing: Trim Gaps, Cracks and What They Can Signal
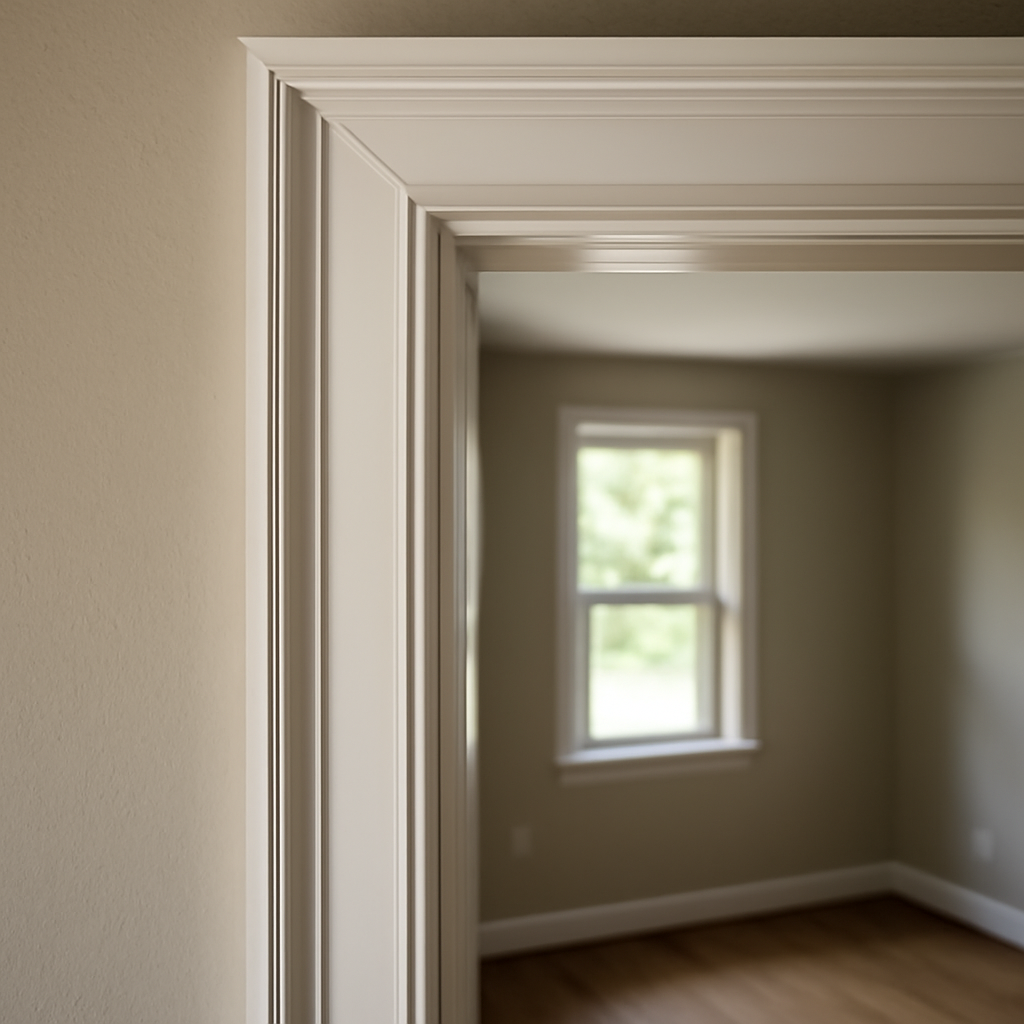
Door casing is the trim that frames a doorway and covers the joint between the door frame and the wall. Most people never think about it until something changes: a mitered corner opens up, a diagonal crack appears in the drywall above the trim, or a door that used to close easily starts to rub. Those changes are usually minor, caused by seasonal wood movement, shrinking framing or a casing nail that let go. Occasionally they are part of a larger pattern that points to settlement or framing movement worth a closer look. This guide explains how door casing differs from the jamb and stop, what normal and less-normal gaps look like, how sticking doors relate to the trim, how casing is repaired, what to know about lead paint on older trim, what inspectors notice and roughly what repairs cost in 2026.
Part of our Structure & Exterior guide — start there for the full picture →
Door Casing vs Jamb vs Stop
A doorway has three distinct wood parts that are easy to confuse:
- Jamb. The frame the door actually hangs in: two side jambs and a head jamb across the top, set inside the rough opening in the wall framing. Hinges attach to one side jamb and the strike plate to the other.
- Stop. The narrow strip nailed to the face of the jamb that the door closes against. It keeps the door from swinging through the opening and, on exterior doors, carries the weatherstripping.
- Casing. The trim applied to the wall around the opening, on both faces of the wall. It bridges the gap between the edge of the jamb and the drywall or plaster, hides shims and framing, and gives the doorway its finished look.
Casing is decorative and protective rather than structural. It does not hold the door up. But because it is nailed to both the jamb and the wall framing, it acts like a sensitive indicator: when the jamb, the wall or the framing around the opening moves, the casing joints are often where that movement first shows.
Common casing styles
Many newer Front Range homes use simple colonial or ranch profiles in finger-jointed pine or MDF, joined with 45-degree miters at the top corners. Craftsman-style casing uses flat boards with a separate head casing and butt joints. Older homes may have thick, built-up casing with corner blocks (rosettes) that avoid miters entirely. The joint type affects how movement shows up: miters tend to open into a visible wedge, while butt joints and corner blocks hide small movements better.
Gaps and Cracks at Casing Corners: What They Can Signal
Most casing gaps are not a cause for alarm. Wood expands and contracts across its width as humidity changes, and Colorado’s indoor air swings from very dry winters, when furnaces run for months, to more humid summers. A mitered corner that opens slightly every winter and closes again in summer is typical. New homes also see framing lumber shrink as it dries during the first year or two, which can open trim joints and pop nail heads.
Usually minor
- A hairline gap at a mitered corner, especially one that comes and goes seasonally.
- A gap between the casing and the wall where the drywall surface is uneven.
- Cracked caulk or paint along the casing edge.
- Small nail pops or a separated corner where the casing was not glued.
Worth a closer look
- Diagonal cracks in drywall or plaster running from the upper corners of the casing, especially if they are wider at one end or have grown over time.
- Miter gaps that are wide, uneven or getting larger, particularly when several doors in the same part of the house show the same pattern.
- A head casing that is visibly out of level or a door that now has a tapered gap at the top.
- Doors that start sticking or will not latch along with new wall or ceiling cracks nearby.
- Sloping floors in the same area, or cracks in the foundation or slab.
Openings like doors and windows concentrate stress in walls, which is why cracks commonly start at their corners. A single diagonal crack above a door is often cosmetic, from drywall seams, shrinkage or minor movement. Several diagonal cracks, sticking doors and sloping floors clustered on one side of a house can be consistent with differential settlement or framing problems. They do not prove it, and many of the same signs come from expansive soils that swell and shrink seasonally, which are common along parts of the Front Range. Our guides to foundation cracks and ceiling cracks explain how to tell typical patterns from ones that suggest a structural evaluation is warranted.
Tracking movement
The simplest way to tell seasonal movement from progressive movement is to watch over time. Photograph the crack or gap with a ruler or coin for scale, mark the ends of drywall cracks with a pencil and date, and recheck through a full year. A gap that opens in January and closes by July is behaving like wood. A crack that keeps growing past its pencil marks, or a door that keeps getting worse, is a reason to bring in a qualified inspector or structural engineer.
Sticking Doors and How the Casing Relates
A sticking door is usually a jamb and hinge issue rather than a casing issue, but the casing often shows the same story. Common causes include:
- Loose hinge screws. The top hinge carries the most load. When its screws loosen or strip, the door sags and rubs at the top latch-side corner. Longer screws driven into the framing behind the jamb are a common fix.
- Swelling. An unpainted top or bottom edge lets the door absorb moisture and swell.
- Paint buildup. Multiple coats on the door edge and stop can make a door bind.
- Framing or structural movement. If the rough opening has racked, the jamb goes out of square and the door rubs in a way that hinge tightening does not fix. The casing miters often open at the same time.
Latching problems follow similar logic: if the door has shifted, the latch no longer lines up with the strike. Our guide to a door that won’t latch walks through strike and hinge adjustments, and our guide to door frame repair covers split jambs, loose frames and rot at exterior doors. When a door and frame are beyond repair, our guide to interior door replacement cost covers prehung door pricing, which typically includes new jambs and often new casing.
Repairing Door Casing
Most casing repairs are straightforward finish carpentry. The right fix depends on whether the problem is cosmetic, a loose piece of trim or damaged wood.
Caulk for casing-to-wall gaps
Gaps between the outer edge of the casing and the wall are normally filled with a paintable acrylic latex or siliconized acrylic caulk. A small, smooth bead, tooled with a damp finger or tool and painted, hides uneven drywall and minor movement. Caulk stays slightly flexible, so it handles seasonal movement better than rigid fillers. Very wide gaps may need a backer or a correction to the trim or wall rather than a thick bead of caulk.
Filler for nail holes, dents and miters
Nail holes, dents and small chips in painted casing are usually filled with a wood filler or spackling compound, sanded and painted. A mitered corner that has opened slightly can be closed by driving a small brad or pin nail through the miter from the top edge, gluing it if possible, then filling and painting. Stained casing usually calls for a color-matched filler or putty instead. Our wood filler guide compares fillers for paint-grade and stain-grade trim. Filling a miter that is opening because of ongoing structural movement will only work until it moves again, so it makes sense to understand the cause first.
Re-nailing and replacing casing
Loose casing can be re-nailed into the jamb edge and the wall framing with finish nails, keeping nails away from the joint so the wood does not split. Damaged sections, such as casing chewed by pets, split by doorstops or swollen from a leak, are often easier to replace than repair. Matching an old profile may require a millwork shop or replacing the casing on that whole doorway. Exterior casing, often called brick mold on many homes, also has to shed water; rot at the bottom of exterior casing and jambs is common where paint and caulk have failed.
Casing after flooring, drywall or door work
Casing often gets disturbed during other projects. New flooring may require undercutting the casing and jamb so planks or tile slide underneath, which looks cleaner than cutting the floor around the trim. Thicker new drywall, or a wall skimmed during a remodel, can leave the casing sitting below the wall surface, which leads to a visible gap or a casing that rocks; jamb extensions or reset trim usually solve that. When a prehung door replaces an old slab, the old casing is typically removed and either reused or replaced, and a careful installer sets the new jamb plumb and square before the casing goes back on. Trim that is nailed tight against an out-of-square jamb will show it at the miters. If a recent renovation is followed by casing that will not stay closed, it is reasonable to ask the installer whether the jamb was shimmed and fastened correctly before assuming a structural problem.
When to call a professional
Caulking and filling are within reach of most homeowners. A finish carpenter makes sense for profile matching and stain-grade work. Growing cracks, multiple sticking doors and sloping floors call for an inspector or structural engineer rather than a trim repair.
Lead Paint on Older Door Trim
Door casing in older homes deserves extra caution because of lead-based paint. EPA states that the federal government banned the sale of lead-based paint for use in homes in 1978 and that approximately three-quarters of the homes in the United States built before 1978 still contain some lead-based paint. EPA specifically notes that old or worn lead-based paint, especially on surfaces subject to constant friction like doors or window sills, can produce chips and dust that become a hazard when inhaled or ingested. Doors that rub against their stops and casing are exactly that kind of friction surface.
Scraping, sanding, cutting or removing painted trim in a pre-1978 home can release lead dust. EPA’s Renovation, Repair and Painting (RRP) Rule requires that anyone paid to perform work that disturbs painted surfaces in homes built before 1978 be certified and that their workers be trained in lead-safe work practices. According to EPA, the rule generally does not apply to homeowners working in their own homes, but it does apply to landlords renting all or part of a home, home child care operators and people who buy, renovate and sell homes for profit.
For do-it-yourselfers, EPA recommends hiring a certified lead inspector or risk assessor to determine whether the surfaces being renovated have lead-based paint, and lists lead-safe practices such as containing the work area, misting surfaces before sanding or scraping, using a HEPA vacuum and cleaning thoroughly. EPA’s DIY guidance specifically mentions removing trim as an activity that creates dust that may contain lead. The main concern, EPA notes, is young children who crawl and put hands and objects in their mouths.
What Home Inspectors Notice
The American Society of Home Inspectors Standard of Practice includes walls, ceilings and floors and a representative number of doors and windows among the interior items an inspector shall inspect. On a typical inspection, that means opening and closing doors, noting doors that bind, do not latch or have damaged hardware, and observing cracks, gaps and stains around openings. Inspectors look for patterns: one open miter is a note, while a cluster of sticking doors, diagonal cracks and sloped floors on one side of the house may lead to a recommendation for further evaluation.
A standard home inspection is visual and does not include lead paint testing. Buyers of pre-1978 homes who plan to repaint or replace trim can arrange a separate lead inspection or risk assessment. For more on how inspectors evaluate framing, foundations and exterior trim, see our section on structure and exterior inspections, and our main guide to hiring a home inspector covers how to choose an inspector and read the report.
Door Casing Repair Costs in 2026
Prices vary with the trim profile, paint or stain finish, number of doorways and local labor rates. As rough 2026 guidance:
- Caulking and filling gaps and nail holes: a low-cost DIY job or a short handyman visit, often bundled with other small tasks.
- Re-nailing and closing open miters: typically a modest handyman charge per doorway, plus touch-up paint.
- Replacing interior casing on one doorway: commonly in the low hundreds of dollars installed and painted for stock profiles, more for custom or stain-grade trim.
- Exterior casing or brick mold replacement with rot repair: usually more, depending on how far rot extends into the jamb and sill.
- Lead-safe work in pre-1978 homes: RRP-certified contractors may charge more for containment, cleanup and documentation.
- Structural evaluation: if cracks and sticking doors point to movement, an engineer’s assessment is a separate fee, and any foundation repair is priced on its own.
Ask for written quotes that state the trim profile and material, whether painting is included and, for older homes, whether the contractor is lead-safe certified.
Keeping Casing Tight and Doors Working
Most of the upkeep is simple. Keep hinge screws tight, especially on the top hinge. Paint all six sides of a new door, including the top and bottom edges, so it absorbs less moisture. Recaulk the casing-to-wall joint when it cracks rather than letting gaps widen with dirt. Use doorstops so handles do not punch through walls or split casing. Running a humidifier in a very dry Colorado winter can reduce seasonal gapping in wood trim, though it is worth keeping indoor humidity moderate to avoid condensation on cold windows. When repainting older trim, check the home’s age and plan for lead-safe practices before sanding.
More Questions About Door Casing
What size door casing is standard?
Standard interior door casing in many US homes is about 2 1/4 to 2 1/2 inches wide, with wider profiles of 3 1/2 inches or more common in older homes and craftsman-style trim.
Casing thickness typically ranges from about 1/2 to 3/4 inch. Choosing a width usually comes down to matching existing trim, the ceiling height and the overall style of the house. Wider casing looks proportionate with tall ceilings and larger doors, while narrow casing suits compact rooms. When replacing a single door’s trim, matching the existing profile keeps the rooms consistent.
Can you replace door casing without removing the door?
Yes, door casing can usually be replaced without removing the door, since casing is trim nailed to the jamb edge and the wall framing, not part of the door hanging hardware.
Score the caulk and paint lines with a utility knife, pry the old casing off gently with a flat bar against a scrap block to protect the wall, and pull or cut the nails. New casing is then fitted with a reveal of about 1/8 to 3/16 inch on the jamb edge, mitered at the corners, nailed, filled, caulked and painted. Hinges and strike plates stay in place.
Should door casing be caulked to the wall?
Yes, door casing is usually caulked where it meets the wall with a paintable latex or acrylic caulk to close small gaps and give a clean painted line.
Caulk works for narrow gaps up to roughly 1/4 inch. Larger gaps may need a backer, shimming or re-nailing the casing tighter before caulking. Joints between the casing and the jamb are often left uncaulked on stained trim but caulked on painted trim. Caulk that cracks repeatedly at the same spot can indicate seasonal movement or settling worth watching, especially if the crack widens over time.
How do you match old door casing in an older home?
Matching old door casing usually means finding a stock profile that is close, ordering a custom-milled profile, or reusing salvaged trim from elsewhere in the house.
Measure the width and thickness, and trace the profile with a contour gauge or by cutting a small sample. Lumber yards and millwork shops can often match historic profiles, and architectural salvage stores sell reclaimed casing. In older homes, painted trim may contain lead paint, so avoid dry sanding or heat-stripping it without lead-safe practices. Hidden areas, like a closet, can donate original casing for a more visible doorway.
References
- Lead Renovation, Repair and Painting Program — U.S. Environmental Protection Agency
- Lead-Safe Renovations for DIYers — U.S. Environmental Protection Agency
- Reduce the Risk of Lead Exposure at Home — U.S. Environmental Protection Agency
- ASHI Standard of Practice for Home Inspections — American Society of Home Inspectors
Frequently asked questions
What is the difference between door casing and a door jamb?
The jamb is the frame the door hangs in, with the hinges and strike attached to it. The casing is the trim nailed around the opening on the wall surface, covering the joint between the jamb and the drywall. The stop is the thin strip on the jamb that the door closes against.
Are gaps in door casing a sign of foundation problems?
Usually not. Small miter gaps that open in winter and close in summer are typical wood movement. Wide or growing gaps combined with diagonal wall cracks, sticking doors and sloping floors can be consistent with settlement and are worth having evaluated.
How do you fix a gap between door casing and the wall?
Small gaps are normally filled with a paintable acrylic or siliconized acrylic caulk, tooled smooth and painted. Very wide gaps may need the trim reset or the wall surface corrected rather than a thick bead of caulk.
Is it safe to sand old door trim?
In homes built before 1978, trim may have lead-based paint, and sanding or scraping can create lead dust. EPA recommends testing first and using lead-safe work practices, and contractors paid to do the work must generally be RRP certified.
How much does it cost to replace door casing?
Replacing stock interior casing on one doorway commonly runs in the low hundreds of dollars installed and painted, with custom profiles, stain-grade trim, exterior rot repair and lead-safe work costing more. These are general 2026 ranges.
What is the best material for door casing?
Pine and MDF are the most common door casing materials. MDF is inexpensive, stable and paints smoothly but swells if it gets wet. Finger-jointed or solid pine handles moisture better and takes stain. Hardwoods such as oak suit stained trim, and PVC casing works for damp areas.
Is door casing the same as door trim?
Door casing is a type of door trim: specifically the molding that frames the doorway and covers the gap between the jamb and the wall. Door trim can also refer more broadly to related pieces, such as doorstop molding, plinth blocks, rosettes, and head casing caps.
Does exterior door casing need to be sealed?
Exterior door casing needs to be primed, painted and caulked to keep water out, and it should be flashed at the top with a drip cap. Unsealed exterior casing tends to rot at the bottom ends and miter joints, which can let water reach the wall framing.
Seeing open miters, cracks above doorways or doors that suddenly stick in a home you’re considering? Let us know and we will connect you with a Front Range inspector who looks at the whole pattern, not just the trim.