Cedar Shake Siding: Maintenance, Rot and Wildfire Concerns
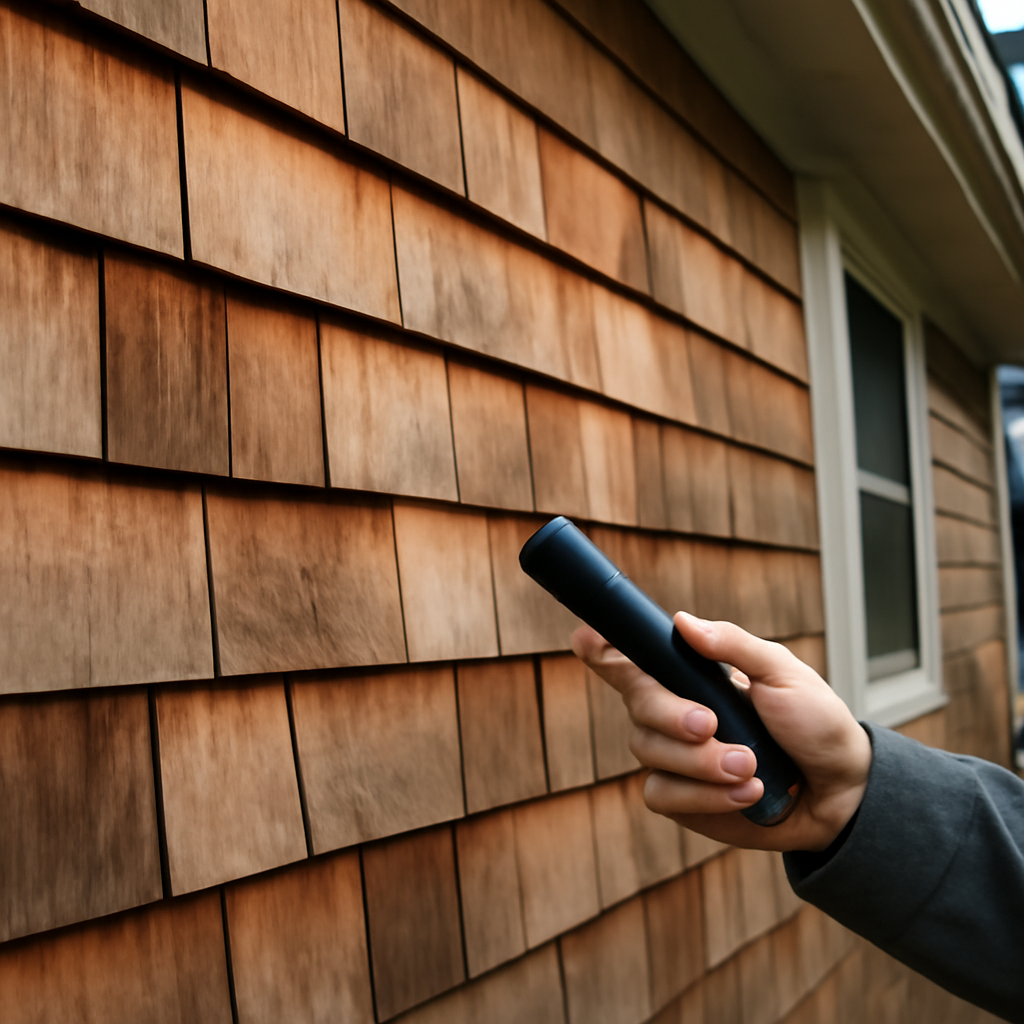
Cedar shake siding gives a house texture that few manufactured products fully match. On the Front Range it turns up on mountain-style homes in Evergreen and Conifer, on 1970s and 1980s contemporaries across Boulder and Jefferson counties, and as accent gables on newer suburban builds. It is also a natural material that changes over time, needs regular finish maintenance and burns. Buyers often love the look and underestimate the upkeep, while owners in foothills neighborhoods increasingly ask whether wood walls are a liability in wildfire season. This guide covers how cedar shakes differ from shingles, how they weather, the rot, woodpecker and insect problems inspectors commonly see, fire risk and treatment options, lead paint concerns on older painted shakes, and what installation and upkeep generally cost. Prices are broad 2026 estimates rather than quotes.
Part of our Structure & Exterior guide — start there for the full picture →
Siding damaged or due for replacement? Talk to a local siding pro.
📞 Call (866) 419-8279What Cedar Shake Siding Is
Cedar shake siding is a wall cladding made of individual pieces of cedar, usually western red cedar, installed in overlapping courses much like a roof. Each piece covers the joint between the two below it, so water running down the wall is shed outward.
The terms “shakes” and “shingles” are often used interchangeably, but they describe different products:
- Shakes are traditionally split from the log, at least on one face, which gives them a rough, irregular surface and a thicker, more rustic profile. Many modern shakes are split on one face and sawn on the back.
- Shingles are sawn on both faces, thinner and more uniform, and produce a cleaner, tighter look.
- Panelized products mount individual shingles on a backer board in long strips, which speeds installation and keeps courses straight.
- Fancy-cut or decorative shingles such as fish-scale or diamond patterns are common on gables and older homes.
Cedar is valued for its natural decay resistance, which comes from extractives in the heartwood, along with its light weight and dimensional stability. That resistance is real but not absolute. Sapwood has less of it, extractives leach over time, and any wood that stays wet long enough will eventually decay.
How Cedar Weathers and How to Finish It
Left untreated, cedar exposed to sun and weather gradually turns silver-gray as UV breaks down the surface fibers and rain washes away the extractives. Some owners want that look. On the Front Range, intense high-altitude UV and dry air speed the process, and south- and west-facing walls often weather noticeably faster than shaded ones, so an untreated house can end up blotchy rather than evenly gray.
Common finish approaches include:
- Natural weathering with no coating. Lowest upfront cost, but surfaces can erode and check faster, and mildew can darken shaded areas.
- Penetrating oil or semi-transparent stain. Preserves grain while adding pigment for UV protection. Recoating is commonly needed every few years, more often on sunny walls.
- Solid-color stain. Hides grain and lasts longer between coats, but can peel if moisture gets behind it.
- Paint. Common on older homes. Offers the most UV protection but requires scraping and repainting when it fails, which raises lead-paint questions on pre-1978 houses.
- Clear water repellents. Reduce water uptake but usually provide little UV protection and wear off quickly.
Fastener choice matters as well. Cedar’s natural extractives can react with plain steel, causing dark streaks and corrosion. Stainless steel or appropriately coated fasteners are generally recommended by industry groups and manufacturers. Black stains running down from nail heads on an older wall can be a clue that the original fasteners were not compatible.
Cleaning should be gentle. High-pressure washing can raise fibers and gouge the soft surface, so manufacturers and finishing suppliers generally recommend low pressure, soft brushes and appropriate cleaners.
Rot, Woodpeckers and Insects
Rot and moisture damage
Decay on cedar walls usually starts where water lingers. Inspectors pay particular attention to the lowest courses near soil, mulch and snowbanks; areas below leaking gutters or missing downspouts; joints where walls meet lower roofs or decks; and shaded north walls where shakes never fully dry. Cupping, curling, splitting and moss or mildew are often early signs. Soft or crumbling wood indicates active decay. The wood rot repair guide covers assessment and repair, and the siding repair guide explains how damaged pieces are replaced and woven into existing courses.
What sits behind the shakes matters too. Older homes may have little or no weather barrier, while newer installations use a water-resistive barrier and sometimes a rainscreen mat that allows the back of each shake to dry. The house wrap guide explains why that layer is important.
Woodpeckers
Woodpeckers, particularly northern flickers, are a well-known nuisance on cedar-sided homes along the Colorado foothills and plains. Birds may drum on siding to communicate, search for insects, or excavate nesting or roosting cavities, and the damage can range from a few holes to large openings that let water and other animals in. Holes concentrated in one spot can suggest insect activity behind the siding. Woodpeckers are generally protected under federal migratory bird law, so deterrence focuses on non-lethal methods and prompt repair of damage. A pattern of holes is worth noting in an inspection report because it may indicate ongoing activity.
Insects
Carpenter bees, carpenter ants and wasps can all use cedar walls. Carpenter bees drill neat round holes, often on the underside of trim. Carpenter ants usually follow moisture-damaged wood. Subterranean termites are present in parts of Colorado but are generally less common along the Front Range than in warmer, wetter regions; any mud tubes running up a foundation onto the siding warrant attention from a pest professional.
Wildfire Risk in WUI Areas
Cedar is combustible, and cedar walls and roofs are a legitimate concern in the wildland-urban interface. The foothills from Boulder to Colorado Springs, and grassland edges such as those involved in the December 2021 Marshall Fire, put many Front Range homes within reach of wind-driven fire.
The U.S. Fire Administration’s article on protecting structures from wildfire embers explains that wildfires spread through ember deposition, radiant heat, direct flame contact and convection, and that embers contribute to a significant percentage of home ignitions. It notes that embers can be carried by wind several miles downwind and that they can smolder in flammable materials for hours before flames appear. It also describes evidence of the ember shower generated during the Marshall Fire in Superior, Colorado. For a cedar-sided house, that means the gaps, cracks, crevices and debris pockets in and around the siding are potential ignition points.
The NFPA’s Preparing Homes for Wildfire guidance describes the home ignition zone, starting with the home and the area 0 to 5 feet from it, which it calls the immediate zone and treats as the most vulnerable to embers. Its recommendations include cleaning roofs and gutters of debris, installing 1/8-inch metal mesh over vents and moving flammable materials such as mulch, plants, leaves, needles and firewood away from exterior walls. On a cedar-sided home those steps take on extra weight: needles lodged behind shakes or mulch piled against the bottom course can give embers a place to start.
Fire-retardant treatments
Fire-retardant-treated cedar shakes and shingles are available. Pressure-impregnated products are treated at the factory and tested for fire performance; some are marketed for use in wildfire-prone areas. Field-applied coatings sprayed or brushed onto existing siding also exist, but their performance, durability and testing vary widely, and some may lose effectiveness as they weather. Owners should look for documented test results for the specific product and ask how long the protection is expected to last outdoors. Local building departments in WUI-designated areas may have their own requirements for exterior wall materials on new construction or major remodels, so checking with the county or city before re-siding is worthwhile.
Some owners in high-risk areas choose to replace cedar with noncombustible materials such as fiber cement; the Hardie board siding guide discusses that option, and the engineered wood siding guide covers a lower-maintenance wood-based alternative that is still combustible. Pairing wall upgrades with a noncombustible roof, such as a standing seam metal roof, and with landscape work described in the defensible space guide addresses more of the ignition pathways than any single change.
Lead Paint on Older Painted Shakes
Many older Front Range homes have painted cedar shakes, and paint applied before 1978 may contain lead. The EPA’s Renovation, Repair and Painting Program page notes that the federal government banned lead-based paint for residential use in 1978 and that approximately three-quarters of U.S. homes built before 1978 still contain some lead-based paint. It explains that deteriorating paint can create chips and dust hazards, and that renovation, repair or painting in a pre-1978 home with lead-based paint can easily create dangerous lead dust.
The RRP Rule requires that anyone paid to perform work that disturbs painted surfaces in pre-1978 homes be certified and trained in lead-safe work practices. In general the rule does not apply to homeowners working on their own homes, though EPA notes exceptions for landlords, home childcare operators and those who buy, renovate and sell homes for profit. For do-it-yourselfers, EPA’s lead-safe renovations for DIYers page describes setting up work areas with heavy plastic sheeting, misting surfaces before sanding or scraping to keep dust down, using a HEPA vacuum and, if heat is used to remove paint, a low-temperature heat gun under 1,100 degrees Fahrenheit.
On a cedar exterior, scraping and sanding before repainting are exactly the activities that generate lead dust and chips, which can settle into soil around the foundation where children play. Testing the paint before prep work, or hiring a lead-safe certified painter, is the safer route when the house predates 1978.
What Inspectors Look For on Cedar Shake Walls
A home inspector evaluates siding visually from accessible areas. The ASHI Standard of Practice directs inspectors to inspect wall coverings, flashing and trim, along with vegetation, grading and surface drainage likely to affect the building adversely, and to describe the wall coverings. Common observations on cedar include:
- Split, cupped, curled, loose or missing shakes.
- Soft or decayed wood at bottom courses, corners and below windows.
- Inadequate clearance to soil, mulch, decks or lower roofs.
- Missing or failing flashing at windows, doors and roof-to-wall intersections.
- Woodpecker holes and insect activity.
- Peeling paint or worn stain, especially on sunny elevations.
- Corroded fasteners and dark staining.
- Vegetation, firewood or debris against the wall, which raises both moisture and fire concerns.
An inspector does not test paint for lead as part of a standard inspection and does not remove siding to look behind it. Where decay is extensive, a recommendation for evaluation by a siding contractor is typical. Buyers in foothills communities may also want to ask their insurer how cedar siding affects coverage and premiums. The hiring process guide explains inspection scope, and the structure and exterior hub collects related guides.
Installation Details That Affect Longevity
Two cedar walls built from the same grade of shakes can age very differently depending on how they were installed. When reviewing a home or a contractor’s proposal, several details are worth checking.
- Exposure and coursing. Each course should overlap the ones below enough that every joint is covered by at least one shake above it. Excessive exposure, often done to save material, leaves thinner coverage and more places for water to reach the wall.
- Joint offsets. Side joints in one course should be offset from joints in the course below so water cannot run straight down a continuous seam.
- Spacing between pieces. Small gaps between individual shakes allow for swelling when wet. Pieces installed tight can buckle; gaps that are too wide expose the layer behind.
- Fastener placement. Nails or staples should be concealed by the course above and driven flush, not crushed into the wood.
- Starter course. The bottom course is typically doubled so the first visible row has a backing layer behind its joints.
- Drying space. A drainage mat or furring behind the shakes helps the back surfaces dry, which can extend finish life and reduce cupping.
Flashing at windows, doors, decks and roof-to-wall lines is just as important on cedar as on any other cladding. Kick-out flashing at the bottom of a roof edge that dies into a wall keeps concentrated runoff from soaking the shakes and the framing behind them.
Cedar Compared With Other Siding Choices
Cedar shakes are rarely the cheapest or lowest-maintenance option, so they are usually chosen for appearance. Fiber cement shingle panels imitate the look while being noncombustible and less attractive to woodpeckers, though they lack the depth and variation of real wood. Engineered wood shake panels cost less and need less frequent refinishing but are still combustible. Vinyl and polymer shake products avoid painting entirely but can look less convincing up close and may crack in cold-weather hail. For a historic or architecturally distinctive home, original cedar is often worth preserving with careful maintenance rather than replacing.
Cedar Shake Siding Costs
Cedar shake siding generally sits toward the upper end of residential siding prices. As a broad 2026 estimate, installed cost for new cedar shakes is commonly well above vinyl and often comparable to or higher than fiber cement, with grade, profile, panelized vs individual installation, trim complexity, number of stories and tear-off all affecting the total. Fire-retardant-treated products typically carry a premium over untreated cedar.
Ongoing costs matter as much as the upfront price:
- Refinishing. Staining or painting every several years, depending on product and exposure, is a recurring expense. Pre-1978 homes may add the cost of lead-safe prep.
- Spot repairs. Replacing individual shakes damaged by rot, woodpeckers or impact is usually inexpensive per piece, though matching weathered color can take time.
- Pest deterrence and repairs where woodpeckers are persistent.
- Wildfire mitigation work in WUI neighborhoods, such as clearing the immediate zone and screening vents.
The siding replacement cost guide compares installed prices across materials for owners deciding whether to restore cedar or switch.
More Questions About Cedar Shake Siding
Is cedar shake siding worth the cost?
Cedar shake siding can be worth the cost for homeowners who value its natural appearance, insulation value and character, and who are prepared to maintain it. It typically costs more than vinyl or fiber cement and requires periodic staining, sealing, and repairs.
Well-maintained cedar can last decades, while neglected cedar can rot, warp or split far sooner. In wildfire-prone areas, untreated wood siding adds risk, and some insurers or local codes may restrict it. Homeowners who prefer low maintenance often choose fiber cement or engineered shakes that imitate the look.
How do you clean cedar shake siding?
Cedar shake siding is typically cleaned with a soft brush and a mild wood cleaner or oxygen bleach solution, rinsed gently with a garden hose. Low-pressure washing on a wide fan tip can be used carefully, but high pressure can gouge wood fibers and force water behind shakes.
Cleaning removes dirt, mildew and graying before restaining. Chlorine bleach can damage wood fibers and nearby plants, so oxygen-based cleaners are usually preferred. Shakes should dry completely, often for a couple of days, before stain or sealer is applied. Cleaning also reveals damaged shakes needing replacement.
Can cedar shake siding be painted?
Yes, cedar shake siding can be painted, but many homeowners prefer semi-transparent or solid stains that let the wood breathe and show texture. Paint forms a film that can trap moisture and peel if the wood is not properly prepared and primed.
Cedar contains natural tannins that can bleed through paint, so a stain-blocking primer is important. Once painted, cedar needs repainting every several years, and returning to a natural finish later is difficult. Older painted shakes may contain lead paint, which requires lead-safe practices before scraping or sanding.
Does cedar shake siding attract termites?
Cedar’s natural oils give it some resistance to insects, but cedar shake siding is not termite-proof. Termites and carpenter ants are drawn mainly to wood that is damp, decayed or in contact with soil.
Keeping the lowest course of shakes several inches above soil and mulch, maintaining gutters and flashing, and replacing rotted shakes reduce risk. Woodpeckers sometimes target cedar when insects are present inside. Annual inspection of the siding near the foundation and around decks helps catch insect damage early.
References
- Protecting Structures From Wildfire Embers and Fire Exposures — U.S. Fire Administration
- Preparing Homes for Wildfire — National Fire Protection Association
- Lead Renovation, Repair and Painting Program — U.S. Environmental Protection Agency
- Lead-Safe Renovations for DIYers — U.S. Environmental Protection Agency
- ASHI Standard of Practice for Home Inspections — American Society of Home Inspectors
Frequently asked questions
How long does cedar shake siding last?
Well-maintained cedar shake siding can last for decades, but lifespan depends heavily on finish maintenance, clearances, drainage and exposure. Shaded, wet walls and bottom courses near soil tend to fail first.
Is cedar shake siding a fire risk?
Cedar is combustible, and untreated shakes can be ignited by embers lodged in gaps or by burning debris against the wall. Fire-retardant-treated products are available, and clearing flammable material from the area within 5 feet of the house is widely recommended.
How often should cedar shakes be stained?
Semi-transparent stains commonly need recoating every few years, while solid stains and paint may last longer. Sunny south and west walls on the Front Range often need attention sooner than shaded walls.
How do you stop woodpeckers from damaging cedar siding?
Repair holes promptly, check for insect activity behind the siding and use non-lethal deterrents such as visual scare devices or netting. Woodpeckers are generally federally protected, so harming them is not an option.
Can older painted cedar shakes contain lead?
Yes. Paint applied before 1978 may contain lead, and scraping or sanding it can create hazardous dust and chips. Testing the paint or hiring an EPA lead-safe certified contractor is recommended before prep work.
What is the difference between cedar shakes and cedar shingles?
Cedar shakes are typically split from the log and thicker with a rougher, rustic texture, while cedar shingles are sawn on both sides for a smoother, uniform look. Shakes generally cost more and look more irregular. Both are used for siding and need similar maintenance.
How much does cedar shake siding cost to replace?
Cedar shake siding replacement costs vary widely by region, home size and product grade, but industry estimates typically place it among the more expensive siding options, often well above vinyl and comparable to or above fiber cement. Removal of old siding, trim work and lead-safe practices add to the total.
Can damaged cedar shakes be replaced individually?
Damaged cedar shakes can usually be replaced individually by splitting out the broken shake, cutting hidden nails with a hacksaw blade or shingle ripper, and sliding a new shake into place. New shakes look lighter at first and blend in as they weather or receive matching stain.
Thinking about a foothills home with cedar walls and want a clear picture of their condition? Contact us to be connected with a Front Range inspector who checks siding, flashing and the ground around the house.