Through-the-Wall Air Conditioners: Sleeves, Circuits, Sealing
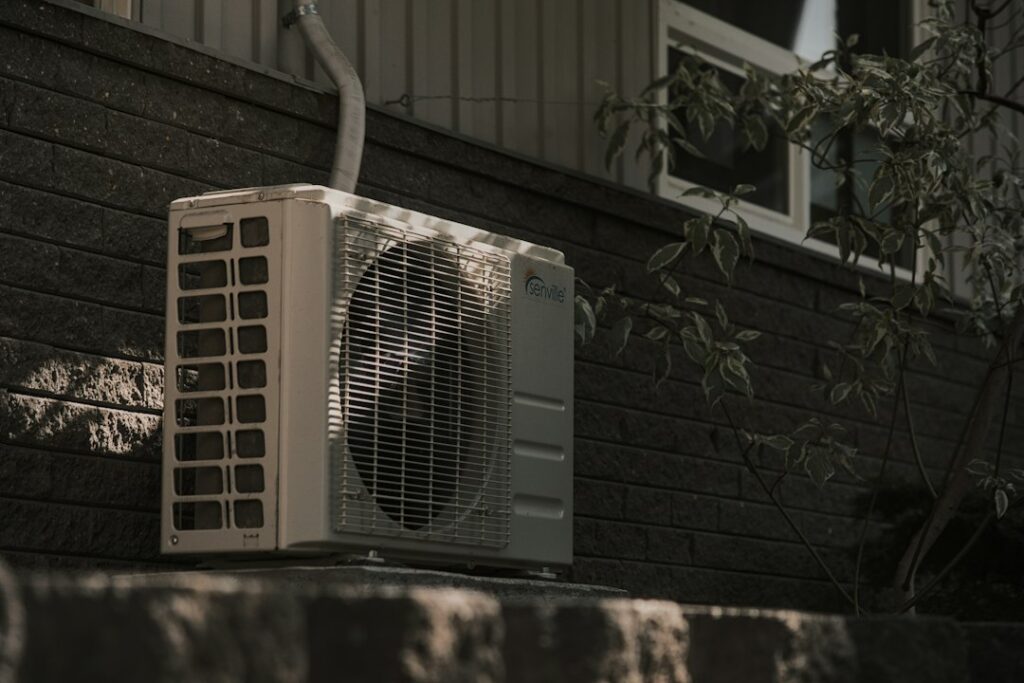
Plenty of Front Range homes without central air rely on a box set into an exterior wall: a through-the-wall air conditioner. These units are common in older bungalows, finished basements, additions, condos and apartments converted from older buildings. A wall ac unit looks a lot like a window unit, and the two share much of the same internal design, but the way it is mounted, powered and sealed into the building is different. Those differences matter when a unit needs replacing, when energy bills climb in winter or when a home inspector writes it up. This guide covers how through-the-wall units work, what to know about sleeves and circuits, how to seal and drain them properly, what inspectors look for and how they compare with ductless mini-splits and portable units.
Part of our Heating, Cooling & Ventilation guide — start there for the full picture →
How a Through-the-Wall Unit Differs From a Window Unit
A through-the-wall air conditioner sits in a permanent opening framed into an exterior wall. The opening is lined with a metal sleeve, a rectangular steel or aluminum box that is fastened into the wall and sealed to the building. The air conditioner chassis slides into the sleeve from inside the room. The back of the unit, where the condenser coil and fan reject heat, faces outdoors, usually behind a rear grille that is part of the sleeve.
A window unit, by contrast, rests in a window opening and is held in place by the sash, side panels and often a support bracket. It can be removed at the end of the season, and the window returns to normal use. Our guides to window AC unit installation and choosing a window air conditioner bracket cover that side of the comparison in detail.
The practical differences come down to a few points:
- Permanence. A wall sleeve is part of the building. Removing the system entirely means framing in and patching a hole in the wall.
- Window access. A wall unit leaves windows free for light, egress and ventilation.
- Seal quality. A properly installed sleeve can be sealed more completely than a window unit’s accordion side panels.
- Venting design. Many true through-the-wall chassis vent only from the back, because the sides of the unit are enclosed by the sleeve. Many window units draw air through side louvers.
Why Side Vents Matter
That last point catches many owners off guard. A window unit with side louvers needs open air around its sides to cool its condenser. Slide one into a wall sleeve, and those louvers are blocked by the sleeve walls. The unit may run hot, cycle off, lose capacity or wear out early. Manufacturers generally specify whether a model is approved for through-the-wall use, and many explicitly say not to install a side-venting window unit in a wall sleeve. Some models are sold as dual-purpose units with rear-only venting; the installation instructions are the place to confirm which type a specific model is.
Sleeve Sizing and Replacement Compatibility
When an existing wall unit dies, the simplest replacement is a new chassis that fits the existing sleeve. That sounds easy, but sleeves are not fully standardized across the industry. Width, height and depth vary between manufacturers and between product lines from the same manufacturer, and rear grille designs differ too.
A replacement that fits the sleeve opening may still be wrong if its depth does not let the rear coil sit correctly at the outer grille, or if its airflow pattern does not line up with the existing grille louvers. Mismatched grilles can cause the unit to recirculate its own hot exhaust air, cutting efficiency.
Before shopping, owners usually measure the inside of the sleeve opening, note any manufacturer label or model number on the sleeve itself and check whether the rear grille is part of the sleeve or a separate piece. Some manufacturers publish sleeve compatibility charts, and some offer adapter kits for common sleeve sizes. When the old sleeve is rusted, damaged or simply an orphan size, replacing the sleeve along with the unit is often the cleaner option, though it involves more wall work.
Sizing the Cooling Capacity
Fitting the hole is only part of the job. The unit also needs to suit the room. ENERGY STAR cautions that bigger is not always better and notes that an oversized room air conditioner costs more to purchase, wastes energy and does not provide better cooling. Its guidance explains that a unit that is too large will cool the room before it has a chance to remove the humidity, leaving the space damp and clammy. ENERGY STAR publishes a chart that matches room square footage to cooling capacity, calculated for an 8-foot ceiling, along with adjustments for sunny or shaded rooms, extra occupants and kitchen use.
Electrical Requirements: Dedicated Circuits and Voltage
Through-the-wall units span a wide range of capacities, and their electrical needs vary with size. Smaller units often run on standard 115 to 120 volt household current. Larger units, along with many models that include electric heat strips or a heat pump function, commonly require a 208/230 volt circuit. The nameplate and installation instructions list the required voltage, maximum overcurrent protection and receptacle type for each model.
Many manufacturers call for a dedicated circuit, meaning the air conditioner is the only load on that breaker. Running an air conditioner on a circuit shared with other outlets can lead to nuisance tripping and voltage drop. Plug configuration also matters. Higher-voltage units use plugs with blade patterns that only fit matching receptacles, which helps prevent a 230 volt appliance from being plugged into the wrong outlet. Our guides to the 220 outlet and to standard electrical outlets explain the different receptacle types and why they are not interchangeable.
Points worth checking during a replacement include:
- Whether the existing receptacle and breaker match the new unit’s nameplate rating.
- Whether the outlet is within reach of the cord without an extension cord, which manufacturers generally prohibit.
- Whether the cord has a built-in leakage or arc detection device, which many room air conditioners include.
- Whether the circuit is truly dedicated or shared with other loads.
Upgrading from a 115 volt unit to a 230 volt unit usually means a licensed electrician running a new circuit and receptacle, and local permit rules may apply.
Sealing, Insulating and Winter Covers in Colorado
A wall unit is essentially a large, uninsulated hole in the building envelope that happens to have an air conditioner in it. How well the sleeve and the chassis are sealed has a lot to do with comfort and energy use, particularly through a Front Range winter.
ENERGY STAR states that an improperly installed room air conditioner leaks as much air as a 6-square-inch hole, increasing energy costs and making a home less comfortable. Its tips include following the manufacturer’s instructions and using the insulation materials that come with the unit, keeping the unit level so the drainage system works effectively and, at the end of the cooling season, removing the unit if possible or using an appropriately sized cover during winter.
Common Air Leakage Points
- Sleeve to wall. Gaps between the sleeve and the framed opening, both inside and outside. Exterior gaps also let rain into the wall cavity.
- Chassis to sleeve. The space between the unit and the sleeve, usually closed with foam gaskets supplied by the manufacturer.
- Through the unit itself. Cold air can move through the chassis even when it is off, especially through any outside-air damper or fresh-air vent setting.
Weatherstripping foam, low-expansion spray foam and exterior-grade sealant are typical tools for closing these gaps. The same principles that apply to sealing doors carry over to wall units; our guide to weatherstripping doors covers material choices that work well in Colorado’s dry, cold climate.
Winter Covers
Because through-the-wall units are not easy to remove each fall, many owners rely on covers. Insulated interior covers fit over the front grille and cut drafts from inside. Exterior covers wrap the rear of the unit and keep snow, wind and debris out. Exterior covers need to be removed before the unit runs again, and units with a heat pump or heat strip function generally should not be covered while they are being used for heat.
Condensate Drainage and Slope
As an air conditioner cools, it pulls moisture out of the air. That water collects in a base pan inside the chassis. Many room air conditioners use a slinger ring on the condenser fan to throw some of the water onto the hot coil, where it evaporates, and the rest drains out the back through openings in the sleeve.
For that to work, the sleeve and chassis need a slight slope toward the outside. Installation instructions typically specify the slope, and it is usually small. A unit sloped toward the room can drip water onto interior walls, floors and drywall below the sleeve. A unit installed perfectly level, or one whose drain openings are blocked, can hold standing water in the pan.
The EPA’s moisture guidance advises keeping air conditioning drip pans clean and drain lines unobstructed and flowing properly. Standing water in a base pan, combined with dust drawn in through the filter, is a common setup for biological growth inside a unit. Musty smells when the unit starts, visible dark growth on the blower wheel or slime in the pan are signs the unit needs cleaning or replacement. Our article on black mold in an AC unit discusses what to look for and when cleaning may not be enough.
Water staining on the drywall below a wall unit, peeling paint around the interior trim or soft framing at the opening are signs that water has been running the wrong way for a while. Exterior staining or rot on siding below the sleeve can point to the same problem from the outside.
Comparing Wall Units, Mini-Splits and Portables
When a through-the-wall unit fails, owners often consider whether to replace it like for like or move to a different type of system. The table below summarizes the main options for cooling a single room or small area.
| System type | Installation | Typical strengths | Typical drawbacks |
|---|---|---|---|
| Through-the-wall unit | Chassis in a permanent wall sleeve | Keeps windows free; replacement can be quick if the sleeve fits | Sleeve compatibility issues; air leakage in winter |
| Window unit | Rests in a window opening | Low upfront cost; removable | Blocks the window; seal around side panels is often weak |
| Ductless mini-split | Indoor head plus outdoor condenser linked by a line set | Quieter indoors; many models heat and cool | Higher installed cost; requires licensed installation |
| Portable unit | Floor unit with exhaust hose to a window | No permanent installation | Uses floor space; generally less efficient |
Ductless mini-splits are the most common upgrade path. The outdoor unit sits outside, so only a small hole is needed for the line set, and the old sleeve opening can be framed in and insulated. Many mini-splits also provide heat, which can be useful in shoulder seasons. Installed costs are typically much higher than a wall unit replacement; our breakdown of ductless mini-split installation cost covers the factors that drive price, and our guide to mini-split repair covers ongoing service needs.
A portable air conditioner needs no permanent installation but takes up floor space and vents through a hose to a window, which makes it a stopgap more often than a permanent solution.
Hedged Cost Ranges
Costs depend on capacity, voltage, features and how much wall and electrical work is required. As broad planning ranges based on typical retail and trade pricing:
- Like-for-like chassis replacement in a compatible sleeve: often the cost of the unit plus little or no labor, with units commonly ranging from several hundred dollars to over a thousand depending on size and features.
- New sleeve plus unit: adds sleeve hardware and labor to remove the old sleeve, fit the new one and seal and trim the opening.
- New dedicated 230 volt circuit: adds electrician labor and materials, which vary with panel capacity and distance.
- Conversion to a mini-split: generally the highest upfront cost, often several thousand dollars for a single zone, plus patching the old wall opening.
Treat these as rough figures. Front Range labor rates, access and permit requirements can move them considerably.
What Home Inspectors Note About Wall Units
The ASHI Standard of Practice directs inspectors to inspect central and permanently installed cooling equipment. It also states that inspectors are not required to inspect cooling units that are not permanently installed or that are installed in windows. Through-the-wall units fall in a gray area: they sit in a permanent sleeve, but the chassis itself is a plug-in appliance. As a result, practice varies. Some inspectors operate and comment on wall units, while others note them as present and exclude them from the evaluation. Buyers should read the report’s scope section to see how a particular inspector handled them.
Even when the unit itself is excluded, inspectors frequently comment on the conditions around it, including:
- Water staining, peeling paint or damaged drywall below the sleeve.
- Gaps, missing sealant or rot around the sleeve on the exterior.
- Rusted or damaged sleeves and rear grilles.
- Extension cords, mismatched plugs or adapters on the power supply.
- Units sloped toward the interior or showing signs of standing water.
- Musty odors or visible growth at the front grille.
Buyers who want a closer look at the cooling system can learn how inspectors approach it in the heating and cooling section of our hiring guide, and about scoping and choosing an inspector in our overall guide to hiring a home inspector. When a unit is old or the surrounding wall shows damage, a separate evaluation by an HVAC technician before closing can clarify whether repair or replacement makes more sense.
References
- Room Air Conditioners — ENERGY STAR
- ASHI Standard of Practice for Home Inspections — American Society of Home Inspectors
- A Brief Guide to Mold, Moisture and Your Home — U.S. Environmental Protection Agency
Frequently asked questions
Can a window air conditioner be installed in a wall sleeve?
Usually not. Many window units draw air through side louvers that a sleeve would block, causing overheating and lost capacity. Use a model the manufacturer approves for through-the-wall installation.
Do through-the-wall air conditioners need a dedicated circuit?
Many manufacturers call for one, and larger units often require a 208/230 volt circuit with a matching receptacle. Check the nameplate and installation instructions, and have an electrician add a circuit if needed.
Will any new wall unit fit an existing sleeve?
Not always. Sleeve sizes and rear grilles vary by manufacturer. Measure the sleeve, look for a model label on it and check compatibility charts, or replace the sleeve along with the unit.
Why is water dripping inside from my wall AC?
The unit or sleeve may be sloped toward the room, or the drain openings may be blocked. Most units need a slight outward slope so condensate drains outside. Clean the base pan and check the slope.
Do home inspectors test through-the-wall air conditioners?
Practice varies. ASHI standards do not require inspecting cooling units that are not permanently installed or are installed in windows, so some inspectors exclude wall units while still noting water damage or wiring concerns around them.
Buying a Front Range home that relies on wall units for cooling? Send us a note and we can help you find a local inspector who will flag sleeve, wiring and moisture issues before you close.