Sprinkler Head Replacement: Types, Leaks and Overspray
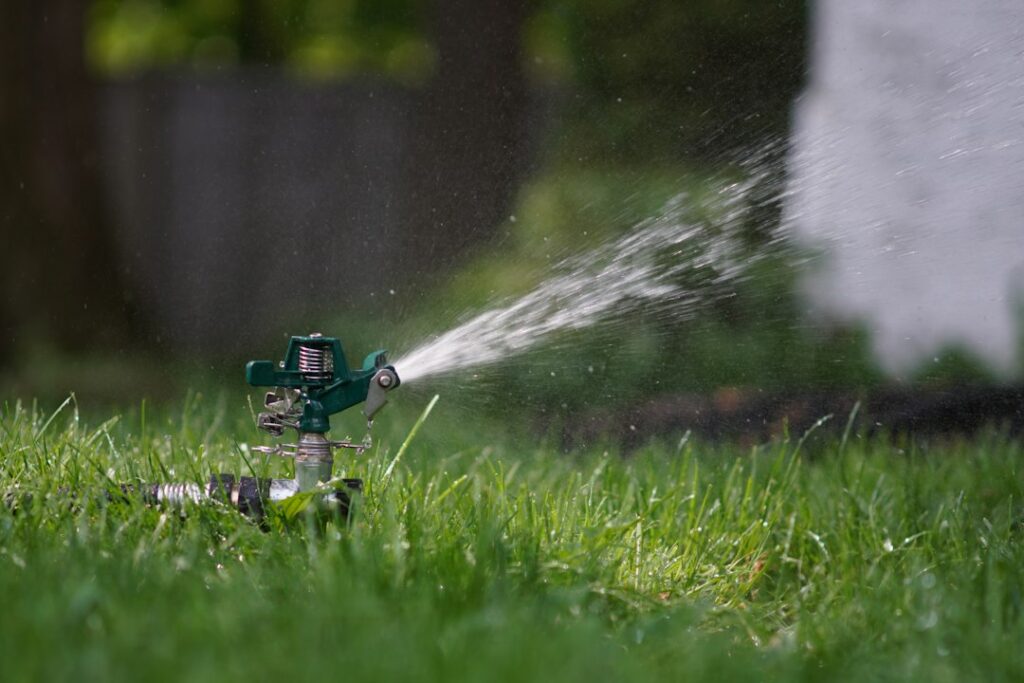
Sprinkler heads take more abuse than any other part of an irrigation system. They sit at ground level where mowers, edgers, snow shovels, car tires and foot traffic find them, and in Colorado they spend half the year in soil that freezes and thaws. When a head breaks, the signs are usually obvious: a geyser, a puddle, a dry patch or a zone with weak spray everywhere except at one bubbling spot. Sprinkler head replacement is one of the most approachable irrigation repairs for homeowners, but choosing the wrong replacement can create new problems, from uneven watering to water sprayed across siding and foundations. This guide explains the main head types, why heads fail, how to match precipitation rates, how to keep water off the house, how to dig safely, and what replacement typically costs.
Part of our Plumbing & Water guide — start there for the full picture →
When Sprinkler Head Replacement Is the Right Fix
Not every misbehaving head needs to be replaced. Some only need cleaning, adjustment or a new nozzle. Replacement makes sense when the body of the head is cracked, the riser is broken, the pop-up stem sticks, the internal seal leaks constantly, or the head is an old model that no longer matches the rest of the zone.
The U.S. Environmental Protection Agency’s WaterSense “Sprinkler Spruce-Up” guidance points out that missing or broken heads can be hard to find because most systems run overnight or early in the morning. It recommends walking through each zone while it runs, looking for heads that do not pop up fully or are tilted, and placing a flag next to any broken head so it can be fixed later. EPA notes that homeowners may be able to fix broken heads themselves, and suggests calling an irrigation professional certified by a WaterSense labeled program when unsure.
Common signs that a head should be replaced rather than adjusted:
- Water gushing from the base of the head or the surrounding soil.
- A cracked or crushed cap or body.
- A pop-up stem that will not retract, or will not rise.
- Constant weeping from the head after the zone shuts off, when the valve has been ruled out.
- A rotor that no longer turns or stalls in one spot after cleaning.
For broader troubleshooting, including valves, wiring and hidden leaks, see our guide to sprinkler system repair.
Spray Heads vs Rotor Heads
Most residential systems use two broad categories of heads, and they are not interchangeable within a zone.
Spray Heads
Spray heads (often called pop-up sprays) throw a fixed fan of water over a short radius, commonly up to roughly 15 feet depending on the nozzle. They apply water quickly, so spray zones generally run for short periods. They come in different pop-up heights, such as 2, 4, 6 and 12 inches, so the nozzle clears the grass or plants around it. Nozzles are available in fixed arcs (quarter, half, full circle), adjustable arcs and specialty patterns for strips along sidewalks and driveways.
Rotor Heads
Rotors throw one or more streams of water that rotate slowly across the arc. They cover larger areas and apply water more slowly than sprays, so rotor zones run longer. Gear-drive rotors are the most common type in residential lawns. Impact rotors, the older “ticking” style, still appear in some systems. Rotary nozzles, sometimes called multi-stream nozzles, are a hybrid: they fit on spray bodies but rotate multiple small streams and apply water more slowly than standard spray nozzles.
Choosing a Replacement
When replacing a single broken head, the simplest rule is to match what was there: same brand if possible, same type, same pop-up height, same nozzle or a nozzle with equivalent radius and flow. Note the inlet thread size and whether the head connects to a rigid riser, a flexible swing pipe or a funny-pipe fitting.
| Feature | Spray head | Rotor head |
|---|---|---|
| Typical radius | Short | Medium to long |
| Application rate | High | Lower |
| Typical run time | Short | Longer |
| Best for | Small lawns, narrow strips, beds | Larger open lawns |
| Mix with the other type on the same zone? | Generally no | |
Matched Precipitation and Head-to-Head Coverage
A sprinkler zone is designed so every part of the lawn receives roughly the same amount of water in the same run time. Two ideas make that work: matched precipitation and head-to-head coverage.
Matched precipitation means that heads on a zone apply water at similar rates per square foot. With many nozzle lines, a quarter-circle nozzle puts out about a quarter of the water of a full-circle nozzle of the same series, so each covers its area at the same depth. Replacing a broken quarter-circle head with a full-circle nozzle, or swapping a spray nozzle for a rotary nozzle on a zone of standard sprays, breaks that balance. One area ends up soggy while another goes brown, and the usual reaction is to run the whole zone longer, which wastes water.
Head-to-head coverage means each head’s spray reaches the next head. EPA’s Sprinkler Spruce-Up guidance describes this as each sprinkler being able to reach the sprinkler head next to it, and it recommends directing sprinklers for uniform coverage to avoid dry spots. A replacement head with a shorter radius leaves a gap; one with a longer radius may overspray onto pavement or the house.
Mixing spray heads and rotors on one zone, or mixing heads from different nozzle series, is one of the most common problems left behind by piecemeal repairs over the years. If an entire zone is inconsistent, it may be more effective to replace all the nozzles on that zone with a matched set than to keep swapping one head at a time.
Common Causes of Broken Heads in Colorado
Mowers, Edgers and Vehicles
Heads that sit slightly high or have sunk unevenly get clipped by mower blades and string trimmers. Heads along driveways and sidewalks are run over by tires, and snowplows and shovels catch them in winter. Setting heads flush with finished grade and using heads with sturdier bodies along edges reduces damage.
Frost and Freeze Damage
Water left in heads and lateral lines can freeze and crack plastic bodies and fittings, and frost heave can tilt heads or push them up out of grade. Blowing out the system each fall reduces freeze damage, but it does not move a head that frost has lifted. Each spring startup is a good time to walk every zone and check heads for cracks, tilt and height.
Sinking and Overgrowth
As turf thickens and thatch builds up, heads gradually end up below the grass line, so the spray is blocked. Ground settling around trenches can have the same effect. Raising a head with a riser extension or replacing it with a taller pop-up often fixes this.
Debris and Wear
Dirt and grass clippings can jam pop-up stems or clog nozzle screens. Wiper seals wear over time and allow water to leak around the stem when the zone starts. Some of these issues are fixed by cleaning, but heads that keep sticking or leaking are good candidates for replacement.
Overspray onto Siding, Windows and Foundations
Heads near the house deserve special attention. Water that sprays against siding, stucco, window frames and foundation walls every day all summer can contribute to peeling paint, stained stucco, rotted trim and wet soil next to the foundation. On the expansive clay soils common along the Front Range, repeated wetting near the house is a concern for foundation movement and basement moisture.
EPA’s Sprinkler Spruce-Up guidance specifically asks homeowners whether they are watering the driveway, house or sidewalk instead of the yard, and recommends turning any sprinklers that spray onto driveways, sidewalks or walls toward the landscape. When replacing heads near the house:
- Use the correct arc. A half-circle or adjustable arc nozzle set to spray away from the wall, not a full circle.
- Choose the right radius. Shorter-radius nozzles or strip nozzles can keep water off the house in narrow areas.
- Consider converting beds to drip. Beds along the foundation often do better with drip than with sprays; see our guide to drip irrigation.
- Check after replacing. Run the zone and watch for wind-blown mist and water hitting the wall.
High pressure makes overspray worse because nozzles produce fine mist that drifts. WaterSense explains that sprinklers are often installed at sites where pressure is higher than recommended for the nozzle, which can cause excessive flow, misting, fogging and uneven coverage. WaterSense labeled spray sprinkler bodies have integral pressure regulation that provides a constant flow at the nozzle. When replacing several spray heads, choosing pressure-regulated bodies is a practical upgrade. Our guide to the water pressure test explains how to check static pressure at a hose bib. If grading near the house already slopes the wrong way, overspray only adds to the problem; our guide to yard drainage covers that side of the issue.
How to Replace a Sprinkler Head
Replacing a standard pop-up spray or rotor head is usually a short job. A general sequence looks like this:
- Turn off the zone and the controller. Make sure the system will not start while the head is open.
- Locate utilities if digging beyond the head. Small excavation right around an existing head is usually shallow, but any wider digging, such as repairing a lateral line or adding a head, calls for locating buried lines first. Contact the 811 service before digging; see our guide to call before you dig for how it works in Colorado.
- Dig carefully around the head. Cut a plug of sod and set it aside, then dig down to the fitting below the head.
- Unscrew the old head. Hold the riser or swing pipe so it does not twist or crack below grade.
- Flush the line. Briefly run the zone with the head removed to flush out dirt, with care to keep debris from falling into the open fitting.
- Install the new head. Use thread tape or sealant only if the manufacturer recommends it. Set the head flush with finished grade.
- Adjust arc and radius. Run the zone and set the pattern to cover the lawn without hitting pavement or the house.
- Backfill and replace the sod. Pack soil firmly around the head so it stays vertical.
If the riser below the head is cracked, it needs to be replaced as well. Broken PVC fittings below grade, leaking swing joints and damage to lateral lines are more involved repairs that may require cutting and gluing pipe.
A Spring Head Check for Front Range Systems
Most Front Range systems are blown out in fall and restarted somewhere between April and May, depending on elevation and the year’s weather. That startup is the best time to find heads that froze, heaved or were damaged by snow removal. A methodical walk-through takes less time than chasing dry spots all summer.
- Open the supply slowly. Opening the main irrigation valve gradually reduces pressure surges that can crack fittings weakened over winter.
- Run each zone manually. Use the controller’s manual mode and watch every head on the zone for at least a minute or two.
- Look for the obvious failures. Geysers, bubbling at the base, heads that do not pop up and heads that pop up but do not spray.
- Check alignment and height. Note tilted heads and heads sitting below the turf or above grade where mowers will hit them.
- Watch the spray pattern. Flag nozzles that hit pavement, siding or windows, and gaps where spray no longer reaches the next head.
- Listen and look after shutoff. Heads that keep draining for a long time after a zone stops can point to a low-head drainage issue or a valve that is not closing fully.
- Write it down. A simple list of zone numbers and head locations makes buying parts and scheduling repairs easier.
WaterSense also recommends inspecting irrigation systems monthly for leaks, broken or clogged heads and other problems, not only at startup. A quick midsummer check catches heads clipped by mowers before a dry patch turns into dead turf. Homeowners who prefer not to do this themselves can ask whether an irrigation contractor is certified by a WaterSense labeled program, which EPA describes as a way to find professionals who can design, install, maintain or audit a system.
Sprinkler Head Replacement Costs
Prices vary by head type, brand, nozzle and whether the repair is DIY or professional. The ranges below are broad and hedged, for planning only.
| Item | Rough range | Notes |
|---|---|---|
| Spray head body (parts only) | Often a few dollars to around $15 | Pressure-regulated and taller pop-ups cost more |
| Spray nozzle (parts only) | Often a few dollars each | Rotary nozzles typically cost more |
| Gear-drive rotor (parts only) | Often around $10 to $30+ | Varies by brand and features |
| Professional head replacement | Often tens of dollars per head, plus a service call | Many contractors have a minimum charge |
| Riser or swing-joint repair | Varies | More digging and parts |
A seasonal startup visit from an irrigation contractor often includes adjusting heads and replacing a few broken ones, which can be cost-effective if several repairs are needed. EPA’s Sprinkler Spruce-Up page notes that leaks and broken sprinklers can waste significant water and money over an irrigation season when they are not found quickly, which is a good argument for checking heads early.
Sprinklers and Home Inspections
For buyers, it helps to know that a standard home inspection does not usually evaluate the irrigation system in depth. The ASHI Standard of Practice lists landscape irrigation systems among the items inspectors are not required to inspect, while it does require inspecting vegetation, grading and surface drainage that are likely to adversely affect the building. In practice, an inspector may note overspray staining on siding, wet soil against the foundation or poor grading, and recommend evaluation by an irrigation contractor.
When a home is listed during the winter, the system may be blown out and impossible to test. Asking the seller for service records, or negotiating a spring startup check, is a common approach. A smart controller is another item worth reviewing; see our guide to the sprinkler timer. For more on how inspections are structured, see our guide to hiring a home inspector and the plumbing and water hub.
References
- Sprinkler Spruce-Up — U.S. Environmental Protection Agency, WaterSense
- Spray Sprinkler Bodies — U.S. Environmental Protection Agency, WaterSense
- Watering Tips — U.S. Environmental Protection Agency, WaterSense
- ASHI Standard of Practice for Home Inspections — American Society of Home Inspectors
Frequently asked questions
Can I replace a sprinkler head myself?
Often, yes. Replacing a pop-up spray or rotor head usually involves turning off the zone, digging around the head, unscrewing it, flushing the line and installing a matching head flush with grade. Cracked risers or broken pipe below the head are more involved repairs.
Can I mix rotor and spray heads on the same zone?
It is generally not recommended. Spray heads apply water much faster than rotors, so a mixed zone tends to overwater some areas and underwater others. Keep each zone to one head type and a matched nozzle series.
Why is my new sprinkler head spraying mist?
Fine mist usually indicates water pressure that is too high for the nozzle. WaterSense notes that high pressure can cause misting, fogging and uneven coverage, and that labeled spray sprinkler bodies with integral pressure regulation help maintain constant flow.
How do I stop sprinklers from spraying my house?
Use the correct arc and radius nozzles, aim heads away from walls, and consider drip for beds along the foundation. EPA recommends turning sprinklers that spray onto driveways, sidewalks or walls back toward the landscape.
How much does sprinkler head replacement cost?
Parts for a spray head are often inexpensive, while rotors cost somewhat more. Professional replacement typically adds labor per head plus a service call or minimum charge. Costs vary by brand, head type and local rates.
Seeing stained siding or soggy soil near the foundation of a home you are considering? Send us a message and we can help you line up an inspector who notes overspray, grading and drainage concerns before closing.