Silicone Caulk: Where It Works, Where It Fails, How to Apply
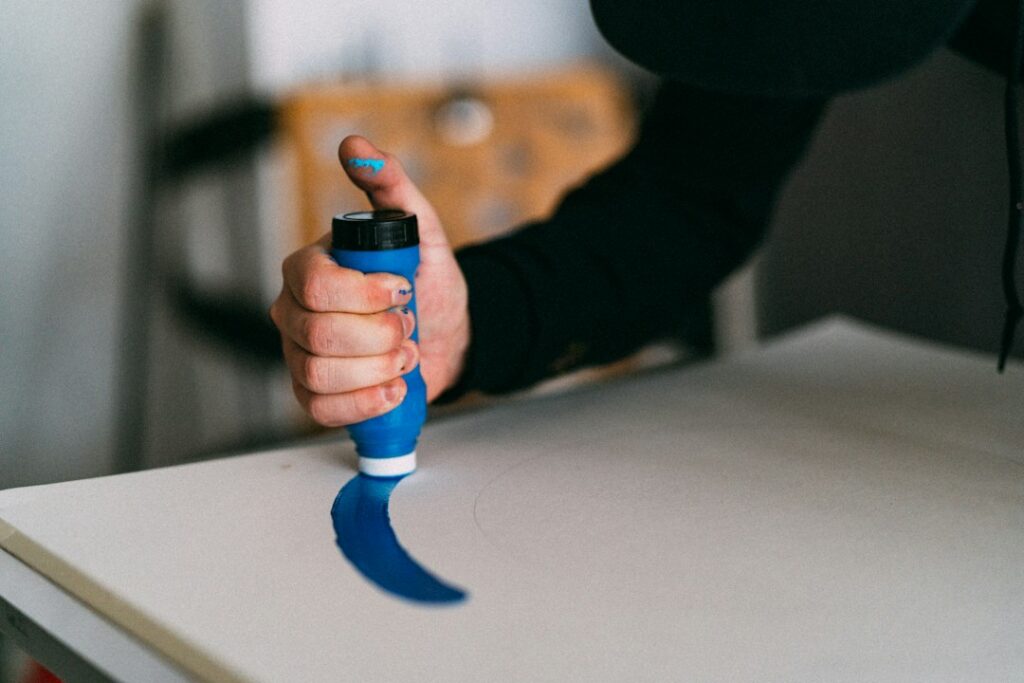
Silicone caulk is the sealant most people reach for around a tub, a shower or a kitchen sink, and for good reason. It stays flexible for years, sheds water, and grips glass, glazed tile and porcelain better than most alternatives. It also has real limits. Paint will not stick to it, it bonds poorly to some porous surfaces, and once it has been applied over the wrong material it is difficult to remove completely. Home inspectors regularly see the results of a bead that was the wrong product, applied over old residue or left to fail: stained grout lines, soft subfloors and mold growing behind a joint that looked fine from a distance. This guide explains how 100% silicone compares with siliconized acrylic and polyurethane, where each belongs, how to prep and cure a joint, and what a failed bead can cost.
Part of our Plumbing & Water guide — start there for the full picture →
What Silicone Caulk Is and When to Use It
Silicone caulk is an elastomeric sealant that cures by reacting with moisture in the air. Once cured, it forms a rubbery, waterproof bead that can stretch and compress as materials expand, contract and shift. That flexibility is the main reason it is the default choice for joints that get wet every day and move a little, such as the seam where a bathtub meets a tile wall.
The short answer for most homeowners: use 100% silicone where water, glass or glazed surfaces are involved and the joint will never be painted. Use a paintable product, usually siliconized acrylic or polyurethane, where the bead will be painted or where it meets raw wood, trim or masonry that silicone does not grip well.
Product labels are the real authority here. Manufacturers state which substrates a formula bonds to, how wide a joint it can fill, the temperature range for application, and how long it takes to become water-ready. Two tubes that both say “silicone” on the front can behave differently, so the fine print on the back matters more than the brand name.
100% Silicone vs Siliconized Acrylic vs Polyurethane
Hardware store shelves carry dozens of sealants, but most residential caulks fall into three families. Knowing which family a product belongs to explains most of its behavior.
100% silicone
Pure silicone sealants offer the best water resistance and long-term flexibility of the common options. They tolerate temperature swings well, resist UV exposure outdoors, and stick strongly to glass, ceramic, porcelain, enameled steel and many metals. The trade-offs are significant: standard silicone cannot be painted, it is harder to tool neatly, cleanup requires a solvent or mineral spirits rather than water, and once cured it leaves a thin film that new caulk and paint will not bond to. Some formulas release a vinegar-like odor while curing, which is normal for that cure chemistry and fades as the bead sets.
Siliconized acrylic (acrylic latex with silicone)
Often labeled “siliconized acrylic” or “acrylic latex plus silicone,” these are water-based caulks with silicone added for better adhesion and flexibility. They clean up with water, tool easily, accept paint, and cost less per tube. They are a reasonable choice for interior trim, baseboards, crown molding and the gap where a backsplash meets a painted wall. They are less durable in standing water and continuous wet exposure than 100% silicone, and they can shrink as they dry, so a deep joint may need a second pass.
Polyurethane
Polyurethane sealants are tough, abrasion-resistant and paintable, and they bond well to concrete, masonry and wood. They are common on exterior joints, driveway and sidewalk cracks, and around siding and trim where a bead needs to be painted to match. They can be stiffer to gun and messier to tool, and many require mineral spirits for cleanup. UV exposure can degrade some formulas unless they are painted.
Quick comparison
- Wet areas (tubs, showers, sinks): 100% silicone, ideally a kitchen-and-bath formula.
- Glass and metal: 100% silicone.
- Painted interior trim: siliconized acrylic.
- Exterior masonry, concrete and painted siding: polyurethane or a paintable hybrid sealant.
- Roofing details: a sealant labeled for roofing, not general-purpose caulk.
Hybrid sealants, sometimes sold as “silyl-modified polymer” or “polymer” sealants, blur these lines by combining paintability with good flexibility. They usually cost more and are worth considering when a joint needs to be both durable and painted.
Where Silicone Caulk Belongs, and Where It Fails
Silicone does its best work in joints that are wet, smooth and never painted.
- The tub-to-wall and tub-to-floor joints.
- Shower pan, base and corner joints, and the seam between a shower surround and tile.
- Around undermount and drop-in sinks, and where countertops meet backsplashes.
- Glass shower enclosures, mirrors (with a mirror-safe formula) and aquarium-style glass joints.
- Around toilet bases, where local practice allows a bead.
It tends to fail, or cause later headaches, in a few predictable places:
- Anywhere that will be painted. Latex and oil paints bead up and peel on cured silicone. A painted bathroom trim joint caulked with silicone will show it within weeks.
- Raw wood trim and window casings. Silicone can grip, but it does not take paint, and unfinished wood can absorb moisture behind the bead. A paintable product is usually the better fit.
- Some porous masonry and natural stone. Standard silicone may not bond well to dusty or porous surfaces, and some formulas can stain natural stone. Stone-safe and masonry-rated sealants exist for that reason.
- Over old silicone. New silicone does not bond reliably to cured silicone residue. That is the single most common reason a fresh bead peels.
A few joints should not get any caulk at all. Weep holes in window frames and brick veneer, the bottom edge of some exterior trim, and certain plumbing escutcheons are designed to drain. Sealing them traps water where it can do harm.
Mold-Resistant Formulas and Bathroom Moisture
Many kitchen-and-bath silicones are labeled mold- or mildew-resistant, which generally means the product contains a fungicide that discourages growth on the surface of the bead. That helps, but it does not make a joint immune. Soap film, body oils and constant dampness give mold something to grow on, and the additive can become less effective over time.
The bigger issue is moisture. EPA’s guidance on mold and moisture states that the key to mold control is moisture control, and it recommends running a bathroom fan or opening a window when showering. EPA’s mold cleanup guidance also says directly: do not paint or caulk moldy surfaces. Clean up the mold and dry the surfaces first. That instruction matters for recaulking, because a new bead laid over a moldy joint simply hides the problem.
Black spots that sit under the surface of the caulk, rather than on top, usually mean mold has grown into or behind the bead, and the joint needs to come out. Our guide to black mold in shower caulk covers when cleaning is enough and when replacement is the answer. For day-to-day prevention, including fan run times and squeegee habits, see how to prevent mold in a shower. Front Range air is dry for much of the year, but a small bathroom without a working exhaust fan can still stay damp for hours after each shower.
How to Apply Silicone Caulk: Prep, Tooling and Cure Times
Most caulk failures trace back to preparation rather than the product. A careful job follows the same basic sequence.
1. Remove the old bead completely
Cut out the old caulk with a utility knife or caulk-removal tool, then scrape and clean away residue. Silicone residue is the enemy of adhesion. A solvent or remover rated for silicone, followed by a wipe with isopropyl alcohol, is the usual approach. Our caulk remover guide compares chemical removers and tools in detail.
2. Clean and dry the joint
Kill and remove any mold, rinse, and let the joint dry thoroughly. Many installers wait at least a day, longer in a humid room, before applying new caulk to a joint that was recently wet. Product labels typically specify a clean, dry, frost-free surface.
3. Fill deep gaps and mask
Joints wider or deeper than the product’s stated maximum often need a foam backer rod so the bead has the right depth and does not sag. Painter’s tape on both sides of the joint gives a clean line, especially on wide joints and glass.
4. Load the tub with water
For a bathtub, a common tip is to fill the tub with water before caulking the tub-to-wall joint. The weight opens the joint to roughly its loaded width, so the cured bead is not stretched every time someone bathes. Drain it only after the caulk has cured. The caulking a bathtub guide walks through that process step by step.
5. Apply and tool in one pass
Cut the nozzle at a slight angle to roughly the width of the joint, push a steady bead into the gap, and tool it smooth with a caulking tool or a gloved finger. Pull the tape immediately, before a skin forms.
6. Respect the cure time
Silicone typically skins over in minutes and becomes touch-dry within an hour or so, but full cure takes much longer. Many kitchen-and-bath silicones list roughly 24 hours before water exposure, and some fast-cure formulas advertise shorter times. Thick beads, cold rooms and low humidity can slow the cure. Colorado’s dry air can stretch cure times compared with more humid climates, since silicone needs moisture from the air to set. Follow the label rather than a generic rule.
Ventilate while the bead cures. Sealants, removers and solvents can release volatile organic compounds, and EPA’s indoor air guidance advises increasing ventilation when using products that emit VOCs and meeting or exceeding any label precautions. Running the bathroom exhaust fan and opening a window is a simple way to follow that advice.
Why Failed Caulk Lets Water Into Subfloors
A caulk joint is only one layer of defense, but it is often the first one water meets. When a bead cracks, pulls away or develops pinholes, shower water can wick into the gap between a tub flange and the wall, or between a shower base and the floor. From there it can run behind tile, wet the wall framing, or soak into the subfloor beneath the tub.
The damage is usually slow and hidden. Warning signs include:
- Loose or hollow-sounding tiles near the tub or shower base.
- Cracked or missing grout lines, especially in corners and along the bottom row.
- Soft or spongy flooring next to the tub.
- Stains or peeling paint on the ceiling below a second-floor bathroom.
- A musty smell that persists even after cleaning.
Caulk and grout work together. Grout fills the joints between tiles, while flexible caulk belongs at changes of plane, such as inside corners and where tile meets the tub. If the grout is failing too, the grout repair guide covers regrouting versus spot repairs. When water has already reached the floor framing, the issue is often bigger than a joint. Our guide on shower pan leaks explains how inspectors and plumbers trace leaks below a shower base.
EPA recommends drying water-damaged areas and items within 24 to 48 hours to prevent mold growth. Slow leaks behind a failed bead rarely get that chance, which is why replacing a cracked joint promptly is one of the cheapest forms of water-damage prevention in a house.
Exterior Uses: Windows, Doors and Penetrations
Outdoors, the right sealant depends on what will happen to the joint afterward. Silicone resists UV and temperature swings well, which makes it a good fit for joints around window glass, metal flashing details and some penetrations that will never be painted. Where trim and siding will be painted, a paintable polyurethane or hybrid sealant is usually the better match.
Front Range weather is hard on exterior caulk. Intense high-altitude sun, freeze-thaw cycles and wide daily temperature swings all stress a bead. Joints around windows and doors on south- and west-facing walls tend to fail first. The exterior window caulking guide covers which joints to seal and which to leave open for drainage.
Roofing is its own category. General-purpose silicone is not a substitute for roofing sealants or proper flashing, and a roof leak patched with the wrong caulk often reappears. If a roof joint needs sealant, the roof sealant guide explains the options.
Silicone Caulk Costs and When to Hire a Pro
Material costs are modest. A standard tube of 100% silicone commonly runs somewhere in the range of $6 to $15, with premium mold-resistant, fast-cure or specialty formulas at the higher end. A caulking gun, a removal tool, tape and cleaning supplies add perhaps $15 to $40 if you are starting from scratch. Prices vary by brand, region and retailer.
Professional recaulking of a single tub or shower is often quoted somewhere around $150 to $400, depending on the size of the enclosure, how stubborn the old caulk is, and whether mold cleanup is involved. Handyman services may bundle several joints into one visit. Those figures are rough estimates, not quotes, and local pricing in Denver, Boulder, Colorado Springs and surrounding counties can differ.
The cost picture changes quickly if failed caulk has already let water into the structure. Subfloor repair, tile replacement and mold remediation can run into the thousands. That is the strongest argument for treating a cracked bead as a maintenance item rather than a cosmetic one.
Consider calling a professional when:
- Old caulk keeps peeling within months of being replaced.
- Mold returns behind the bead or shows on drywall nearby.
- Tiles are loose, the floor is soft, or there are stains below the bathroom.
- The joint is wide, irregular or involves stone that may stain.
The ASHI Standard of Practice calls for inspectors to inspect plumbing fixtures and faucets, along with exterior wall coverings, flashing and trim, so failed sealant at tubs, showers and windows is commonly noted in an inspection report. A report is not a repair estimate, though. Plumbers, tile setters and handymen will each quote the fix differently. For help choosing who to call, the plumbing and water hiring guide covers what to ask contractors, and the broader guide to hiring home professionals explains how inspection findings translate into repair bids.
References
- A Brief Guide to Mold, Moisture and Your Home — U.S. Environmental Protection Agency
- Mold Cleanup in Your Home — U.S. Environmental Protection Agency
- Volatile Organic Compounds’ Impact on Indoor Air Quality — U.S. Environmental Protection Agency
- ASHI Standard of Practice for Home Inspections — American Society of Home Inspectors
Frequently asked questions
Can you put new silicone caulk over old silicone?
It is not recommended. New silicone does not bond reliably to cured silicone, so a bead applied over old caulk tends to peel. Remove the old bead, clean off residue with a remover and isopropyl alcohol, and let the joint dry before recaulking.
How long does silicone caulk take to cure before showering?
Many kitchen-and-bath silicones list roughly 24 hours before water exposure, though some fast-cure products advertise less. Thick beads, cool rooms and Colorado's dry air can slow curing, so follow the product label.
Can silicone caulk be painted?
Standard 100% silicone cannot be painted because paint beads up and peels on it. Where a joint needs paint, use siliconized acrylic indoors or a paintable polyurethane or hybrid sealant outdoors.
Is mold-resistant silicone caulk enough to stop shower mold?
It helps, but moisture control matters more. EPA recommends running a bathroom fan or opening a window while showering. Mold that has grown behind the bead means the joint should be removed, cleaned, dried and replaced.
Who should look at a shower that keeps leaking after recaulking?
Repeated failures can point to a shower pan, flange or framing problem rather than the caulk itself. A plumber or a home inspector can help pinpoint the source. If you would like a referral to a Front Range professional, contact our team.
Seeing stains, soft floors or recurring mold around a tub or shower? Front Range homeowners can reach out through our contact page to connect with a vetted local inspector.