Mold Killing Solution: DIY and Commercial Options
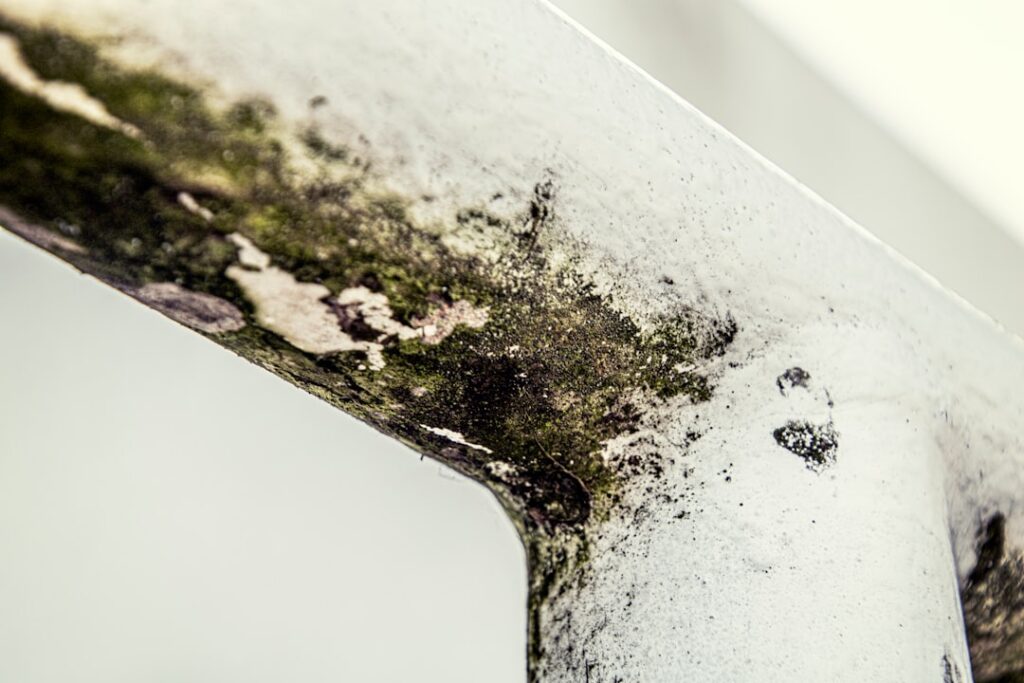
A mold killing solution can be something you mix from kitchen-cabinet staples or a commercial product carrying an EPA registration number. Both have a place, but the more important truth is that no solution undoes the limits set by the surface you are treating: chemistry kills surface mold, while material removal is what handles growth rooted in porous walls. This guide summarizes EPA and CDC guidance current as of 2026 and is informational only — consult your physician about health symptoms and a certified professional for testing and remediation decisions. Knowing which solution fits which job, and where the EPA biocide caveat applies, keeps the work both effective and safe.
Is this mold, asbestos, or water damage? Get a free instant screen
Upload a clear photo of the suspect area. You'll get an instant AI screening opinion and what to do next. This is screening guidance, not a professional determination.
Screening guidance only. AI can be wrong. Confirm asbestos, mold type, or lead with lab testing or a licensed professional before acting.
What Makes an Effective Mold Killing Solution
An effective solution does two things: it kills the living mold on contact, and it helps lift the growth off the surface so it can be physically removed. That second part matters because, as the EPA notes, dead mold can still cause allergic reactions — killing it is not the same as removing it. The best results come from a solution that loosens growth for wiping and scrubbing, not one that merely sterilizes the surface and leaves residue behind.
Solutions split into household DIY mixes and commercial formulas. DIY options rely on common chemicals like vinegar, hydrogen peroxide, and baking soda. Commercial products often combine a biocide with surfactants and stain removers, and some are EPA-registered antimicrobials, meaning the manufacturer filed efficacy and safety data for the stated use. Both categories work on the right surface; neither overcomes the porous-material problem. For a product-focused look, our guide to choosing a home mold killer compares the common options.
DIY Mold Killing Solutions
Household solutions appeal because they are cheap, low-odor, and already on hand. Each has strengths and limits.
White Vinegar
Distilled white vinegar is a mild acid that many people use undiluted on light surface growth. It has no harsh fumes and works on hard, non-porous surfaces and some semi-porous ones. Spray it on, let it dwell, scrub, and wipe. Its mildness makes it a reasonable first choice for routine bathroom mildew.
Hydrogen Peroxide
Common 3 percent hydrogen peroxide kills surface mold and breaks down into water and oxygen, leaving no toxic residue. It can lighten stains as well. Apply, let it sit, then scrub. It works on many surfaces but can bleach fabrics and some finishes, so test an inconspicuous spot first.
Baking Soda
Baking soda is more of a gentle abrasive and deodorizer than a strong biocide. Dissolved in water as a spray or made into a paste, it helps scrub growth loose and absorbs musty odors. It pairs well with vinegar or peroxide for stubborn surface spots.
Commercial Solutions and the EPA Biocide Caveat
Commercial mold killers range from bathroom sprays to industrial-strength biocides. Some carry an EPA registration number, which means the product was reviewed for the use described on its label. That registration is meaningful, but it comes with an important caveat the EPA itself stresses: the agency does not recommend routinely using biocides, including bleach, as a standard mold cleanup method.
The reasoning is practical. Biocides do not address the moisture that caused the mold, they can leave chemical residue, and on porous materials they often fail to reach the growth rooted below the surface. The EPA’s preferred approach is removal of the mold and the moisture source rather than chemical treatment. Use commercial biocides for what they do well — surface disinfection on hard materials — and do not treat them as a substitute for removing saturated porous materials or fixing leaks. Always follow the label’s dilution, dwell time, and ventilation instructions, and never combine products, since mixing bleach with ammonia or acids can release toxic gases.
Matching Solution to Surface
The surface decides whether any solution can finish the job. On non-porous materials — glazed tile, glass, sealed stone, metal, hard plastic — mold sits on top, so a solution genuinely removes it. Vinegar or peroxide handles light growth; a commercial cleaner or diluted bleach solution handles heavier surface mold. Scrub, rinse, and dry.
On porous materials — drywall, bare wood, carpet, ceiling tile — growth penetrates below the surface where no solution reaches. Spraying these materials may lighten the stain while living growth remains inside. The EPA’s guidance is that moldy porous materials usually have to be discarded. This is the line no chemistry crosses, and recognizing it prevents the endless re-spraying that frustrates so many homeowners. The same principle drives how professionals approach interior mold removal across a home.
Using Any Solution Safely
Safety starts with ventilation. Open windows, run an exhaust fan, and avoid working in a sealed room with strong chemicals. The CDC recommends an N95 respirator, gloves that resist the cleaning agent, and goggles that seal around the eyes. People with asthma, allergies, or weakened immune systems should not do the cleanup themselves.
Apply solutions directly to the surface rather than misting broadly into the air, which spreads both spores and chemical droplets. Respect the label’s dwell time, scrub, then wipe and dry completely — leftover moisture invites the mold straight back. Dispose of moldy materials and used rags in sealed bags. Store products out of reach of children and pets, and keep incompatible chemicals far apart.
Mixing and Applying DIY Solutions Correctly
Technique affects how well any home solution performs. With vinegar, use it undiluted from a spray bottle, saturate the surface lightly, and let it dwell for 30 minutes to an hour before scrubbing — the dwell time is what does the work. Hydrogen peroxide at 3 percent goes on straight from the bottle; let it bubble and sit for ten minutes or so, then scrub. Baking soda works as a paste for grout and corners or dissolved in water as a finishing spray that also deodorizes.
A safe and effective routine is to apply one agent, let it dwell, scrub, rinse, then follow with a second if needed — for example, peroxide first, then a baking soda paste on stubborn grout. What you must never do is combine these into a single mix that includes bleach, or mix bleach with vinegar or ammonia, since those combinations release toxic gases. Keep products separate, ventilate the space, and rinse between agents. After any solution, dry the surface completely, because the dampness left behind is exactly what the mold needs to return.
Why Killing Mold Is Not the Same as Removing It
A point that trips up many homeowners is the difference between killing mold and removing it. A biocide can deactivate living mold, but the EPA stresses that dead mold can still cause allergic reactions, because the fragments and proteins that trigger responses remain on the surface. A solution that sterilizes but does not lift the growth leaves that residue behind. This is why physical removal — scrubbing and wiping the growth off, or removing the material entirely — matters as much as the killing action.
The practical consequence is that the goal of any cleaning is a surface that is both treated and physically clean, not merely disinfected. On a hard, non-porous surface you can achieve both: kill and wipe away. On a porous material you cannot, because the growth is rooted below where scrubbing reaches, which is the core reason the EPA recommends discarding moldy porous materials rather than treating them. Understanding this reframes the whole question from “what kills mold best” to “what surface am I treating, and can I actually remove the growth from it.”
When a Solution Is Not the Answer
No mold killing solution is the right tool for every situation. The EPA suggests homeowners limit do-it-yourself cleanup to mold under about 10 square feet on hard surfaces. Beyond that, or when porous materials are saturated, growth sits inside HVAC systems, contamination follows sewage or flood water, or mold keeps returning, a professional with containment and removal capability is the better call.
For a small patch of surface growth on a hard material, with the moisture source fixed, a well-chosen solution used carefully does the job. The skill is knowing when chemistry is enough and when the answer is removal and moisture control instead. That judgment, more than any particular product, determines whether the mold stays gone. The broader inspection-and-testing context is in our mold inspection hub.
Commercial Versus DIY: Which to Reach For
The choice between a homemade solution and a store-bought product comes down to the job in front of you. For routine, light surface mildew on bathroom tile or a sealed surface, DIY options like vinegar or hydrogen peroxide are inexpensive, low-odor, and entirely adequate. They handle the most common household mold tasks without the cost or fumes of stronger products, and they leave little residue.
Commercial products earn their place for heavier surface growth, for stain removal where appearance matters, and for situations where a homeowner wants the assurance of an EPA-registered antimicrobial reviewed for the stated use. Bathroom-specific cleaners are formulated for tile and grout and often combine cleaning with stain-lifting. The deciding factor is rarely the strength of the chemistry but the surface: neither category overcomes the limitation that porous materials must be removed rather than treated. For most homeowners, keeping vinegar and peroxide on hand for routine work and a commercial cleaner for tougher surface spots covers the realistic range, with the understanding that any recurring problem points to moisture, not to needing a stronger bottle.
Solutions for Specific Surfaces Around the Home
Matching solution to surface gets concrete when you walk through the home. On bathroom tile and glass, vinegar or a bathroom cleaner removes surface mildew; grout and caulk need scrubbing and may require replacement if growth has penetrated. On sealed kitchen counters and backsplashes, a peroxide spray or diluted cleaner handles surface growth on contact. On window sills and frames, clean the surface growth and address the condensation driving it.
On painted walls with intact paint and a dry surface behind, gentle cleaning of surface growth can work, but soft or peeling areas signal moisture in the material that no solution fixes. On bare basement concrete, surface growth can be cleaned, though efflorescence is a mineral deposit rather than mold and signals moisture moving through the wall. On carpet, upholstery, drywall, and ceiling tile — all porous — solutions do not reach the rooted growth, and removal is the answer. Walking the home with the porous-versus-non-porous distinction in mind tells you in each spot whether a solution will finish the job or whether the material needs to come out.
References
- EPA mold cleanup and biocide guidance — U.S. Environmental Protection Agency
- CDC mold cleanup and protective gear guidance — Centers for Disease Control and Prevention
- A Brief Guide to Mold, Moisture and Your Home — U.S. Environmental Protection Agency
If a solution keeps failing on recurring mold, Front Range homeowners can reach out through our contact page to connect with a vetted local inspector or remediation pro.