Mold in Walls Signs: What to Do Next
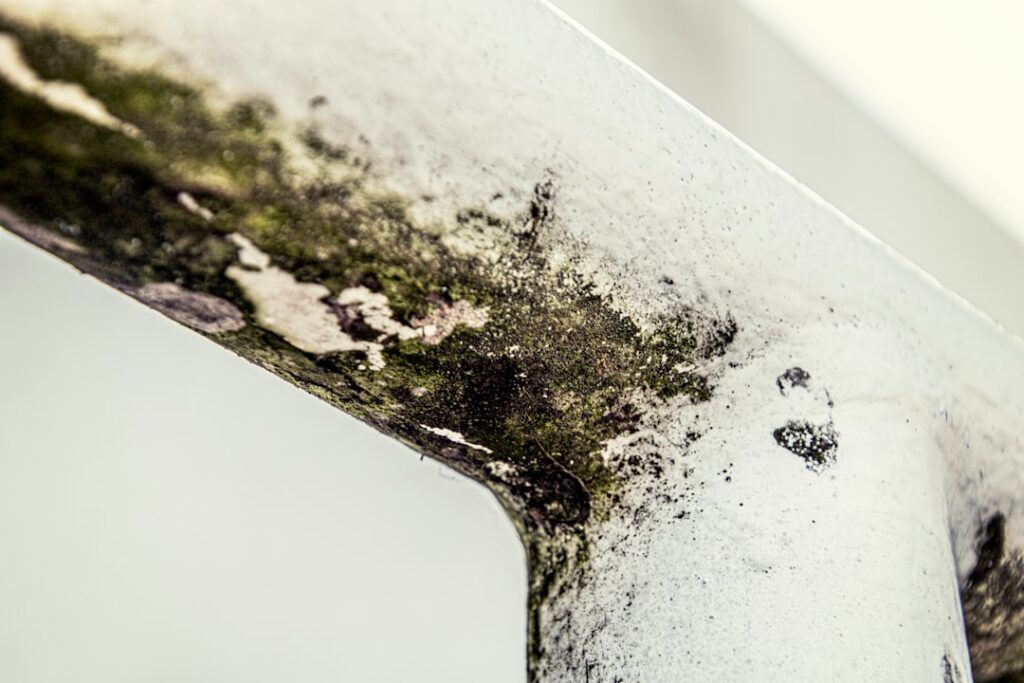
Suspecting mold inside a wall is unsettling, and the natural next question is what to actually do about it. Recognizing mold in walls signs is one thing; deciding whether to open the wall, order a test, or call a professional is another. This guide focuses on that decision, giving you a practical framework for turning suspicion into the right action. It summarizes EPA and CDC guidance current as of 2026 and is informational only; consult your physician about health symptoms and a certified professional for testing or removal decisions.
Part of our Mold Around the Home guide — start there for the full picture →
Is this mold, asbestos, or water damage? Get a free instant screen
Upload a clear photo of the suspect area. You'll get an instant AI screening opinion and what to do next. This is screening guidance, not a professional determination.
Screening guidance only. AI can be wrong. Confirm asbestos, mold type, or lead with lab testing or a licensed professional before acting.
First, confirm the signs point to wall mold
Before acting, make sure the clues add up. The common mold in walls signs include a persistent musty odor, staining or discoloration bleeding through paint, bubbling or peeling paint, soft or warped drywall, and a history of leaks or condensation in that area. One sign alone is weak evidence; several together make wall-cavity mold likely. If you want a deeper rundown of each indicator, our companion guide on the signs of mold in walls covers the detection clues in detail. This article picks up where that leaves off: what to do next.
The decision framework
Three questions guide the next step. How strong is the evidence? How large might the problem be? And how sensitive are the people in the home? Your answers point toward opening the wall, testing, or calling a pro.
When to open the wall
Opening a wall is the most direct way to confirm and address cavity mold, but it disturbs spores, so it is not a casual step.
Strong evidence, small suspected area
If signs are clear, a known leak occurred, and the suspected area is small, a careful homeowner may cut a small inspection opening. Mist the area first to limit airborne spores, wear an N95 respirator, gloves, and eye protection, and contain the space with plastic sheeting.
Use a borescope first
A less invasive option is a borescope, a small camera inserted through a tiny hole. It lets you view the cavity without removing a large section of drywall, helping you judge the extent before committing to a full opening.
Stop if it is bigger than expected
If opening the wall reveals growth larger than about ten square feet, the EPA’s homeowner threshold, stop and bring in a professional. Cutting further spreads spores and may expose you to more than you should handle alone.
When to test
Testing has a narrower role than many homeowners assume. The EPA notes that sampling is usually unnecessary because cleanup is the same regardless of species.
Good reasons to test
Testing makes sense when you need documentation for a dispute or insurance claim, when growth is hidden and you cannot confirm it visually, or when you want to verify that remediation worked. In those cases, a professional can collect air or surface samples and interpret lab results.
When testing adds little
If mold is already visible and you plan to clean it regardless, testing rarely changes the action. Spending on a test before cleanup, when the cleanup is identical either way, often wastes money.
When to call a professional
Some situations call for an expert from the start rather than after a DIY attempt.
Scope and complexity
Suspected growth over about ten square feet, mold tied to flooding or sewage, recurring growth despite cleaning, or signs in multiple walls all warrant a professional. So does a hidden leak you cannot trace yourself.
Health sensitivity
If anyone in the home has asthma, allergies, a weakened immune system, or unexplained symptoms that track to one room, lean toward professional handling. The CDC notes sensitive people can react more strongly to mold exposure, and minimizing their contact during cleanup matters.
What a professional brings
A qualified inspector finds hidden moisture with meters, confirms the extent, and identifies the water source. A remediation contractor contains the area, uses HEPA filtration, and cleans safely. The mold inspection and testing hub explains how inspection and remediation fit together.
Always address the moisture source
Whatever path you choose, the wall mold will return unless you fix the water that caused it. Trace the dampness to a leak, condensation, or high humidity, and correct it. The EPA is consistent that moisture control is the foundation of any lasting fix. Our explainer on water and mold covers how to track the source.
How to safely make an inspection opening
If you decide a small inspection opening is warranted, doing it carefully limits spore spread.
Prepare the area
Clear the space, lay down plastic sheeting to catch debris, and have sealed bags ready. Put on an N95 respirator, gloves, and goggles before you cut.
Mist before cutting
Lightly mist the surface to keep spores from going airborne when you breach the drywall. Cut a small, manageable hole rather than a large section.
Assess and stop if needed
Look or use a borescope to judge the extent. If the growth is larger than expected or the cavity is saturated, stop and call a professional rather than continuing.
Insurance and documentation considerations
If the mold stems from a covered event like a burst pipe, documentation matters. Photograph the signs, the source if you find it, and the affected area before any cleanup. Keep records of when you discovered the problem and what you did. Some policies cover sudden water damage but not long-term neglect, so prompt documentation and action strengthen a claim. This is one situation where testing and a professional report can be worth the cost, since they create an objective record. Our overview of the mold inspection and testing hub explains what a report contains.
Weighing DIY against professional cost
The cost calculation goes beyond the obvious. DIY confirmation and cleanup of a small, clearly bounded patch can be inexpensive and effective. But misjudging the scope, spreading spores through poor containment, or failing to find the moisture source can turn a small job into a large remediation. For anything ambiguous, the modest cost of a professional assessment often prevents far greater expense later. Factor in health sensitivity too, since the stakes rise when occupants have asthma or allergies, as the CDC notes.
A decision summary
Use a simple flow. Confirm the signs add up. If evidence is strong, the area is small, and occupants are not sensitive, a careful DIY opening and cleanup may suit. If you need documentation, or the growth is hidden and unconfirmed, lean toward testing. If the scope is large, the water is contaminated, the problem recurs, or occupants are sensitive, call a professional from the start. Whatever you choose, fix the moisture, because nothing else makes the fix last.
Putting the framework together
Match the action to the situation. Clear signs plus a small area plus low health sensitivity can support a careful DIY confirmation and cleanup. Documentation needs or hidden, unconfirmed growth point toward testing. Large scope, contaminated water, recurrence, or sensitive occupants point straight to a professional. In every case, find and fix the moisture, and never paint over the area to hide it.
Matching urgency to the situation
Not every set of wall mold signs demands the same speed of response. A faint musty smell with no other signs and no sensitive occupants allows time to investigate methodically. Active water, warped drywall, or symptoms in a sensitive household calls for prompt action, since mold can begin growing within 24 to 48 hours of materials getting damp. Gauging urgency keeps you from overreacting to an old, stable stain while ensuring you move quickly when an active leak is feeding fresh growth. The signs themselves, especially whether the area is currently wet, tell you how fast to act.
Coordinating moisture repair with mold removal
Whatever path you take, the moisture repair and the mold removal must be coordinated. Removing wall mold before the leak is fixed means it returns. Fixing the leak but leaving the mold leaves spores and odor behind. The right sequence is to stop the water, then remove the affected material, then verify the area stays dry. When a plumber or roofer handles the source and a remediator handles the mold, make sure they coordinate so the wall is not closed up before both jobs are done. Our explainer on water and mold covers the source side in depth.
Living in the home during the process
For many households, work happens while people remain in the home, so manage exposure during the process. Keep occupants, especially anyone with asthma or allergies, away from the active work area. Rely on containment and HEPA filtration for any significant growth, and ventilate to the outdoors. Avoid running the HVAC system in ways that could spread spores from the work zone. The CDC notes sensitive people can react more strongly to mold, so minimizing their contact during the disruptive phase matters as much as the cleanup itself.
Reading the strength of the evidence
The first input to the decision framework is how convincing the signs are. A single faint clue, like a slight musty smell, is weak evidence on its own. A cluster of signs, an odor plus staining plus bubbling paint plus a known leak, is strong. Adding an elevated moisture-meter reading makes the case nearly certain. Weighing the evidence honestly keeps you from tearing into a wall on a hunch or, conversely, ignoring a clear problem. The stronger and more numerous the signs, the more justified an invasive step becomes.
Estimating the likely scope
The second input is how large the problem might be. Surface signs hint at scope: a small isolated stain suggests limited growth, while widespread staining, multiple affected walls, or soft, warped drywall suggests something extensive. Because mold inside walls often turns out larger than the surface implies, lean toward caution when the signs are broad. The EPA’s roughly ten-square-foot threshold is the practical line between a homeowner job and a professional one, and estimating scope before you open anything helps you predict which side of that line you are on.
Factoring in who lives in the home
The third input is the sensitivity of the people in the household. The CDC notes that those with asthma, allergies, or weakened immune systems can react more strongly to mold exposure. When sensitive occupants are present, the calculus shifts toward minimizing their contact and toward professional handling with proper containment. Even an otherwise DIY-scale problem may warrant a more cautious approach if someone in the home is vulnerable. Health sensitivity can tip a borderline decision toward calling a professional.
Documenting your decision and the conditions
Whatever you decide, keep a brief record of the signs, when you noticed them, any moisture readings, and the steps you take. This documentation helps any professional you later involve, supports an insurance claim if the mold stems from a covered water event, and gives you a baseline to judge whether the situation improves after you act. A few photos and notes cost nothing and can prove valuable, especially if the problem turns out larger than expected once a wall is opened.
Avoiding two opposite mistakes
The decision framework guards against two opposite errors. One is overreaction, tearing open a wall on the strength of a single faint clue, which spreads spores and may reveal nothing but an old stain. The other is neglect, ignoring a persistent musty smell and clear staining until a small problem becomes a large, costly one. The framework, weighing evidence, scope, and occupant sensitivity, keeps your response proportional. Acting decisively when the signs are strong and the source is active, while investigating calmly when they are weak, avoids both extremes.
The constant across every path
Whatever route the framework points to, one element never changes: the moisture source must be found and fixed. Opening a wall, testing, or calling a professional all address the mold, but none of them keeps it from returning unless the water is resolved. The EPA’s guidance is consistent that moisture control is the foundation of any lasting fix. So treat source repair as the non-negotiable part of every decision, the step that turns a temporary cleanup into a permanent solution regardless of which path you choose.
References
- Mold Cleanup in Your Home — U.S. Environmental Protection Agency
- A Brief Guide to Mold, Moisture, and Your Home — U.S. Environmental Protection Agency
- Mold and Health Precautions — Centers for Disease Control and Prevention
Frequently asked questions
Should I open the wall myself to check for mold?
Only with strong evidence and a small suspected area. Mist the surface, wear a respirator, gloves, and goggles, and contain the space. If you find more than about ten square feet, stop and call a professional.
Do I need a mold test before cleanup?
Usually not. The EPA notes cleanup is the same regardless of species, so testing rarely changes the action when mold is visible. Test for documentation, unconfirmed hidden growth, or to verify remediation.
When should I call a professional for wall mold?
Call a pro for suspected growth over ten square feet, water from flooding or sewage, recurring mold, signs in multiple walls, or when occupants are health-sensitive. Professionals also trace hidden moisture you cannot find.
Will fixing the wall stop the mold for good?
Only if you also fix the moisture source. The EPA stresses moisture control as the key. Without correcting the leak, condensation, or humidity, mold will regrow even after the wall is repaired.
Front Range homeowners weighing whether to open a wall or call for help can reach a vetted inspector through our contact page for a clear assessment first.