Painting Kitchen Cabinets: Prep, Primers and Lead Checks
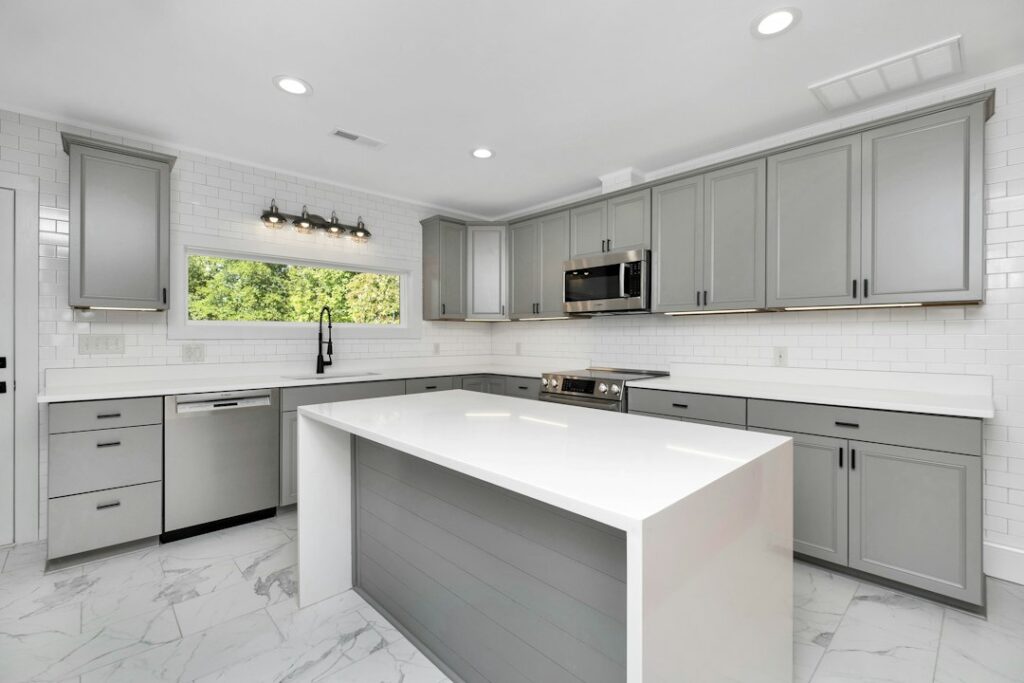
Painting cabinets is one of the most popular ways to change the look of a kitchen without tearing it out. It is also one of the easiest projects to get wrong. Cabinet surfaces are handled every day, splashed with grease and water, and bumped by pots and shoes. A paint job that looks great the first week can chip around the handles within months if the prep was rushed or the product was wrong for the surface. This guide covers how to evaluate cabinets before starting, degreasing and deglossing, bonding primers, choosing a kitchen cabinet paint, application, lead paint concerns when sanding old finishes in pre-1978 homes, VOCs and ventilation, how painting compares with refacing, and typical costs. It summarizes EPA guidance current as of 2026; consult a certified professional for lead testing decisions.
Part of our Structure & Exterior guide — start there for the full picture →
Start by Identifying the Cabinet Material and Finish
Paint sticks well to some cabinet surfaces and poorly to others. Before buying anything, figure out what the cabinets are made of and what finish is on them now.
- Solid wood and wood veneer: generally good candidates. Open-grain woods such as oak show their grain texture through paint unless a grain filler is used, which some owners like and others do not.
- MDF and painted MDF: paints well, with a smooth result. Raw MDF edges absorb primer quickly and may need extra coats.
- Thermofoil: a vinyl film heat-formed over MDF. Paint adhesion is difficult, and peeling or bubbling thermofoil usually has to be removed or the doors replaced. Painting over a failing film rarely lasts.
- Laminate and melamine: slick, nonporous surfaces that need a primer specifically labeled for adhesion to laminates. Our sibling guide on the laminate countertop discusses similar surface challenges.
The existing finish matters too. Factory finishes on many cabinets are hard catalyzed coatings that resist adhesion. Older cabinets may have oil-based paint, varnish or lacquer. A common test is to rub an inconspicuous spot with a cloth dampened in denatured alcohol: latex paint tends to soften, while many oil-based and catalyzed finishes do not. Paint manufacturers’ technical data sheets explain which primers they recommend over each type.
Check the cabinet boxes before you paint
Paint is a finish, not a repair. Look for swollen cabinet floors under the sink, delaminating veneer, loose face frames and sagging shelves before investing hours in prep. Fix leaks, tighten or replace worn cabinet hinges and repair sticking hardware first. Our sibling guide on drawer slides covers sagging drawers. If the boxes are failing, painting may not be worth the effort.
Prep: Degreasing, Deglossing and Sanding
Professional painters often say prep is most of the job, and with cabinets that is close to literal. Most adhesion failures come from paint applied over grease, gloss or dust.
Remove, label and set up
Take off doors, drawer fronts and hardware. Label each door and its location, for example with a numbered piece of tape inside the hinge cup hole, so everything goes back where it came from. Painting doors flat on racks, in a clean area, gives a smoother finish and fewer drips than painting them on the cabinet. Protect countertops, floors and appliances that stay in place.
Degrease thoroughly
Kitchen cabinets collect a film of cooking grease, especially near the range and around handles. Paint will not bond to it. Clean every surface with a degreasing cleaner suited for pre-paint prep, following the label, and rinse with clean water so no residue remains. Many painters clean twice: once before sanding and again after. Pay attention to the edges and the areas around pulls, where hand oils build up.
Degloss and scuff-sand
Shiny finishes need to be dulled so primer can grip. Options include scuff-sanding with fine abrasive, using a liquid deglosser according to its instructions, or both. The goal is a uniformly dull surface, not stripping to bare wood. Sanding creates dust, so vacuum and wipe down thoroughly afterward. In a home built before 1978, sanding raises lead paint questions covered below. Do not sand until you know whether lead is present.
Fill and repair
Fill dents, gouges and old hardware holes if you are changing pull sizes. Wood filler or a two-part filler is sanded flush once cured. Grain filler can smooth open-grain oak if a flat, furniture-like finish is the goal.
Bonding Primers and Choosing a Kitchen Cabinet Paint
Primer does most of the adhesion work. Paint mostly provides the color, hardness and washability.
Primer types
- Shellac-based primers: dry fast, block stains and wood tannins well and adhere to many glossy surfaces. They have strong odors and require alcohol for cleanup.
- Oil-based primers: good adhesion and stain blocking, sand smoothly, but take longer to dry and usually carry higher VOC content.
- Waterborne bonding primers: formulated to adhere to slick surfaces such as laminates and previously finished cabinets, with easier cleanup and lower odor.
Stain-blocking matters with wood species that bleed tannins, such as oak and some cherry. Bleed-through shows as yellowish or brown spots in white paint. Follow the primer manufacturer’s guidance on recoat times and compatible topcoats.
Paint types
- Waterborne alkyd or urethane-modified acrylic enamels: popular for cabinets because they level well, dry harder than standard wall paint and clean up with water. Many are marketed specifically for cabinets and trim.
- Traditional oil-based alkyd enamels: very hard and smooth but slower drying, more likely to yellow over time, especially whites, and generally higher in solvent content.
- 100 percent acrylic trim paints: durable and flexible, though some remain softer and can stick to themselves where doors meet frames.
- Catalyzed and conversion coatings: used by many professional finishers with spray equipment. They can produce a factory-like finish but require specialized handling and protection.
Ordinary wall paint is a poor choice for cabinets because it stays relatively soft and scuffs easily. Satin and semi-gloss sheens are common because they clean easily while hiding minor imperfections better than high gloss.
Application and cure time
Spraying produces the smoothest finish but requires masking, ventilation and practice. A high-quality brush combined with a fine foam or microfiber roller can give good results for DIY work. Thin coats are better than thick ones. Respect the recoat time on the label and lightly sand between coats if the manufacturer recommends it.
Dry to the touch is not the same as cured. Many cabinet enamels take days or weeks to reach full hardness. Rehang doors carefully, use bumpers, and treat surfaces gently during that time. Colorado’s dry air speeds surface drying, but cold garages slow curing, and most paints list a minimum application temperature.
Common failures and how to avoid them
- Peeling at edges and around pulls: usually leftover grease, skipped deglossing or the wrong primer for the surface. Clean and scuff edges as carefully as flat panels.
- Doors sticking to frames: called blocking, it happens when paint is not fully cured or the product stays soft. Allow full cure time and add small bumpers.
- Brush and roller marks: often from heavy coats, overworking the paint or applying in a hot, dry room where it sets too fast. Some products allow a manufacturer-approved extender to improve leveling.
- Yellow or brown spots: tannin bleed from the wood, solved with a stain-blocking primer before the topcoat.
- Yellowing whites: more common with traditional oil-based enamels, especially in darker areas of the kitchen.
- Chips in high-traffic spots: paint applied too thinly over a poor bond. A touch-up kit of the same product, kept with the house records, makes small repairs easy.
Hardware and reassembly
New paint is a good time to replace worn hardware. If the new pulls have a different hole spacing, fill and sand the old holes before priming, and drill the new ones with a template so they line up across the kitchen. Reinstall doors in their labeled positions, then adjust hinges so gaps are even. Soft-close hinges and bumpers reduce impact on fresh paint while it continues to cure.
Lead Paint in Pre-1978 Kitchens
Many Front Range homes were built before 1978, and their original cabinets, trim or past paint layers may include lead-based paint. According to EPA, approximately three-quarters of U.S. homes built before 1978 still contain some lead-based paint, and any renovation, repair or painting project in a pre-1978 home with lead-based paint can easily create dangerous lead dust. EPA also notes that settled lead dust can re-enter the air when the home is vacuumed or swept or when people walk through it.
That matters for cabinet painting because sanding and scraping are the steps that turn intact paint into dust. Practical points from EPA’s guidance:
- Hiring a painter: EPA’s Renovation, Repair and Painting Rule requires anyone paid to perform work that disturbs painted surfaces in homes built before 1978 to be certified and trained in lead-safe work practices. Ask for the firm’s lead-safe certification.
- Doing it yourself: EPA states that the RRP Rule generally does not apply to homeowners working on their own homes, but it does apply to owners who rent out their home, run a childcare center in it or flip houses. EPA encourages do-it-yourselfers to use its DIY lead-safe work practices.
- Small areas of damaged paint: EPA advises fixing small areas, under 6 square feet, without sanding where possible, and if sanding is necessary, wetting the area first, sanding the minimum needed and cleaning up thoroughly.
- Removal: EPA advises homeowners not to attempt to remove lead-based paint themselves.
Testing before prep is the clearest path. Many owners hire a certified lead inspector or risk assessor to test the existing finishes before deciding how to prep. Our guide on painting over lead paint explains when encapsulating existing paint can be an option and what to watch for.
VOCs, Odors and Ventilation
Paints, primers, deglossers and cleaners all contribute to indoor air pollution while they are being used. EPA notes that paints, varnishes and many degreasing products contain organic solvents that release volatile organic compounds (VOCs), and that during and for several hours after certain activities, such as paint stripping, indoor levels may be very high relative to outdoor levels. EPA lists possible health effects including eye, nose and throat irritation, headaches and nausea, with effects depending on the level and length of exposure.
EPA’s recommendations for reducing exposure include:
- Increase ventilation when using products that emit VOCs, and meet or exceed label precautions.
- If a label says to use a product in a well-ventilated area, work outdoors or in an area with an exhaust fan, or open windows for maximum outdoor air.
- Buy quantities you will use soon and dispose of partially used containers safely, using local household hazardous waste collection where available.
- Never mix household products unless the label directs it.
Low-VOC and zero-VOC products reduce but do not eliminate emissions, and tints can add VOCs. Shellac and oil-based primers usually have the strongest odors. Painting doors in a garage with the door open, using a box fan to exhaust air from the kitchen, and keeping children and pets out of the work area are practical steps. Spraying adds overspray and solvent mist, so a properly fitted respirator rated for the product is worth considering. Winter projects in Colorado are harder to ventilate, which is one reason many owners schedule cabinet painting for spring or fall.
Painting Versus Refacing or Replacing, and Typical Costs
Painting changes color and sheen but keeps the existing door style, box layout and hardware positions. If those are fine, painting is usually the least expensive way to refresh a kitchen. If the door style is dated, the doors are thermofoil that is peeling, or the layout no longer works, other options may fit better.
- Cabinet refacing: new doors and drawer fronts, with veneer or laminate applied to the existing face frames and exposed sides. It changes style without new boxes.
- Full replacement: new boxes, doors and layout. Our kitchen cabinets installation guide covers that process.
As general 2026 ranges, which vary by kitchen size, cabinet condition and region:
- DIY painting: materials such as cleaner, abrasives, primer, cabinet enamel, brushes, rollers and new hardware often total a few hundred dollars, plus significant time.
- Professional cabinet painting: commonly a few thousand dollars or more for an average kitchen, higher for spray finishes, many doors or extensive repairs. Lead-safe practices in pre-1978 homes may add cost.
- Refacing: typically more than painting.
- Replacement: usually the most expensive, especially with countertop changes.
Deciding between DIY and hiring out often comes down to time and tolerance for disruption. A typical kitchen has dozens of doors and drawer fronts, each needing cleaning, sanding, priming and at least two finish coats on both sides, with drying time between every step. Homeowners doing the work themselves should expect the kitchen to be partly out of service for a week or more. Professionals who spray doors in a shop can shorten the time the kitchen is disrupted, and they bring equipment for dust control, which matters in older homes where lead may be present.
Get written quotes that list the prep steps, primer and paint products, number of coats, whether doors are sprayed off-site, lead-safe practices and the warranty against peeling. Our interior painting cost guide covers how painters price wall and trim work for comparison.
Where an inspection fits in
A home inspection is not a paint evaluation. The ASHI Standard of Practice states that inspectors inspect countertops and a representative number of installed cabinets, and are not required to inspect paint, wallpaper and other finish treatments. An inspector may still note peeling finishes, water-damaged cabinet floors and loose doors, which can affect a buyer’s plans to repaint. Lead testing is a separate service. Problems found in cabinets sometimes point to leaks and framing issues covered in our structure and exterior inspections section, and the main guide to hiring a home inspector explains what a full inspection includes.
References
- Lead Renovation, Repair and Painting Program — U.S. Environmental Protection Agency
- Reduce the Risk of Lead Exposure at Home — U.S. Environmental Protection Agency
- Volatile Organic Compounds’ Impact on Indoor Air Quality — U.S. Environmental Protection Agency
- ASHI Standard of Practice for Home Inspections — American Society of Home Inspectors
Frequently asked questions
What is the best paint for kitchen cabinets?
Many painters use waterborne alkyd or urethane-modified acrylic enamels made for cabinets and trim, over a bonding primer. Ordinary wall paint stays too soft for cabinet doors.
Do I have to sand cabinets before painting?
Glossy finishes need to be dulled by scuff-sanding, a liquid deglosser or both, after thorough degreasing. In pre-1978 homes, check for lead before sanding.
Can I paint thermofoil cabinets?
It is difficult. Thermofoil is a vinyl film, and peeling or bubbling film usually has to be removed or the doors replaced. Intact thermofoil needs a primer rated for that surface.
Does a painter need lead certification for kitchen cabinets?
Under EPA's RRP Rule, anyone paid to disturb painted surfaces in a home built before 1978 must be lead-safe certified. Ask for the firm's certification before work starts.
How much does it cost to paint kitchen cabinets?
DIY materials often total a few hundred dollars, while professional painting commonly runs a few thousand dollars or more for an average kitchen. These are general 2026 ranges.
Planning to repaint cabinets in an older Front Range home you are buying? Talk to us about an inspection first, so leaks, damaged cabinet boxes and other issues come to light before you pick colors.